How to Use Heater 100W: Examples, Pinouts, and Specs

Introduction
The Heater 100W (Manufacturer: ZAY, Part ID: UNO) is an electric heating element designed to convert electrical energy into heat. With a power rating of 100 watts, this component is ideal for applications requiring controlled heating. It is commonly used in industrial, residential, and DIY projects for warming spaces, liquids, or materials.
Explore Projects Built with Heater 100W

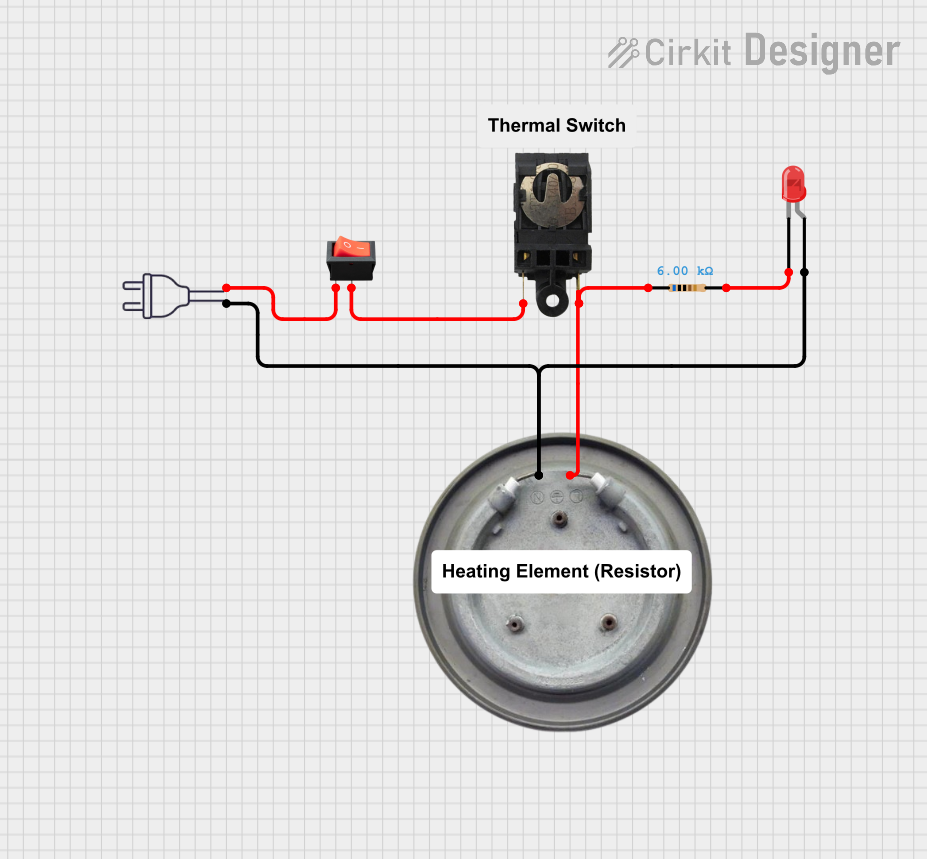
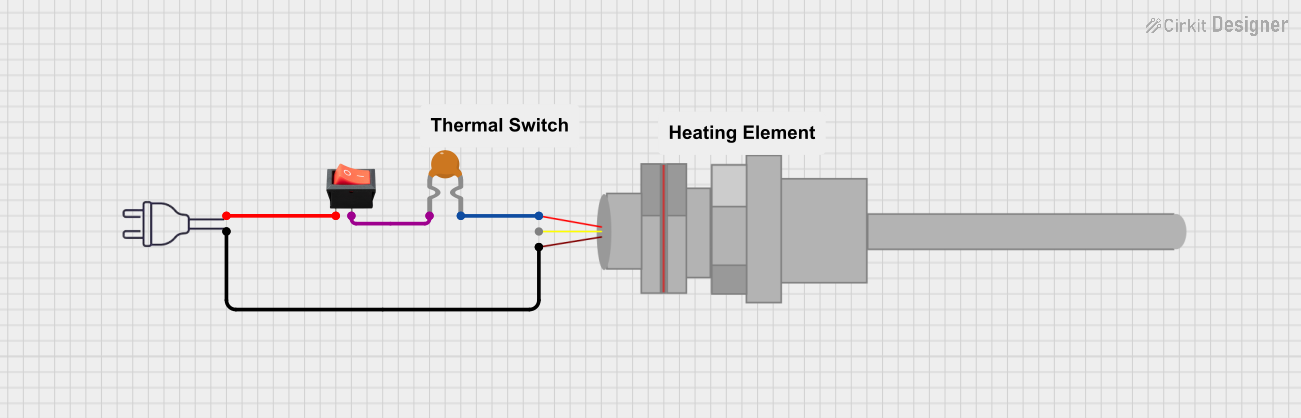

Explore Projects Built with Heater 100W
Common Applications and Use Cases
- Space heaters for small enclosures or rooms
- Heating liquids in laboratory or industrial setups
- DIY projects requiring localized heating
- Temperature-controlled systems in electronics
- Preheating materials for manufacturing processes
Technical Specifications
The following table outlines the key technical details of the Heater 100W:
| Parameter | Value |
|---|---|
| Manufacturer | ZAY |
| Part ID | UNO |
| Power Rating | 100 W |
| Operating Voltage | 12 V DC or 24 V DC (model-dependent) |
| Operating Current | 8.33 A (12 V model) or 4.17 A (24 V model) |
| Heating Element Type | Resistive wire |
| Dimensions | 50 mm x 20 mm x 10 mm |
| Maximum Surface Temp. | 200°C |
| Insulation Resistance | ≥ 100 MΩ |
| Lead Wire Length | 300 mm |
| Weight | 50 g |
Pin Configuration and Descriptions
The Heater 100W has two lead wires for electrical connections. The table below describes the connections:
| Pin/Lead | Description |
|---|---|
| Red Wire | Positive terminal (+) for DC input |
| Black Wire | Negative terminal (-) for DC input |
Usage Instructions
How to Use the Heater 100W in a Circuit
- Power Supply Selection: Ensure the power supply matches the operating voltage of the heater (12 V DC or 24 V DC). The power supply must also provide sufficient current (at least 8.33 A for the 12 V model or 4.17 A for the 24 V model).
- Wiring: Connect the red wire to the positive terminal of the power supply and the black wire to the negative terminal. Use appropriate connectors or soldering for secure connections.
- Mounting: Secure the heater to the desired surface using heat-resistant adhesive or mounting brackets. Ensure proper ventilation to avoid overheating.
- Control: For temperature control, use a thermostat or a PWM (Pulse Width Modulation) controller. This allows precise regulation of the heater's output.
Important Considerations and Best Practices
- Heat Dissipation: Avoid enclosing the heater in a confined space without proper ventilation, as this may lead to overheating.
- Power Supply: Use a regulated DC power supply to prevent voltage fluctuations that could damage the heater.
- Safety: Ensure the heater is not in contact with flammable materials. Use heat-resistant insulation for wiring.
- Temperature Monitoring: For critical applications, use a temperature sensor (e.g., thermistor or thermocouple) to monitor the heater's surface temperature.
- Arduino Integration: The Heater 100W can be controlled using an Arduino UNO and a relay module or MOSFET for switching. Below is an example code snippet for controlling the heater with an Arduino:
// Example: Controlling Heater 100W with Arduino UNO
// This code uses a relay module to turn the heater ON and OFF
// based on a temperature threshold.

const int relayPin = 7; // Pin connected to the relay module
const int tempSensorPin = A0; // Pin connected to a temperature sensor
const int tempThreshold = 50; // Temperature threshold in °C

void setup() {
  pinMode(relayPin, OUTPUT); // Set relay pin as output
  digitalWrite(relayPin, LOW); // Ensure relay is OFF initially
  Serial.begin(9600); // Initialize serial communication
}

void loop() {
  int sensorValue = analogRead(tempSensorPin); // Read temperature sensor
  float temperature = (sensorValue / 1023.0) * 100.0; // Convert to °C (example)

  Serial.print("Temperature: ");
  Serial.print(temperature);
  Serial.println(" °C");

  if (temperature < tempThreshold) {
    digitalWrite(relayPin, HIGH); // Turn ON heater
  } else {
    digitalWrite(relayPin, LOW); // Turn OFF heater
  }

  delay(1000); // Wait 1 second before next reading
}
Troubleshooting and FAQs
Common Issues and Solutions
Heater Does Not Turn On
- Cause: Insufficient power supply or loose connections.
- Solution: Verify the power supply voltage and current ratings. Check all connections for proper contact.
Heater Overheats
- Cause: Lack of ventilation or improper control.
- Solution: Ensure adequate airflow around the heater. Use a temperature controller or PWM to regulate the heat output.
Uneven Heating
- Cause: Poor mounting or surface contact.
- Solution: Ensure the heater is securely mounted and in full contact with the surface to be heated.
Burnt Smell or Smoke
- Cause: Heater in contact with flammable materials or excessive voltage.
- Solution: Remove any flammable materials near the heater. Verify the input voltage is within the specified range.
FAQs
Q1: Can the Heater 100W be used with an AC power supply?
A1: No, the Heater 100W is designed for DC power only. Using an AC power supply may damage the component.
Q2: What is the maximum operating temperature of the heater?
A2: The maximum surface temperature of the heater is 200°C. Ensure proper monitoring to avoid exceeding this limit.
Q3: Can I use the Heater 100W for heating liquids?
A3: Yes, but ensure the heater is properly insulated and does not come into direct contact with the liquid. Use a heat-conductive material as an intermediary.
Q4: How do I control the heater's temperature?
A4: Use a thermostat, PWM controller, or microcontroller (e.g., Arduino) with a relay or MOSFET to regulate the heater's output.
By following this documentation, users can safely and effectively integrate the Heater 100W into their projects.