How to Use BME680: Examples, Pinouts, and Specs
Introduction
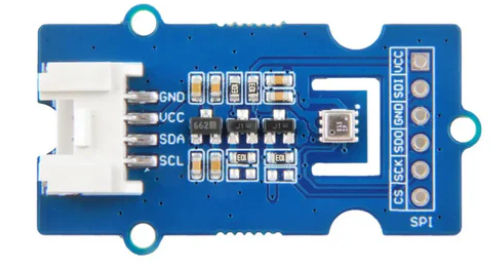
The BME680 is a compact, low-power environmental sensor designed to measure temperature, humidity, barometric pressure, and gas (VOC) levels. Manufactured by ESP32 with the part ID "30pin," this multi-sensor device is ideal for applications requiring precise environmental monitoring. Its small form factor and high integration make it a popular choice for IoT devices, smart home systems, weather stations, and air quality monitoring solutions.
Explore Projects Built with BME680
Explore Projects Built with BME680
Common Applications and Use Cases
- Indoor air quality monitoring
- Weather stations
- Smart home automation
- IoT devices for environmental sensing
- HVAC systems for air quality control
- Wearable devices for health and fitness tracking
Technical Specifications
The BME680 offers a range of features and specifications that make it versatile for various applications. Below are the key technical details:
| Parameter | Value |
|---|---|
| Supply Voltage | 1.7V to 3.6V |
| Operating Current | 2.1 µA (sleep mode), 0.09 mA (active mode) |
| Temperature Range | -40°C to +85°C |
| Humidity Range | 0% to 100% RH |
| Pressure Range | 300 hPa to 1100 hPa |
| Gas Sensor Type | VOC (Volatile Organic Compounds) |
| Interface | I2C, SPI |
| Dimensions | 3.0 mm x 3.0 mm x 0.93 mm |
Pin Configuration and Descriptions
The BME680 is typically available in a 30-pin package. Below is the pin configuration:
| Pin Number | Pin Name | Description |
|---|---|---|
| 1 | VDD | Power supply (1.7V to 3.6V) |
| 2 | GND | Ground |
| 3 | SCL | I2C clock line |
| 4 | SDA | I2C data line |
| 5 | CS | Chip select for SPI communication |
| 6 | SDI/SDO | Data input/output for SPI |
| 7 | INT | Interrupt pin (optional) |
Usage Instructions
The BME680 can be easily integrated into a circuit using either I2C or SPI communication protocols. Below are the steps to use the sensor:
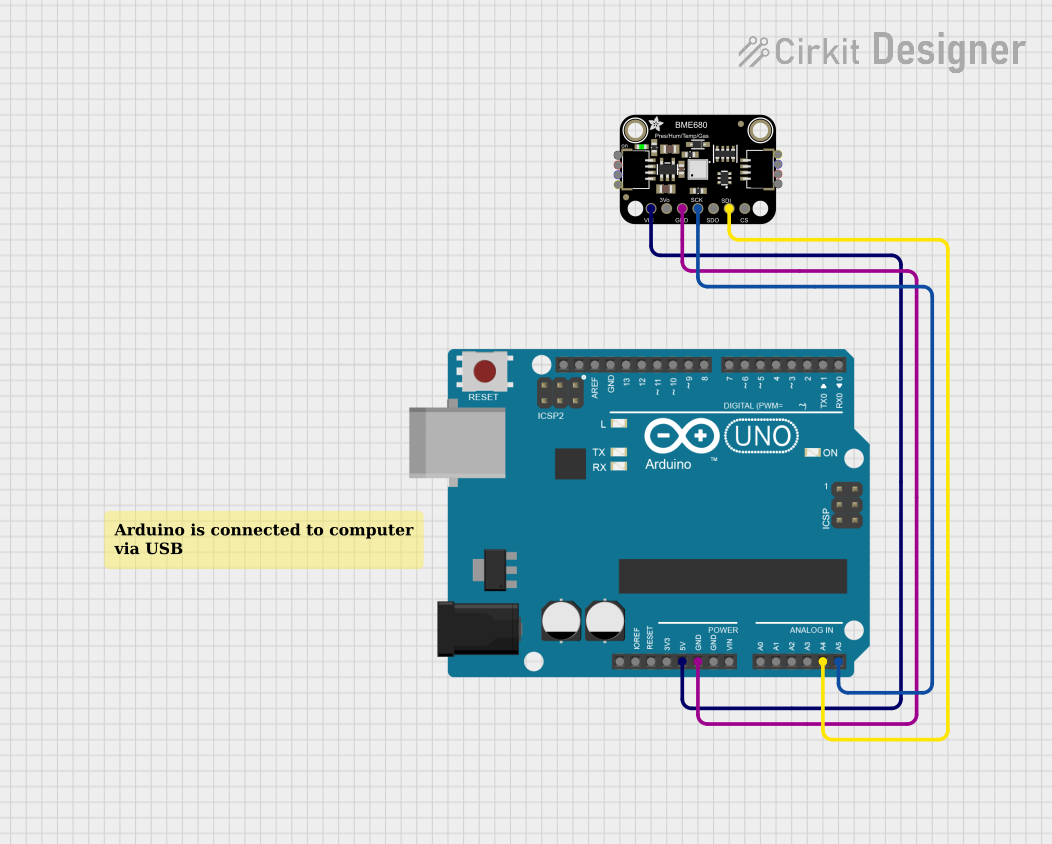
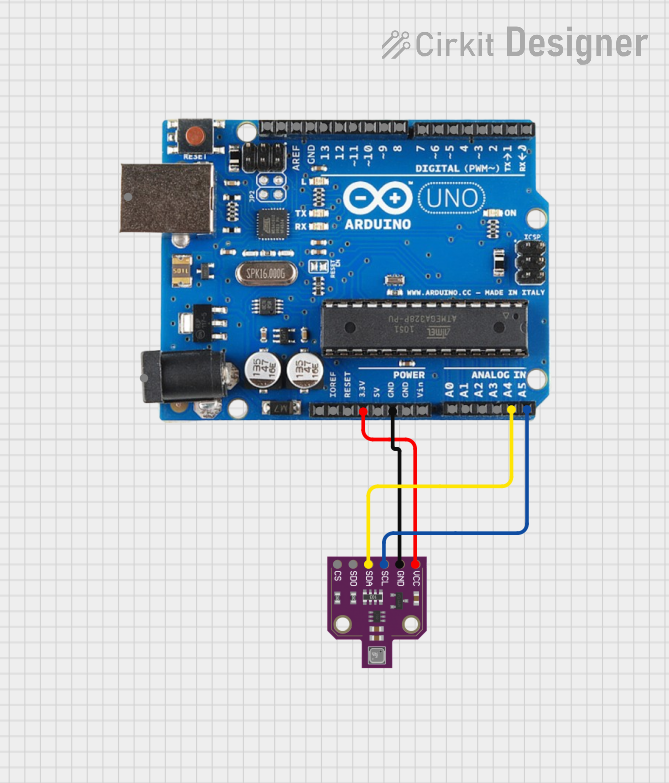
Connecting the BME680 to an Arduino UNO
Wiring: Connect the BME680 to the Arduino UNO as follows:
VDDto3.3Von the ArduinoGNDtoGNDon the ArduinoSCLtoA5(I2C clock line)SDAtoA4(I2C data line)
Install Libraries: Use the Adafruit BME680 library for Arduino. Install it via the Arduino IDE Library Manager.
Upload Code: Use the following example code to read data from the sensor:
#include <Wire.h>
#include <Adafruit_Sensor.h>
#include <Adafruit_BME680.h>

// Create an instance of the BME680 sensor
Adafruit_BME680 bme;

void setup() {
  Serial.begin(9600);
  while (!Serial); // Wait for the serial monitor to open

  // Initialize the BME680 sensor
  if (!bme.begin()) {
    Serial.println("Could not find a valid BME680 sensor, check wiring!");
    while (1);
  }

  // Set up sensor settings
  bme.setTemperatureOversampling(BME680_OS_8X);
  bme.setHumidityOversampling(BME680_OS_2X);
  bme.setPressureOversampling(BME680_OS_4X);
  bme.setIIRFilterSize(BME680_FILTER_SIZE_3);
  bme.setGasHeater(320, 150); // 320°C for 150 ms
}

void loop() {
  // Perform a measurement
  if (!bme.performReading()) {
    Serial.println("Failed to perform reading!");
    return;
  }

  // Print sensor readings to the serial monitor
  Serial.print("Temperature = ");
  Serial.print(bme.temperature);
  Serial.println(" °C");

  Serial.print("Humidity = ");
  Serial.print(bme.humidity);
  Serial.println(" %");

  Serial.print("Pressure = ");
  Serial.print(bme.pressure / 100.0);
  Serial.println(" hPa");

  Serial.print("Gas = ");
  Serial.print(bme.gas_resistance / 1000.0);
  Serial.println(" KOhms");

  Serial.println();
  delay(2000); // Wait 2 seconds before the next reading
}
Important Considerations and Best Practices
- Power Supply: Ensure the sensor is powered within its specified voltage range (1.7V to 3.6V). Using a voltage regulator may be necessary for 5V systems.
- I2C Pull-Up Resistors: If using I2C, ensure pull-up resistors (typically 4.7kΩ) are present on the
SCLandSDAlines. - Gas Sensor Warm-Up: The gas sensor requires a warm-up period for accurate readings. Allow at least 5 minutes after powering on the sensor.
- Environmental Factors: Avoid exposing the sensor to water or dust, as this may affect its accuracy and longevity.
Troubleshooting and FAQs
Common Issues and Solutions
Sensor Not Detected:
- Cause: Incorrect wiring or I2C address mismatch.
- Solution: Double-check the wiring and ensure the correct I2C address is used in the code (default is
0x76or0x77).
Inaccurate Readings:
- Cause: Insufficient warm-up time or environmental interference.
- Solution: Allow the sensor to warm up for at least 5 minutes. Ensure the sensor is placed in a stable environment.
Gas Resistance Always Zero:
- Cause: Gas heater not configured properly.
- Solution: Verify the gas heater settings in the code (e.g., temperature and duration).
High Power Consumption:
- Cause: Sensor operating in continuous mode.
- Solution: Use sleep mode or reduce the measurement frequency to save power.
FAQs
Q1: Can the BME680 measure CO2 levels?
A1: No, the BME680 measures VOCs, which can be used as an indicator of air quality but does not directly measure CO2.
Q2: What is the maximum cable length for I2C communication?
A2: The maximum length depends on the pull-up resistor values and the I2C clock speed. Typically, it is recommended to keep the length under 1 meter for reliable communication.
Q3: Can the BME680 be used outdoors?
A3: The BME680 is not waterproof or dustproof. If used outdoors, it must be enclosed in a protective housing with proper ventilation.
Q4: How do I switch between I2C and SPI modes?
A4: The communication mode is determined by the wiring of the CS pin. Pull CS low for SPI mode or connect it to VDD for I2C mode.
By following this documentation, users can effectively integrate and utilize the BME680 sensor in their projects.