How to Use HC-06: Examples, Pinouts, and Specs
Introduction
The HC-06 is a widely used Bluetooth module that enables wireless communication between devices. It operates as a slave device, meaning it can only accept connections from a master Bluetooth device such as a smartphone or a computer. Common applications include wireless control for robotics, serial communication between microcontrollers, and DIY electronics projects that require Bluetooth connectivity.
Explore Projects Built with HC-06
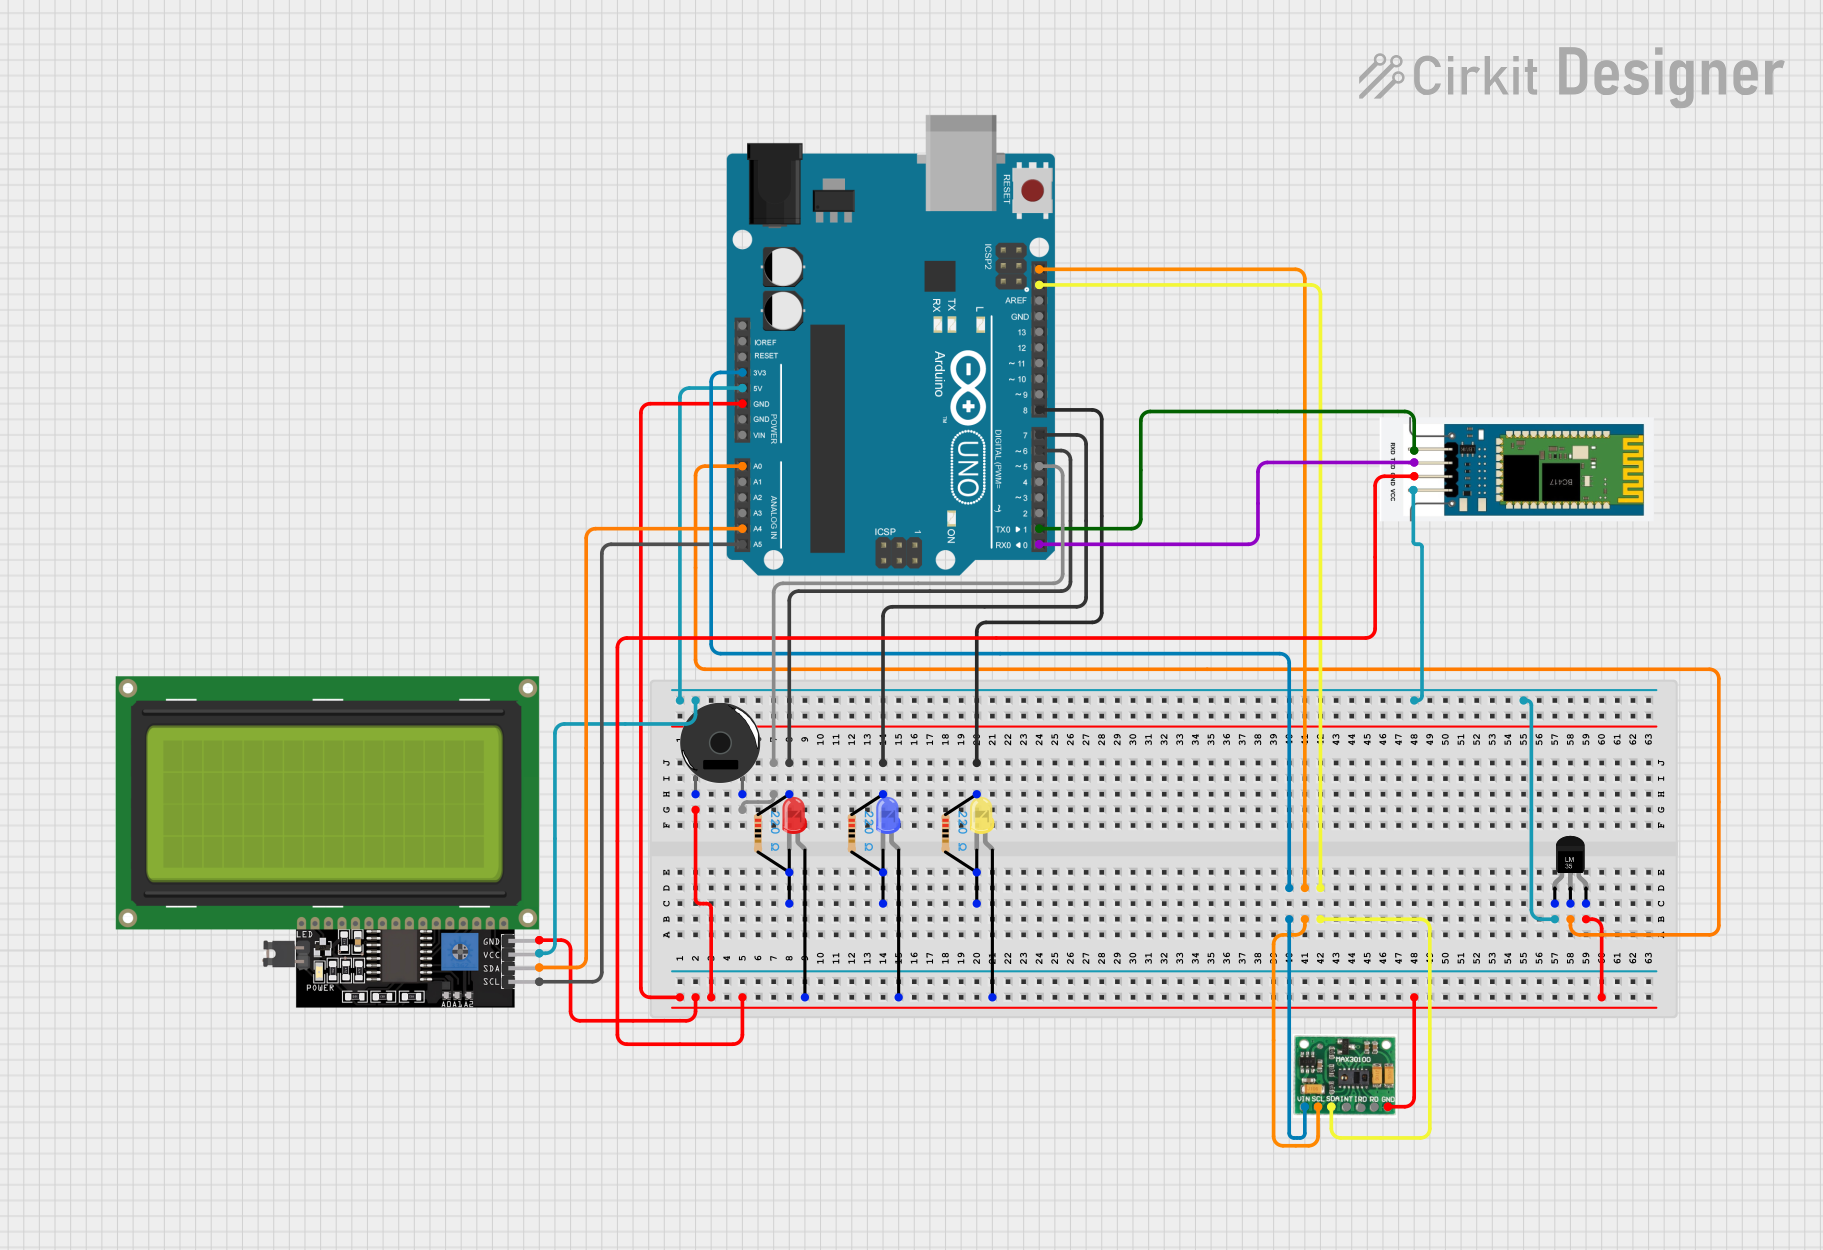

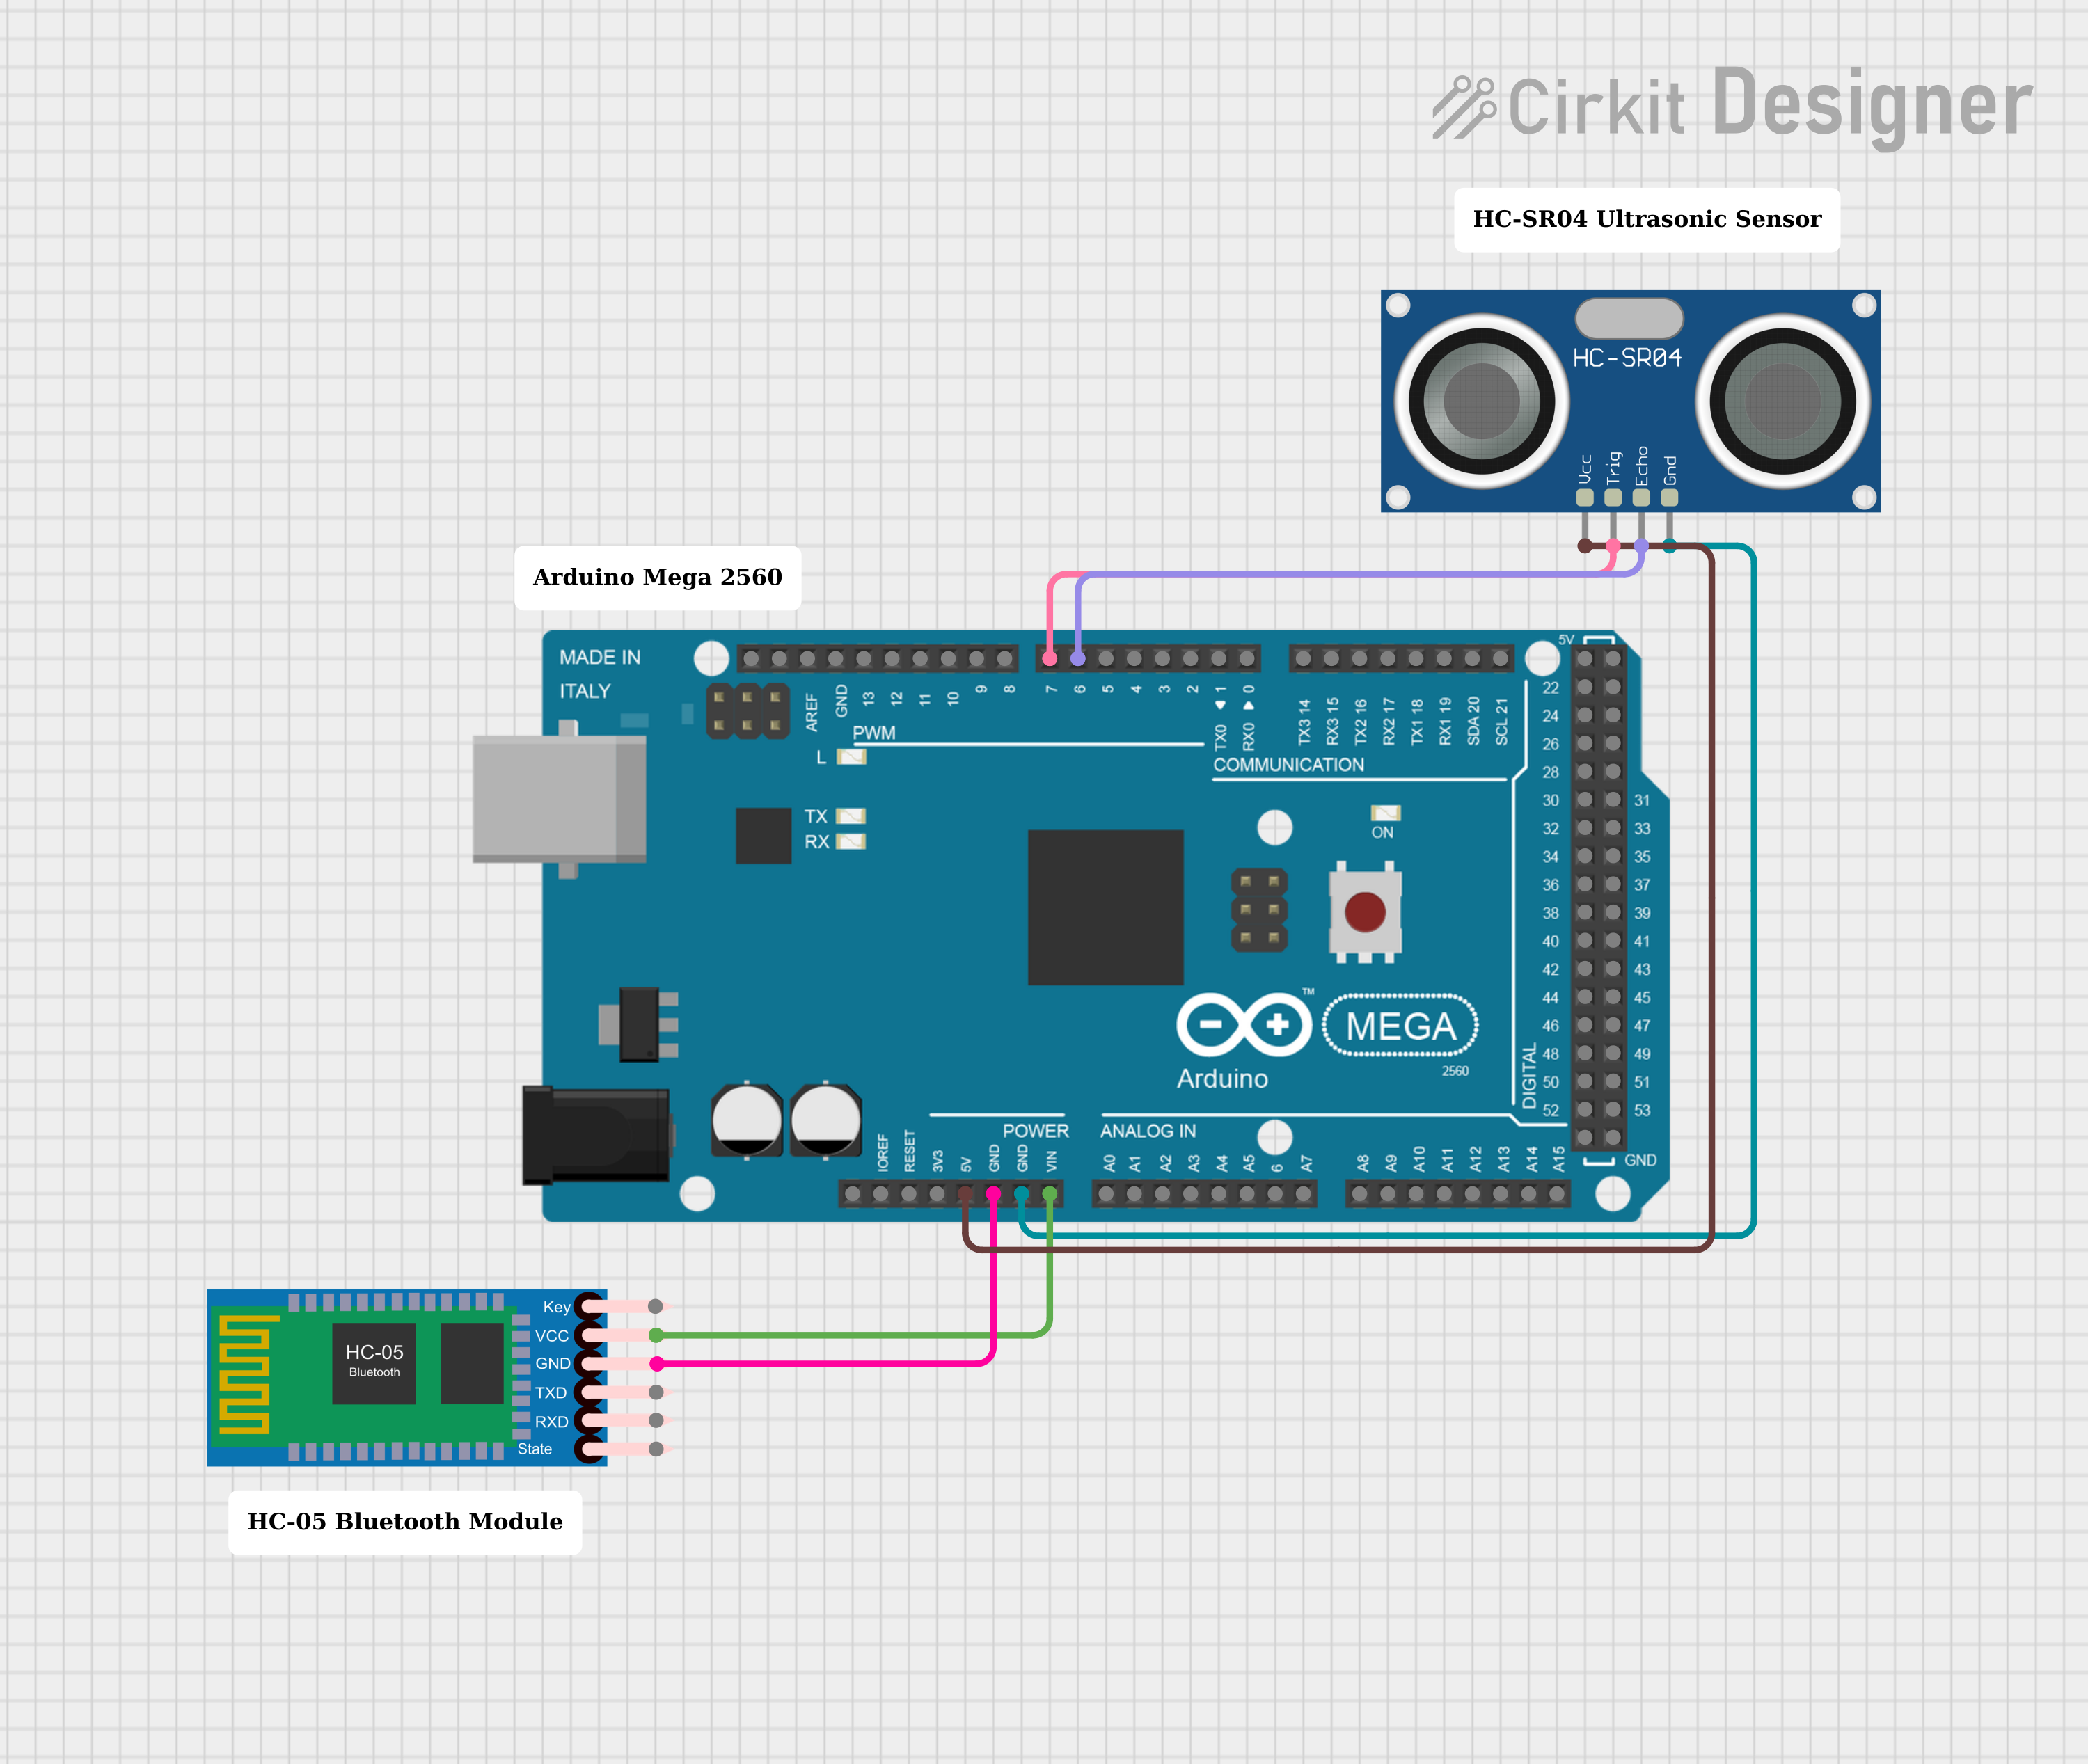
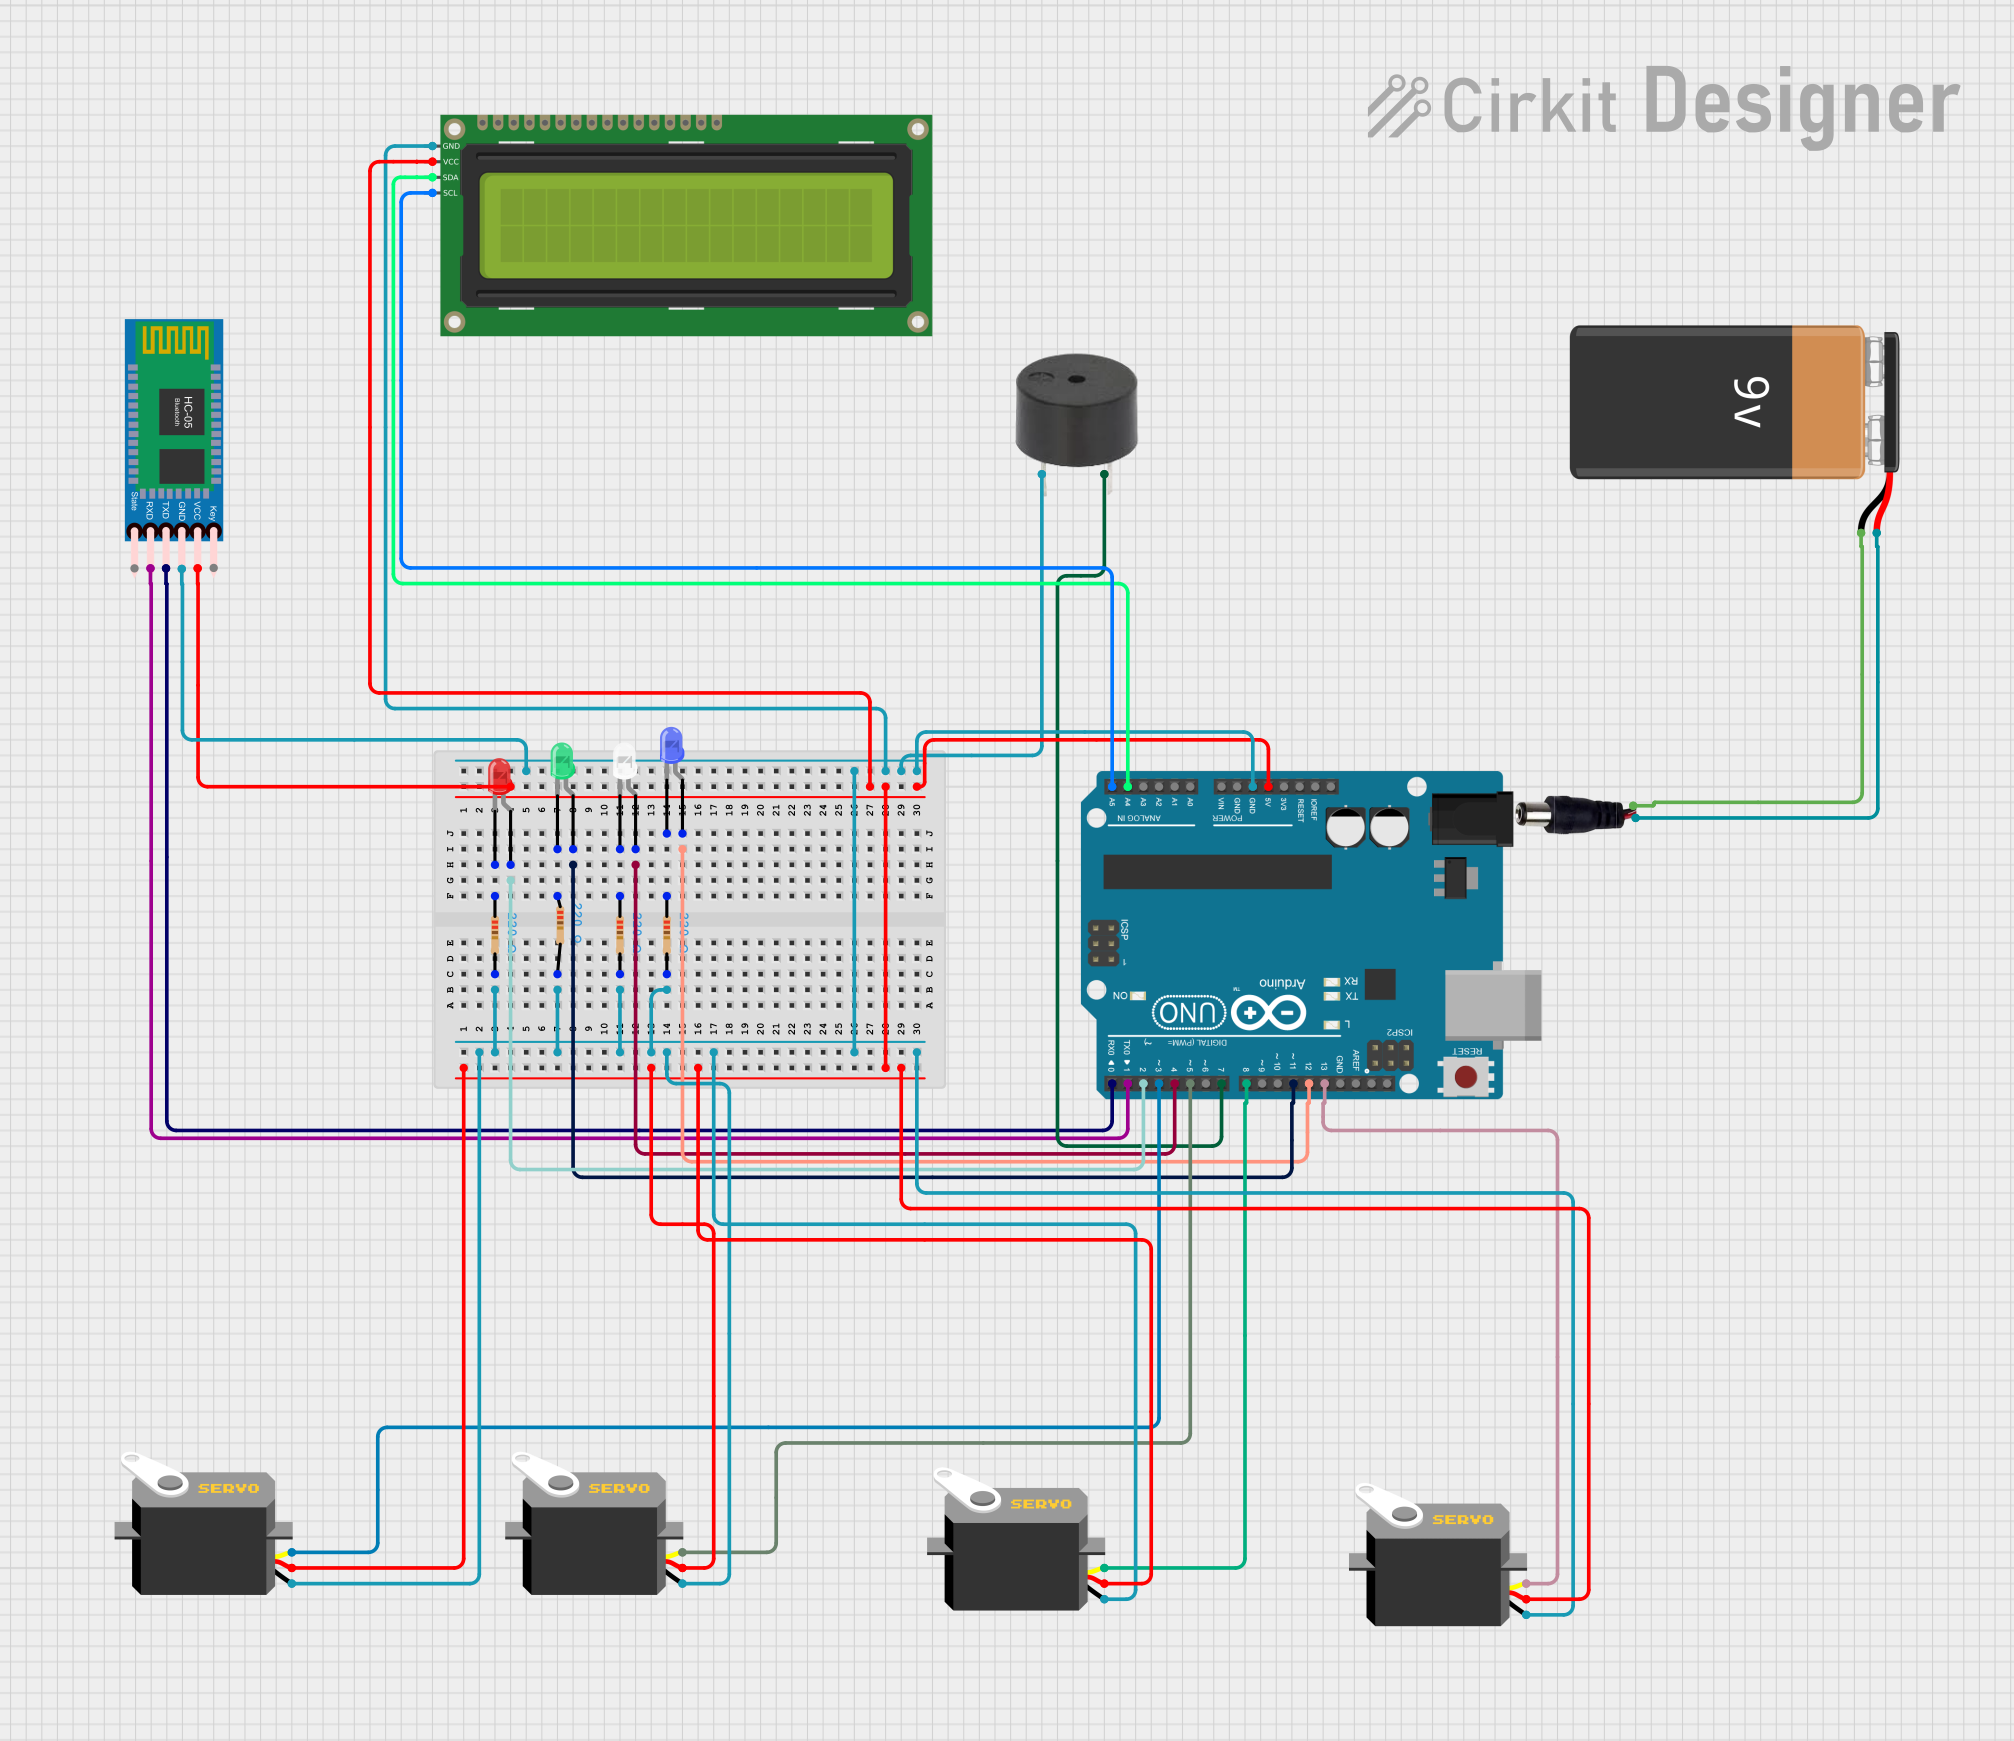
Explore Projects Built with HC-06
Technical Specifications
Key Technical Details
- Bluetooth Protocol: Bluetooth 2.0+EDR (Enhanced Data Rate)
- Operating Frequency: 2.4 GHz ISM band
- Modulation Mode: GFSK (Gaussian Frequency Shift Keying)
- Supply Voltage: 3.6V to 6V (Typically 5V compatible)
- Operating Current: 30mA (when paired)
- Communication Interface: Serial/UART (Universal Asynchronous Receiver/Transmitter)
- Default Baud Rate: 9600 bps (can be configured from 1200 to 1382400 bps)
- Security: Authentication and encryption
- Default Pairing Code: 1234 or 0000
- Operating Temperature: -20°C to +55°C
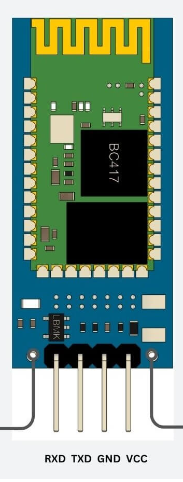
Pin Configuration and Descriptions
| Pin Number | Name | Description |
|---|---|---|
| 1 | KEY | Used to switch the module to AT command mode |
| 2 | VCC | Power supply (3.6V to 6V) |
| 3 | GND | Ground connection |
| 4 | TXD | Transmit Data, connects to RXD of the host device |
| 5 | RXD | Receive Data, connects to TXD of the host device |
| 6 | STATE | Indicates the status of the Bluetooth connection |
Usage Instructions
Connecting to a Circuit
- Connect the VCC pin to the 5V output on the Arduino UNO.
- Connect the GND pin to one of the GND pins on the Arduino UNO.
- Connect the TXD pin of the HC-06 to the RX pin (Pin 0) on the Arduino UNO.
- Connect the RXD pin of the HC-06 to the TX pin (Pin 1) on the Arduino UNO.
Important Considerations and Best Practices
- Ensure that the power supply is within the specified range to avoid damaging the module.
- When connecting to a microcontroller, use voltage dividers or level shifters if necessary to match the logic levels.
- Avoid placing the module near sources of interference, such as motors or high-frequency signals.
- For stable performance, add a decoupling capacitor (typically 100nF to 1μF) between VCC and GND close to the module.
Example Arduino Code
#include <SoftwareSerial.h>

SoftwareSerial mySerial(10, 11); // RX, TX

void setup() {
  // Open the serial communication
  Serial.begin(9600);
  mySerial.begin(9600); // Set the baud rate for the HC-06
  Serial.println("Enter AT commands:");
}

void loop() {
  // Forward what Serial received to Software Serial Port
  if (Serial.available()) {
    mySerial.write(Serial.read());
  }
  // Forward what Software Serial received to Serial Port
  if (mySerial.available()) {
    Serial.write(mySerial.read());
  }
}
This code sets up a pass-through from the Arduino's serial monitor to the HC-06, allowing you to send AT commands directly from the serial monitor to configure the HC-06.
Troubleshooting and FAQs
Common Issues
- Module not responding to AT commands: Ensure the KEY pin is pulled HIGH to enter AT command mode.
- Unable to pair or connect: Check that the device is in range, and the pairing code is correct.
- Intermittent connectivity: Ensure there are no sources of interference nearby and that the power supply is stable.
Solutions and Tips
- AT command mode: To enter AT command mode, the KEY pin must be HIGH before powering on the module.
- LED Indicator: The onboard LED indicates the module's status. A blinking LED means it's not connected, while a solid LED indicates an established connection.
- Baud Rate: If experiencing communication issues, verify that the baud rate of the HC-06 matches that of the host device.
FAQs
Q: Can the HC-06 act as a master device? A: No, the HC-06 is designed to function as a slave device.
Q: How do I change the name or PIN of the HC-06? A: You can change these settings using AT commands when the module is in AT command mode.
Q: What is the range of the HC-06 Bluetooth module? A: The typical range is up to 10 meters without obstacles, but this can vary depending on the environment and interference.
Q: Can I use the HC-06 with iOS devices? A: The HC-06 uses the SPP (Serial Port Profile), which is not supported by iOS. You would need a module that supports Bluetooth Low Energy (BLE) for iOS compatibility.