How to Use 3S LiPo Battery: Examples, Pinouts, and Specs
Introduction
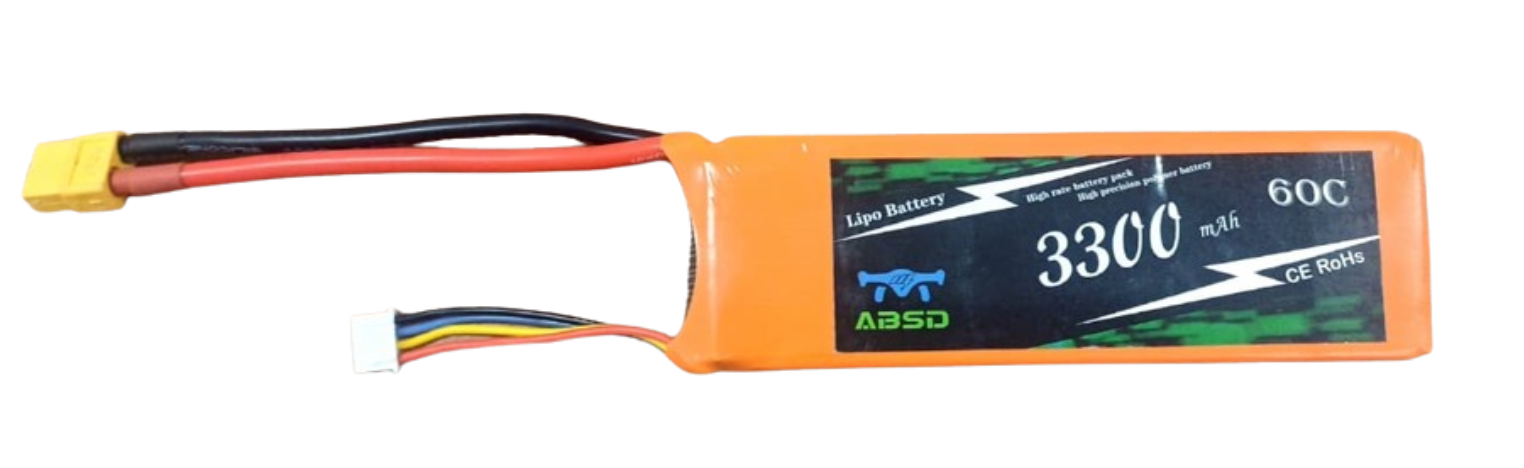
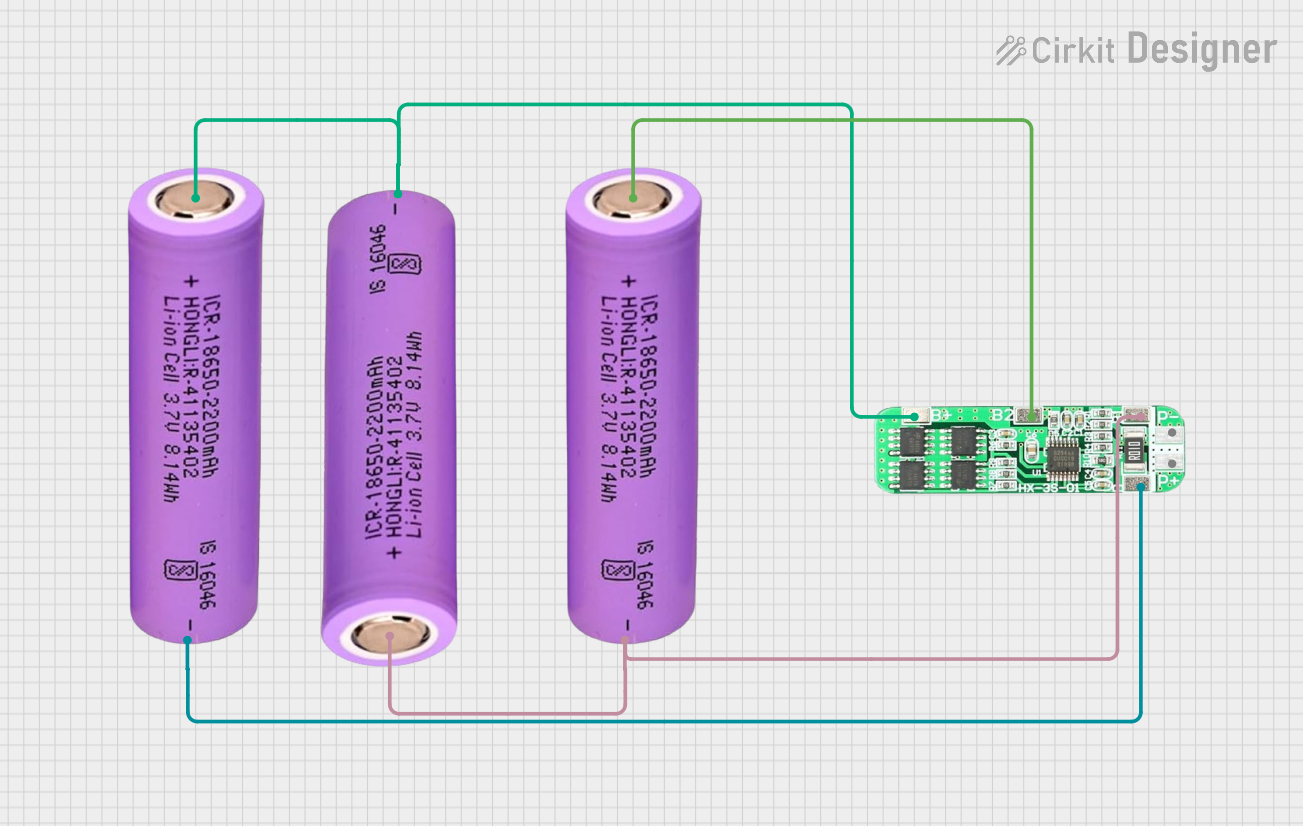
The 3S LiPo Battery (Manufacturer Part ID: Generic 3S LiPo 3300 mAh Battery) is a rechargeable lithium polymer battery consisting of three cells connected in series. This configuration provides a nominal voltage of 11.1V (3.7V per cell) and is capable of delivering high energy density in a lightweight package. With a capacity of 3300 mAh, this battery is ideal for applications requiring reliable and long-lasting power, such as RC vehicles, drones, and portable electronics.
Explore Projects Built with 3S LiPo Battery


Explore Projects Built with 3S LiPo Battery
Common Applications
- RC Vehicles: Cars, boats, and planes requiring high current and lightweight power.
- Drones: Multirotors and quadcopters for extended flight times.
- Robotics: Powering motors and control systems in mobile robots.
- Portable Electronics: Devices requiring compact, high-capacity batteries.
Technical Specifications
The following table outlines the key technical details of the 3S LiPo Battery:
| Parameter | Specification |
|---|---|
| Nominal Voltage | 11.1V (3.7V per cell) |
| Maximum Voltage | 12.6V (4.2V per cell) |
| Minimum Safe Voltage | 9.0V (3.0V per cell) |
| Capacity | 3300 mAh |
| Discharge Rate (C-Rating) | 25C (82.5A max continuous) |
| Charge Voltage | 12.6V |
| Charge Current | 1C (3.3A recommended) |
| Connector Type | XT60 (Power) and JST-XH (Balance) |
| Dimensions | 135mm x 45mm x 25mm |
| Weight | ~250g |
Pin Configuration
The 3S LiPo Battery typically includes two connectors:
- Power Connector (XT60): Supplies power to the load.
- Balance Connector (JST-XH): Used for balancing individual cells during charging.
| Pin Number | JST-XH Balance Connector Description |
|---|---|
| 1 | Cell 1 Positive (+) |
| 2 | Cell 1 Negative (-) / Cell 2 Positive (+) |
| 3 | Cell 2 Negative (-) / Cell 3 Positive (+) |
| 4 | Cell 3 Negative (-) |
Usage Instructions
How to Use the 3S LiPo Battery in a Circuit
- Connect the Power Connector: Use the XT60 connector to supply power to your circuit or device.
- Monitor Voltage Levels: Ensure the battery voltage does not drop below 9.0V to prevent damage.
- Balance Charging: Always use a LiPo-compatible charger with a balance charging feature to maintain cell health.
- Secure the Battery: Use straps or holders to secure the battery in place, especially in mobile applications like drones or RC vehicles.
Important Considerations and Best Practices
- Charging: Use a LiPo charger set to 3S (11.1V) mode. Do not exceed the recommended charge current of 3.3A.
- Storage: Store the battery at a voltage of 11.4V (3.8V per cell) for long-term storage to prevent degradation.
- Temperature: Avoid exposing the battery to temperatures above 60°C or below 0°C.
- Discharge: Do not exceed the maximum continuous discharge current of 82.5A to prevent overheating or damage.
- Safety: Never puncture, short-circuit, or overcharge the battery. Use a fireproof LiPo bag during charging for added safety.
Example: Using the 3S LiPo Battery with an Arduino UNO
To power an Arduino UNO with a 3S LiPo Battery, use a DC-DC step-down converter to regulate the voltage to 5V. Below is an example circuit and code:
Circuit Setup
- Connect the XT60 power connector to the input of the DC-DC step-down converter.
- Adjust the converter output to 5V using a multimeter.
- Connect the converter output to the Arduino UNO's Vin and GND pins.
Example Code
// Example code to read battery voltage using an Arduino UNO
// Ensure a voltage divider is used to step down the 11.1V to a safe level for the Arduino

const int batteryPin = A0; // Analog pin connected to the voltage divider
const float voltageDividerRatio = 5.7; // Adjust based on resistor values used

void setup() {
  Serial.begin(9600); // Initialize serial communication
}

void loop() {
  int rawValue = analogRead(batteryPin); // Read the analog value
  float batteryVoltage = (rawValue / 1023.0) * 5.0 * voltageDividerRatio;

  Serial.print("Battery Voltage: ");
  Serial.print(batteryVoltage);
  Serial.println(" V");

  delay(1000); // Wait 1 second before the next reading
}
Note: Use a voltage divider circuit to step down the battery voltage to a safe range (0-5V) for the Arduino's analog input.
Troubleshooting and FAQs
Common Issues
Battery Swelling:
- Cause: Overcharging, over-discharging, or physical damage.
- Solution: Stop using the battery immediately and dispose of it safely.
Uneven Cell Voltages:
- Cause: Imbalanced charging or aging cells.
- Solution: Use a balance charger to equalize cell voltages.
Battery Not Charging:
- Cause: Faulty charger, damaged connectors, or over-discharged battery.
- Solution: Check the charger and connectors. If the battery voltage is below 9.0V, it may not charge.
Short Runtime:
- Cause: High discharge rate, aging battery, or insufficient capacity.
- Solution: Reduce the load or replace the battery if it has degraded.
FAQs
Q1: Can I use the 3S LiPo Battery for a 12V device?
A1: Yes, but ensure the device can handle the voltage range of 9.0V to 12.6V. Use a DC-DC converter if a stable 12V is required.
Q2: How do I know when the battery is fully charged?
A2: The battery is fully charged when the charger indicates completion, and the voltage reads 12.6V.
Q3: What happens if I over-discharge the battery?
A3: Over-discharging can permanently damage the cells. Use a low-voltage alarm or cutoff circuit to prevent this.
Q4: Can I charge the battery without a balance charger?
A4: It is not recommended. A balance charger ensures all cells are charged evenly, prolonging battery life.