How to Use Mg811: Examples, Pinouts, and Specs

 Design with Mg811 in Cirkit Designer
Introduction
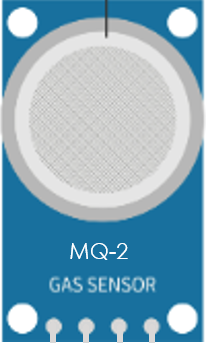
The MG811 is a gas sensor designed to detect carbon dioxide (CO2) levels in the environment. Manufactured by Arduino, this sensor leverages non-dispersive infrared (NDIR) technology to provide accurate and reliable measurements of CO2 concentration. Its high sensitivity and stability make it ideal for a variety of applications, including:
- Indoor air quality monitoring
- HVAC (Heating, Ventilation, and Air Conditioning) systems
- Environmental research and analysis
- Greenhouse CO2 monitoring
- Industrial safety systems
The MG811 is a robust and versatile sensor, suitable for both hobbyist and professional use.
Explore Projects Built with Mg811

 Open Project in Cirkit Designer
 Open Project in Cirkit Designer
 Open Project in Cirkit Designer
 Open Project in Cirkit Designer
Explore Projects Built with Mg811

 Open Project in Cirkit Designer
 Open Project in Cirkit Designer
 Open Project in Cirkit Designer
 Open Project in Cirkit Designer
Technical Specifications
Below are the key technical details of the MG811 sensor:
| Parameter | Value |
|---|---|
| Operating Voltage | 6V ± 0.1V |
| Output Voltage Range | 0.6V to 1.2V (depending on CO2 concentration) |
| Preheating Time | ≥ 24 hours |
| CO2 Detection Range | 350 ppm to 10,000 ppm |
| Operating Temperature | -20°C to 50°C |
| Operating Humidity | 0% to 95% RH (non-condensing) |
| Power Consumption | ~200 mW |
| Sensor Type | NDIR (Non-Dispersive Infrared) |
Pin Configuration and Descriptions
The MG811 sensor module typically comes with the following pin configuration:
| Pin Name | Description |
|---|---|
| VCC | Power supply input (6V ± 0.1V) |
| GND | Ground connection |
| AOUT | Analog output voltage proportional to CO2 levels |
| DOUT | Digital output (high/low signal based on threshold) |
Usage Instructions
How to Use the MG811 in a Circuit
- Power Supply: Connect the VCC pin to a stable 6V power source and the GND pin to ground. Ensure the power supply is regulated to avoid damaging the sensor.
- Signal Output:
- Use the AOUT pin to read the analog voltage output, which corresponds to the CO2 concentration.
- Optionally, use the DOUT pin for a digital high/low signal if a threshold is set.
- Preheating: Allow the sensor to preheat for at least 24 hours before taking accurate measurements. This ensures the sensor stabilizes and provides reliable data.
- Analog-to-Digital Conversion: If using a microcontroller like the Arduino UNO, connect the AOUT pin to an analog input pin (e.g., A0) for reading the sensor's output voltage.
Important Considerations and Best Practices
- Calibration: The MG811 sensor requires calibration to ensure accurate CO2 measurements. Use a known CO2 concentration for reference during calibration.
- Ventilation: Ensure proper airflow around the sensor to avoid accumulation of gases that could affect readings.
- Temperature and Humidity: Operate the sensor within its specified temperature and humidity range for optimal performance.
- Power Stability: Use a regulated power supply to prevent voltage fluctuations that could impact sensor accuracy.
Example Code for Arduino UNO
Below is an example of how to interface the MG811 sensor with an Arduino UNO to read CO2 levels:
// MG811 CO2 Sensor Example Code
// Connect the AOUT pin of the MG811 to the A0 pin of the Arduino UNO

const int sensorPin = A0; // Analog pin connected to MG811 AOUT
float sensorVoltage;      // Variable to store sensor output voltage
float CO2Concentration;   // Variable to store calculated CO2 concentration

void setup() {
  Serial.begin(9600); // Initialize serial communication
  pinMode(sensorPin, INPUT); // Set sensor pin as input
}

void loop() {
  // Read the analog voltage from the sensor
  int sensorValue = analogRead(sensorPin);

  // Convert the analog value to voltage (assuming 5V reference)
  sensorVoltage = sensorValue * (5.0 / 1023.0);

  // Convert voltage to CO2 concentration (example formula, adjust as needed)
  // This formula depends on calibration and sensor characteristics
  CO2Concentration = (sensorVoltage - 0.6) * 5000; // Example conversion

  // Print the results to the Serial Monitor
  Serial.print("Sensor Voltage: ");
  Serial.print(sensorVoltage);
  Serial.println(" V");

  Serial.print("CO2 Concentration: ");
  Serial.print(CO2Concentration);
  Serial.println(" ppm");

  delay(1000); // Wait 1 second before the next reading
}
Note: The formula for converting voltage to CO2 concentration is an example and may vary based on calibration and sensor characteristics. Refer to the sensor's datasheet for precise calculations.
Troubleshooting and FAQs
Common Issues and Solutions
No Output or Incorrect Readings:
- Ensure the sensor is powered with a stable 6V supply.
- Verify that the sensor has been preheated for at least 24 hours.
- Check all connections for loose wires or incorrect pin assignments.
Fluctuating Readings:
- Ensure proper ventilation around the sensor.
- Avoid placing the sensor near heat sources or in areas with high humidity.
Low Sensitivity:
- Perform a calibration using a known CO2 concentration.
- Check for any obstructions or contaminants on the sensor surface.
Arduino Code Not Working:
- Verify that the correct analog pin is used in the code.
- Ensure the Arduino board is properly powered and connected to the computer.
FAQs
Q: Can the MG811 detect gases other than CO2?
A: No, the MG811 is specifically designed to detect CO2 and may not provide accurate readings for other gases.
Q: How often should the sensor be calibrated?
A: Calibration frequency depends on the application. For critical applications, calibrate the sensor periodically (e.g., monthly).
Q: Can I use the MG811 with a 5V power supply?
A: No, the MG811 requires a 6V ± 0.1V power supply for proper operation. Using a 5V supply may result in inaccurate readings or sensor malfunction.
Q: Is the MG811 suitable for outdoor use?
A: The MG811 is not designed for outdoor use as it is sensitive to extreme temperatures and humidity. Use it in controlled environments for best results.