How to Use SDcard module: Examples, Pinouts, and Specs
Introduction
An SD card module is an electronic component that enables microcontrollers and embedded systems to interface with Secure Digital (SD) cards for data storage and retrieval. This module is commonly used in applications such as data logging, MP3 players, digital cameras, and any system that requires a large amount of non-volatile storage. The module typically includes a slot for the SD card and the necessary circuitry to facilitate communication between the card and a host device, such as level shifters for voltage compatibility and voltage regulators for stable power supply.
Explore Projects Built with SDcard module
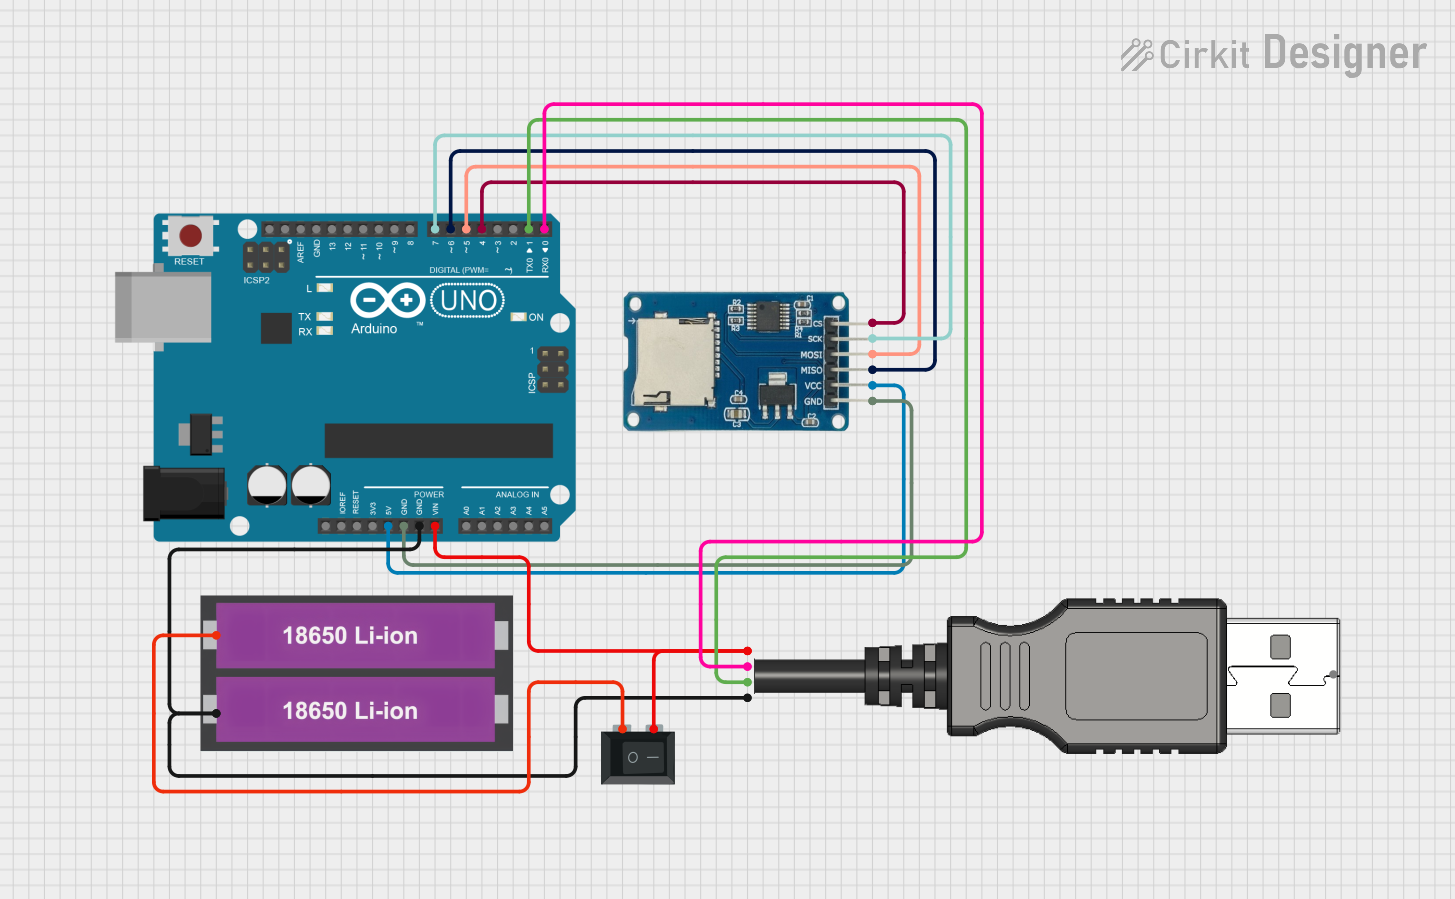
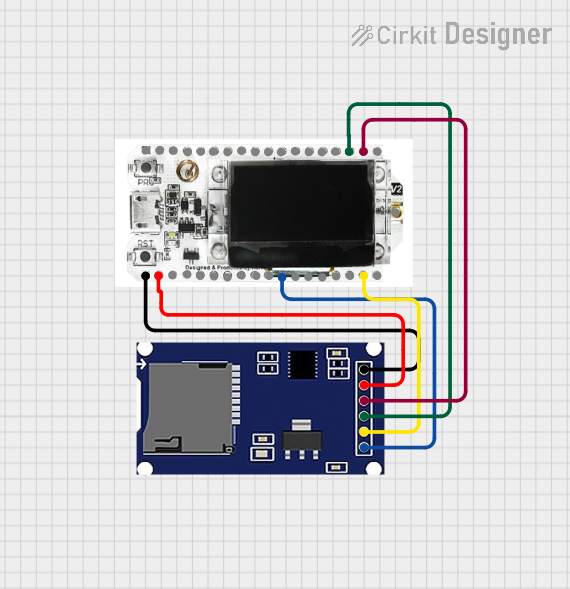

Explore Projects Built with SDcard module
Technical Specifications
Key Technical Details
- Supply Voltage (VCC): 3.3V to 5V (with onboard voltage regulator)
- Logic Level Voltage: 3.3V (level shifting may be required for 5V systems)
- Communication Interface: SPI (Serial Peripheral Interface)
- Supported SD Card Types: Standard SD, SDHC (up to 32GB)
- Data Transfer Rate: Dependent on the SD card class
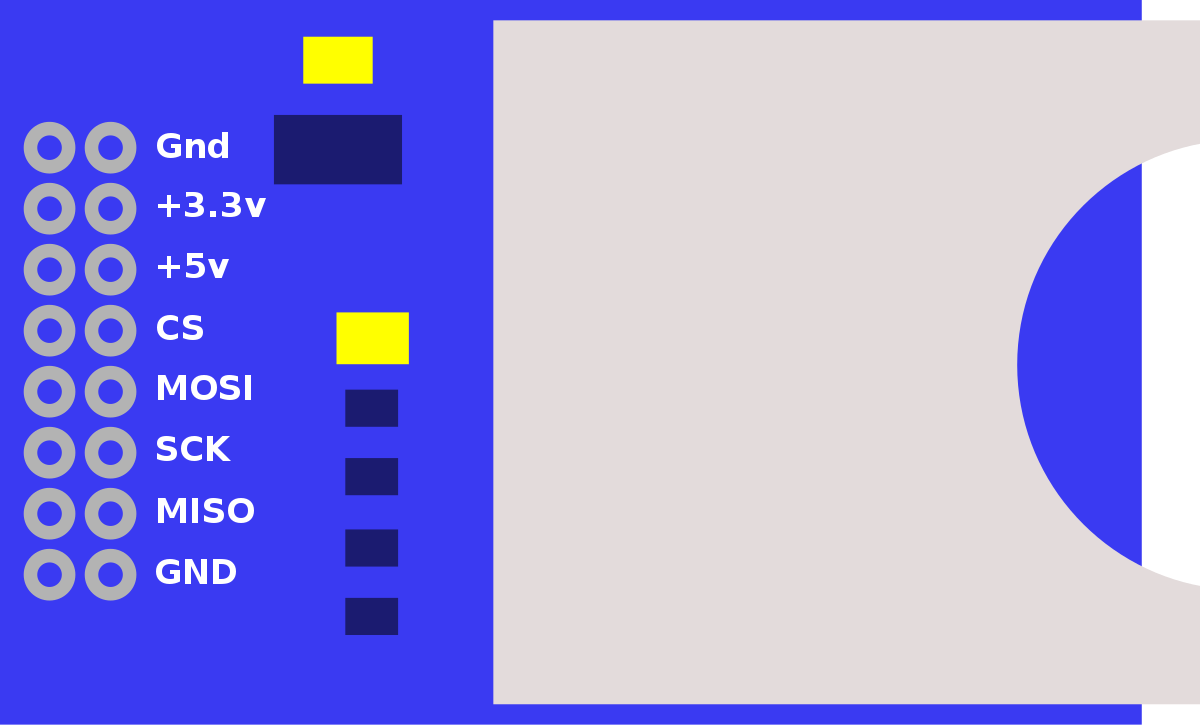
Pin Configuration and Descriptions
| Pin Name | Description |
|---|---|
| VCC | Power supply (3.3V to 5V input) |
| GND | Ground |
| MISO | Master In Slave Out - SPI data output |
| MOSI | Master Out Slave In - SPI data input |
| SCK | Serial Clock - SPI clock signal |
| CS | Chip Select - SPI slave select signal |
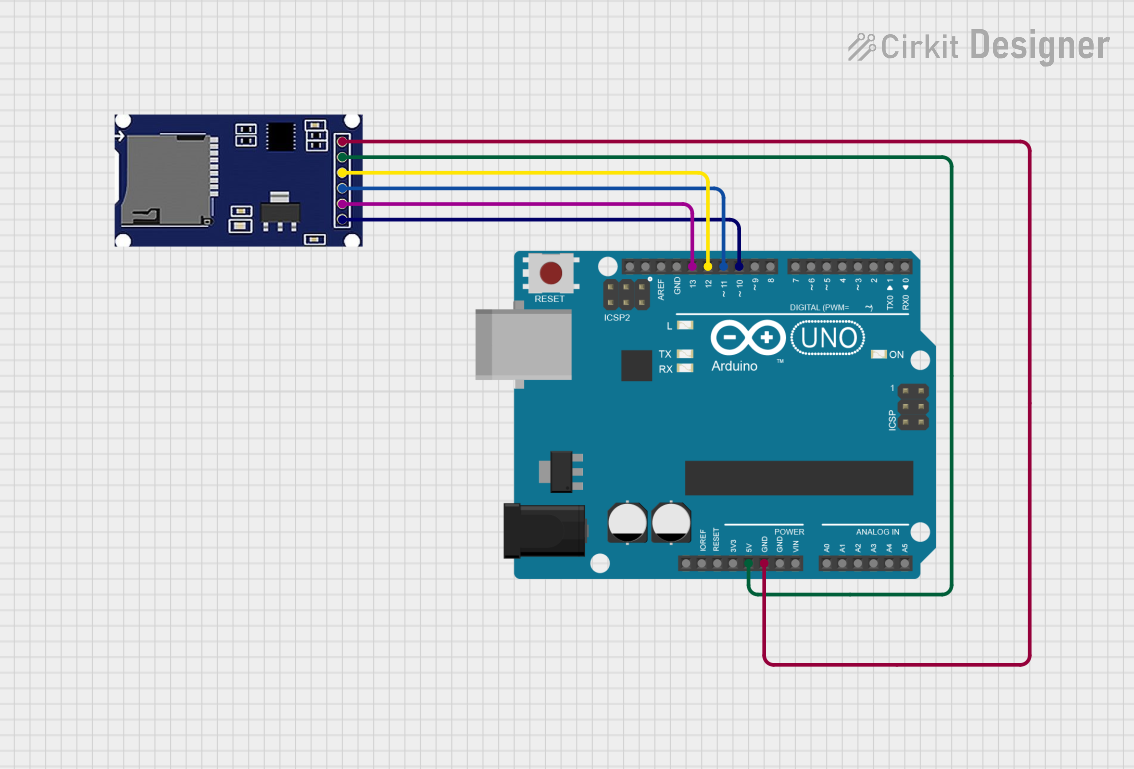
Usage Instructions
Interfacing with a Microcontroller
- Power Connections: Connect the VCC pin to the 5V output on the microcontroller and the GND pin to a ground pin on the microcontroller.
- SPI Connections: Connect the MISO, MOSI, and SCK pins to the corresponding SPI pins on the microcontroller.
- Chip Select (CS): Connect the CS pin to a digital I/O pin on the microcontroller; this pin will be used to select the SD card module when communicating over SPI.
Important Considerations and Best Practices
- Level Shifting: If the microcontroller operates at 5V logic and the SD card module is rated for 3.3V logic, use level shifters to prevent damage to the SD card.
- File System: Format the SD card with a FAT16 or FAT32 file system before use.
- Library Support: Utilize existing libraries such as
SD.hfor Arduino to simplify the implementation of file operations. - Power Supply: Ensure a stable power supply; fluctuations can corrupt data on the SD card.
Example Code for Arduino UNO
#include <SPI.h>
#include <SD.h>

// Set the CS pin
const int chipSelect = 10;

void setup() {
  // Open serial communications
  Serial.begin(9600);

  // Initialize the SD card
  if (!SD.begin(chipSelect)) {
    Serial.println("Card failed, or not present");
    // Don't continue if the initialization fails
    return;
  }
  Serial.println("Card initialized.");

  // Create or open a file
  File dataFile = SD.open("datalog.txt", FILE_WRITE);

  // If the file is available, write to it
  if (dataFile) {
    dataFile.println("Hello, SD card!");
    dataFile.close();
    Serial.println("Data written to file.");
  } else {
    // If the file isn't open, report an error
    Serial.println("Error opening datalog.txt");
  }
}

void loop() {
  // Nothing here
}
Troubleshooting and FAQs
Common Issues
- Card Initialization Failure: Ensure the card is formatted correctly and the wiring is secure.
- Read/Write Errors: Check for loose connections and ensure the correct chip select pin is used in the code.
- Corrupted Data: Use a stable power supply and safely eject the card from a computer after writing data to it.
Solutions and Tips
- Formatting: Use a computer to format the SD card to FAT16 or FAT32.
- Connections: Double-check all connections, especially the SPI and CS pins.
- Library Versions: Make sure to use the latest version of the SD library compatible with your development environment.
FAQs
Q: Can I use a microSD card with this module? A: Yes, with a microSD to SD card adapter, you can use a microSD card.
Q: What is the maximum size of SD card supported? A: Most modules support SD cards up to 32GB, but check the specifications of your particular module.
Q: How do I ensure my data is written to the card?
A: Use the dataFile.flush() or dataFile.close() methods after writing to ensure data is saved.
Q: Can I interface with the SD card module using a 5V microcontroller? A: Yes, but ensure that the module has onboard level shifters or add external level shifters to protect the SD card.