How to Use Energy Meter XTM35SA: Examples, Pinouts, and Specs
Introduction
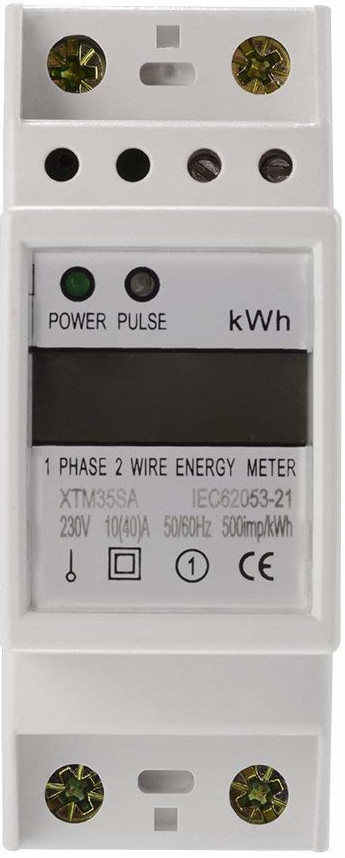
The Energy Meter XTM35SA, manufactured by Tignous, is a digital energy meter designed for accurate measurement of electrical energy consumption in residential, commercial, and industrial applications. It features a clear LCD display for real-time energy monitoring and supports various communication protocols for data logging and remote monitoring. The XTM35SA is compact, reliable, and easy to integrate into existing electrical systems, making it a versatile choice for energy management solutions.
Explore Projects Built with Energy Meter XTM35SA
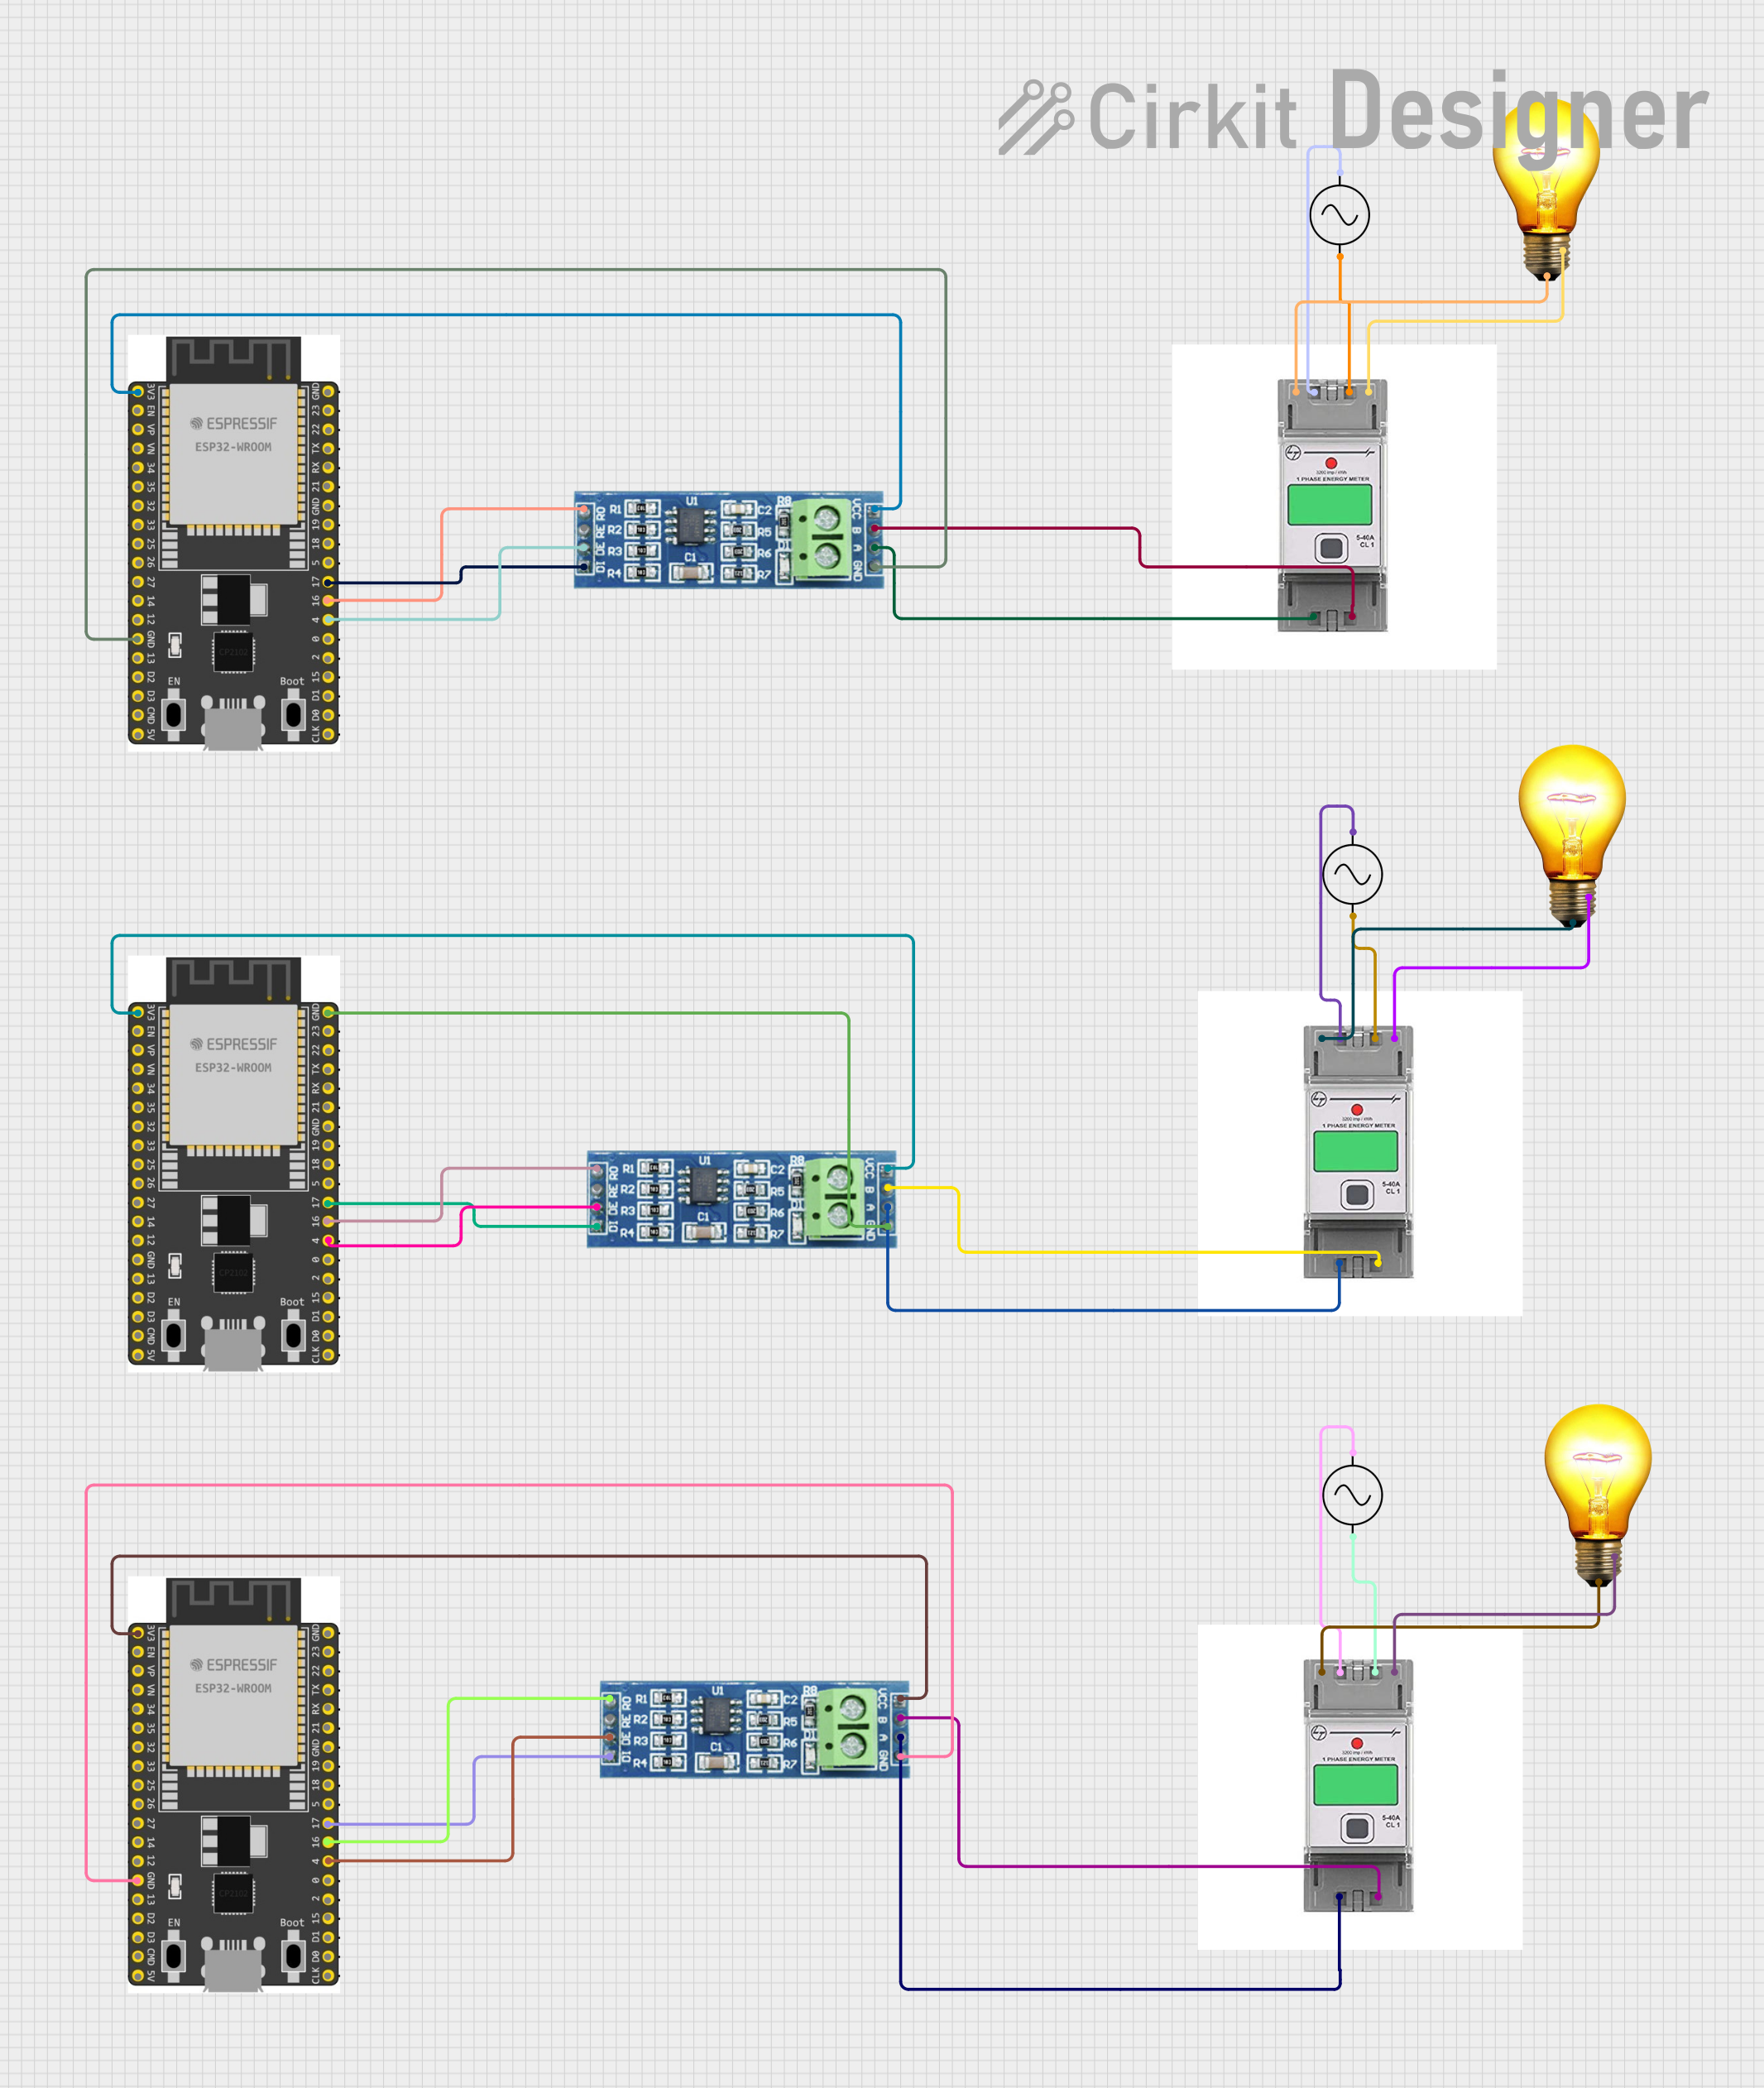
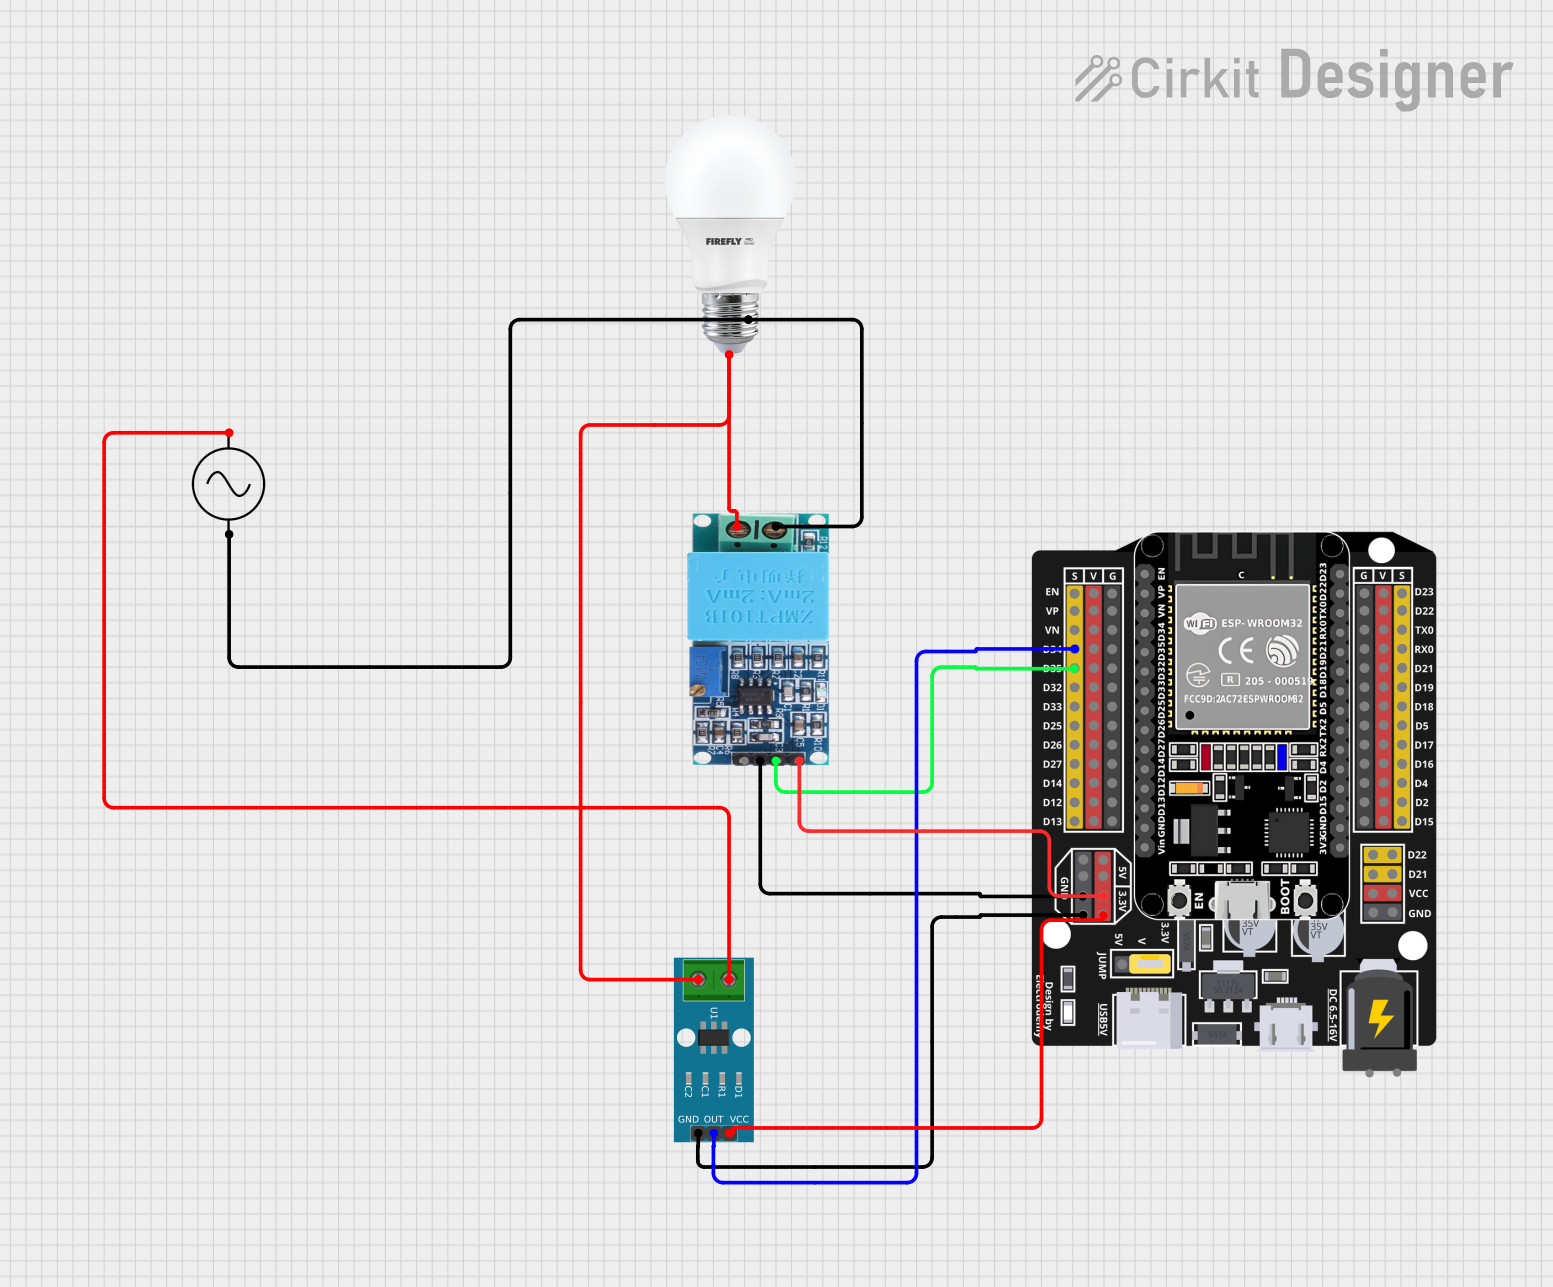
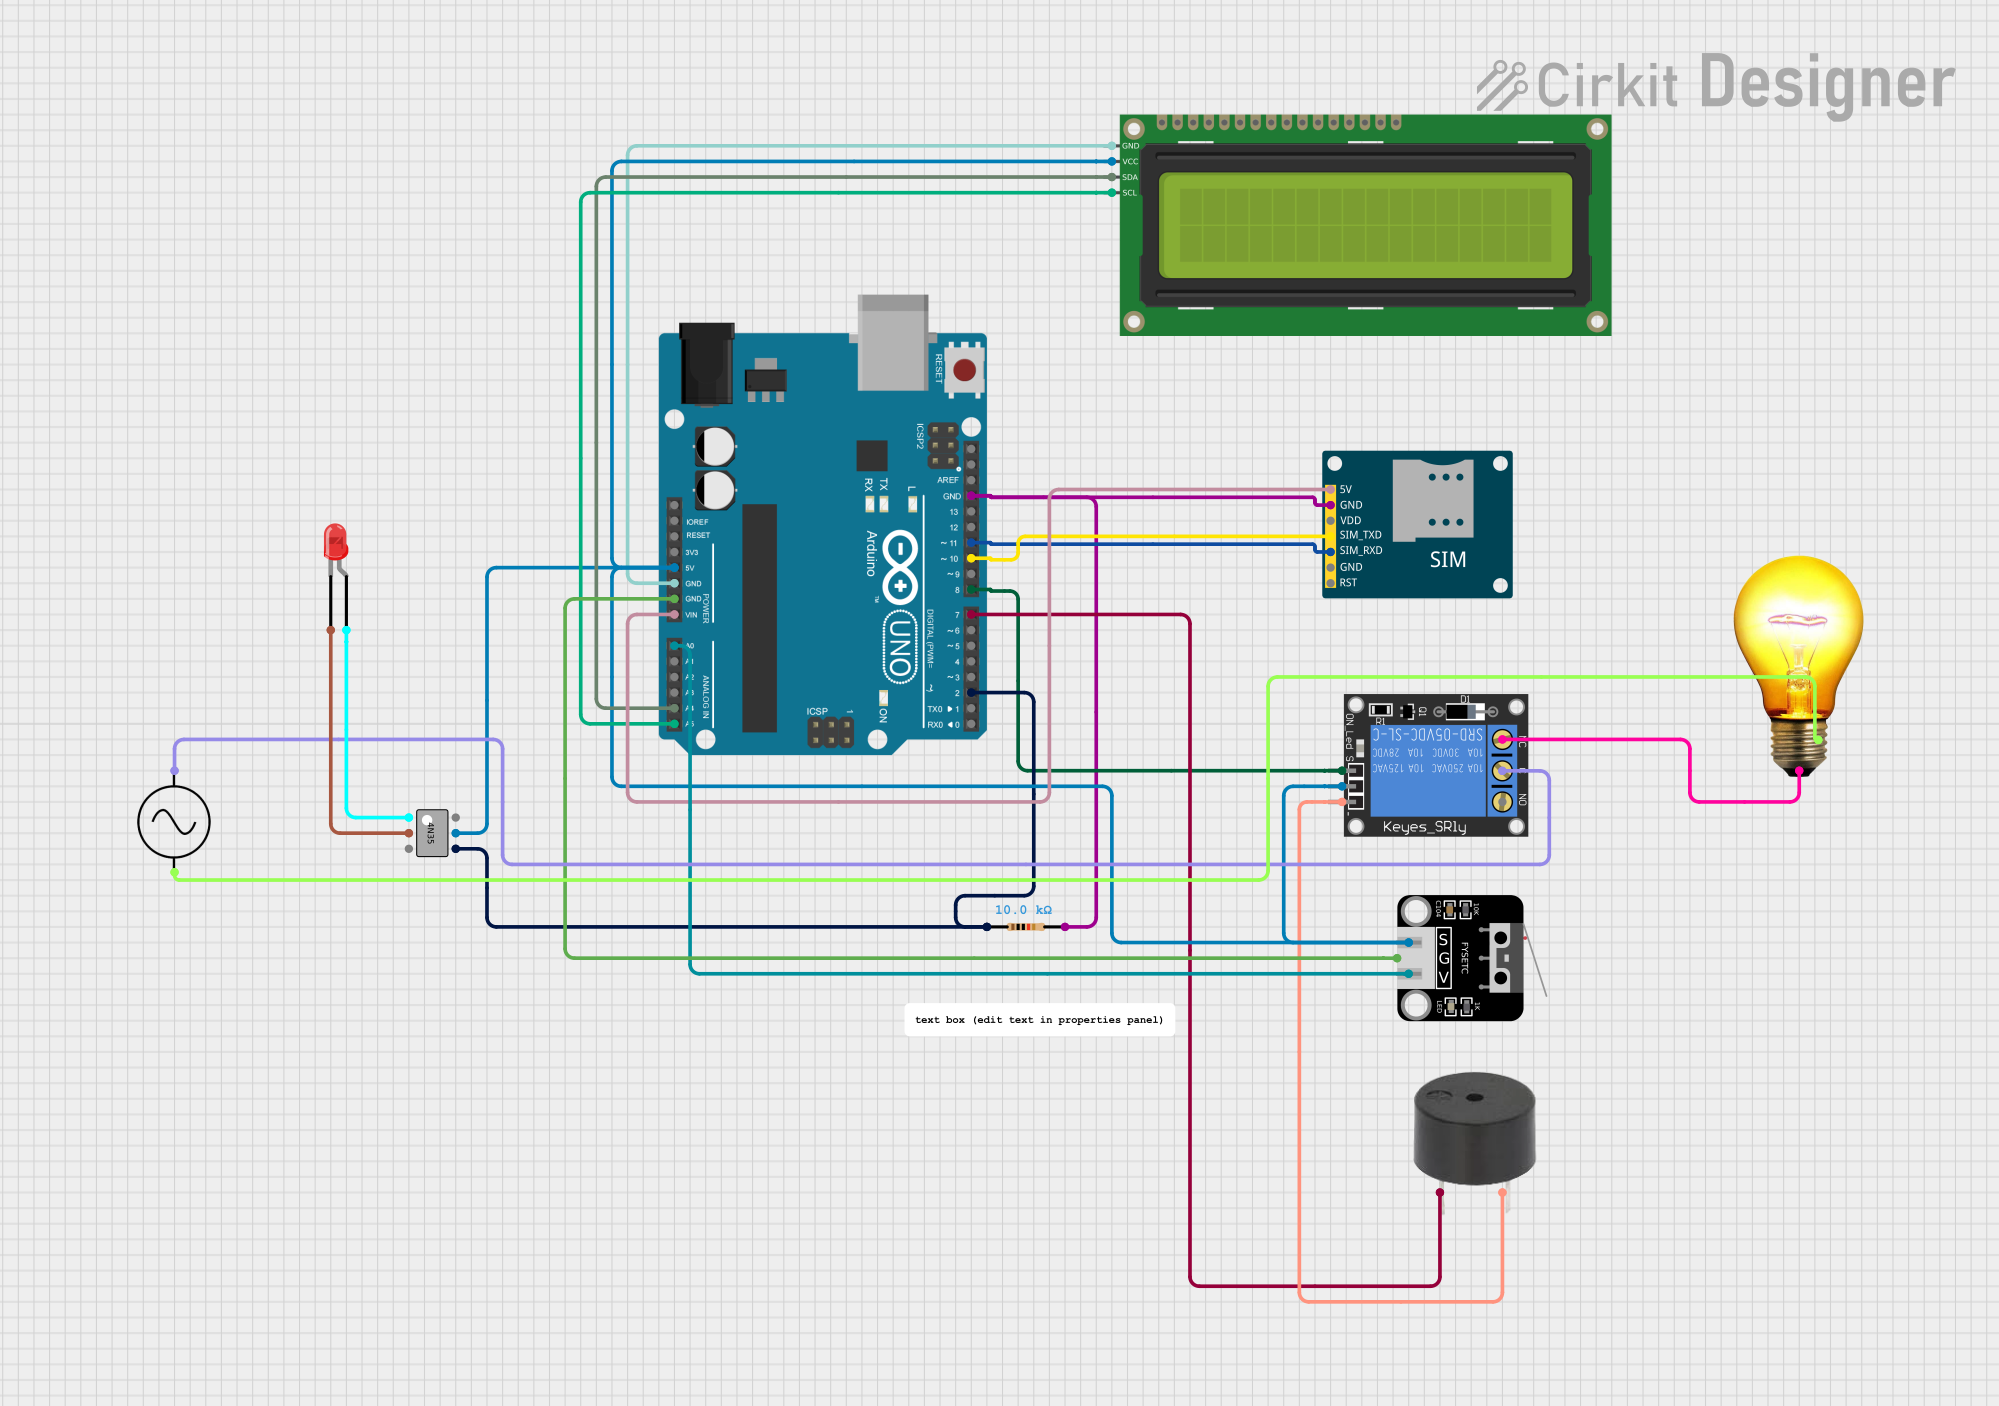

Explore Projects Built with Energy Meter XTM35SA
Common Applications
- Residential energy consumption monitoring
- Commercial building energy management
- Industrial power usage tracking
- Integration with smart home systems
- Data logging for energy audits
Technical Specifications
The following table outlines the key technical specifications of the XTM35SA:
| Parameter | Specification |
|---|---|
| Manufacturer | Tignous |
| Part ID | XTM35SA |
| Voltage Rating | 230V AC ± 20% |
| Current Rating | 5(80)A |
| Frequency | 50/60 Hz |
| Accuracy Class | Class 1 |
| Power Consumption | ≤ 2W / 10VA |
| Display Type | LCD (6+2 digits) |
| Communication Protocols | RS485 (Modbus RTU), Infrared (optional) |
| Operating Temperature | -25°C to +55°C |
| Storage Temperature | -40°C to +70°C |
| Dimensions | 100mm x 36mm x 65mm |
| Mounting Type | DIN Rail |
| Certification | IEC 62053-21, CE |
Pin Configuration and Descriptions
The XTM35SA features terminal connections for power input, load output, and communication. The table below describes the terminal layout:
| Terminal No. | Description |
|---|---|
| 1 | Line Input (L) |
| 2 | Neutral Input (N) |
| 3 | Line Output (L) |
| 4 | Neutral Output (N) |
| 5 | RS485 Communication (A) |
| 6 | RS485 Communication (B) |
| 7 | Infrared Communication (optional) |
Usage Instructions
How to Use the XTM35SA in a Circuit
- Mounting: Securely mount the XTM35SA on a DIN rail in your distribution box.
- Wiring:
- Connect the Line Input (L) and Neutral Input (N) terminals to the incoming power supply.
- Connect the Line Output (L) and Neutral Output (N) terminals to the load.
- For communication, connect the RS485 terminals (A and B) to your data acquisition system or monitoring device.
- Power On: Once all connections are secure, power on the system. The LCD display will show real-time energy consumption data.
- Communication Setup:
- If using RS485, configure the Modbus RTU settings (e.g., baud rate, parity) as per your system requirements.
- For infrared communication, align the infrared port with the receiver for data transfer.
Important Considerations and Best Practices
- Ensure all connections are made with the power supply turned off to avoid electrical hazards.
- Use appropriately rated cables for the current and voltage levels in your system.
- Verify the RS485 communication settings (e.g., device ID, baud rate) to ensure compatibility with your monitoring system.
- Regularly inspect the meter for any signs of damage or wear.
Arduino UNO Integration Example
The XTM35SA can be connected to an Arduino UNO via the RS485 interface for data logging. Below is an example code snippet for reading energy data using the Modbus RTU protocol:
#include <ModbusMaster.h>

// Instantiate ModbusMaster object
ModbusMaster node;

void setup() {
  Serial.begin(9600); // Initialize serial communication
  node.begin(1, Serial); // Set Modbus slave ID to 1
}

void loop() {
  uint8_t result;
  uint16_t data;

  // Read energy consumption (example register address: 0x0000)
  result = node.readInputRegisters(0x0000, 1);

  if (result == node.ku8MBSuccess) {
    data = node.getResponseBuffer(0);
    Serial.print("Energy Consumption: ");
    Serial.print(data);
    Serial.println(" kWh");
  } else {
    Serial.println("Error reading data");
  }

  delay(1000); // Wait 1 second before next read
}
Note: Replace the register address (
0x0000) with the actual address for energy data as specified in the XTM35SA Modbus register map.
Troubleshooting and FAQs
Common Issues and Solutions
No Display on Power On:
- Cause: Incorrect wiring or no power supply.
- Solution: Verify the input connections and ensure the power supply is within the specified range.
Inaccurate Readings:
- Cause: Loose connections or incorrect wiring.
- Solution: Check all connections and ensure the meter is properly installed.
RS485 Communication Failure:
- Cause: Incorrect baud rate or wiring issues.
- Solution: Verify the RS485 settings (baud rate, parity, etc.) and check the wiring.
Infrared Communication Not Working:
- Cause: Misalignment of the infrared port.
- Solution: Ensure the infrared port is properly aligned with the receiver.
FAQs
Q: Can the XTM35SA measure three-phase power?
A: No, the XTM35SA is designed for single-phase power measurement only.Q: What is the maximum current the XTM35SA can handle?
A: The XTM35SA can handle a maximum current of 80A.Q: Is the XTM35SA compatible with solar inverters?
A: Yes, the XTM35SA can be used to monitor energy consumption in systems with solar inverters, provided the voltage and current ratings are within range.Q: How do I reset the energy readings?
A: Refer to the user manual for instructions on resetting the meter, as this may vary depending on the firmware version.
This concludes the documentation for the Energy Meter XTM35SA. For further assistance, refer to the official Tignous user manual or contact their support team.