How to Use Waveshare E-Paper ESP32 Driver Board: Examples, Pinouts, and Specs
Introduction
The Waveshare E-Paper ESP32 Driver Board is a versatile and compact driver board designed to control E-Paper displays. Powered by the ESP32 microcontroller, it supports wireless communication via Wi-Fi and Bluetooth, making it ideal for IoT applications, portable devices, and low-power display solutions. This board simplifies the integration of E-Paper displays into projects, offering a user-friendly interface and robust performance.
Explore Projects Built with Waveshare E-Paper ESP32 Driver Board
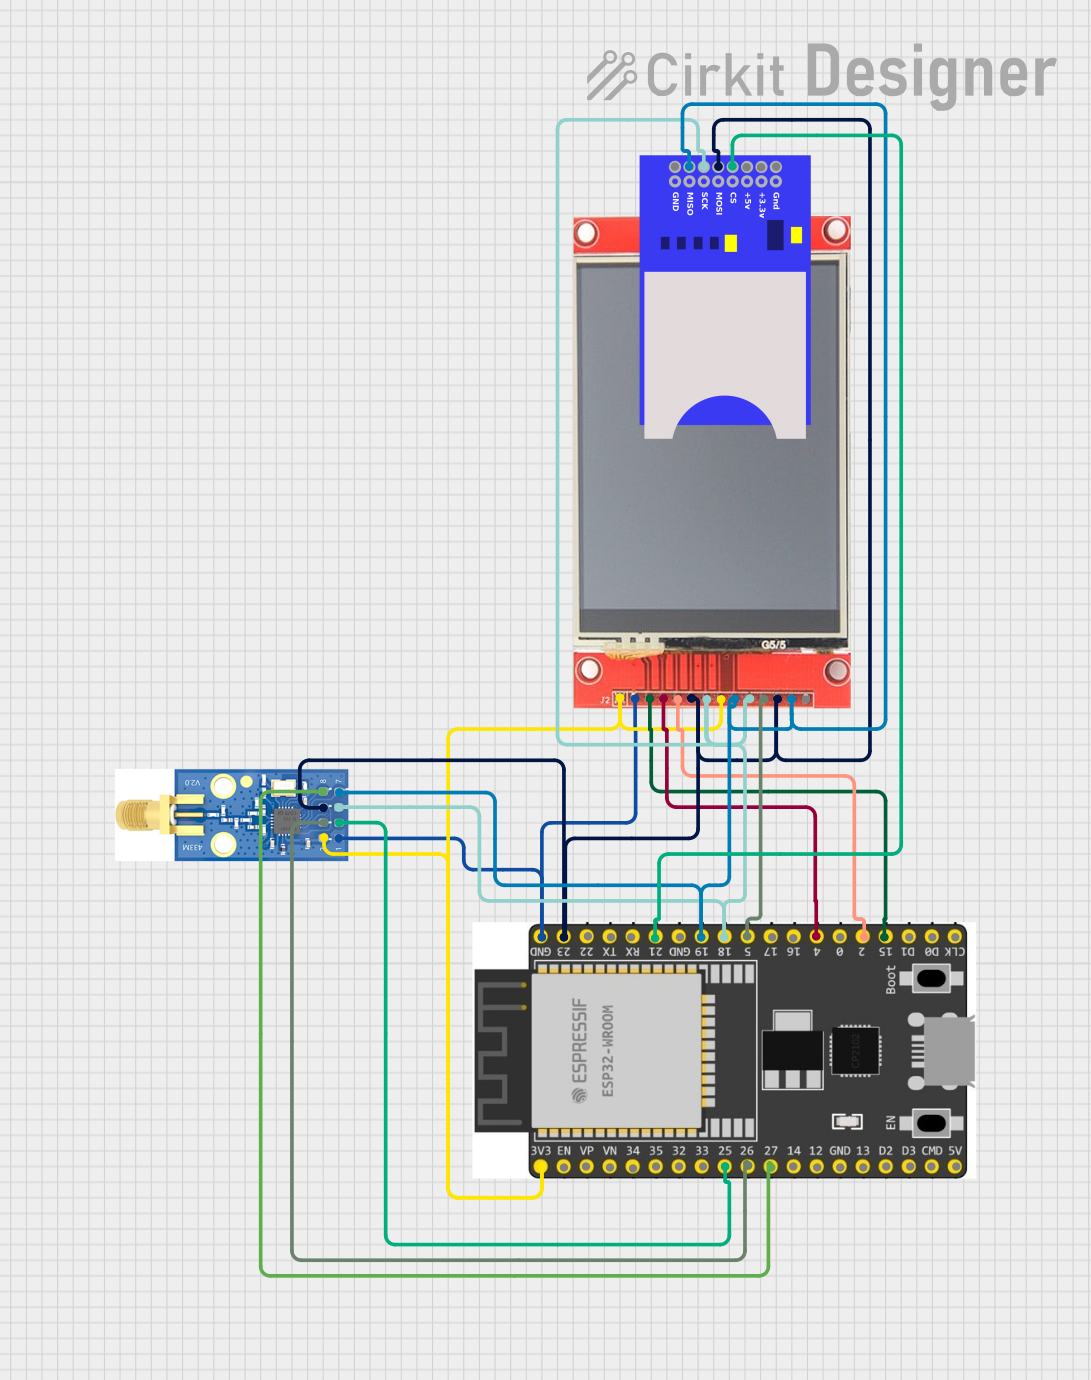
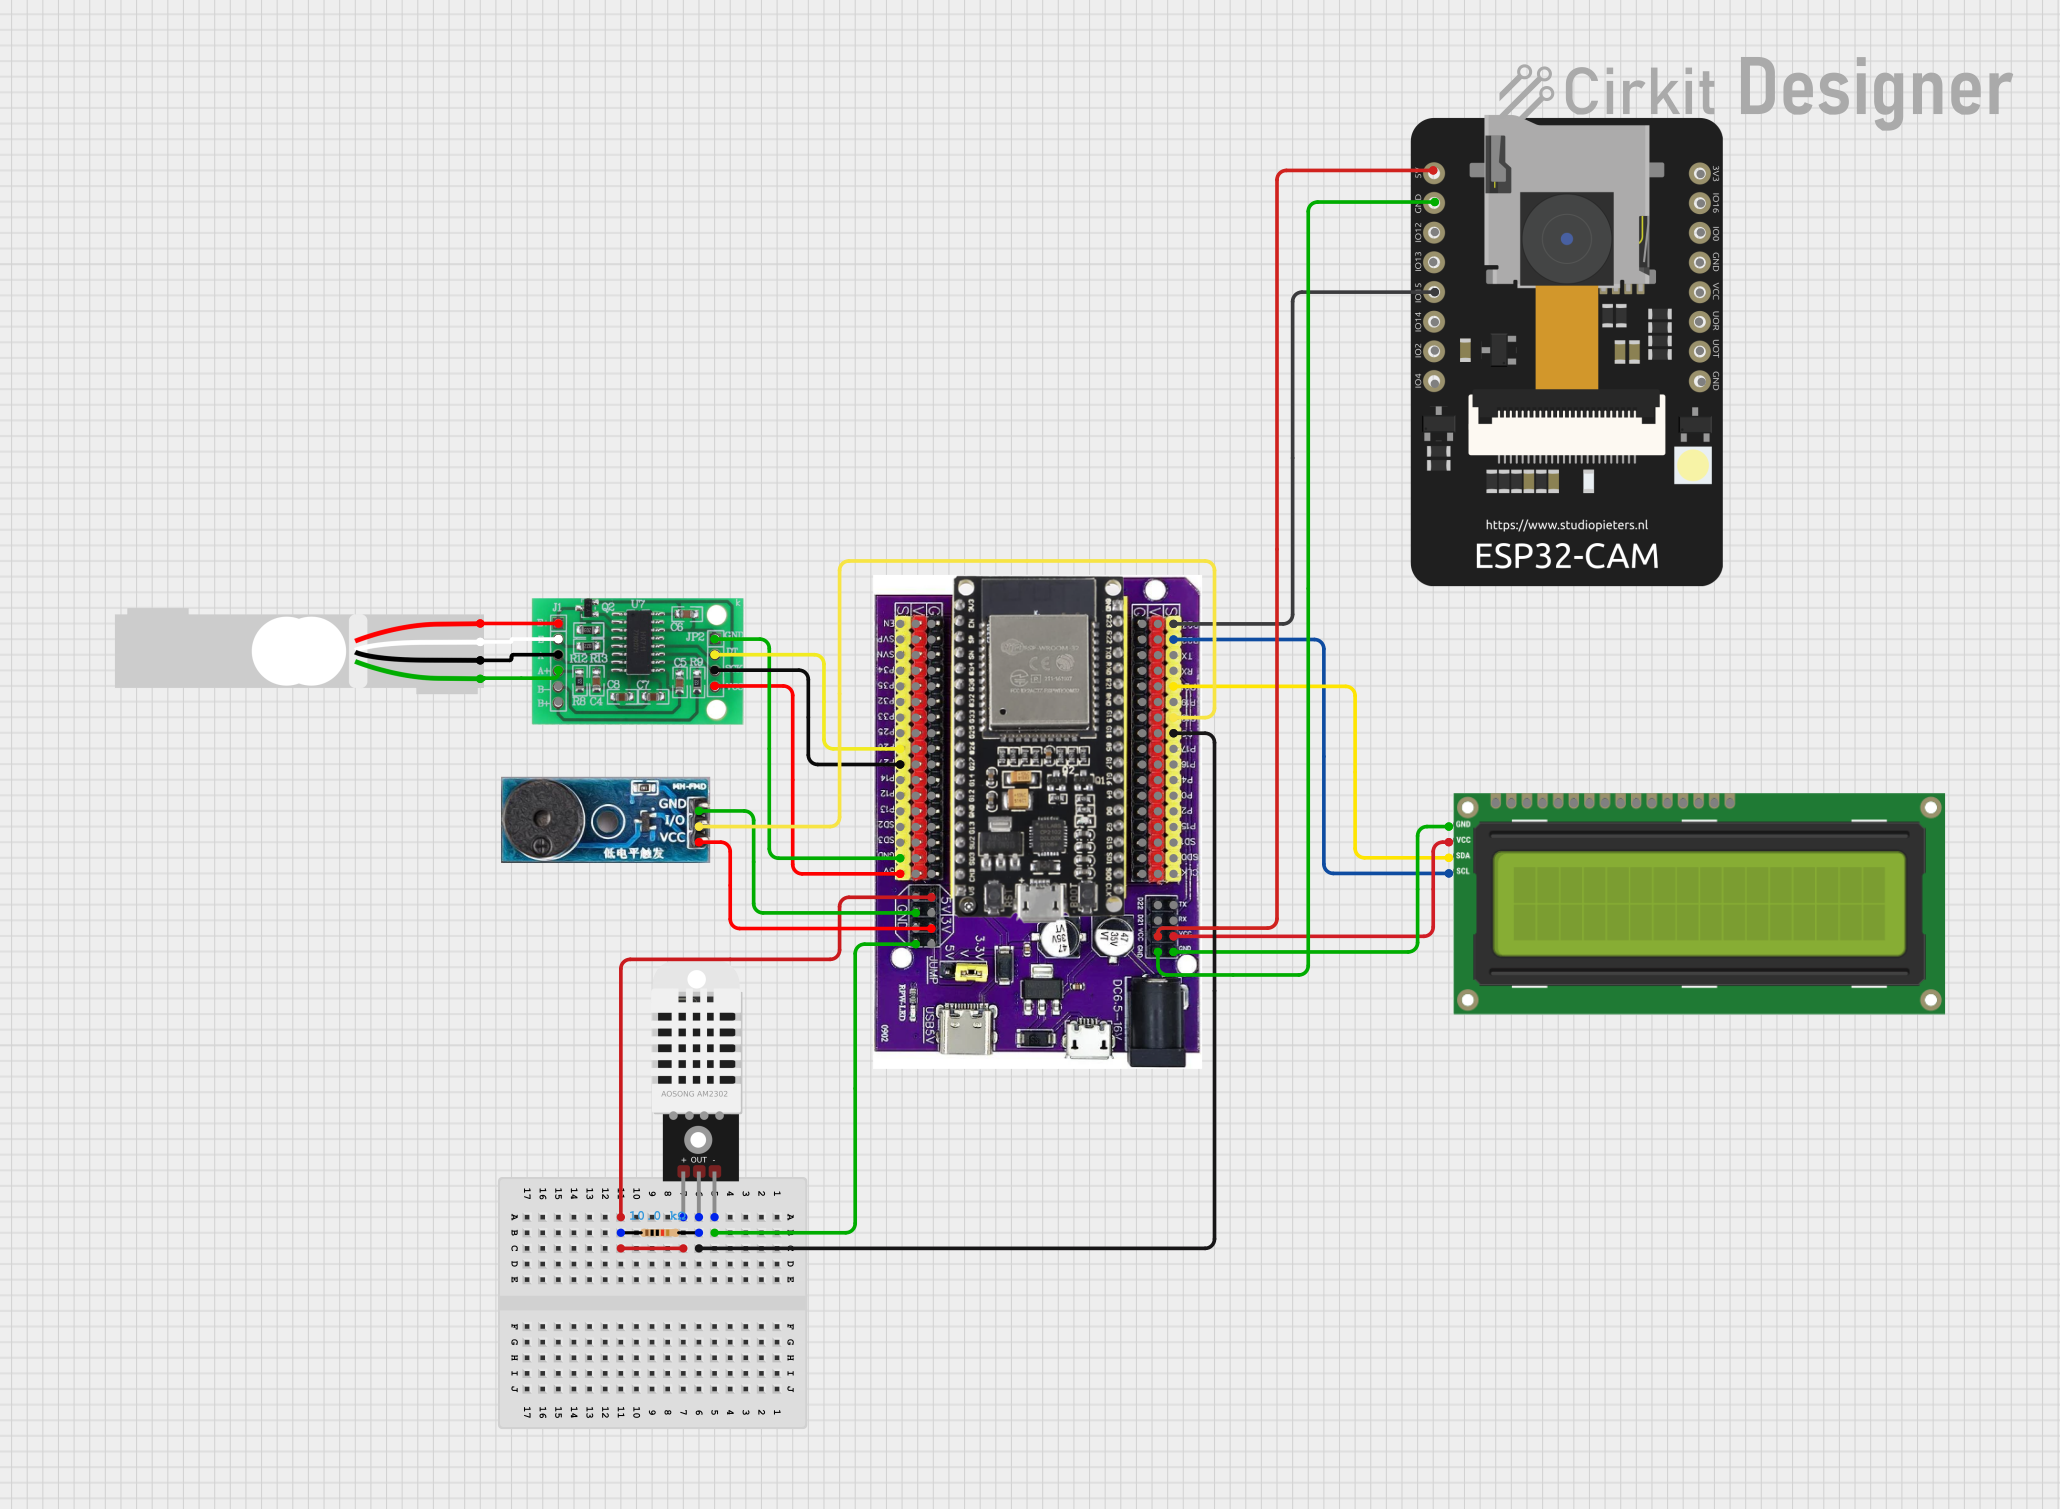
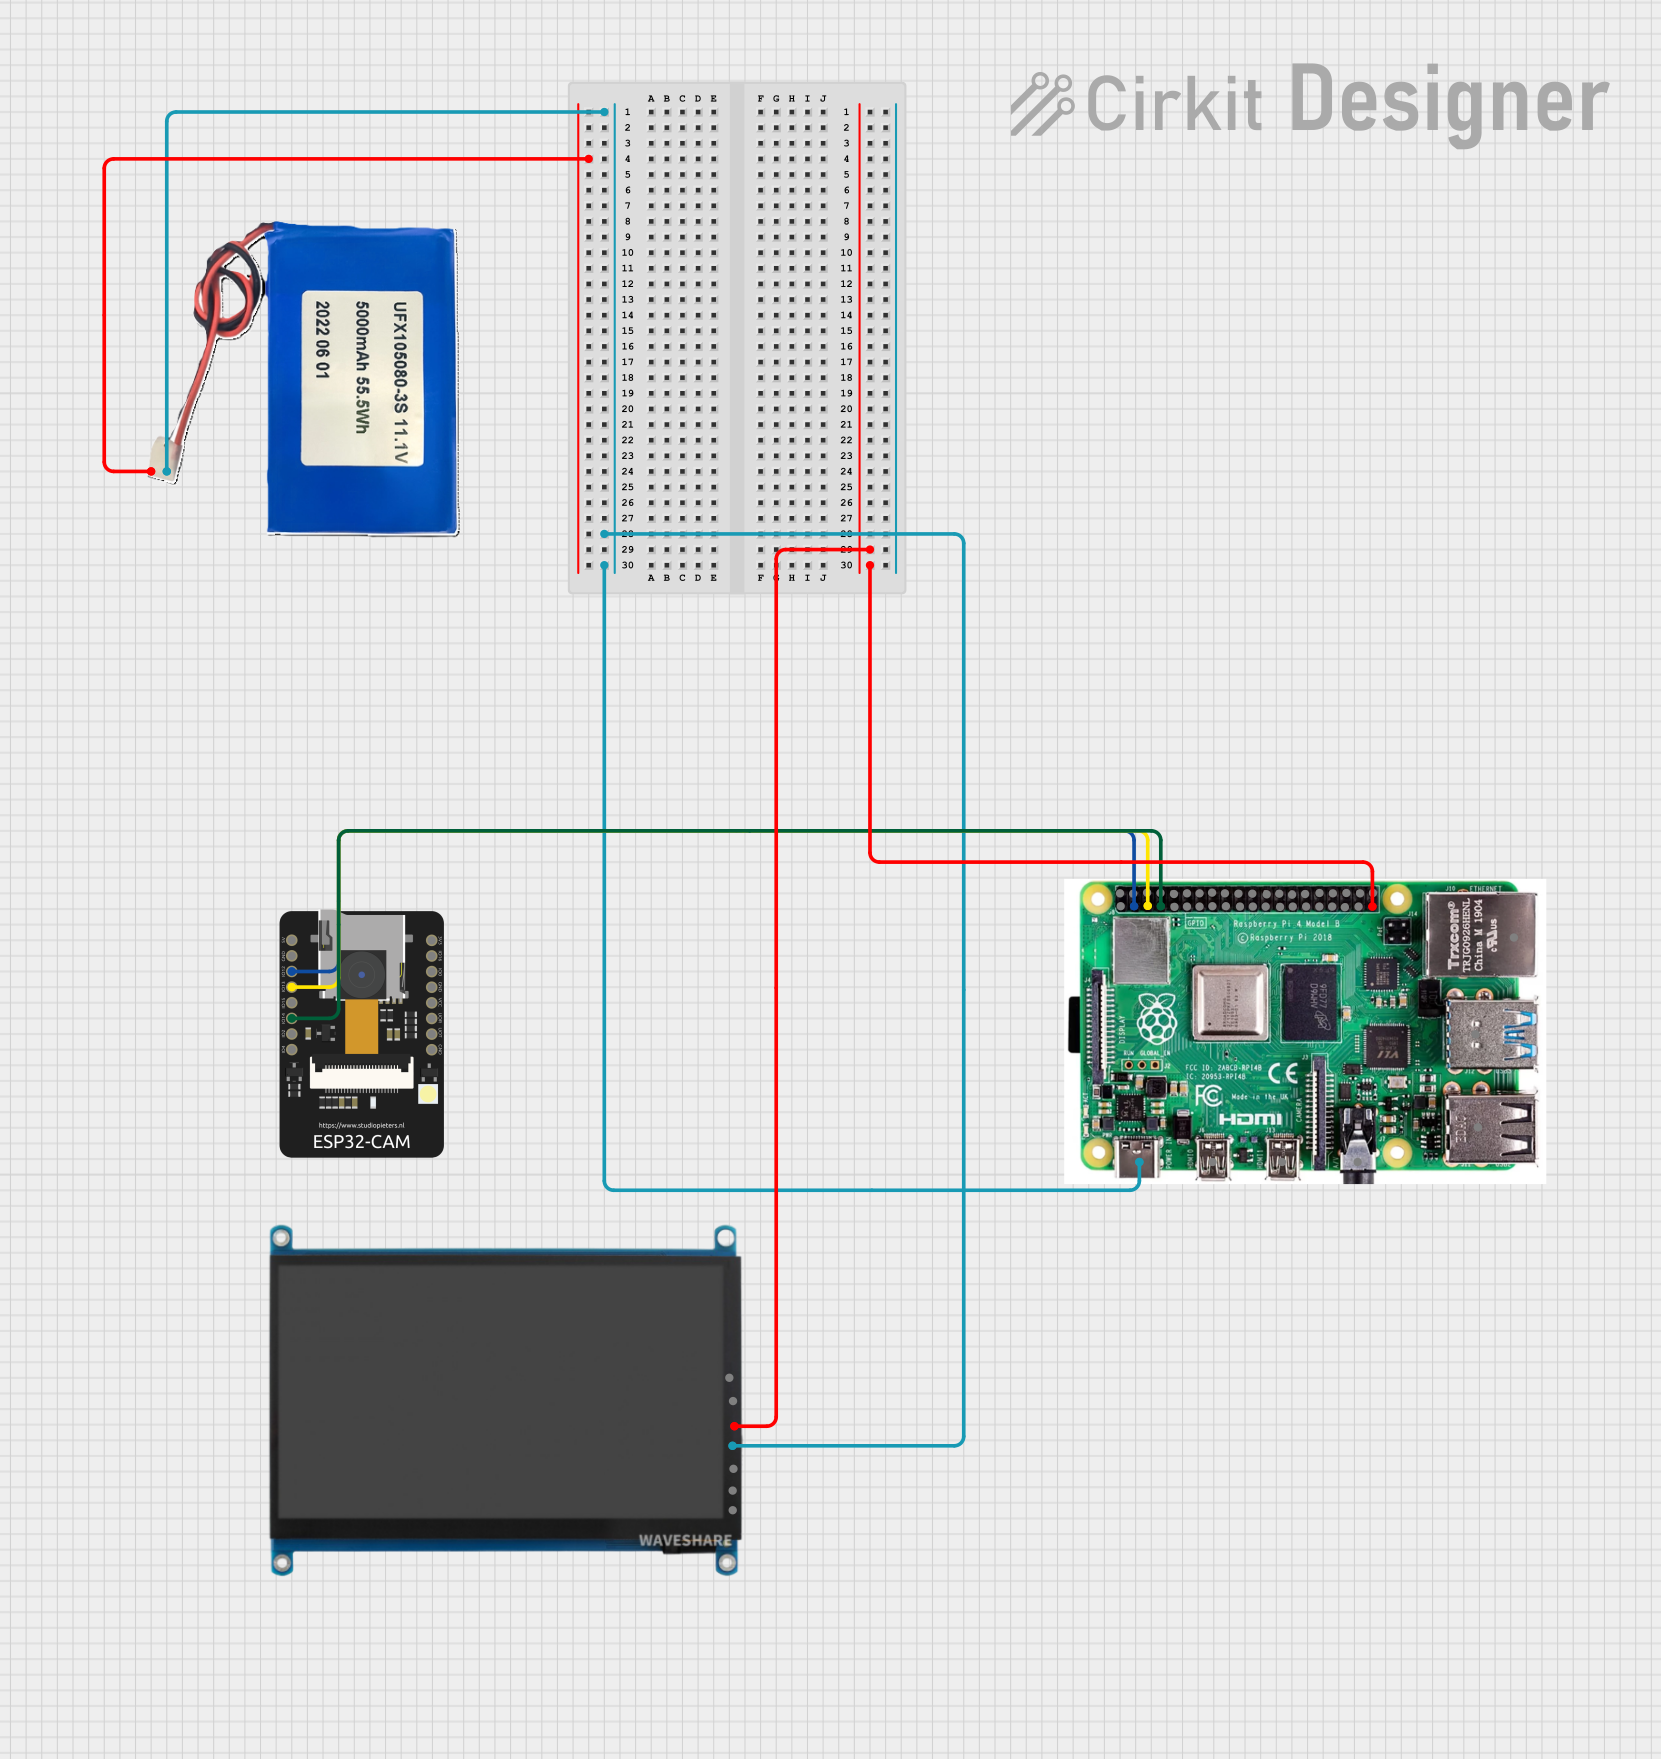
Explore Projects Built with Waveshare E-Paper ESP32 Driver Board
Common Applications and Use Cases
- IoT devices with low-power display requirements
- Smart home dashboards and control panels
- Portable e-readers and digital signage
- Battery-powered devices with long standby times
- Prototyping and development of wireless E-Paper display systems
Technical Specifications
The following table outlines the key technical details of the Waveshare E-Paper ESP32 Driver Board:
| Specification | Details |
|---|---|
| Microcontroller | ESP32-WROOM-32 |
| Wireless Connectivity | Wi-Fi 802.11 b/g/n, Bluetooth v4.2 + BLE |
| Operating Voltage | 3.3V (regulated from USB or external power supply) |
| Power Supply | 5V via USB Type-C or external 3.7V Li-Po battery |
| Display Interface | SPI (Serial Peripheral Interface) |
| Compatible Displays | Waveshare E-Paper displays (1.54", 2.13", 2.9", 4.2", etc.) |
| GPIO Pins | 20 (including SPI, I2C, UART, ADC, and PWM) |
| Flash Memory | 4MB |
| Operating Temperature | -40°C to 85°C |
| Dimensions | 56mm x 26mm |
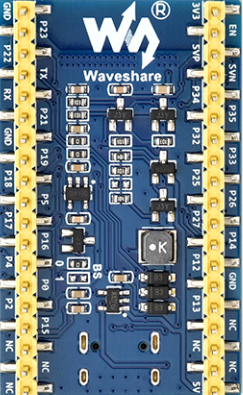
Pin Configuration and Descriptions
The Waveshare E-Paper ESP32 Driver Board features a 20-pin header for interfacing with E-Paper displays and other peripherals. Below is the pinout description:
| Pin | Name | Function |
|---|---|---|
| 1 | 3.3V | 3.3V power output for external components |
| 2 | GND | Ground connection |
| 3 | DIN | SPI data input (MOSI) |
| 4 | CLK | SPI clock |
| 5 | CS | SPI chip select for E-Paper display |
| 6 | DC | Data/Command control signal for E-Paper display |
| 7 | RST | Reset signal for E-Paper display |
| 8 | BUSY | Busy status signal from E-Paper display |
| 9 | TXD | UART transmit data |
| 10 | RXD | UART receive data |
| 11 | GPIO0 | General-purpose I/O pin |
| 12 | GPIO2 | General-purpose I/O pin |
| 13 | GPIO4 | General-purpose I/O pin |
| 14 | GPIO5 | General-purpose I/O pin |
| 15 | GPIO12 | General-purpose I/O pin |
| 16 | GPIO13 | General-purpose I/O pin |
| 17 | GPIO14 | General-purpose I/O pin |
| 18 | GPIO15 | General-purpose I/O pin |
| 19 | GPIO16 | General-purpose I/O pin |
| 20 | GPIO17 | General-purpose I/O pin |
Usage Instructions
How to Use the Component in a Circuit
- Powering the Board: Connect the board to a 5V USB power source via the USB Type-C port or use a 3.7V Li-Po battery.
- Connecting the E-Paper Display: Attach the E-Paper display to the 20-pin header, ensuring proper alignment of the pins.
- Programming the ESP32: Use the USB Type-C port to connect the board to a computer for programming. The board is compatible with the Arduino IDE, ESP-IDF, and other ESP32 development environments.
- Configuring the SPI Interface: Ensure the SPI pins (DIN, CLK, CS, DC, RST, BUSY) are correctly configured in your code to communicate with the E-Paper display.
Important Considerations and Best Practices
- Power Supply: Use a stable power source to avoid voltage fluctuations that may affect the display or ESP32 operation.
- E-Paper Refreshing: E-Paper displays require specific refresh sequences. Refer to the display's datasheet for timing details.
- Low-Power Mode: Utilize the ESP32's deep sleep mode to minimize power consumption in battery-powered applications.
- Firmware Updates: Keep the ESP32 firmware updated to ensure compatibility with the latest libraries and features.
Example Code for Arduino UNO
Below is an example code snippet to initialize and display text on a Waveshare E-Paper display using the ESP32 Driver Board:
#include <GxEPD2_BW.h> // Include the E-Paper library
#include <Wire.h>
#include <SPI.h>

// Define the E-Paper display type and pins
#define CS_PIN 5    // Chip select pin
#define DC_PIN 17   // Data/Command pin
#define RST_PIN 16  // Reset pin
#define BUSY_PIN 4  // Busy pin

// Initialize the E-Paper display object
GxEPD2_BW<GxEPD2_213_B73, GxEPD2_213_B73::HEIGHT> display(GxEPD2_213_B73(CS_PIN, DC_PIN, RST_PIN, BUSY_PIN));

void setup() {
  Serial.begin(115200); // Initialize serial communication
  display.init();       // Initialize the E-Paper display

  // Clear the display and set text
  display.setRotation(1); // Set display rotation
  display.setTextColor(GxEPD_BLACK); // Set text color
  display.setFont(&FreeMonoBold9pt7b); // Set font
  display.setCursor(10, 30); // Set cursor position
  display.print("Hello, E-Paper!"); // Print text to display

  display.display(); // Refresh the display to show content
}

void loop() {
  // No actions in the loop
}
Troubleshooting and FAQs
Common Issues Users Might Face
E-Paper Display Not Refreshing:
- Ensure the SPI pins are correctly connected and configured in the code.
- Verify that the display's BUSY pin is monitored to avoid sending commands during refresh.
ESP32 Not Detected by Computer:
- Check the USB cable and ensure it supports data transfer.
- Install the correct USB-to-serial driver for the ESP32.
Power Issues:
- Use a stable 5V power source or a fully charged Li-Po battery.
- Avoid powering high-current peripherals directly from the 3.3V pin.
Solutions and Tips for Troubleshooting
- Debugging with Serial Monitor: Use the Serial Monitor in the Arduino IDE to check for error messages or debug output.
- Library Compatibility: Ensure you are using the latest version of the GxEPD2 library or other compatible libraries for E-Paper displays.
- Resetting the Board: If the board becomes unresponsive, press the reset button or power cycle the board.
By following this documentation, users can effectively integrate the Waveshare E-Paper ESP32 Driver Board into their projects and troubleshoot common issues with ease.