Cirkit Designer Logo
Cirkit Designer
Your all-in-one circuit design IDE
Home / 
Component Documentation

How to Use Thermistor: Examples, Pinouts, and Specs

Image of Thermistor
Cirkit Designer LogoDesign with Thermistor in Cirkit Designer

Introduction

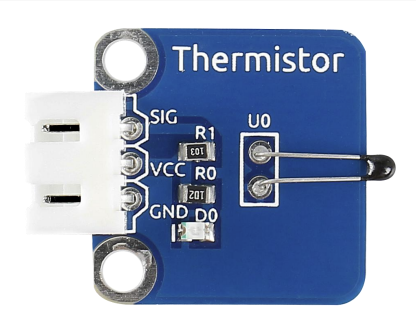
A thermistor is a type of resistor whose resistance varies significantly with temperature. Manufactured by SunFounder, this component is widely used for temperature sensing and control applications. Thermistors are essential in various fields, including HVAC systems, automotive applications, and consumer electronics, due to their high sensitivity to temperature changes.

Explore Projects Built with Thermistor

Use Cirkit Designer to design, explore, and prototype these projects online. Some projects support real-time simulation. Click "Open Project" to start designing instantly!
Arduino Nano Based Temperature Sensing Circuit
Image of filtro: A project utilizing Thermistor in a practical application
This circuit appears to be a temperature sensing system using an NTC thermistor connected to an Arduino Nano. The NTC thermistor forms part of a voltage divider with a 100k Ohm resistor, and the resulting voltage is read by the Arduino's analog input A0. The purpose of the circuit is likely to measure temperature changes, which can be inferred from the varying resistance of the NTC with temperature.
Cirkit Designer LogoOpen Project in Cirkit Designer
Arduino UNO-Based Smart Fan Control System with Temperature Sensor and LCD Display
Image of circuit diagram: A project utilizing Thermistor in a practical application
This circuit is a temperature monitoring and control system using an Arduino UNO. It includes an NTC thermistor for temperature sensing, pushbuttons for user input, an I2C module for communication, and a fan controlled by a MOSFET. The system also features a buzzer for alerts and an LCD for displaying information.
Cirkit Designer LogoOpen Project in Cirkit Designer
Arduino Mega 2560 Based Temperature Monitoring and Relay Control System
Image of pepa: A project utilizing Thermistor in a practical application
This circuit is designed to measure temperature using a PT100 sensor interfaced with an Arduino Mega 2560 through an Adafruit MAX31865 RTD Sensor Breakout. The Arduino controls a relay based on the temperature threshold set via serial input and displays the temperature readings on an I2C LCD display. The relay can be used to control an external device, such as a heater or a fan, based on the temperature.
Cirkit Designer LogoOpen Project in Cirkit Designer
Battery-Powered Temperature-Sensitive LED and Buzzer Circuit with NTC Thermistor and BC547 Transistor
Image of MINI FIRE ALARM: A project utilizing Thermistor in a practical application
This circuit is a temperature-sensitive alarm system that uses an NTC thermistor to detect temperature changes. When the temperature exceeds a certain threshold, the BC547 transistor activates, causing the LED to light up and the buzzer to sound, powered by a 9V battery.
Cirkit Designer LogoOpen Project in Cirkit Designer

Explore Projects Built with Thermistor

Use Cirkit Designer to design, explore, and prototype these projects online. Some projects support real-time simulation. Click "Open Project" to start designing instantly!
Image of filtro: A project utilizing Thermistor in a practical application
Arduino Nano Based Temperature Sensing Circuit
This circuit appears to be a temperature sensing system using an NTC thermistor connected to an Arduino Nano. The NTC thermistor forms part of a voltage divider with a 100k Ohm resistor, and the resulting voltage is read by the Arduino's analog input A0. The purpose of the circuit is likely to measure temperature changes, which can be inferred from the varying resistance of the NTC with temperature.
Cirkit Designer LogoOpen Project in Cirkit Designer
Image of circuit diagram: A project utilizing Thermistor in a practical application
Arduino UNO-Based Smart Fan Control System with Temperature Sensor and LCD Display
This circuit is a temperature monitoring and control system using an Arduino UNO. It includes an NTC thermistor for temperature sensing, pushbuttons for user input, an I2C module for communication, and a fan controlled by a MOSFET. The system also features a buzzer for alerts and an LCD for displaying information.
Cirkit Designer LogoOpen Project in Cirkit Designer
Image of pepa: A project utilizing Thermistor in a practical application
Arduino Mega 2560 Based Temperature Monitoring and Relay Control System
This circuit is designed to measure temperature using a PT100 sensor interfaced with an Arduino Mega 2560 through an Adafruit MAX31865 RTD Sensor Breakout. The Arduino controls a relay based on the temperature threshold set via serial input and displays the temperature readings on an I2C LCD display. The relay can be used to control an external device, such as a heater or a fan, based on the temperature.
Cirkit Designer LogoOpen Project in Cirkit Designer
Image of MINI FIRE ALARM: A project utilizing Thermistor in a practical application
Battery-Powered Temperature-Sensitive LED and Buzzer Circuit with NTC Thermistor and BC547 Transistor
This circuit is a temperature-sensitive alarm system that uses an NTC thermistor to detect temperature changes. When the temperature exceeds a certain threshold, the BC547 transistor activates, causing the LED to light up and the buzzer to sound, powered by a 9V battery.
Cirkit Designer LogoOpen Project in Cirkit Designer

Technical Specifications

Key Technical Details

Parameter Value
Manufacturer SunFounder
Part ID Thermistor
Resistance at 25°C 10kΩ
Temperature Range -55°C to +125°C
Tolerance ±1%
Beta Value (B25/50) 3950K
Power Rating 0.5W
Type NTC (Negative Temperature Coefficient)

Pin Configuration and Descriptions

Pin Number Pin Name Description
1 VCC Power supply (typically 3.3V or 5V)
2 GND Ground
3 Signal Analog output signal

Usage Instructions

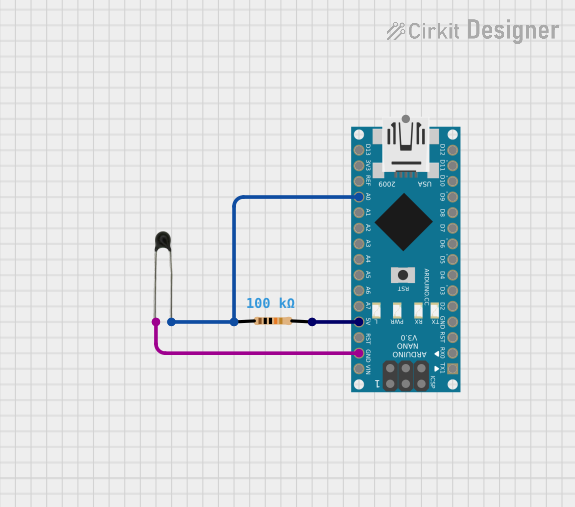
How to Use the Thermistor in a Circuit

  1. Connect the Thermistor:

    • Connect one end of the thermistor to the VCC (3.3V or 5V).
    • Connect the other end to a resistor (typically 10kΩ) and then to the GND.
    • The junction between the thermistor and the resistor should be connected to an analog input pin on your microcontroller (e.g., Arduino).
  2. Circuit Diagram:

    VCC (3.3V or 5V)
       |
       |
    [Thermistor]
       |
       |-----> Analog Input (e.g., A0 on Arduino)
       |
    [10kΩ Resistor]
       |
       |
      GND
    

Important Considerations and Best Practices

  • Calibration: Ensure to calibrate the thermistor for accurate temperature readings.
  • Temperature Range: Operate within the specified temperature range (-55°C to +125°C) to avoid damage.
  • Power Supply: Use a stable power supply to ensure consistent readings.
  • Placement: Place the thermistor in a location where it can accurately sense the temperature without interference.

Arduino Example Code

// Thermistor connected to A0
const int thermistorPin = A0;
int rawValue;
float resistance;
float temperatureC;

// Constants for the thermistor
const float BETA = 3950; // Beta value
const float R0 = 10000;  // Resistance at 25°C

void setup() {
  Serial.begin(9600);
}

void loop() {
  rawValue = analogRead(thermistorPin);
  resistance = (1023.0 / rawValue - 1) * R0;
  temperatureC = 1 / (log(resistance / R0) / BETA + 1 / 298.15) - 273.15;

  Serial.print("Temperature: ");
  Serial.print(temperatureC);
  Serial.println(" °C");

  delay(1000); // Delay for 1 second
}

Troubleshooting and FAQs

Common Issues Users Might Face

  1. Inaccurate Temperature Readings:

    • Solution: Ensure proper calibration and check the connections for any loose wires.
  2. No Output Signal:

    • Solution: Verify the power supply and ensure the thermistor is connected correctly.
  3. Fluctuating Readings:

    • Solution: Use a stable power supply and ensure the thermistor is not exposed to rapid temperature changes.

FAQs

Q1: Can I use the thermistor with a 3.3V power supply?

  • A1: Yes, the thermistor can be used with both 3.3V and 5V power supplies.

Q2: How do I calibrate the thermistor?

  • A2: Calibration involves comparing the thermistor readings with a known temperature source and adjusting the calculations accordingly.

Q3: What is the Beta value?

  • A3: The Beta value (B25/50) is a constant that describes the thermistor's resistance change with temperature. For this thermistor, it is 3950K.

By following this documentation, users can effectively integrate and utilize the SunFounder Thermistor in their projects, ensuring accurate temperature sensing and control.