How to Use Piezo Speaker: Examples, Pinouts, and Specs

Introduction
A Piezo Speaker is an electronic device that produces sound by converting electrical signals into mechanical vibrations using a piezoelectric material. These speakers are widely used in various applications due to their small size, low power consumption, and ability to produce a wide range of frequencies. Common applications include:
- Alarms and buzzers
- Keypad feedback in electronic devices
- Sound effects in toys and gadgets
- Notification sounds in appliances
Explore Projects Built with Piezo Speaker

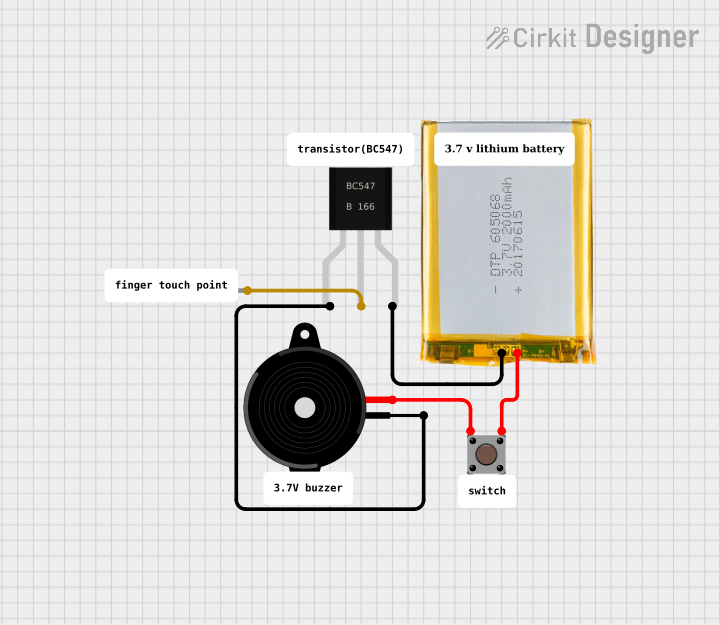
Explore Projects Built with Piezo Speaker
Technical Specifications
Key Technical Details
| Parameter | Value |
|---|---|
| Operating Voltage | 3V to 12V |
| Current Consumption | 5mA to 30mA |
| Sound Output | 70dB to 100dB at 10cm |
| Resonant Frequency | 2kHz to 4kHz |
| Dimensions | Varies (commonly 20mm x 10mm) |
Pin Configuration and Descriptions
| Pin Number | Pin Name | Description |
|---|---|---|
| 1 | VCC | Positive voltage supply (3V to 12V) |
| 2 | GND | Ground |
Usage Instructions
How to Use the Component in a Circuit
- Power Supply: Connect the VCC pin of the Piezo Speaker to a positive voltage supply (3V to 12V).
- Ground Connection: Connect the GND pin to the ground of the circuit.
- Signal Input: To produce sound, apply a square wave signal to the VCC pin. The frequency of the square wave determines the pitch of the sound.
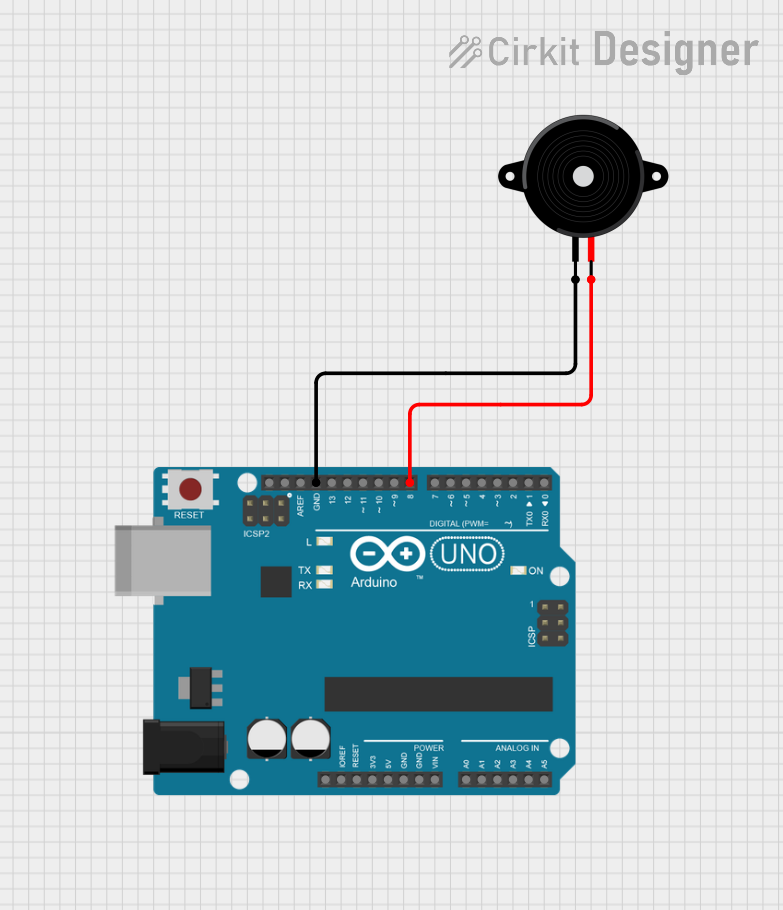
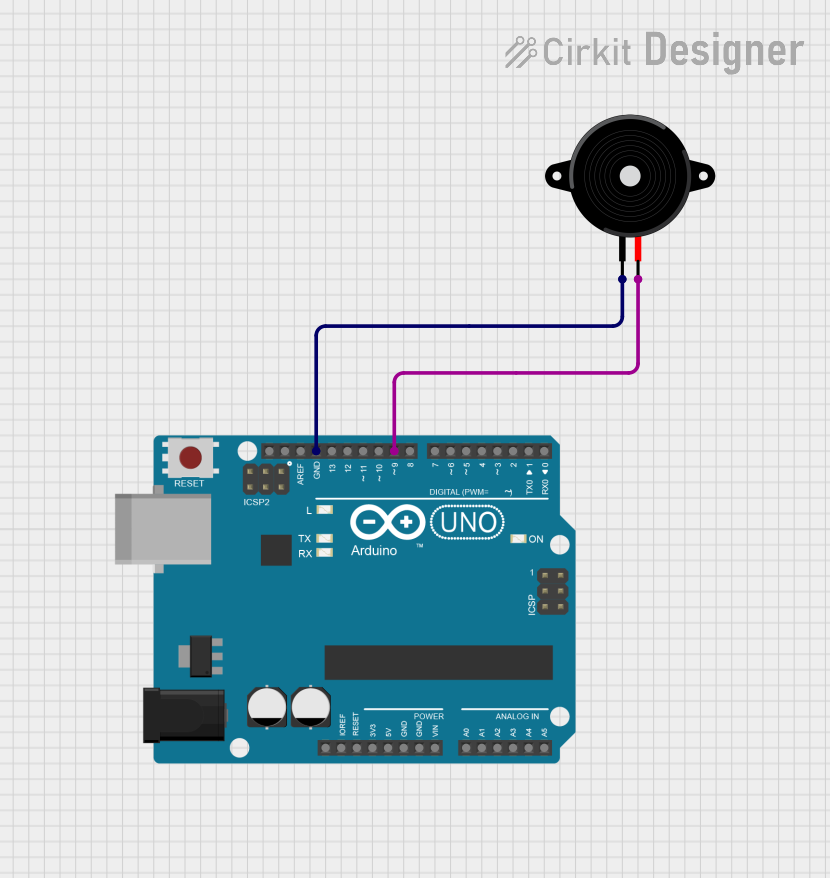
Example Circuit with Arduino UNO
// Define the pin connected to the Piezo Speaker
const int piezoPin = 8;

void setup() {
  // Initialize the piezo pin as an output
  pinMode(piezoPin, OUTPUT);
}

void loop() {
  // Generate a 1kHz tone for 500 milliseconds
  tone(piezoPin, 1000, 500);
  delay(1000); // Wait for 1 second

  // Generate a 2kHz tone for 500 milliseconds
  tone(piezoPin, 2000, 500);
  delay(1000); // Wait for 1 second
}
Important Considerations and Best Practices
- Voltage Levels: Ensure the voltage supplied to the Piezo Speaker is within the specified range (3V to 12V) to avoid damage.
- Frequency Range: Operate the Piezo Speaker within its resonant frequency range (2kHz to 4kHz) for optimal sound output.
- Mounting: Securely mount the Piezo Speaker to prevent mechanical vibrations from affecting other components in the circuit.
Troubleshooting and FAQs
Common Issues Users Might Face
No Sound Output:
- Solution: Check the power supply connections and ensure the voltage is within the specified range. Verify that the signal input is a square wave.
Distorted Sound:
- Solution: Ensure the frequency of the input signal is within the resonant frequency range of the Piezo Speaker. Check for any loose connections or mechanical vibrations affecting the speaker.
Low Volume:
- Solution: Increase the input voltage within the specified range. Ensure the Piezo Speaker is securely mounted to avoid energy loss through vibrations.
FAQs
Q1: Can I use a Piezo Speaker with a microcontroller other than Arduino?
- A1: Yes, you can use a Piezo Speaker with any microcontroller that can generate a square wave signal. Ensure the voltage and current requirements are met.
Q2: How can I change the pitch of the sound produced by the Piezo Speaker?
- A2: The pitch of the sound is determined by the frequency of the square wave signal applied to the Piezo Speaker. Higher frequencies produce higher-pitched sounds, and lower frequencies produce lower-pitched sounds.
Q3: Can I use a Piezo Speaker for playing music?
- A3: While Piezo Speakers can produce a range of frequencies, they are not ideal for high-fidelity music playback. They are best suited for simple tones, alarms, and sound effects.
This documentation provides a comprehensive guide to understanding, using, and troubleshooting a Piezo Speaker. Whether you are a beginner or an experienced user, this information will help you effectively integrate a Piezo Speaker into your electronic projects.