How to Use BioAmp EXG Pill: Examples, Pinouts, and Specs
Introduction
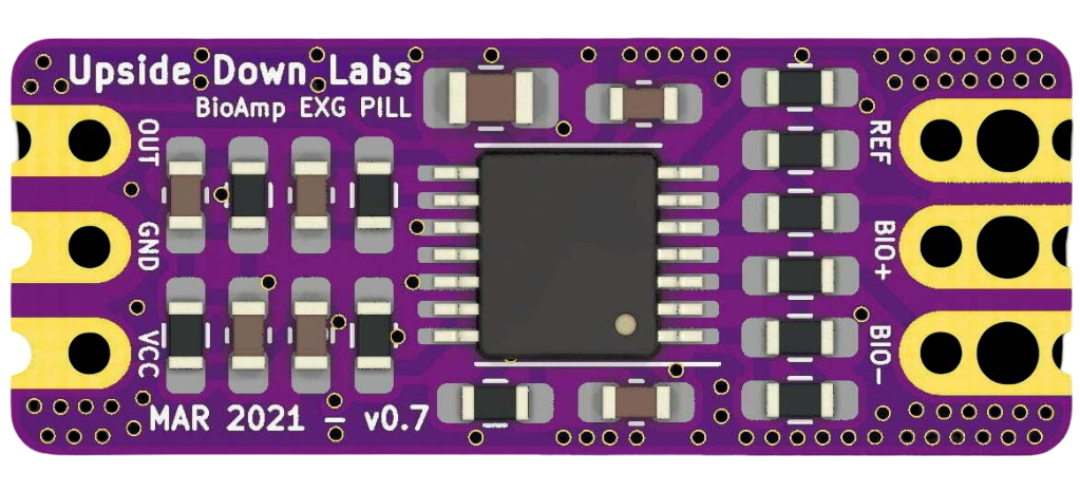
The BioAmp EXG Pill by Upsidedownlabs (Part ID: EXG Pill sensor) is a compact, wearable device designed for bioelectrical signal acquisition. It is specifically tailored for applications such as electrocardiogram (ECG) and electromyogram (EMG) monitoring. This device integrates advanced sensors to capture physiological signals with high precision, making it ideal for health and fitness tracking, medical research, and wearable technology development.
Explore Projects Built with BioAmp EXG Pill


Explore Projects Built with BioAmp EXG Pill
Common Applications and Use Cases
- ECG Monitoring: Captures heart activity for health diagnostics and fitness tracking.
- EMG Monitoring: Measures muscle activity for rehabilitation, sports science, and prosthetics.
- Wearable Devices: Used in smartwatches, fitness bands, and other health-monitoring gadgets.
- Medical Research: Enables non-invasive physiological signal acquisition for studies.
- DIY Projects: Popular among hobbyists and developers for creating custom bio-signal applications.
Technical Specifications
Key Technical Details
| Parameter | Value |
|---|---|
| Supply Voltage | 3.3V to 5V |
| Operating Current | ~5mA |
| Signal Gain | 1000x |
| Input Impedance | >10 GΩ |
| Bandwidth | 0.5 Hz to 50 Hz (ECG) |
| Noise Level | <1 µV RMS |
| Output Signal | Analog |
| Dimensions | 20mm x 20mm x 3mm |
| Weight | ~2 grams |
| Operating Temperature Range | -10°C to 50°C |
Pin Configuration and Descriptions
The BioAmp EXG Pill has a simple pinout for easy integration into circuits:
| Pin | Name | Description |
|---|---|---|
| 1 | VCC | Power supply input (3.3V to 5V). |
| 2 | GND | Ground connection. |
| 3 | OUT | Analog output signal representing the acquired bioelectrical signal. |
| 4 | REF | Reference electrode input for differential signal acquisition. |
Usage Instructions
How to Use the Component in a Circuit
- Power the Device: Connect the VCC pin to a 3.3V or 5V power source and the GND pin to ground.
- Connect Electrodes:
- Attach the REF pin to the reference electrode.
- Place the signal electrodes on the desired body location (e.g., chest for ECG or muscles for EMG).
- Read the Output: The OUT pin provides an analog signal that can be fed into an ADC (Analog-to-Digital Converter) of a microcontroller or data acquisition system.
- Filter and Process the Signal: Use software or hardware filters to remove noise and extract meaningful data.
Important Considerations and Best Practices
- Electrode Placement: Ensure proper placement of electrodes for accurate signal acquisition. Use conductive gel for better contact.
- Noise Reduction: Minimize electrical noise by keeping wires short and avoiding interference from nearby electronics.
- Power Supply: Use a stable and clean power source to prevent signal distortion.
- Signal Processing: Apply appropriate filters (e.g., low-pass filters) to remove high-frequency noise.
- Safety: Do not use the device on individuals with implanted medical devices (e.g., pacemakers) without consulting a medical professional.
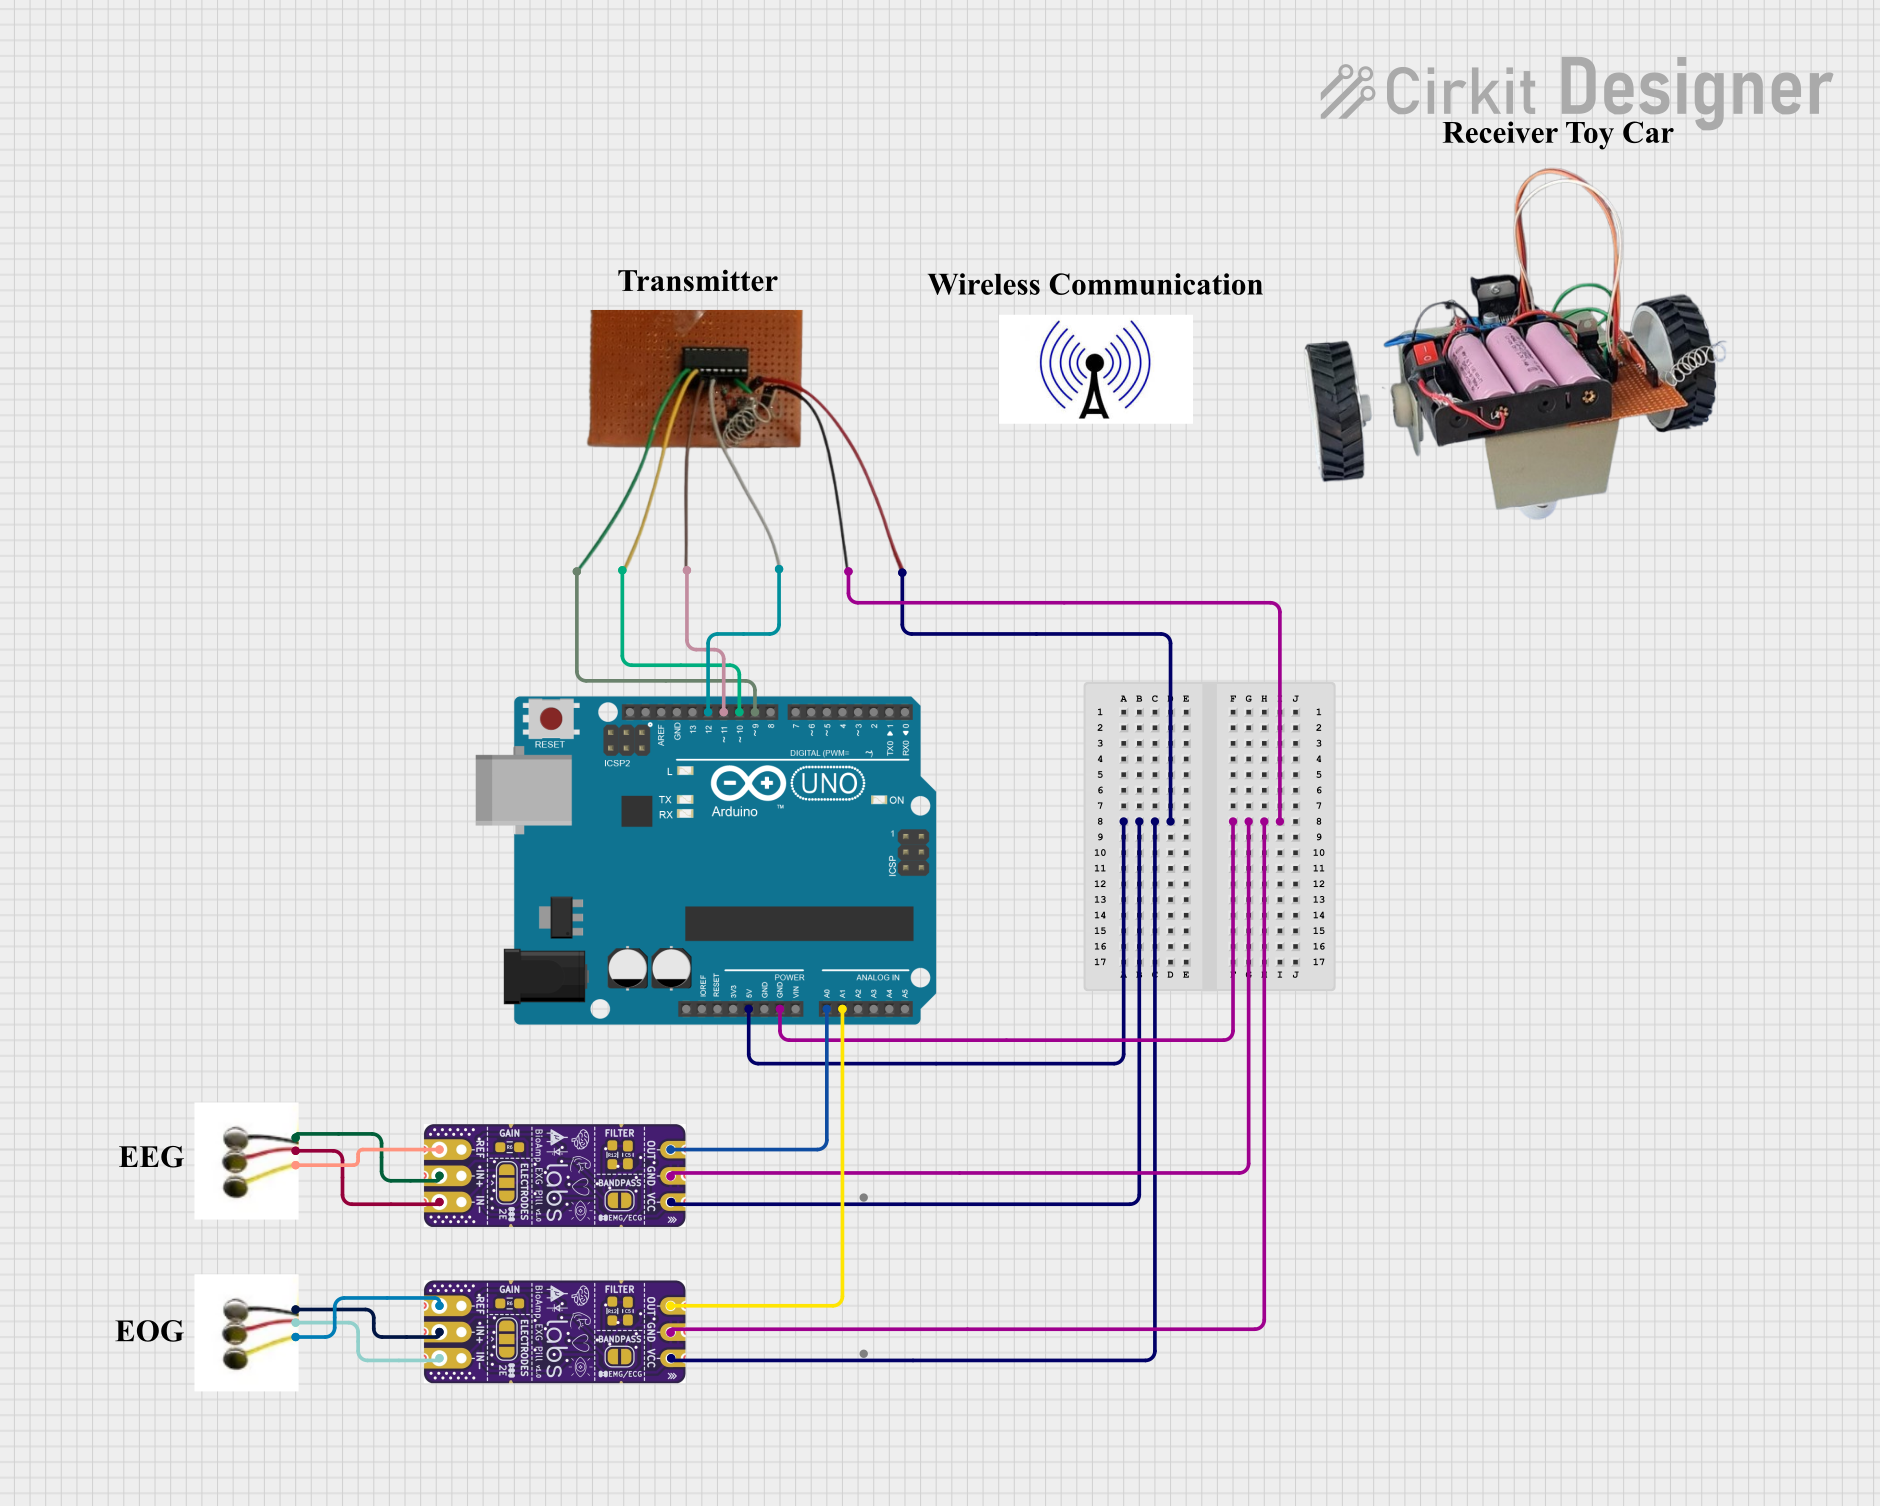
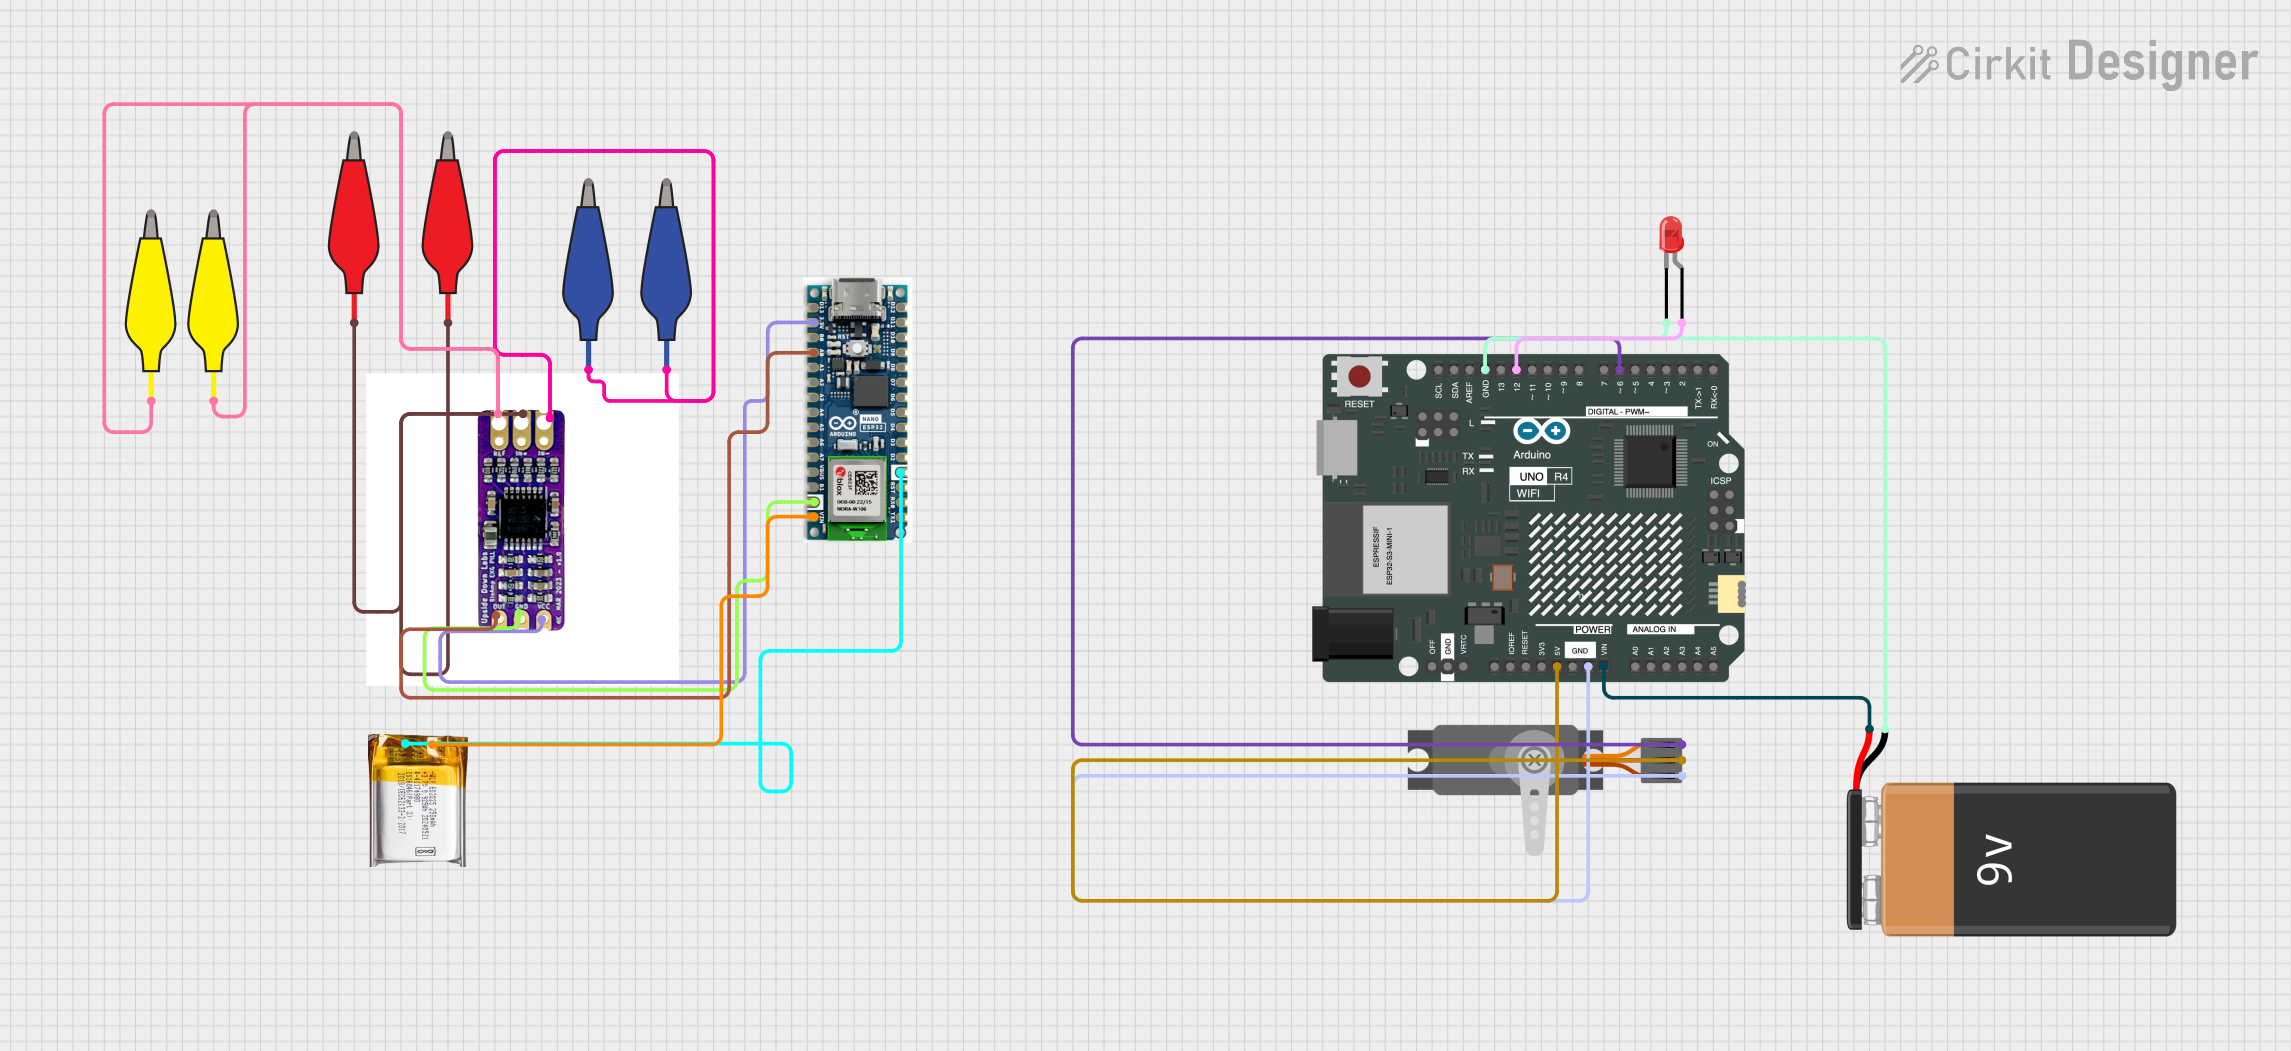
Example: Connecting to an Arduino UNO
The BioAmp EXG Pill can be easily interfaced with an Arduino UNO for signal acquisition and processing. Below is an example code snippet:
// Example code for interfacing BioAmp EXG Pill with Arduino UNO
// Reads the analog signal from the OUT pin and displays it on the Serial Monitor

const int bioAmpPin = A0; // Connect the OUT pin of BioAmp EXG Pill to Arduino A0

void setup() {
  Serial.begin(9600); // Initialize serial communication at 9600 baud
  pinMode(bioAmpPin, INPUT); // Set the bioAmpPin as input
}

void loop() {
  int signalValue = analogRead(bioAmpPin); // Read the analog signal from BioAmp
  Serial.println(signalValue); // Print the signal value to the Serial Monitor
  delay(10); // Small delay for stable readings
}
Note: Use a plotting tool (e.g., Arduino Serial Plotter) to visualize the signal in real-time.
Troubleshooting and FAQs
Common Issues and Solutions
| Issue | Solution |
|---|---|
| No signal or weak signal output | - Check electrode placement and ensure good skin contact. |
| - Verify power supply connections and voltage levels. | |
| Excessive noise in the output signal | - Use shielded cables and keep wires short. |
| - Apply software or hardware filters to remove noise. | |
| Signal appears distorted or clipped | - Ensure the power supply is stable and within the specified range. |
| - Verify that the ADC input range matches the output range of the BioAmp. | |
| Device not working at all | - Double-check all connections and ensure correct pin mapping. |
Frequently Asked Questions
Can the BioAmp EXG Pill be used for EEG (Electroencephalogram) applications?
- The device is optimized for ECG and EMG signals. While it may capture EEG signals, the bandwidth and gain may not be ideal for this application.
What type of electrodes should I use?
- Use high-quality disposable or reusable Ag/AgCl electrodes for best results.
Can I use the BioAmp EXG Pill with a 3.3V microcontroller?
- Yes, the device operates within a 3.3V to 5V range, making it compatible with most microcontrollers.
Is the device safe for continuous use?
- Yes, the BioAmp EXG Pill is designed for safe, non-invasive signal acquisition. However, avoid prolonged use on sensitive skin areas.
How do I clean the electrodes?
- For reusable electrodes, clean them with a damp cloth and mild soap. Avoid submerging the device in water.
This documentation provides a comprehensive guide to using the BioAmp EXG Pill for bioelectrical signal acquisition. For further assistance, refer to the manufacturer's resources or contact Upsidedownlabs support.