Cirkit Designer Logo
Cirkit Designer
Your all-in-one circuit design IDE
Home / 
Component Documentation

How to Use IR High Range NPN Optical Proximity Switch 3 - 80cm range E18-D80NK: Examples, Pinouts, and Specs

Image of IR High Range NPN Optical Proximity Switch 3 - 80cm range E18-D80NK
Cirkit Designer LogoDesign with IR High Range NPN Optical Proximity Switch 3 - 80cm range E18-D80NK in Cirkit Designer

Introduction

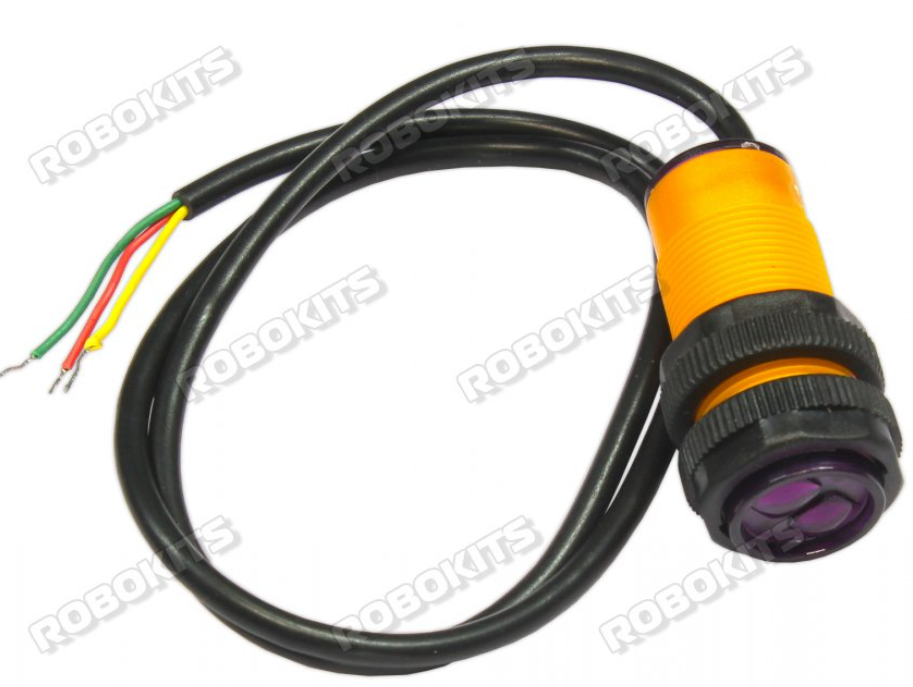
The E18-D80NK is an infrared (IR) proximity sensor designed to detect objects within a range of 3 to 80 cm. It utilizes an NPN transistor output, making it suitable for various applications in automation and robotics, such as object detection, obstacle avoidance, and presence sensing.

Explore Projects Built with IR High Range NPN Optical Proximity Switch 3 - 80cm range E18-D80NK

Use Cirkit Designer to design, explore, and prototype these projects online. Some projects support real-time simulation. Click "Open Project" to start designing instantly!
Arduino Mega 2560 Proximity Sensor System with IR High Range Detection
Image of rawan123456789: A project utilizing IR High Range NPN Optical Proximity Switch 3 - 80cm range E18-D80NK in a practical application
This circuit consists of an Arduino Mega 2560 microcontroller connected to an IR High Range NPN Optical Proximity Switch. The proximity switch is powered by the Arduino's 5V and GND pins, and its output is connected to the Arduino's digital pin D5, allowing the microcontroller to read proximity sensor data.
Cirkit Designer LogoOpen Project in Cirkit Designer
ESP32-Based Wi-Fi Controlled 24V Input/Output Interface Module
Image of ESP32 4 på rad: A project utilizing IR High Range NPN Optical Proximity Switch 3 - 80cm range E18-D80NK in a practical application
This circuit uses an ESP32 microcontroller to interface with a 3.3V PNP to 24V NPN photoelectric isolation module, which in turn connects to a 40-pin connector for general-purpose input and output. The 24V power supply provides the necessary voltage for the isolation module and the 40-pin connector, enabling the ESP32 to control and monitor high-voltage signals safely.
Cirkit Designer LogoOpen Project in Cirkit Designer
Battery-Powered IR Sensor and AND Gate Circuit with LED Indicator
Image of Line follower with 7408: A project utilizing IR High Range NPN Optical Proximity Switch 3 - 80cm range E18-D80NK in a practical application
This circuit uses four IR sensors connected to a 7408 AND gate IC to detect the presence of objects. The output of the AND gate drives an LED indicator, with power regulated by a 7805 voltage regulator and controlled by a toggle switch.
Cirkit Designer LogoOpen Project in Cirkit Designer
Arduino UNO Controlled Relay System with Infrared Proximity Sensors
Image of KRAN OTOMATIS: A project utilizing IR High Range NPN Optical Proximity Switch 3 - 80cm range E18-D80NK in a practical application
This circuit consists of an Arduino UNO microcontroller interfaced with multiple E18-D80NK infrared proximity sensors and 12V single-channel relays controlling several plastic solenoid valves. The Arduino monitors the sensors and activates the corresponding relays to control the flow through the solenoid valves based on the proximity sensor inputs. A DC power source provides power to the system, with the relays switching the higher voltage lines for the solenoid valves.
Cirkit Designer LogoOpen Project in Cirkit Designer

Explore Projects Built with IR High Range NPN Optical Proximity Switch 3 - 80cm range E18-D80NK

Use Cirkit Designer to design, explore, and prototype these projects online. Some projects support real-time simulation. Click "Open Project" to start designing instantly!
Image of rawan123456789: A project utilizing IR High Range NPN Optical Proximity Switch 3 - 80cm range E18-D80NK in a practical application
Arduino Mega 2560 Proximity Sensor System with IR High Range Detection
This circuit consists of an Arduino Mega 2560 microcontroller connected to an IR High Range NPN Optical Proximity Switch. The proximity switch is powered by the Arduino's 5V and GND pins, and its output is connected to the Arduino's digital pin D5, allowing the microcontroller to read proximity sensor data.
Cirkit Designer LogoOpen Project in Cirkit Designer
Image of ESP32 4 på rad: A project utilizing IR High Range NPN Optical Proximity Switch 3 - 80cm range E18-D80NK in a practical application
ESP32-Based Wi-Fi Controlled 24V Input/Output Interface Module
This circuit uses an ESP32 microcontroller to interface with a 3.3V PNP to 24V NPN photoelectric isolation module, which in turn connects to a 40-pin connector for general-purpose input and output. The 24V power supply provides the necessary voltage for the isolation module and the 40-pin connector, enabling the ESP32 to control and monitor high-voltage signals safely.
Cirkit Designer LogoOpen Project in Cirkit Designer
Image of Line follower with 7408: A project utilizing IR High Range NPN Optical Proximity Switch 3 - 80cm range E18-D80NK in a practical application
Battery-Powered IR Sensor and AND Gate Circuit with LED Indicator
This circuit uses four IR sensors connected to a 7408 AND gate IC to detect the presence of objects. The output of the AND gate drives an LED indicator, with power regulated by a 7805 voltage regulator and controlled by a toggle switch.
Cirkit Designer LogoOpen Project in Cirkit Designer
Image of KRAN OTOMATIS: A project utilizing IR High Range NPN Optical Proximity Switch 3 - 80cm range E18-D80NK in a practical application
Arduino UNO Controlled Relay System with Infrared Proximity Sensors
This circuit consists of an Arduino UNO microcontroller interfaced with multiple E18-D80NK infrared proximity sensors and 12V single-channel relays controlling several plastic solenoid valves. The Arduino monitors the sensors and activates the corresponding relays to control the flow through the solenoid valves based on the proximity sensor inputs. A DC power source provides power to the system, with the relays switching the higher voltage lines for the solenoid valves.
Cirkit Designer LogoOpen Project in Cirkit Designer

Technical Specifications

Parameter Value
Operating Voltage 5V to 36V DC
Detection Range 3 cm to 80 cm
Output Type NPN Normally Open (NO)
Output Current 300 mA (max)
Response Time < 2 ms
Operating Temperature -25°C to 55°C
Dimensions 18 mm (diameter) x 45 mm (length)
Cable Length 45 cm

Pin Configuration

Pin Color Description
1 Brown Vcc (5V to 36V DC)
2 Blue GND
3 Black Output (NPN)

Usage Instructions

Connecting the Sensor

  1. Power Supply: Connect the brown wire to a DC power supply ranging from 5V to 36V.
  2. Ground: Connect the blue wire to the ground (GND) of your circuit.
  3. Output: Connect the black wire to the input pin of your microcontroller or any other device that can read the NPN output.

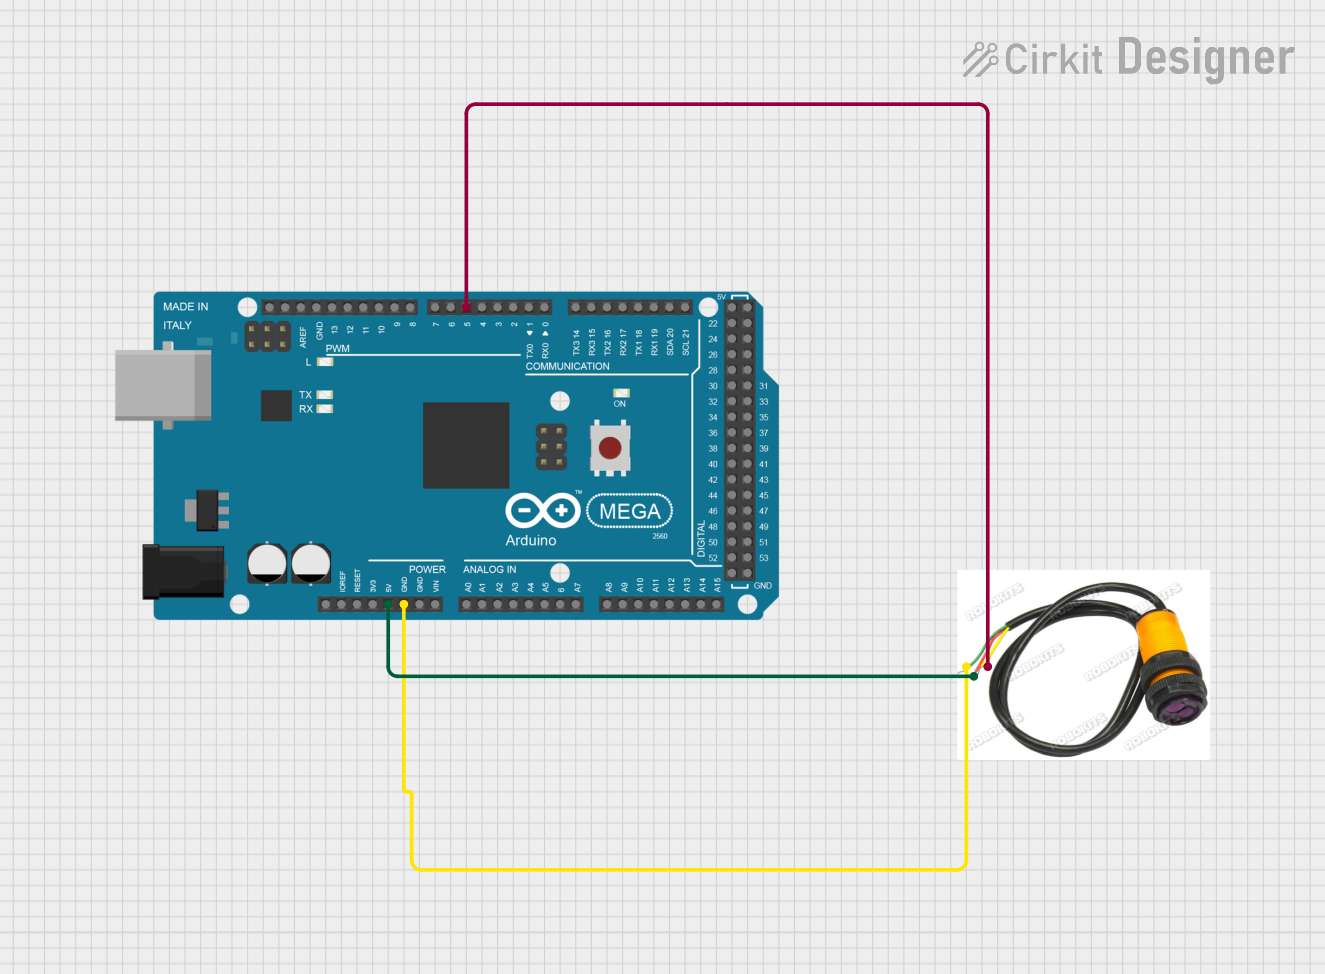
Example Circuit with Arduino UNO

- Brown wire to 5V (Arduino)
- Blue wire to GND (Arduino)
- Black wire to Digital Pin 2 (Arduino)

Sample Code for Arduino UNO

// Define the pin connected to the sensor's output
const int sensorPin = 2;

void setup() {
  // Initialize the serial communication
  Serial.begin(9600);
  
  // Set the sensor pin as input
  pinMode(sensorPin, INPUT);
}

void loop() {
  // Read the sensor value
  int sensorValue = digitalRead(sensorPin);
  
  // Print the sensor value to the serial monitor
  Serial.print("Sensor Value: ");
  Serial.println(sensorValue);
  
  // Add a small delay to avoid flooding the serial monitor
  delay(100);
}

Important Considerations and Best Practices

  • Power Supply: Ensure the power supply voltage is within the specified range (5V to 36V DC).
  • Mounting: Mount the sensor securely to avoid false readings due to vibrations or movement.
  • Interference: Avoid placing the sensor near strong IR sources to prevent interference.
  • Calibration: Adjust the detection range using the potentiometer on the sensor.

Troubleshooting and FAQs

Common Issues

  1. No Detection:

    • Solution: Check the power supply connections and ensure the sensor is receiving the correct voltage.
    • Solution: Verify the sensor's output is connected to the correct input pin on the microcontroller.
  2. False Readings:

    • Solution: Ensure the sensor is not exposed to strong IR sources or direct sunlight.
    • Solution: Secure the sensor to prevent vibrations or movement.
  3. Intermittent Detection:

    • Solution: Check for loose connections and ensure all wires are securely connected.
    • Solution: Adjust the detection range using the potentiometer.

FAQs

Q1: Can the sensor detect transparent objects?

  • A1: The sensor may have difficulty detecting transparent objects due to the nature of IR reflection.

Q2: What is the maximum detection range?

  • A2: The maximum detection range is 80 cm, adjustable using the potentiometer.

Q3: Can I use the sensor with a 3.3V microcontroller?

  • A3: The sensor requires a minimum of 5V for operation. You can use a level shifter to interface with a 3.3V microcontroller.

Q4: How do I adjust the detection range?

  • A4: Use the potentiometer on the sensor to adjust the detection range. Turn it clockwise to increase the range and counterclockwise to decrease it.

This documentation provides a comprehensive guide to using the E18-D80NK IR High Range NPN Optical Proximity Switch. Whether you are a beginner or an experienced user, following these instructions and best practices will help you effectively integrate this sensor into your projects.