How to Use FireBeetle OSD: Examples, Pinouts, and Specs
Introduction
The FireBeetle OSD, developed by DFRobot, is a compact and energy-efficient microcontroller board designed for embedded applications. It features an integrated OLED display, making it ideal for real-time data visualization. This board is well-suited for projects requiring a combination of low power consumption, compact size, and an easy-to-use interface for programming and debugging.
Explore Projects Built with FireBeetle OSD
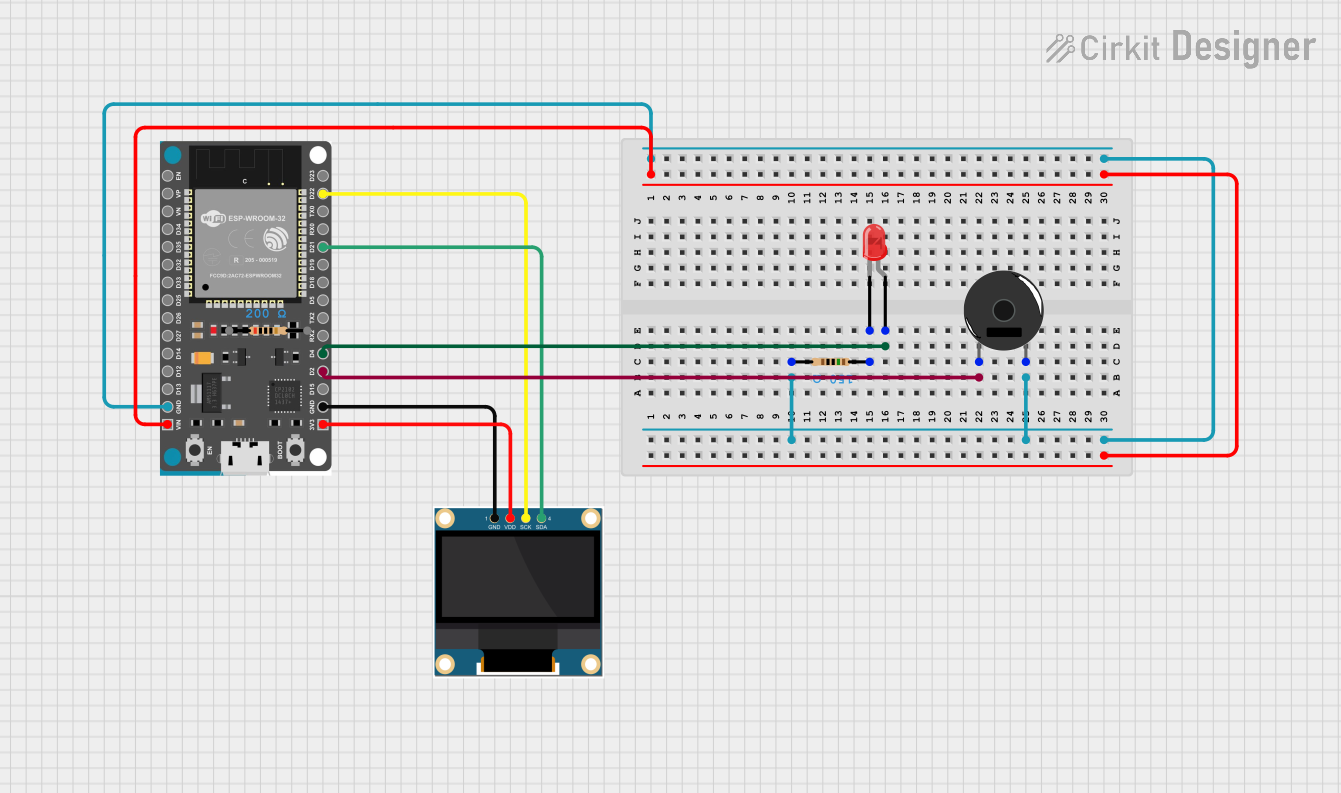
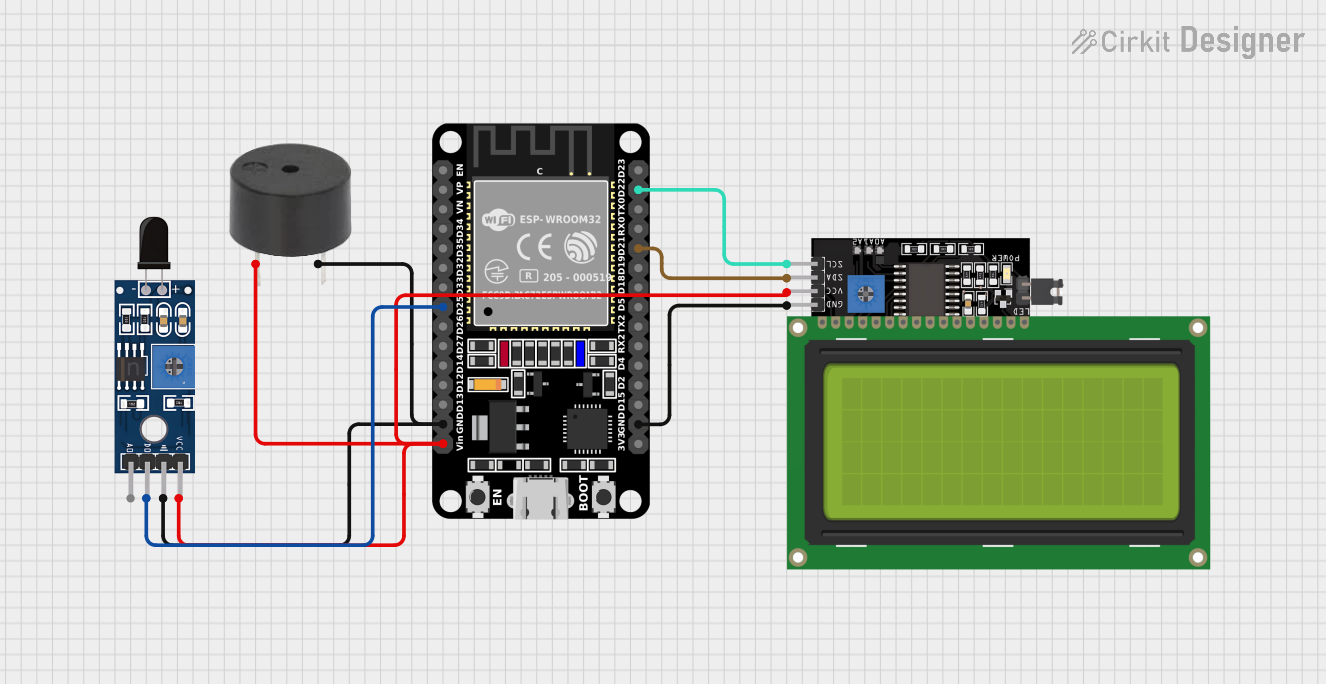
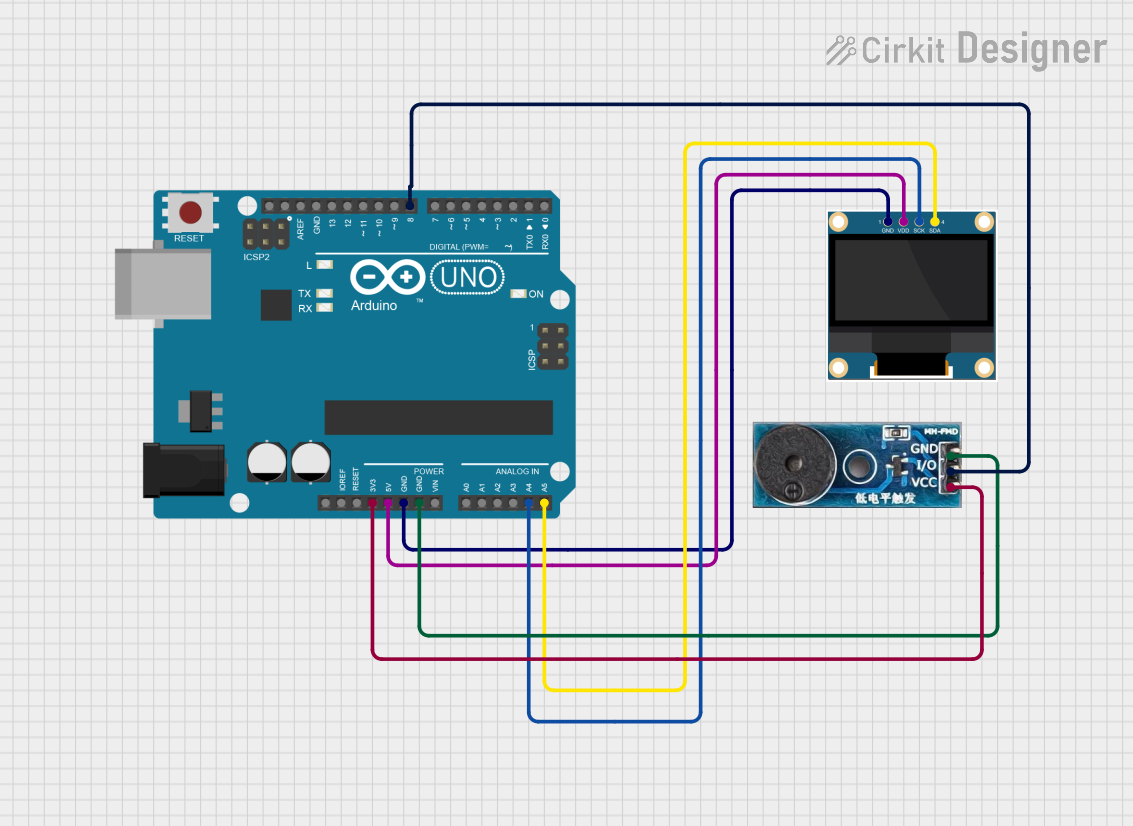
Explore Projects Built with FireBeetle OSD
Common Applications and Use Cases
- IoT (Internet of Things) devices
- Wearable electronics
- Data logging and monitoring systems
- Portable devices with real-time display requirements
- Educational and prototyping projects
Technical Specifications
The FireBeetle OSD is equipped with robust features that make it versatile for a wide range of applications. Below are its key technical specifications:
General Specifications
| Parameter | Specification |
|---|---|
| Microcontroller | ESP32-based |
| Operating Voltage | 3.3V |
| Input Voltage Range | 3.7V - 5.5V |
| Power Consumption | Ultra-low power mode: <10 µA |
| OLED Display | 0.96-inch, 128x64 resolution, monochrome |
| Communication Interfaces | UART, I2C, SPI |
| GPIO Pins | 10 (including ADC and PWM support) |
| Flash Memory | 4MB |
| Dimensions | 27mm x 58mm |
| Weight | 10g |
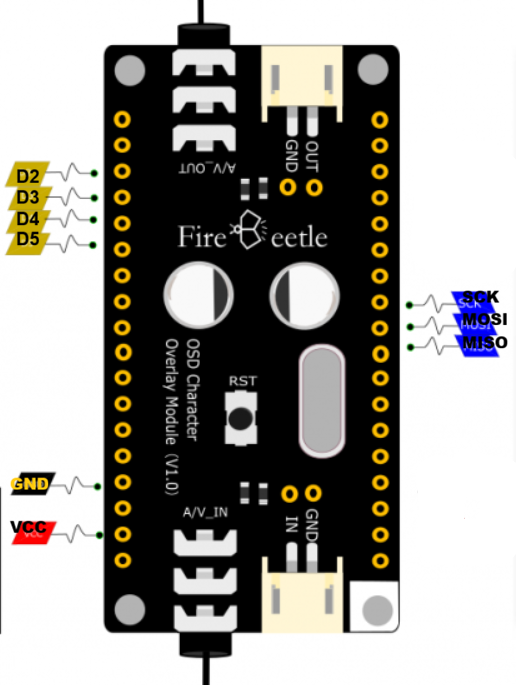
Pin Configuration and Descriptions
The FireBeetle OSD features a simple pinout for easy integration into projects. Below is the pin configuration:
| Pin Name | Function | Description |
|---|---|---|
| VIN | Power Input | Accepts 3.7V-5.5V input for powering the board. |
| GND | Ground | Common ground for the circuit. |
| 3V3 | 3.3V Output | Provides regulated 3.3V output. |
| D0-D9 | GPIO Pins | General-purpose I/O pins with ADC and PWM. |
| SDA | I2C Data | Data line for I2C communication. |
| SCL | I2C Clock | Clock line for I2C communication. |
| TX | UART Transmit | Transmits data via UART. |
| RX | UART Receive | Receives data via UART. |
| RST | Reset | Resets the microcontroller. |
Usage Instructions
The FireBeetle OSD is designed for ease of use, making it suitable for both beginners and experienced developers. Below are the steps and best practices for using the board:
Setting Up the FireBeetle OSD
Powering the Board:
- Connect a power source (3.7V-5.5V) to the VIN and GND pins. Alternatively, you can power the board via the micro-USB port.
Programming the Board:
- Install the Arduino IDE and add the ESP32 board support package.
- Select "FireBeetle-ESP32" as the board in the Arduino IDE.
- Connect the board to your computer using a USB cable and upload your code.
Using the OLED Display:
- The integrated OLED display can be controlled using the
Adafruit_SSD1306library. Install this library in the Arduino IDE for easy display management.
- The integrated OLED display can be controlled using the
Example Code: Displaying Text on the OLED
The following example demonstrates how to display "Hello, FireBeetle!" on the OLED screen:
#include <Wire.h>
#include <Adafruit_GFX.h>
#include <Adafruit_SSD1306.h>

// Define the OLED display dimensions
#define SCREEN_WIDTH 128
#define SCREEN_HEIGHT 64

// Create an instance of the SSD1306 display
Adafruit_SSD1306 display(SCREEN_WIDTH, SCREEN_HEIGHT, &Wire, -1);

void setup() {
  // Initialize the display
  if (!display.begin(SSD1306_I2C_ADDRESS, 0x3C)) {
    // If initialization fails, halt the program
    Serial.println(F("SSD1306 allocation failed"));
    for (;;);
  }

  // Clear the display buffer
  display.clearDisplay();

  // Set text size and color
  display.setTextSize(1); // Text size multiplier
  display.setTextColor(SSD1306_WHITE);

  // Set cursor position
  display.setCursor(0, 0);

  // Display text
  display.println(F("Hello, FireBeetle!"));
  display.display(); // Render the text on the screen
}

void loop() {
  // No actions required in the loop for this example
}
Important Considerations and Best Practices
- Power Supply: Ensure the input voltage does not exceed 5.5V to avoid damaging the board.
- Pin Usage: Avoid exceeding the current limits of GPIO pins (typically 12mA per pin).
- OLED Display: Use the appropriate library and ensure the I2C address matches the display's configuration (default: 0x3C).
- Heat Management: While the board is energy-efficient, prolonged use at high loads may generate heat. Ensure proper ventilation.
Troubleshooting and FAQs
Common Issues and Solutions
The board does not power on:
- Verify the input voltage is within the 3.7V-5.5V range.
- Check the connections to the VIN and GND pins or the USB cable.
OLED display is blank:
- Ensure the
Adafruit_SSD1306library is installed and correctly configured. - Verify the I2C address (default: 0x3C) matches the display's configuration.
- Check the SDA and SCL connections for proper wiring.
- Ensure the
Code upload fails:
- Ensure the correct board and port are selected in the Arduino IDE.
- Press and hold the RST button while uploading the code.
GPIO pins not functioning as expected:
- Confirm the pin mode is correctly set in the code (e.g.,
pinMode(pin, OUTPUT)). - Check for short circuits or incorrect wiring.
- Confirm the pin mode is correctly set in the code (e.g.,
FAQs
Q: Can I use the FireBeetle OSD with a battery?
A: Yes, the board supports battery input via the VIN pin. Ensure the battery voltage is within the 3.7V-5.5V range.
Q: What is the maximum current output of the 3.3V pin?
A: The 3.3V pin can supply up to 500mA, depending on the input power source.
Q: Is the OLED display replaceable?
A: The OLED display is integrated into the board and is not designed to be replaced.
Q: Can I use the FireBeetle OSD with other microcontrollers?
A: While the FireBeetle OSD is a standalone microcontroller, its GPIO pins can interface with other microcontrollers for specific applications.