Cirkit Designer
Your all-in-one circuit design IDE
Home /
Component Documentation
How to Use SINGLE SOLENOID: Examples, Pinouts, and Specs
Introduction
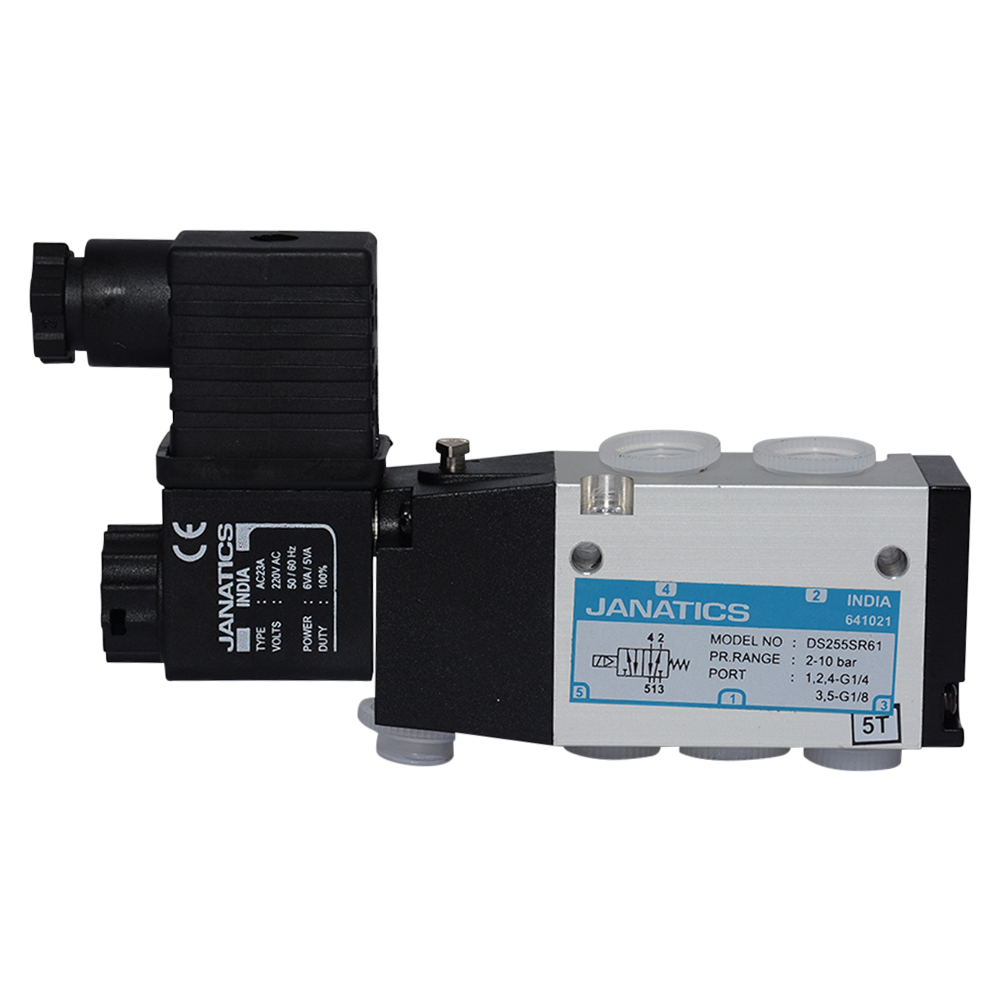
A single solenoid is an electromechanical device that converts electrical energy into linear motion. It consists of a coil of wire that generates a magnetic field when an electric current passes through it, causing a plunger or armature to move. This movement can be used to control mechanical systems, such as valves, switches, or locks.
Explore Projects Built with SINGLE SOLENOID
Arduino UNO-Based Automated Testing System with Relays and Sensors
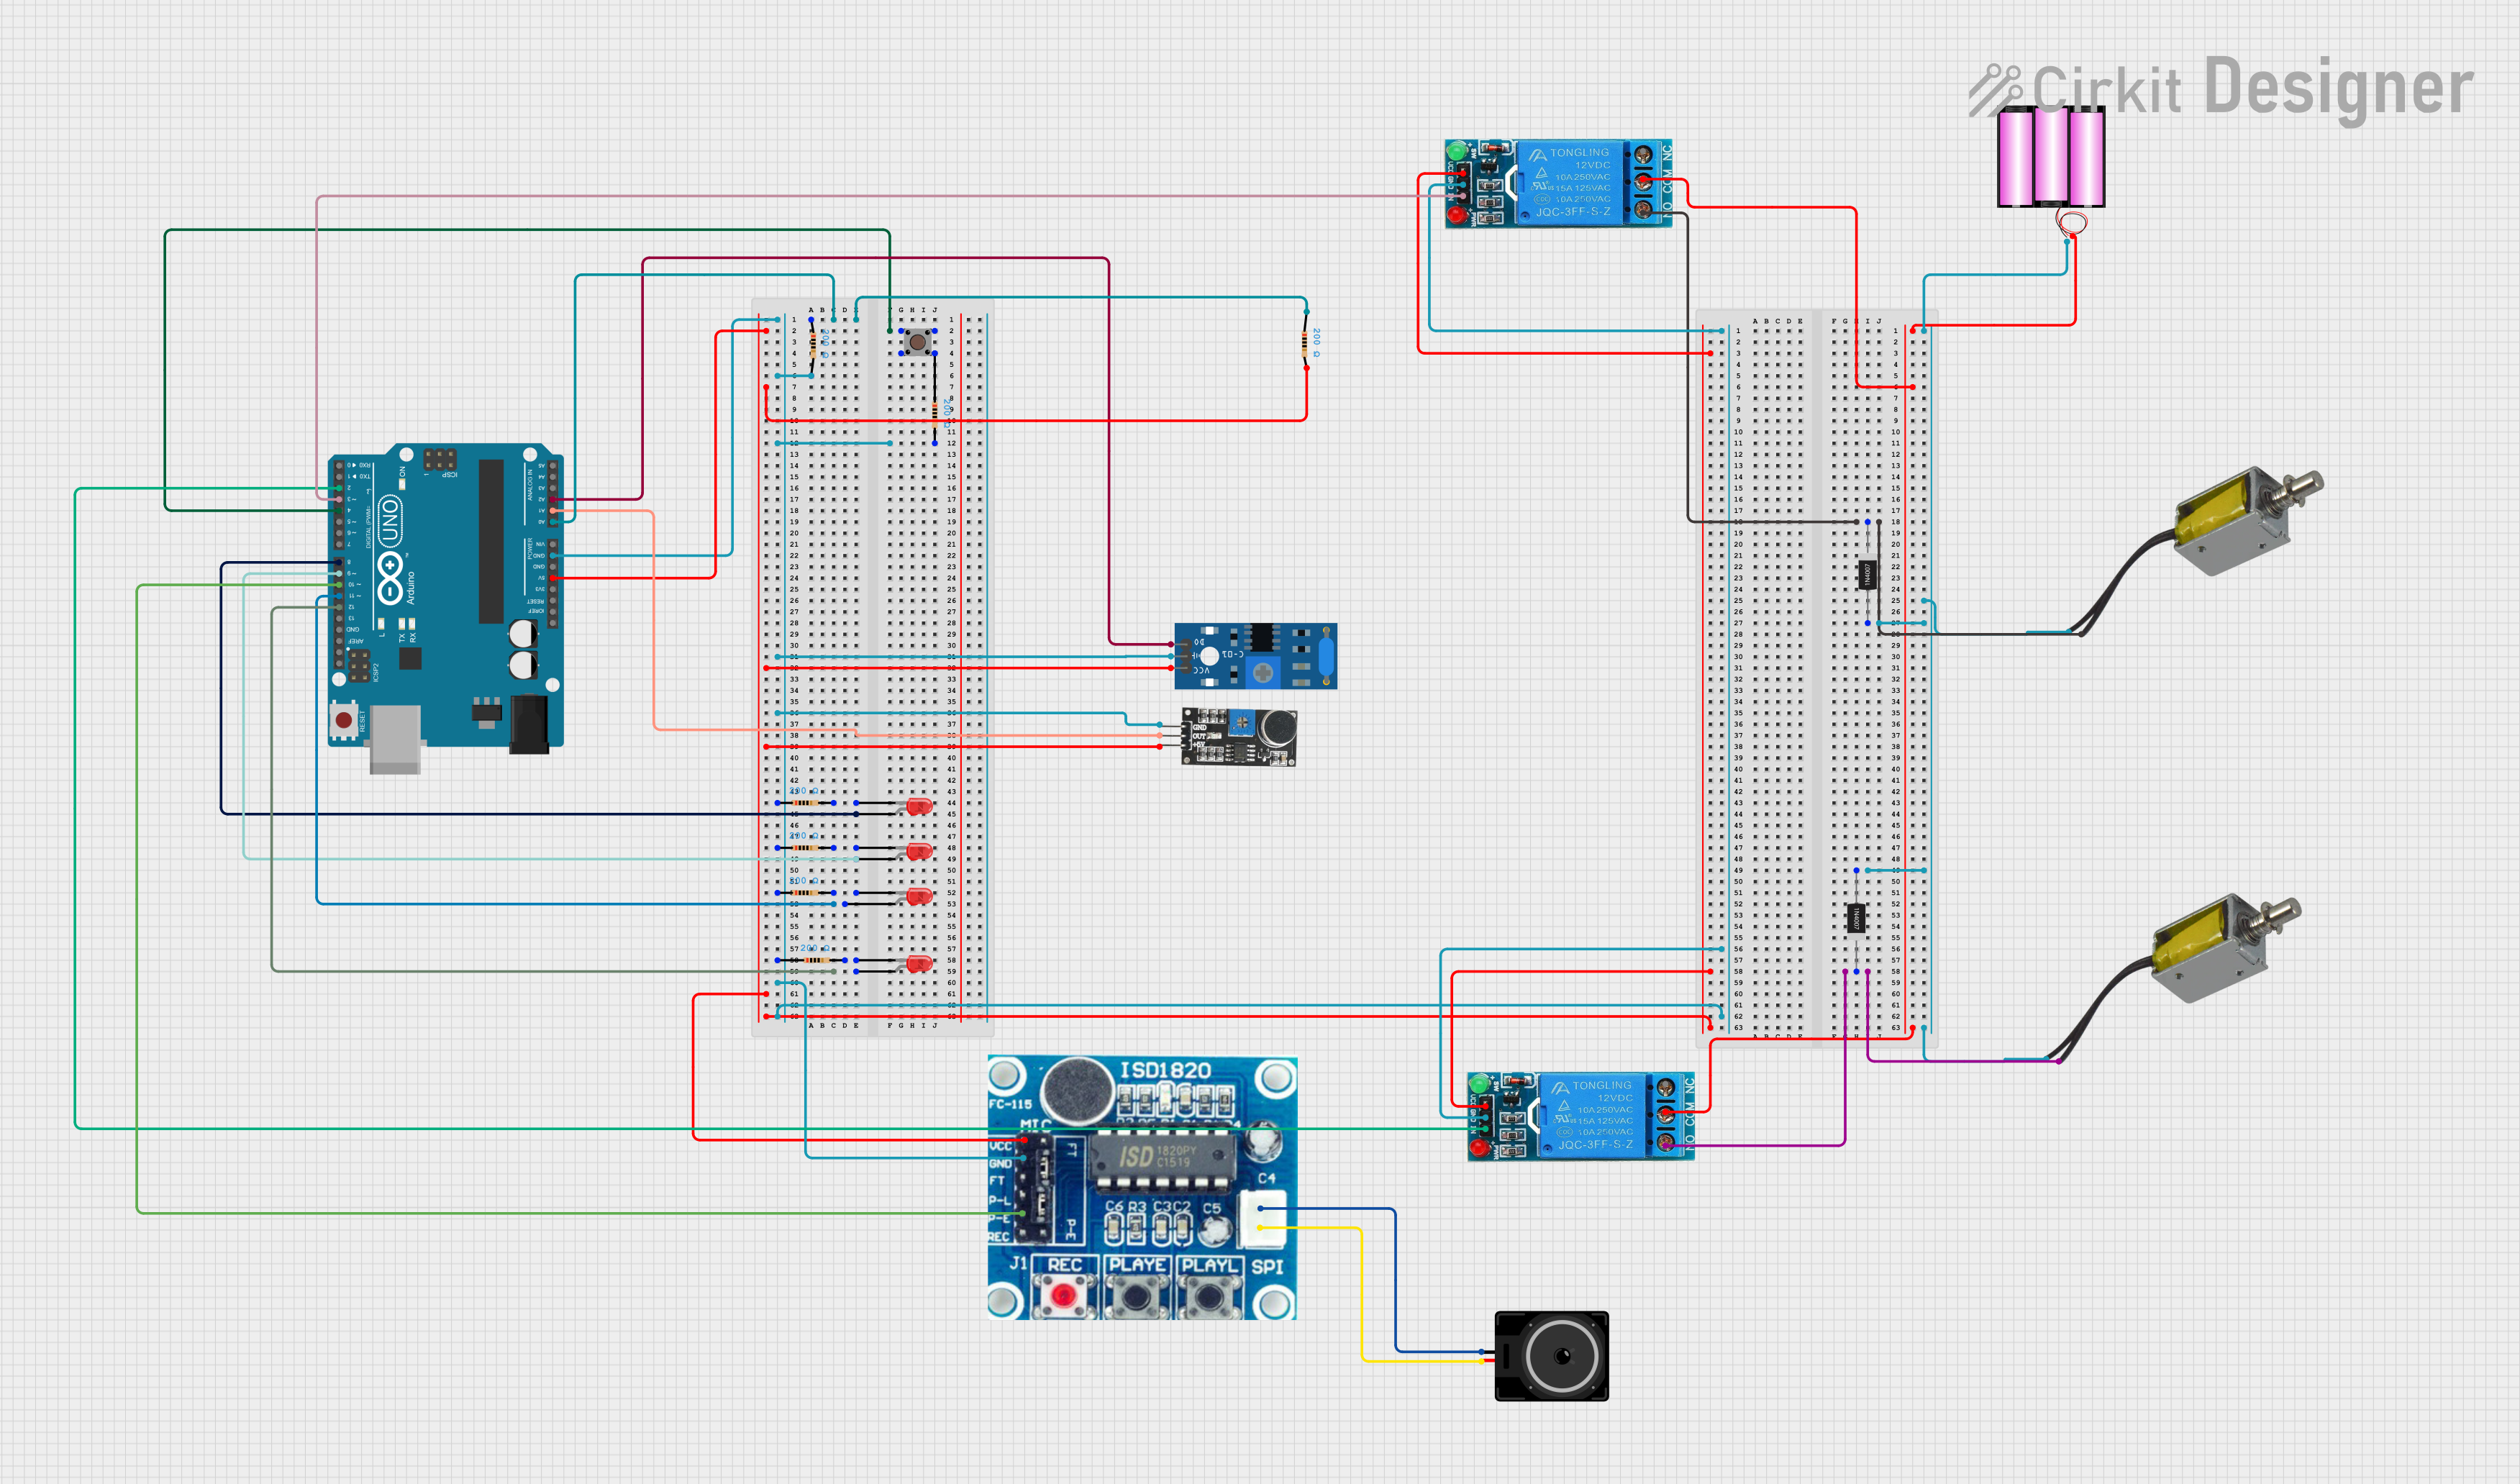
This circuit is an automated testing system controlled by an Arduino UNO, which performs light, vibration, loopback, and melody tests using various sensors and LEDs. The results of these tests are indicated by LEDs and solenoids, with relays controlling the solenoids to signify pass or fail outcomes. The system also includes a sound playback module and a pushbutton to initiate the tests.
Arduino UNO Controlled 12V Solenoid Lock with LCD Display
This circuit uses an Arduino UNO to control a 12V solenoid lock via a single-channel relay. The Arduino receives serial input to determine whether to activate or deactivate the lock, displaying the status on an LCD screen and controlling the relay accordingly.
Arduino UNO Controlled Relay System with Infrared Proximity Sensors
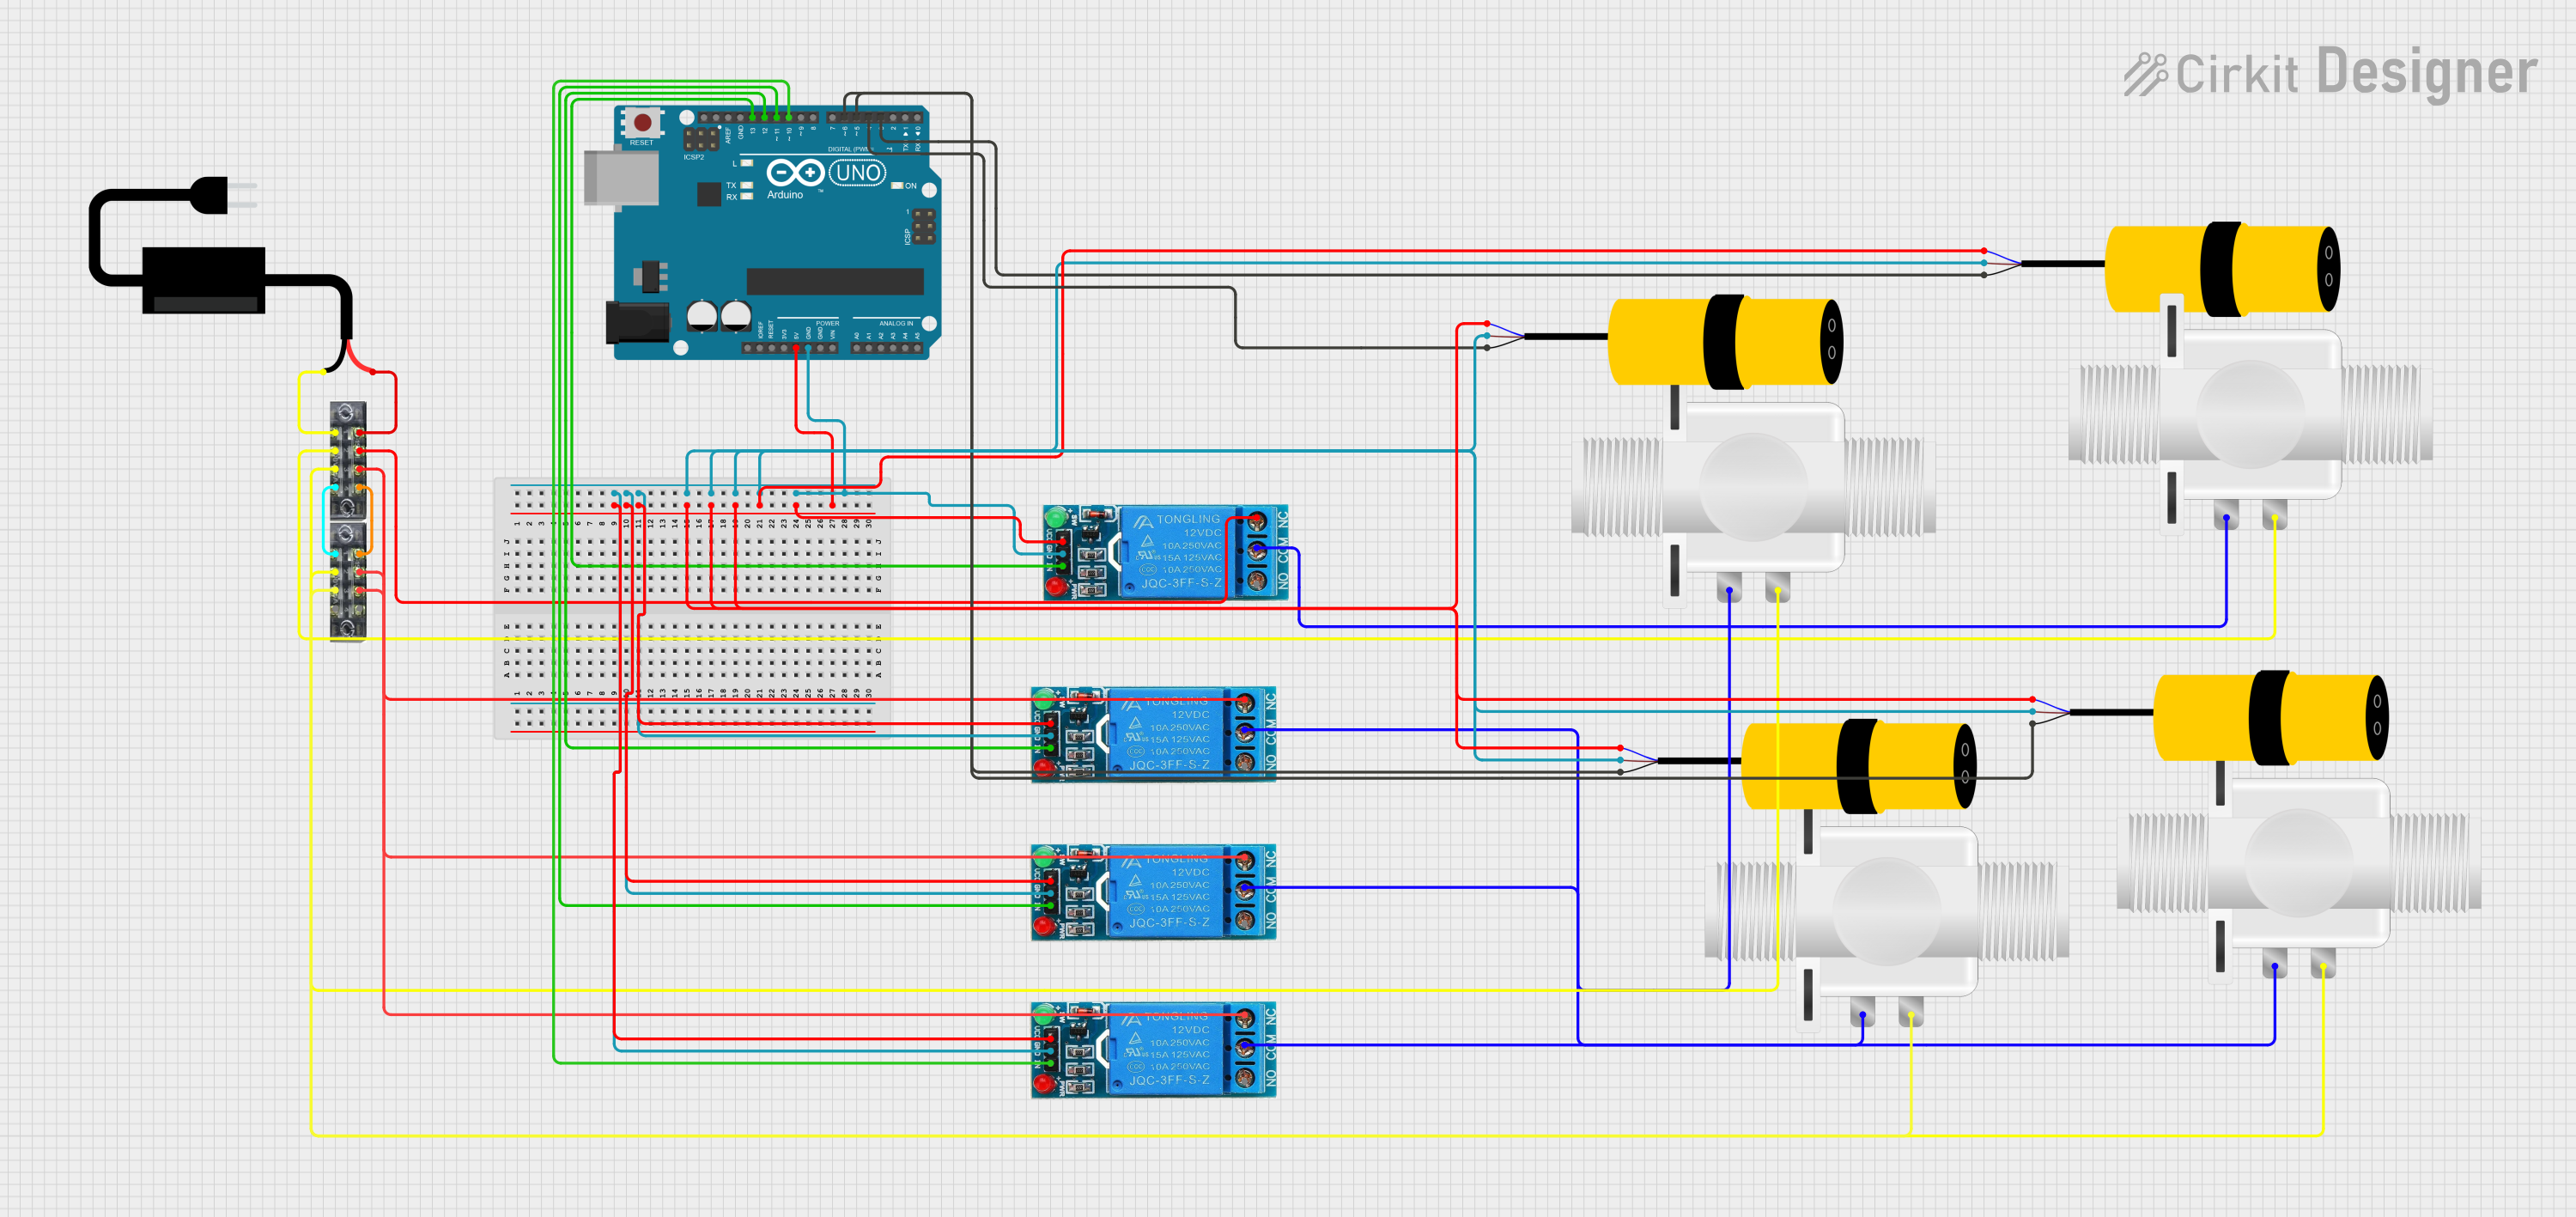
This circuit consists of an Arduino UNO microcontroller interfaced with multiple E18-D80NK infrared proximity sensors and 12V single-channel relays controlling several plastic solenoid valves. The Arduino monitors the sensors and activates the corresponding relays to control the flow through the solenoid valves based on the proximity sensor inputs. A DC power source provides power to the system, with the relays switching the higher voltage lines for the solenoid valves.
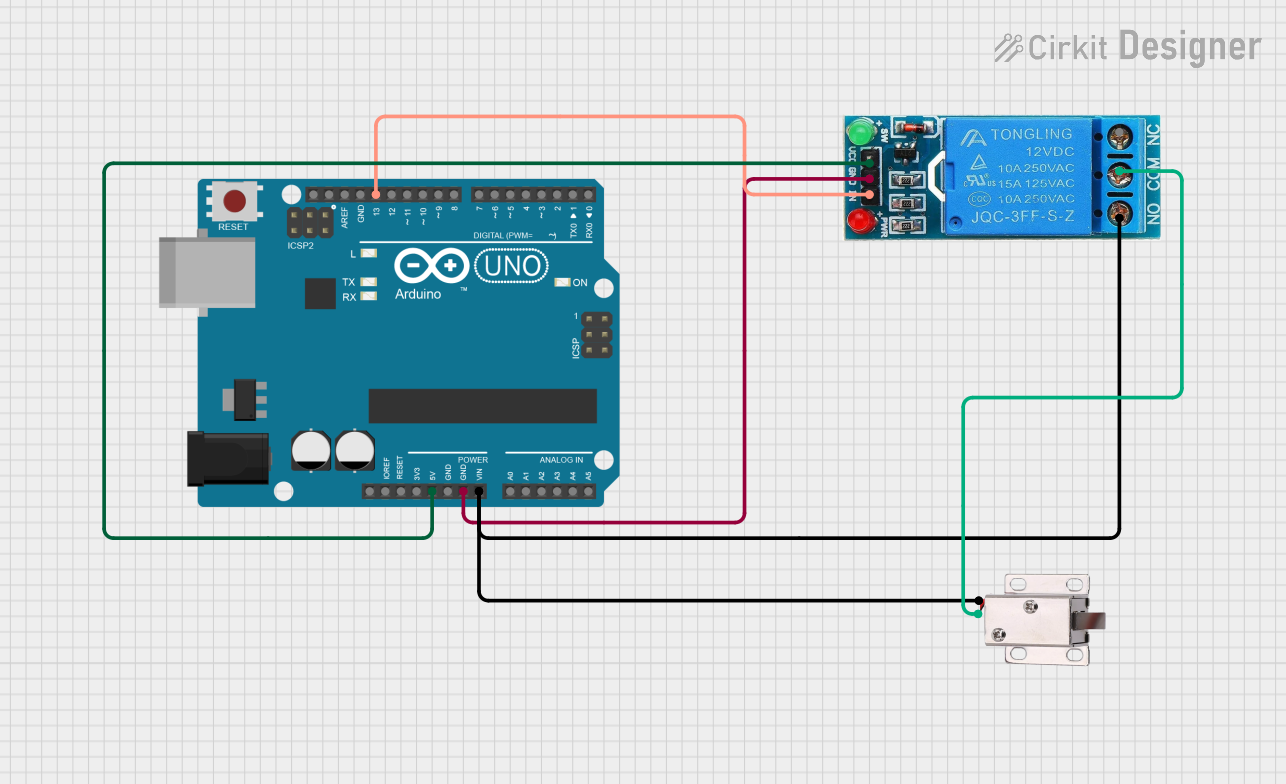
Arduino-Controlled 12V Solenoid Lock with Relay
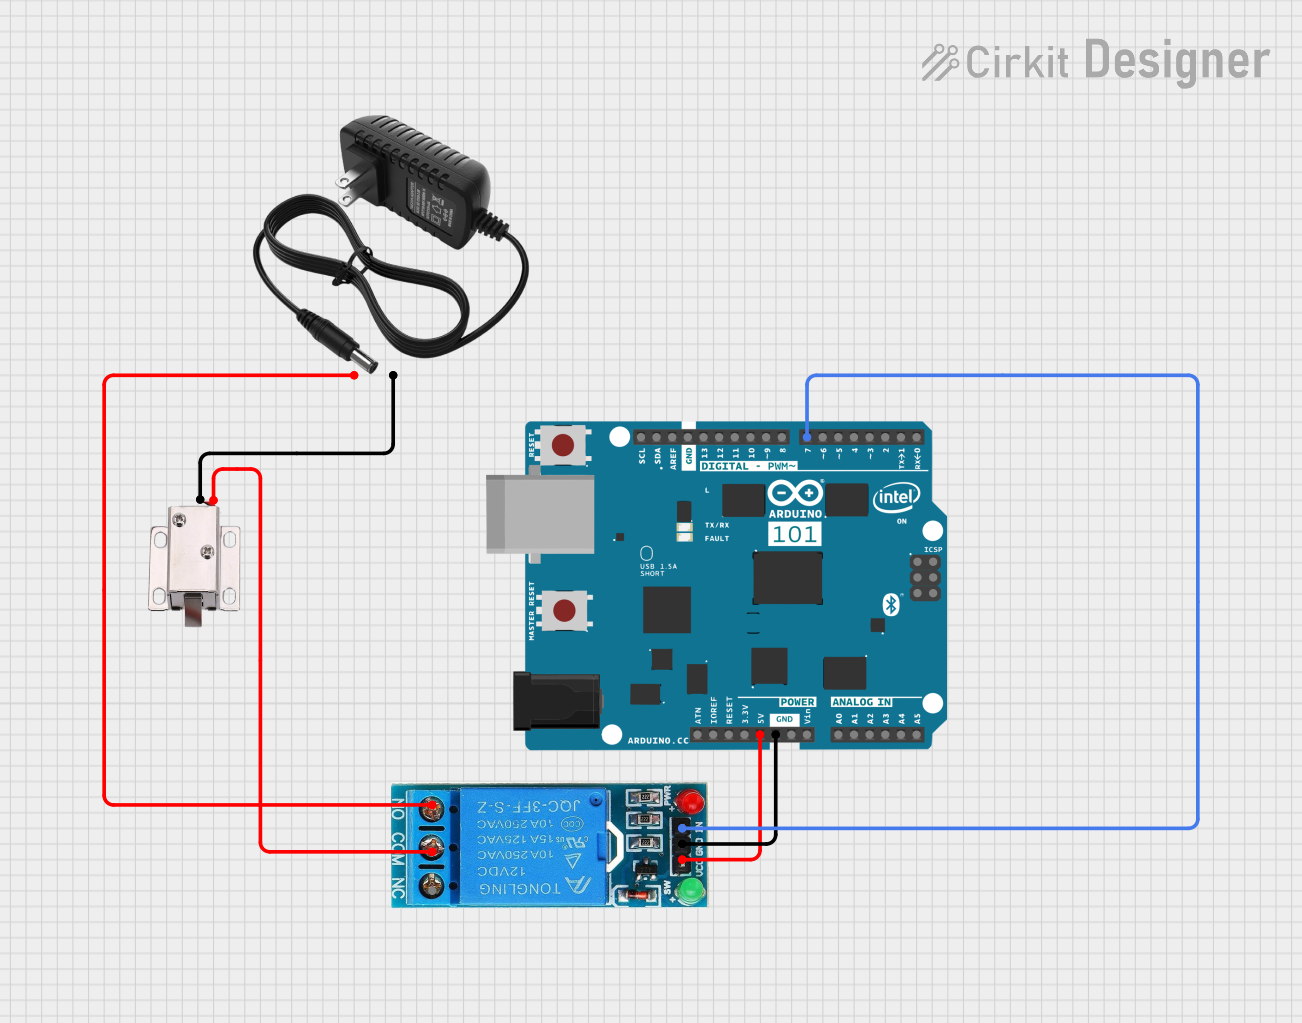
This circuit uses an Arduino 101 to control a 12V solenoid lock via a 12V single channel relay. The relay is powered by a 12V power supply and is triggered by a digital output from the Arduino, allowing the solenoid lock to be activated or deactivated based on the Arduino's control logic.
Explore Projects Built with SINGLE SOLENOID
Arduino UNO-Based Automated Testing System with Relays and Sensors
This circuit is an automated testing system controlled by an Arduino UNO, which performs light, vibration, loopback, and melody tests using various sensors and LEDs. The results of these tests are indicated by LEDs and solenoids, with relays controlling the solenoids to signify pass or fail outcomes. The system also includes a sound playback module and a pushbutton to initiate the tests.
Arduino UNO Controlled 12V Solenoid Lock with LCD Display
This circuit uses an Arduino UNO to control a 12V solenoid lock via a single-channel relay. The Arduino receives serial input to determine whether to activate or deactivate the lock, displaying the status on an LCD screen and controlling the relay accordingly.
Arduino UNO Controlled Relay System with Infrared Proximity Sensors
This circuit consists of an Arduino UNO microcontroller interfaced with multiple E18-D80NK infrared proximity sensors and 12V single-channel relays controlling several plastic solenoid valves. The Arduino monitors the sensors and activates the corresponding relays to control the flow through the solenoid valves based on the proximity sensor inputs. A DC power source provides power to the system, with the relays switching the higher voltage lines for the solenoid valves.
Arduino-Controlled 12V Solenoid Lock with Relay
This circuit uses an Arduino 101 to control a 12V solenoid lock via a 12V single channel relay. The relay is powered by a 12V power supply and is triggered by a digital output from the Arduino, allowing the solenoid lock to be activated or deactivated based on the Arduino's control logic.
Common Applications and Use Cases
- Automotive Systems: Used in fuel injectors, starter motors, and door locks.
- Industrial Automation: Controls pneumatic or hydraulic valves.
- Home Appliances: Found in washing machines, dishwashers, and doorbells.
- Robotics: Actuates robotic arms and grippers.
- Access Control: Used in electronic door locks and security systems.
Technical Specifications
Key Technical Details
| Parameter | Value |
|---|---|
| Manufacturer | FESTO |
| Part ID | SOLENOID |
| Voltage Rating | 12V DC |
| Current Rating | 1.5A |
| Power Consumption | 18W |
| Stroke Length | 10mm |
| Force | 5N |
| Response Time | 20ms |
| Duty Cycle | 100% |
| Operating Temperature | -20°C to 60°C |
Pin Configuration and Descriptions
| Pin Number | Description | Function |
|---|---|---|
| 1 | VCC | Positive supply voltage (12V DC) |
| 2 | GND | Ground |
Usage Instructions
How to Use the Component in a Circuit
- Power Supply: Connect the VCC pin to a 12V DC power supply.
- Ground Connection: Connect the GND pin to the ground of the power supply.
- Control Signal: Use a microcontroller (e.g., Arduino UNO) to control the solenoid by switching the power supply on and off.
Important Considerations and Best Practices
- Current Limiting: Ensure that the power supply can provide sufficient current (1.5A) to the solenoid.
- Heat Dissipation: The solenoid can generate heat during operation. Ensure proper ventilation or heat sinking.
- Duty Cycle: Although the solenoid is rated for a 100% duty cycle, continuous operation at maximum current may reduce its lifespan.
- Flyback Diode: Use a flyback diode across the solenoid terminals to protect the control circuit from voltage spikes.
Example Circuit with Arduino UNO
/*
 * Example code to control a single solenoid using Arduino UNO.
 * The solenoid is connected to pin 9 through a transistor.
 */

const int solenoidPin = 9; // Pin connected to the transistor base

void setup() {
  pinMode(solenoidPin, OUTPUT); // Set the solenoid pin as an output
}

void loop() {
  digitalWrite(solenoidPin, HIGH); // Activate the solenoid
  delay(1000); // Keep it on for 1 second
  digitalWrite(solenoidPin, LOW); // Deactivate the solenoid
  delay(1000); // Keep it off for 1 second
}
Troubleshooting and FAQs
Common Issues Users Might Face
- Solenoid Not Activating:
- Solution: Check the power supply voltage and current ratings. Ensure proper connections.
- Overheating:
- Solution: Ensure proper ventilation and consider using a heat sink.
- Voltage Spikes:
- Solution: Use a flyback diode across the solenoid terminals.
Solutions and Tips for Troubleshooting
- Check Connections: Ensure all connections are secure and correct.
- Measure Voltage and Current: Use a multimeter to verify the voltage and current supplied to the solenoid.
- Inspect Components: Check for any damaged components, such as burnt resistors or broken wires.
- Use Proper Code: Ensure the control code is correctly written and uploaded to the microcontroller.
By following this documentation, users can effectively integrate and troubleshoot the FESTO single solenoid in their projects.