Cirkit Designer Logo
Cirkit Designer
Your all-in-one circuit design IDE
Home / 
Component Documentation

How to Use Ultrasonic Sensor: Examples, Pinouts, and Specs

Image of Ultrasonic Sensor
Cirkit Designer LogoDesign with Ultrasonic Sensor in Cirkit Designer

Introduction

The HC-SR04 from AZDelivery is a widely used ultrasonic sensor that provides a non-contact distance measurement function. It operates by emitting ultrasonic waves at a frequency of 40 kHz and measures the time taken for the echo to return after bouncing off an object. This sensor is commonly used in robotics, obstacle avoidance systems, distance measurement applications, and various automation projects.

Explore Projects Built with Ultrasonic Sensor

Use Cirkit Designer to design, explore, and prototype these projects online. Some projects support real-time simulation. Click "Open Project" to start designing instantly!
Arduino UNO Based Ultrasonic Distance Measurement with HC-SR04 and Bluetooth Communication via HC-05
Image of hc sr`: A project utilizing Ultrasonic Sensor in a practical application
This circuit features an Arduino UNO microcontroller interfaced with an HC-SR04 Ultrasonic Sensor and an HC-05 Bluetooth module. The Arduino is configured to trigger the ultrasonic sensor to measure distance and communicate the data wirelessly via the HC-05 module. Power is supplied to both the sensor and the Bluetooth module from the Arduino's 5V output, and ground connections are shared among all components.
Cirkit Designer LogoOpen Project in Cirkit Designer
Arduino UNO-Based Ultrasonic Distance Measurement with Bluetooth Interface and Visual Feedback
Image of BMO: A project utilizing Ultrasonic Sensor in a practical application
This circuit features an Arduino UNO microcontroller interfaced with an HC-SR04 ultrasonic sensor, a red LED with a series resistor, a buzzer, an I2C LCD 16x2 screen, and an HC-05 Bluetooth module. The ultrasonic sensor is likely used for distance measurement, with the Arduino controlling the LED and buzzer as indicators, displaying information on the LCD screen, and potentially communicating data wirelessly via the HC-05 Bluetooth module. The provided code skeleton suggests that the specific functionalities are yet to be implemented.
Cirkit Designer LogoOpen Project in Cirkit Designer
Arduino UNO Based Ultrasonic Distance Sensor with Buzzer Alert
Image of Copy of shoe: A project utilizing Ultrasonic Sensor in a practical application
This circuit functions as an ultrasonic distance detector with an audible alert. The HC-SR04 Ultrasonic Sensor is interfaced with an Arduino UNO to measure the distance to objects, and a buzzer is triggered to sound an alert when the object is within a predefined proximity.
Cirkit Designer LogoOpen Project in Cirkit Designer
Arduino UNO Based Ultrasonic Radar System with Servo Motor
Image of ultrasonic radar: A project utilizing Ultrasonic Sensor in a practical application
This circuit is designed to function as an ultrasonic radar system, utilizing an Arduino UNO microcontroller, an HC-SR04 ultrasonic sensor, and an SG90 servo motor. The Arduino controls the servo to sweep the ultrasonic sensor through a range of angles, while the sensor measures the distance to any objects in its path. The system outputs the angle and distance measurements to the serial monitor and provides an indication when an obstacle is detected within 20 cm.
Cirkit Designer LogoOpen Project in Cirkit Designer

Explore Projects Built with Ultrasonic Sensor

Use Cirkit Designer to design, explore, and prototype these projects online. Some projects support real-time simulation. Click "Open Project" to start designing instantly!
Image of hc sr`: A project utilizing Ultrasonic Sensor in a practical application
Arduino UNO Based Ultrasonic Distance Measurement with HC-SR04 and Bluetooth Communication via HC-05
This circuit features an Arduino UNO microcontroller interfaced with an HC-SR04 Ultrasonic Sensor and an HC-05 Bluetooth module. The Arduino is configured to trigger the ultrasonic sensor to measure distance and communicate the data wirelessly via the HC-05 module. Power is supplied to both the sensor and the Bluetooth module from the Arduino's 5V output, and ground connections are shared among all components.
Cirkit Designer LogoOpen Project in Cirkit Designer
Image of BMO: A project utilizing Ultrasonic Sensor in a practical application
Arduino UNO-Based Ultrasonic Distance Measurement with Bluetooth Interface and Visual Feedback
This circuit features an Arduino UNO microcontroller interfaced with an HC-SR04 ultrasonic sensor, a red LED with a series resistor, a buzzer, an I2C LCD 16x2 screen, and an HC-05 Bluetooth module. The ultrasonic sensor is likely used for distance measurement, with the Arduino controlling the LED and buzzer as indicators, displaying information on the LCD screen, and potentially communicating data wirelessly via the HC-05 Bluetooth module. The provided code skeleton suggests that the specific functionalities are yet to be implemented.
Cirkit Designer LogoOpen Project in Cirkit Designer
Image of Copy of shoe: A project utilizing Ultrasonic Sensor in a practical application
Arduino UNO Based Ultrasonic Distance Sensor with Buzzer Alert
This circuit functions as an ultrasonic distance detector with an audible alert. The HC-SR04 Ultrasonic Sensor is interfaced with an Arduino UNO to measure the distance to objects, and a buzzer is triggered to sound an alert when the object is within a predefined proximity.
Cirkit Designer LogoOpen Project in Cirkit Designer
Image of ultrasonic radar: A project utilizing Ultrasonic Sensor in a practical application
Arduino UNO Based Ultrasonic Radar System with Servo Motor
This circuit is designed to function as an ultrasonic radar system, utilizing an Arduino UNO microcontroller, an HC-SR04 ultrasonic sensor, and an SG90 servo motor. The Arduino controls the servo to sweep the ultrasonic sensor through a range of angles, while the sensor measures the distance to any objects in its path. The system outputs the angle and distance measurements to the serial monitor and provides an indication when an obstacle is detected within 20 cm.
Cirkit Designer LogoOpen Project in Cirkit Designer

Technical Specifications

Key Technical Details

  • Operating Voltage: 5V DC
  • Quiescent Current: <2mA
  • Working Current: 15mA
  • Ultrasonic Frequency: 40kHz
  • Max Range: 4m
  • Min Range: 2cm
  • Measuring Angle: 15 degrees
  • Resolution: 3mm

Pin Configuration and Descriptions

Pin Number Pin Name Description
1 VCC Power supply (5V DC)
2 TRIG Trigger input (10µs pulse to start measurement)
3 ECHO Echo output (pulse width represents distance)
4 GND Ground

Usage Instructions

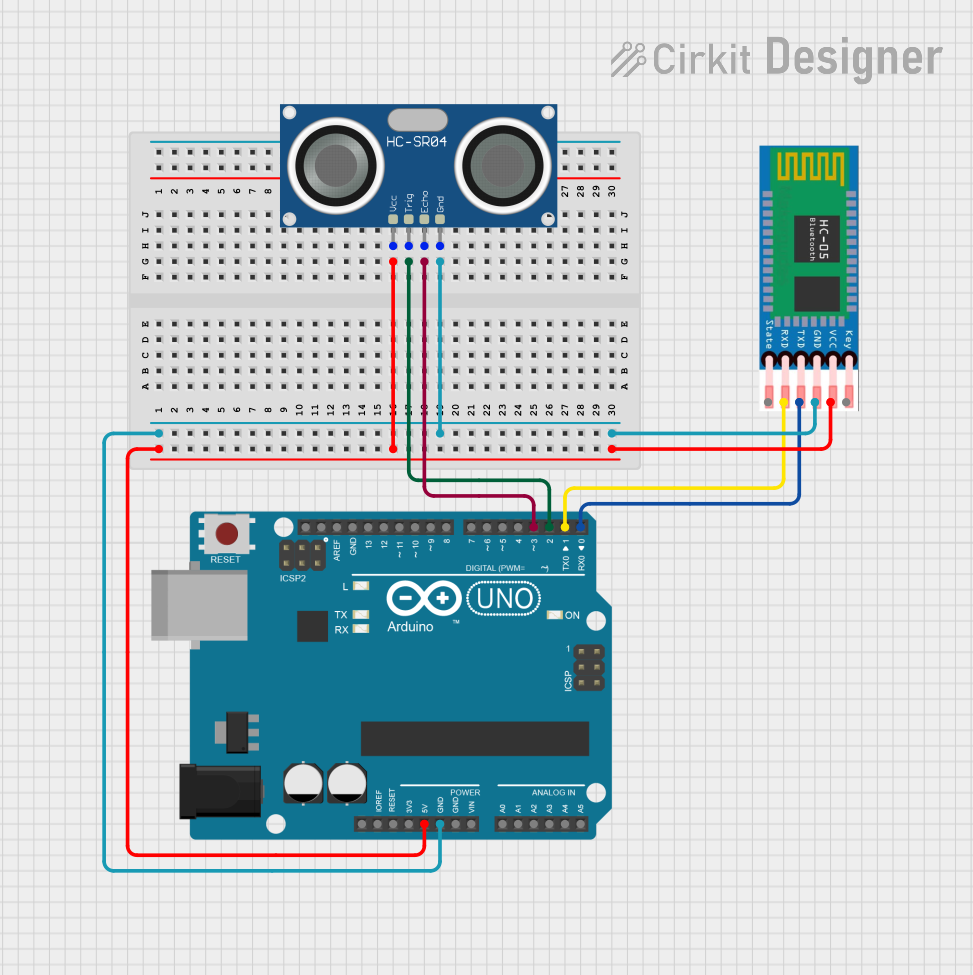
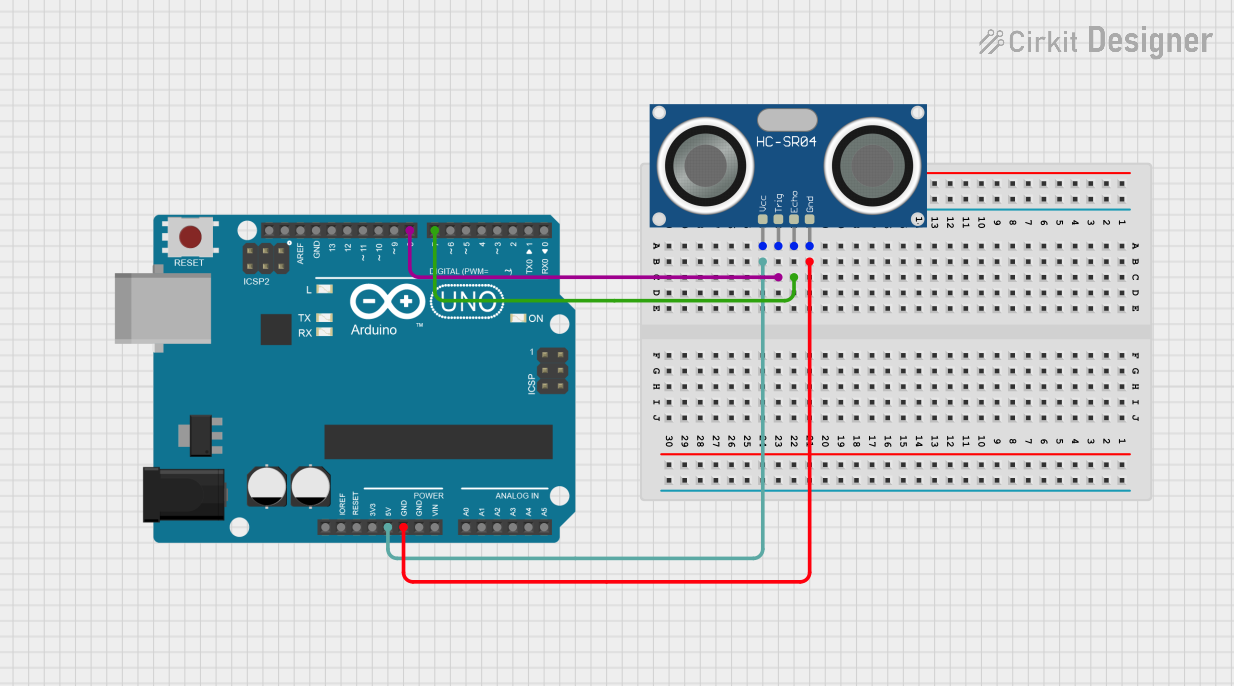
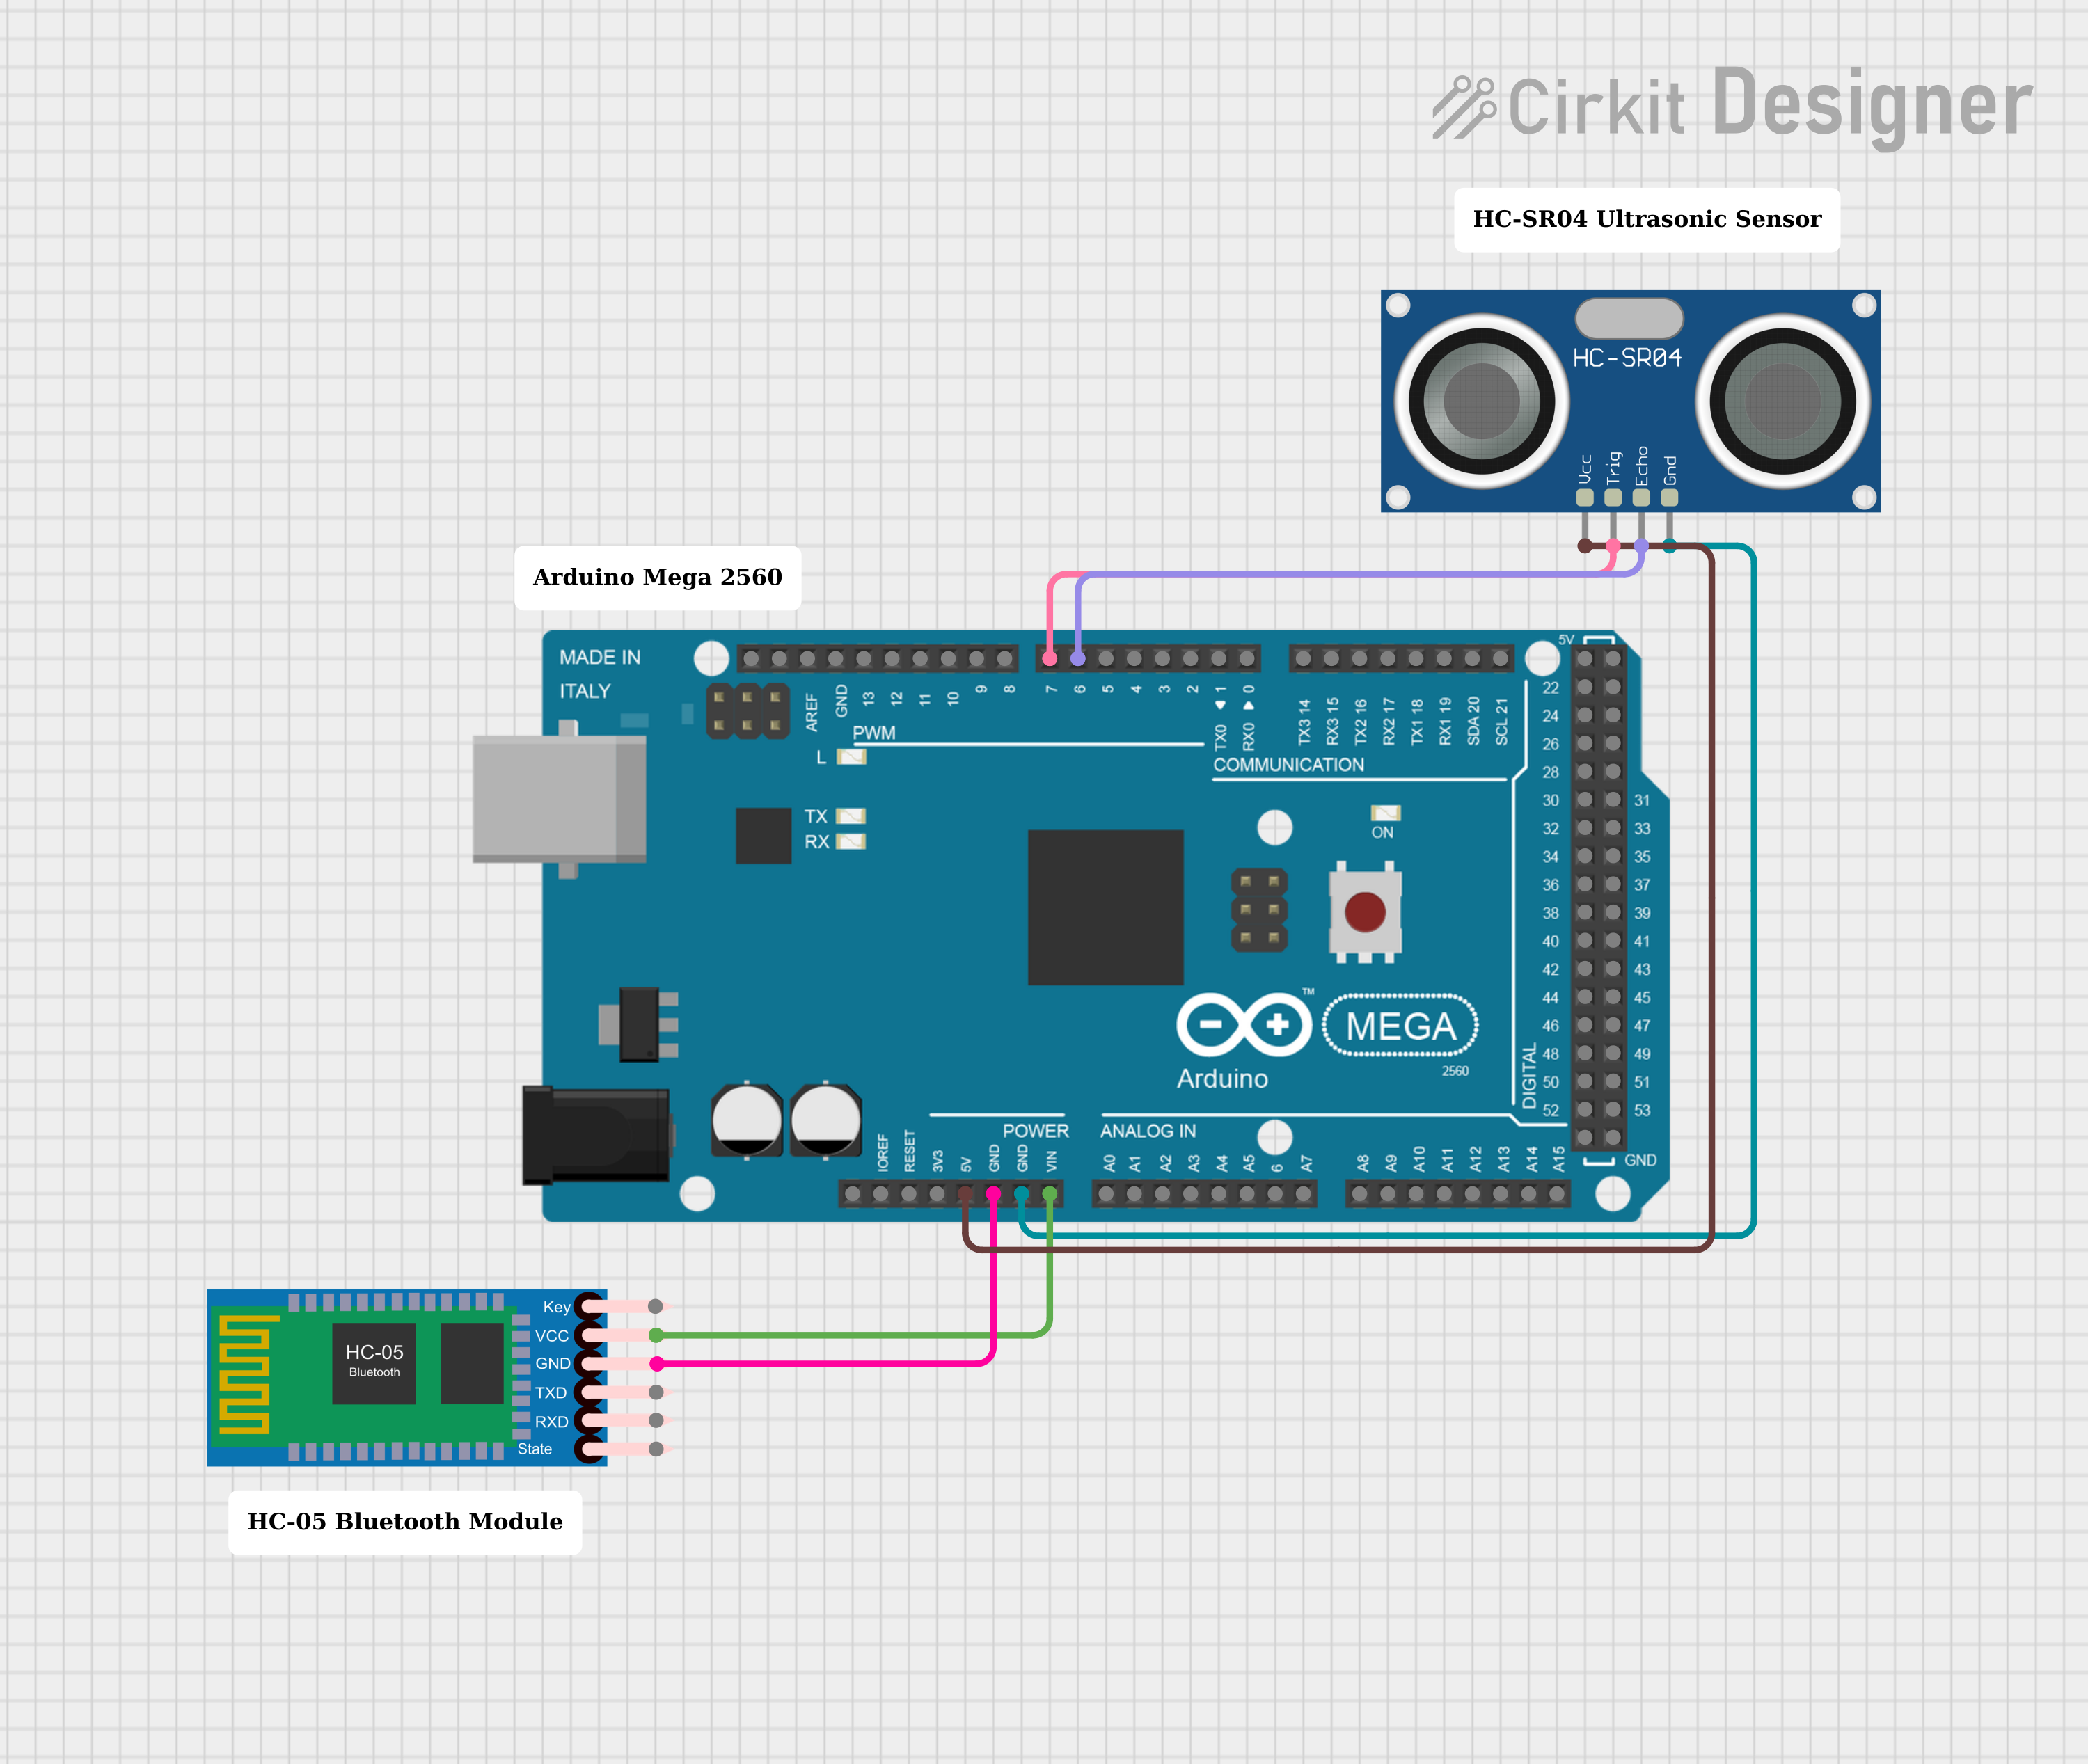
Connecting to a Circuit

  1. Connect the VCC pin to the 5V output on the Arduino.
  2. Connect the GND pin to one of the GND pins on the Arduino.
  3. Connect the TRIG pin to a digital I/O pin on the Arduino.
  4. Connect the ECHO pin to another digital I/O pin on the Arduino.

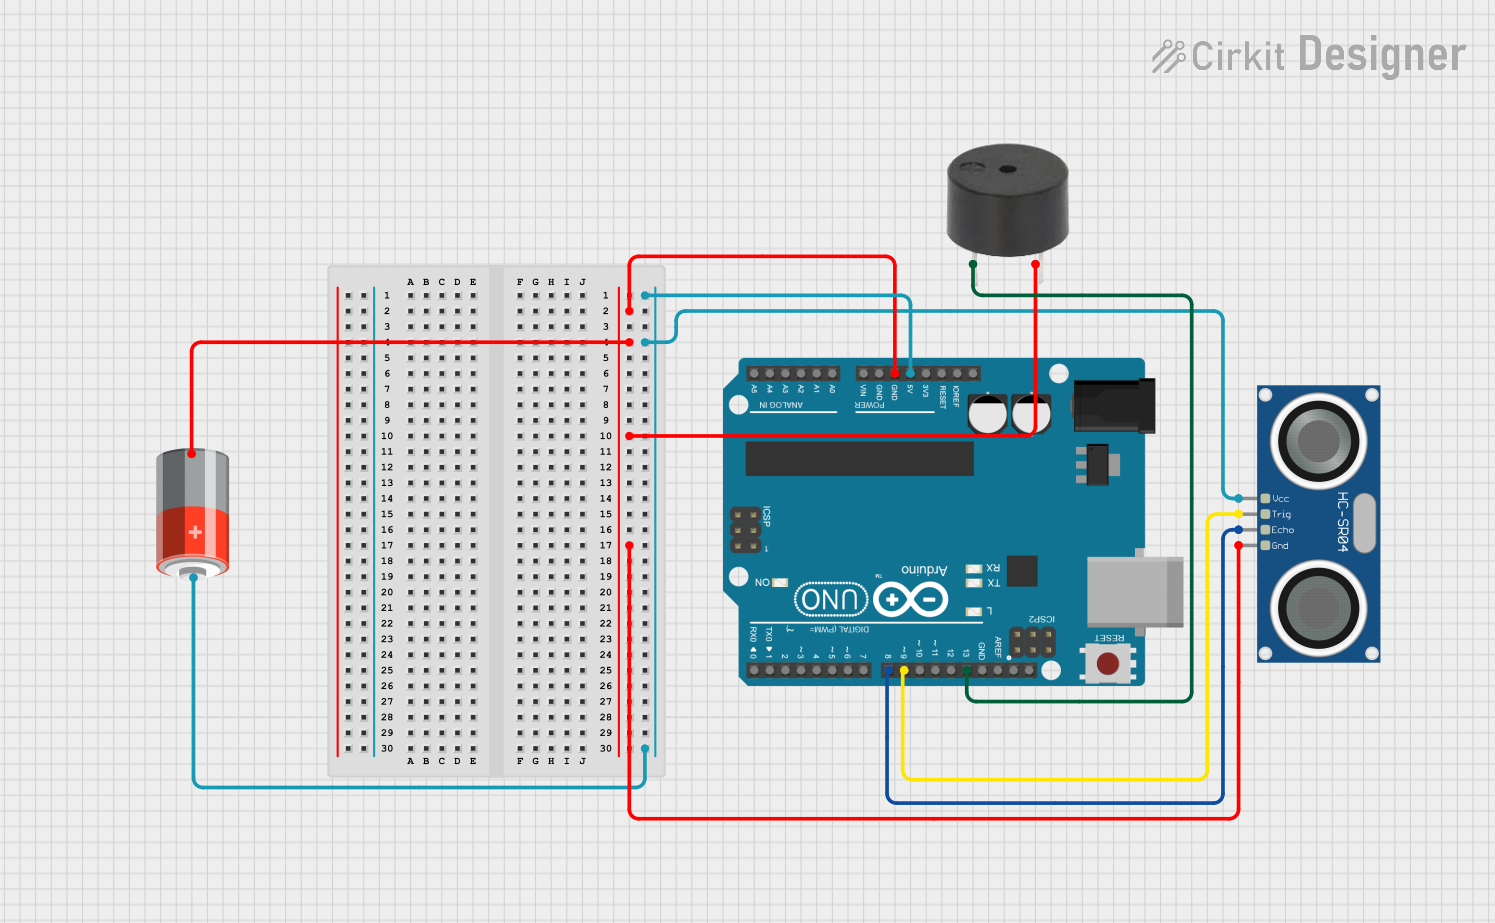
Code Example for Arduino UNO

// Define the connections to the Arduino
const int trigPin = 9;
const int echoPin = 10;

void setup() {
  // Initialize the serial communication
  Serial.begin(9600);
  // Define the TRIG pin as an Output and the ECHO pin as an Input
  pinMode(trigPin, OUTPUT);
  pinMode(echoPin, INPUT);
}

void loop() {
  // Clear the TRIG pin by setting it LOW
  digitalWrite(trigPin, LOW);
  delayMicroseconds(2);

  // Trigger the sensor by setting the TRIG pin HIGH for 10 microseconds
  digitalWrite(trigPin, HIGH);
  delayMicroseconds(10);
  digitalWrite(trigPin, LOW);

  // Read the ECHO pin; the duration is the time (in microseconds) from sending
  // the signal to receiving its echo
  long duration = pulseIn(echoPin, HIGH);

  // Calculate the distance (in cm) based on the speed of sound (34300 cm/s)
  // and the time it took for the echo to return. We divide by 2 because the
  // sound wave travels to the object and back.
  int distance = duration * 0.034 / 2;

  // Print the distance on the Serial Monitor
  Serial.print("Distance: ");
  Serial.print(distance);
  Serial.println(" cm");

  // Delay between measurements
  delay(1000);
}

Important Considerations and Best Practices

  • Ensure that the power supply is stable and within the specified voltage range.
  • Avoid placing the sensor in an environment with strong ultrasonic noise to prevent interference.
  • The sensor's accuracy can be affected by temperature and humidity; consider these factors in critical applications.
  • The measuring angle is 15 degrees, so objects outside this angle may not be detected accurately.
  • For consistent results, avoid using the sensor to measure soft, curved, or thin objects that may not reflect sound properly.

Troubleshooting and FAQs

Common Issues

  • Inaccurate Readings: Ensure that the sensor is facing the object directly without any obstructions. Check for any sources of ultrasonic noise that may interfere with the sensor's operation.
  • No Readings: Verify that all connections are secure and the sensor is powered correctly. Check the code for any errors in the pin assignments or logic.

FAQs

Q: Can the HC-SR04 sensor be used outdoors? A: The HC-SR04 can be used outdoors but may be less reliable in extreme weather conditions. It is not waterproof, so it should be protected from water and moisture.

Q: What is the maximum and minimum range of the HC-SR04 sensor? A: The maximum range is approximately 4 meters, and the minimum range is 2 centimeters.

Q: How can I increase the accuracy of the sensor? A: Ensure that the sensor is placed in a stable environment, away from wind and noise. Also, consider averaging multiple readings to reduce the effect of any anomalies.

Q: Is it possible to use multiple HC-SR04 sensors together? A: Yes, but ensure that each sensor's trigger and echo pins are controlled separately to avoid crosstalk and interference between sensors.

This documentation provides a comprehensive guide to using the HC-SR04 ultrasonic sensor with an Arduino UNO. For further assistance or technical support, please contact the manufacturer or refer to the community forums dedicated to Arduino and electronics enthusiasts.