
How to Use Arduino Motor Shield (Rev3): Examples, Pinouts, and Specs
 Design with Arduino Motor Shield (Rev3) in Cirkit Designer
Introduction
The Arduino Motor Shield (Rev3) is an add-on board designed to simplify motor control in Arduino-based projects. It enables users to control DC motors, stepper motors, and servos with ease, making it ideal for robotics, automation, and other motor-driven applications. The shield features built-in protection circuits and power management, ensuring safe and efficient operation.
Explore Projects Built with Arduino Motor Shield (Rev3)
 Open Project in Cirkit Designer
 Open Project in Cirkit Designer
 Open Project in Cirkit Designer
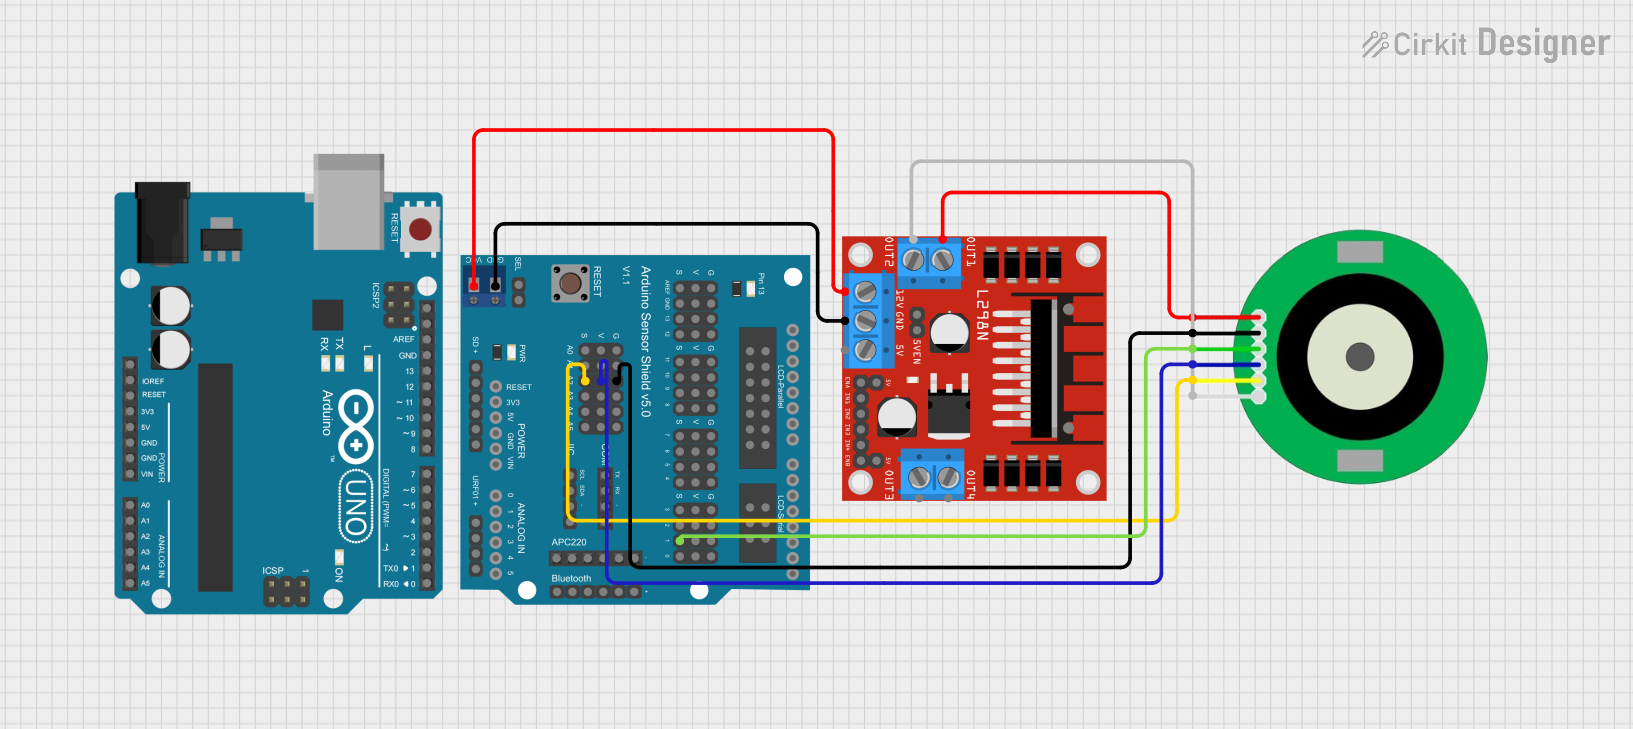 Open Project in Cirkit Designer
Explore Projects Built with Arduino Motor Shield (Rev3)
Open Project in Cirkit DesignerOpen Project in Cirkit DesignerOpen Project in Cirkit DesignerOpen Project in Cirkit DesignerCommon Applications and Use Cases
- Robotics projects requiring precise motor control
- Automated systems like conveyor belts or robotic arms
- DIY RC vehicles and drones
- Projects involving multiple motors, such as CNC machines or 3D printers
Technical Specifications
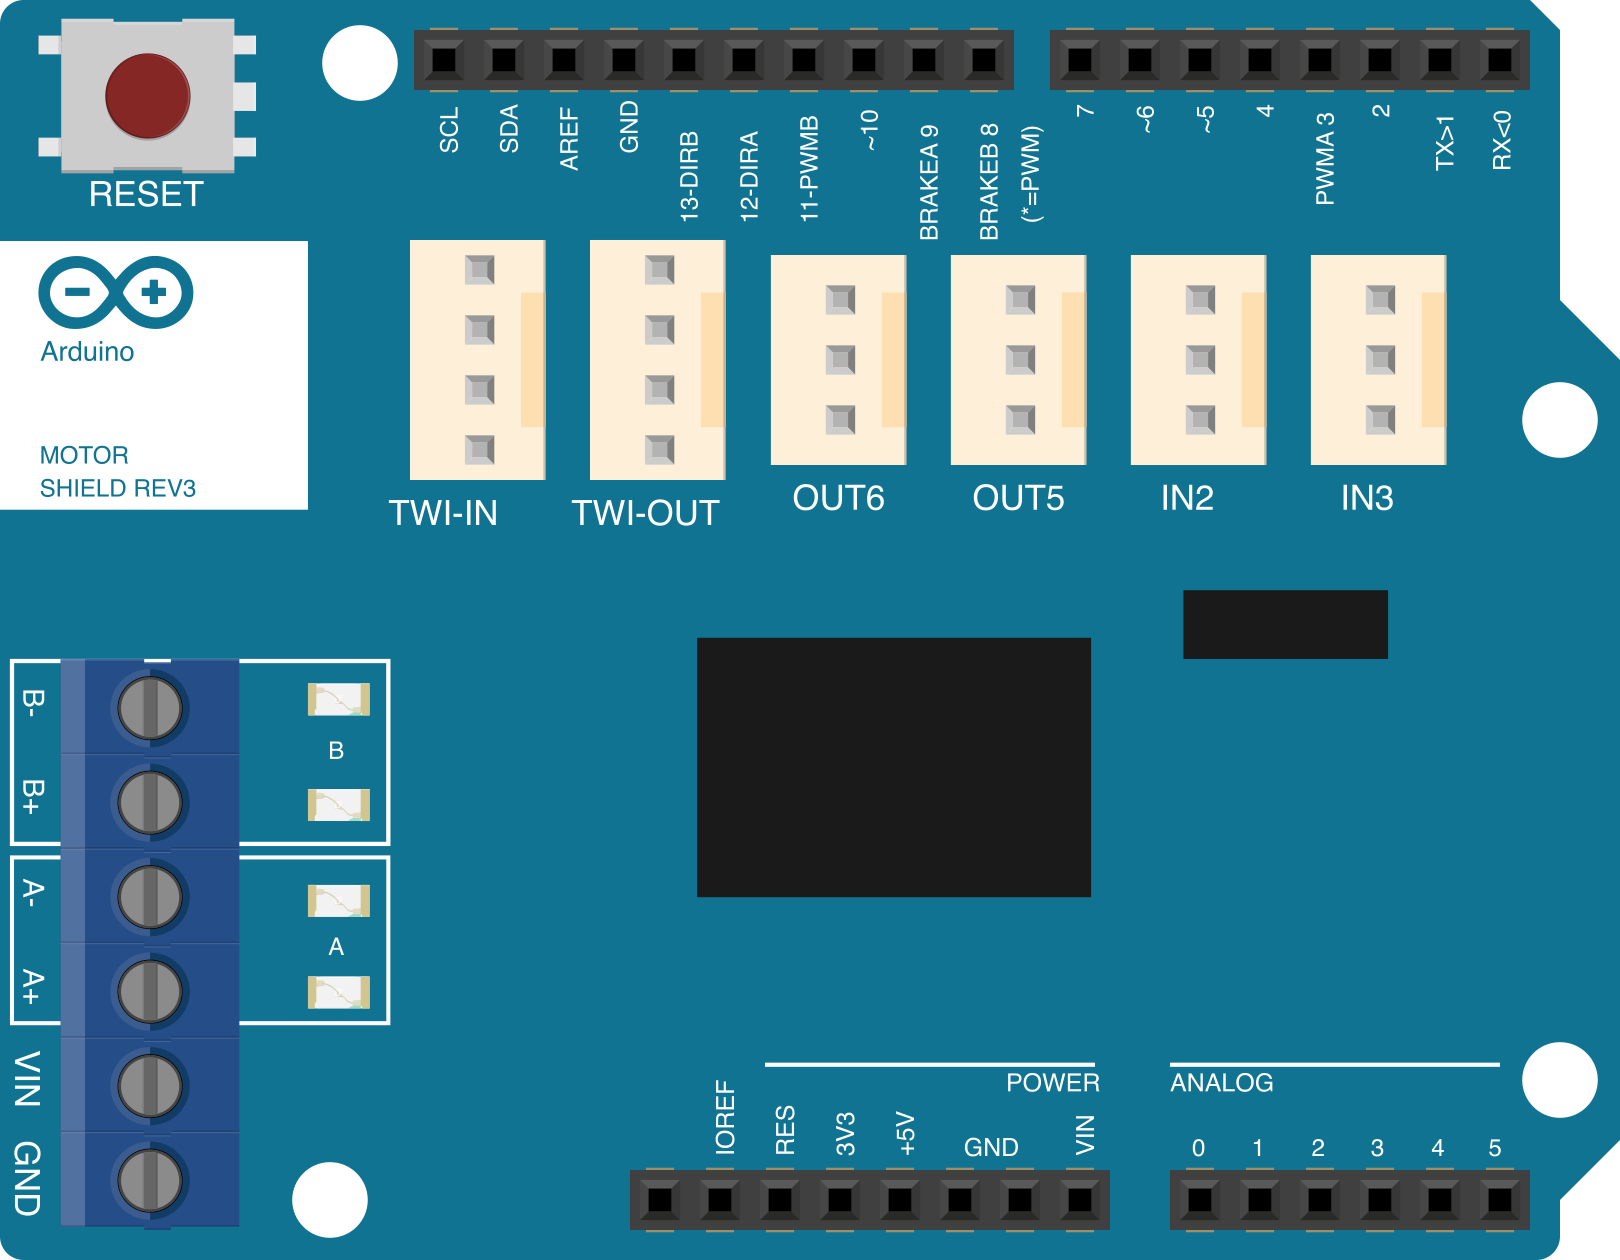
The Arduino Motor Shield (Rev3) is based on the L298P dual full-bridge driver, which allows independent or simultaneous control of two DC motors or one stepper motor. It also includes servo motor support via dedicated pins.
Key Technical Details
- Operating Voltage: 5V (from Arduino) or external power supply (up to 12V)
- Motor Driver IC: L298P
- Maximum Current per Channel: 2A (peak)
- PWM Frequency: Up to 20 kHz
- Control Pins: Digital pins 3, 5, 6, 9, 10, 11
- Servo Control Pins: 5V, GND, and signal pins for up to 2 servos
- External Power Input: 6V to 12V via screw terminal or barrel jack
- Dimensions: 68.6mm x 53.4mm
Pin Configuration and Descriptions
The Arduino Motor Shield (Rev3) uses the following pin configuration:
| Pin | Function |
|---|---|
| Digital 3 | PWM control for Motor A |
| Digital 5 | PWM control for Motor B |
| Digital 6 | Direction control for Motor A |
| Digital 9 | Direction control for Motor B |
| Digital 10 | Brake for Motor A |
| Digital 11 | Brake for Motor B |
| Servo 1 | Signal pin for Servo 1 (connected to Arduino pin 9) |
| Servo 2 | Signal pin for Servo 2 (connected to Arduino pin 10) |
| External Power | Screw terminal or barrel jack for external motor power (6V to 12V) |
| GND | Ground connection for external power supply |
Usage Instructions
How to Use the Arduino Motor Shield (Rev3) in a Circuit
- Mount the Shield: Place the Arduino Motor Shield (Rev3) on top of an Arduino board, ensuring the pins align correctly.
- Connect Motors:
- For DC motors, connect the motor terminals to the
MOTOR AandMOTOR Bscrew terminals. - For stepper motors, connect the motor's four wires to the
MOTOR AandMOTOR Bterminals. - For servos, connect the servo's signal wire to the
Servo 1orServo 2pin.
- For DC motors, connect the motor terminals to the
- Power the Motors:
- If the motors require more power than the Arduino can provide, connect an external power supply (6V to 12V) to the screw terminal or barrel jack.
- Program the Arduino:
- Use the Arduino IDE to write a sketch that controls the motors. The shield uses PWM signals for speed control and digital signals for direction.
Important Considerations and Best Practices
- Power Supply: Ensure the external power supply matches the voltage and current requirements of your motors.
- Heat Dissipation: The L298P driver may heat up during operation. Use a heatsink if necessary for prolonged use.
- Avoid Overloading: Do not exceed the maximum current rating of 2A per channel to prevent damage to the shield.
- Servo Power: Servos draw power from the Arduino's 5V pin. Ensure the Arduino's power supply can handle the additional current.
Example Code for Arduino UNO
Below is an example sketch to control two DC motors using the Arduino Motor Shield (Rev3):
// Example code to control two DC motors with the Arduino Motor Shield (Rev3)

// Define motor control pins
const int motorA_pwm = 3;  // PWM pin for Motor A
const int motorA_dir = 6;  // Direction pin for Motor A
const int motorB_pwm = 5;  // PWM pin for Motor B
const int motorB_dir = 9;  // Direction pin for Motor B

void setup() {
  // Set motor control pins as outputs
  pinMode(motorA_pwm, OUTPUT);
  pinMode(motorA_dir, OUTPUT);
  pinMode(motorB_pwm, OUTPUT);
  pinMode(motorB_dir, OUTPUT);
}

void loop() {
  // Motor A: Forward at 50% speed
  digitalWrite(motorA_dir, HIGH);  // Set direction
  analogWrite(motorA_pwm, 128);   // Set speed (0-255)

  // Motor B: Reverse at 75% speed
  digitalWrite(motorB_dir, LOW);  // Set direction
  analogWrite(motorB_pwm, 192);  // Set speed (0-255)

  delay(2000);  // Run motors for 2 seconds

  // Stop both motors
  analogWrite(motorA_pwm, 0);
  analogWrite(motorB_pwm, 0);

  delay(2000);  // Wait for 2 seconds before repeating
}
Troubleshooting and FAQs
Common Issues and Solutions
Motors Not Running:
- Ensure the shield is properly seated on the Arduino board.
- Check the motor connections and ensure they are secure.
- Verify that the external power supply is connected and within the required voltage range.
Motors Running in the Wrong Direction:
- Swap the motor's terminal connections or adjust the direction control pins in the code.
Arduino Resets When Motors Start:
- This may occur if the motors draw too much current. Use an external power supply to power the motors.
Servo Motors Not Responding:
- Ensure the servo signal wire is connected to the correct pin.
- Verify that the Arduino's 5V pin can supply enough current for the servos.
FAQs
Q: Can I control more than two DC motors with this shield?
A: No, the Arduino Motor Shield (Rev3) is designed to control up to two DC motors or one stepper motor. For additional motors, consider using multiple shields or a different motor driver.
Q: Can I use this shield with an Arduino Mega?
A: Yes, the shield is compatible with the Arduino Mega. However, ensure the pins used for motor control match the Mega's pinout.
Q: Is it possible to control both DC motors and servos simultaneously?
A: Yes, the shield supports simultaneous control of two DC motors and up to two servos.
Q: What happens if I exceed the current limit?
A: Exceeding the 2A per channel limit may damage the L298P driver. Always ensure your motors operate within the specified current range.