How to Use ATHENA SHIELD: Examples, Pinouts, and Specs
Introduction
The ATHENA SHIELD, manufactured by Bernard (Part ID: Dous), is a versatile expansion board designed to enhance the functionality of microcontroller-based projects. It integrates a variety of features, including sensors, communication interfaces, and power management systems, making it an ideal choice for prototyping and development. The shield is compatible with popular microcontrollers, such as the Arduino UNO, and simplifies the process of adding advanced capabilities to your projects.
Explore Projects Built with ATHENA SHIELD

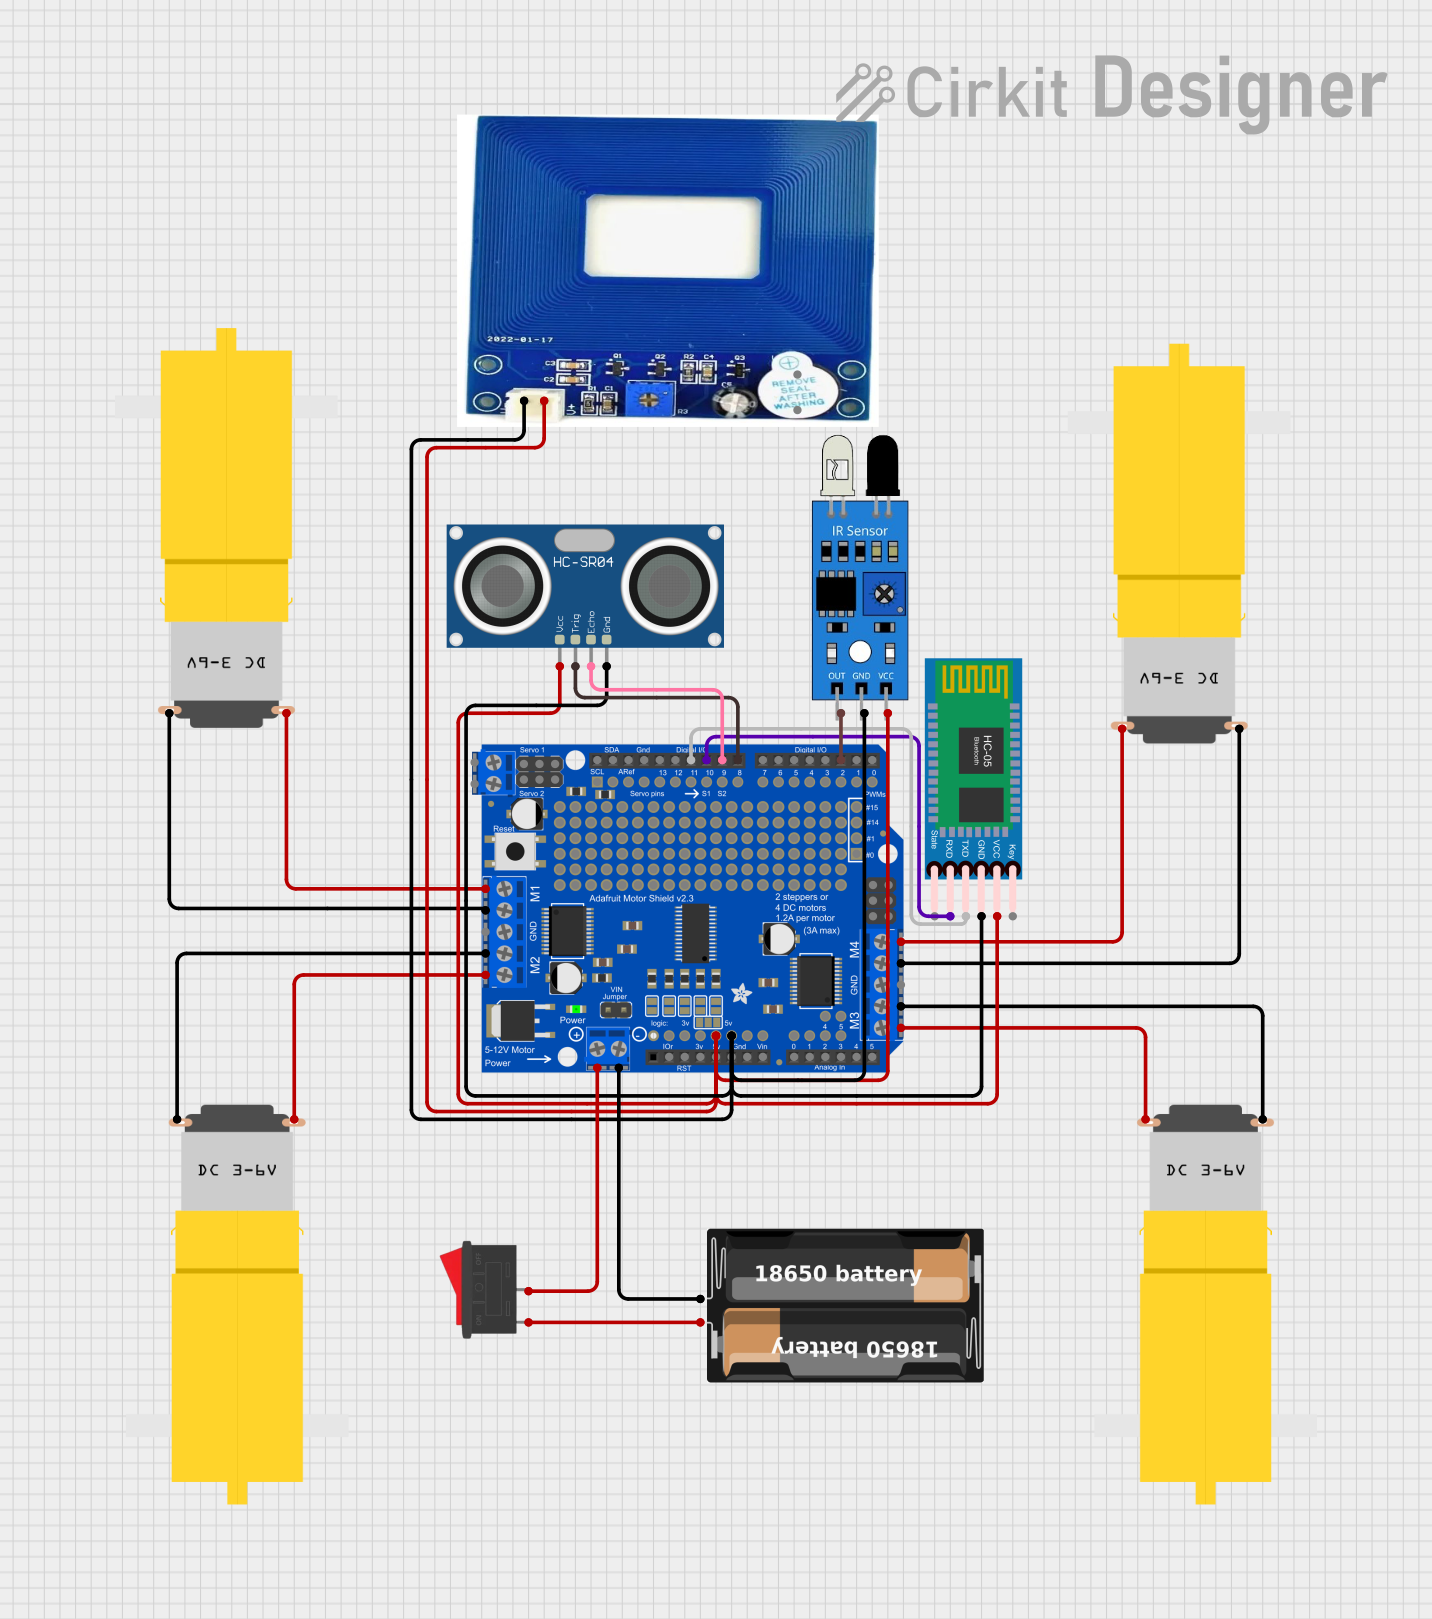
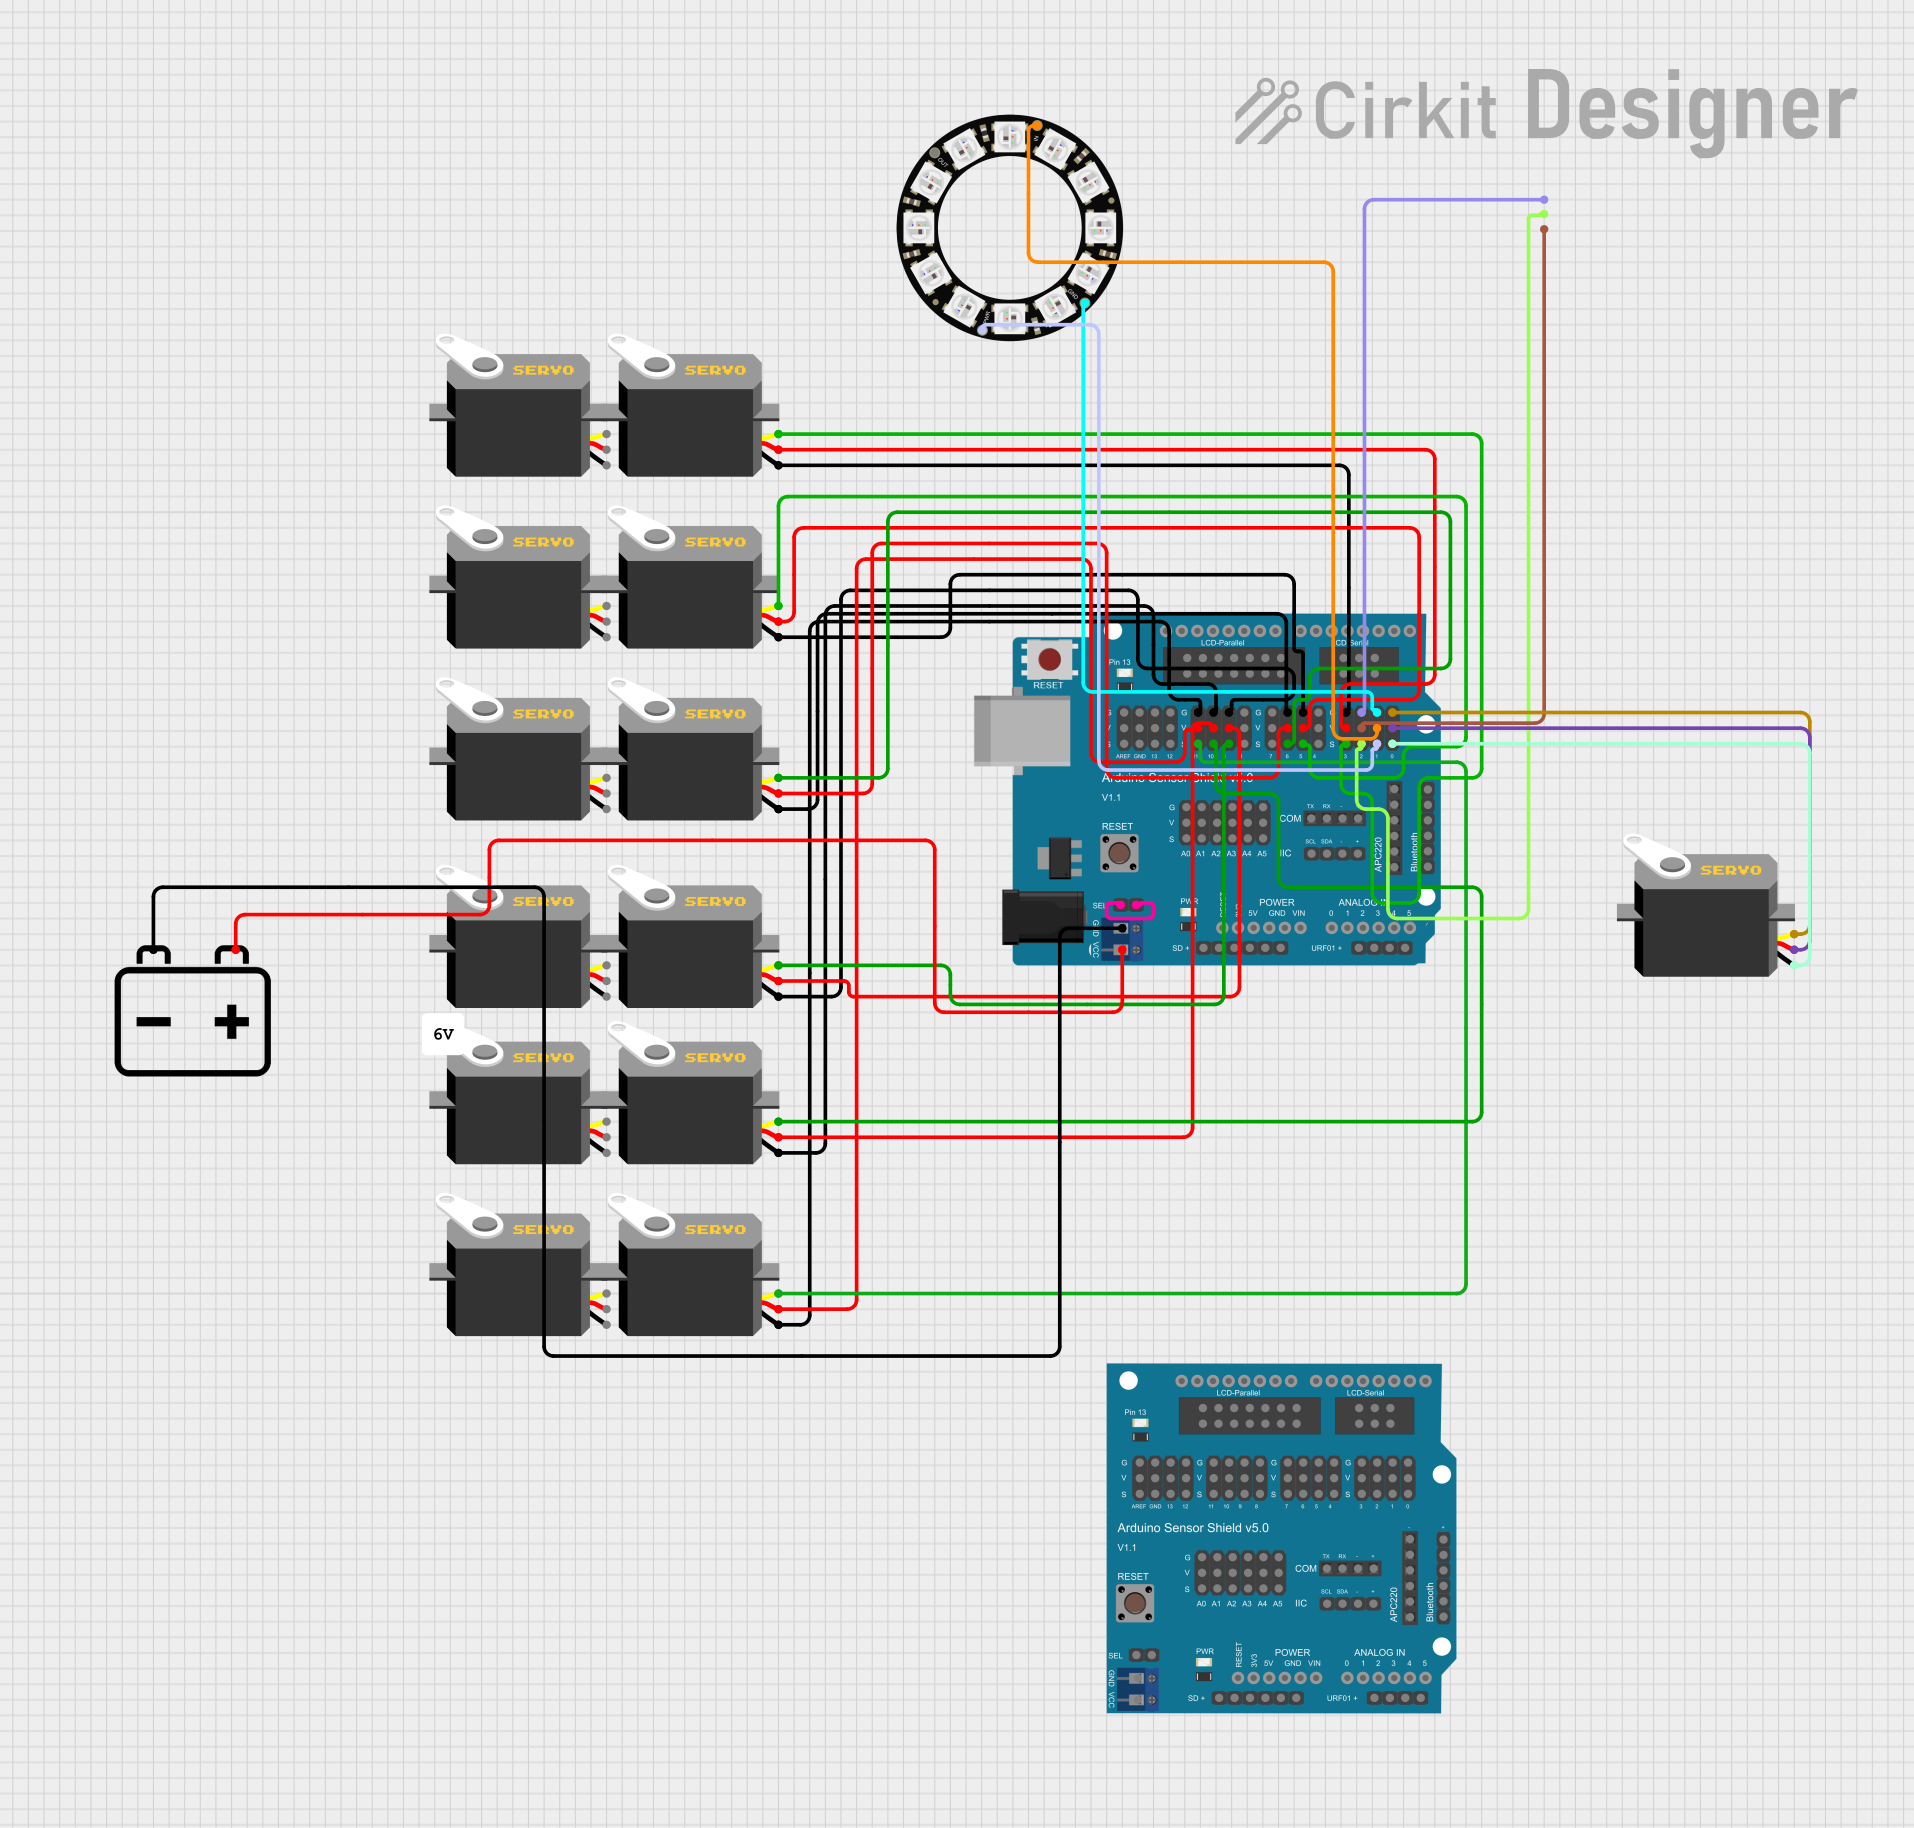
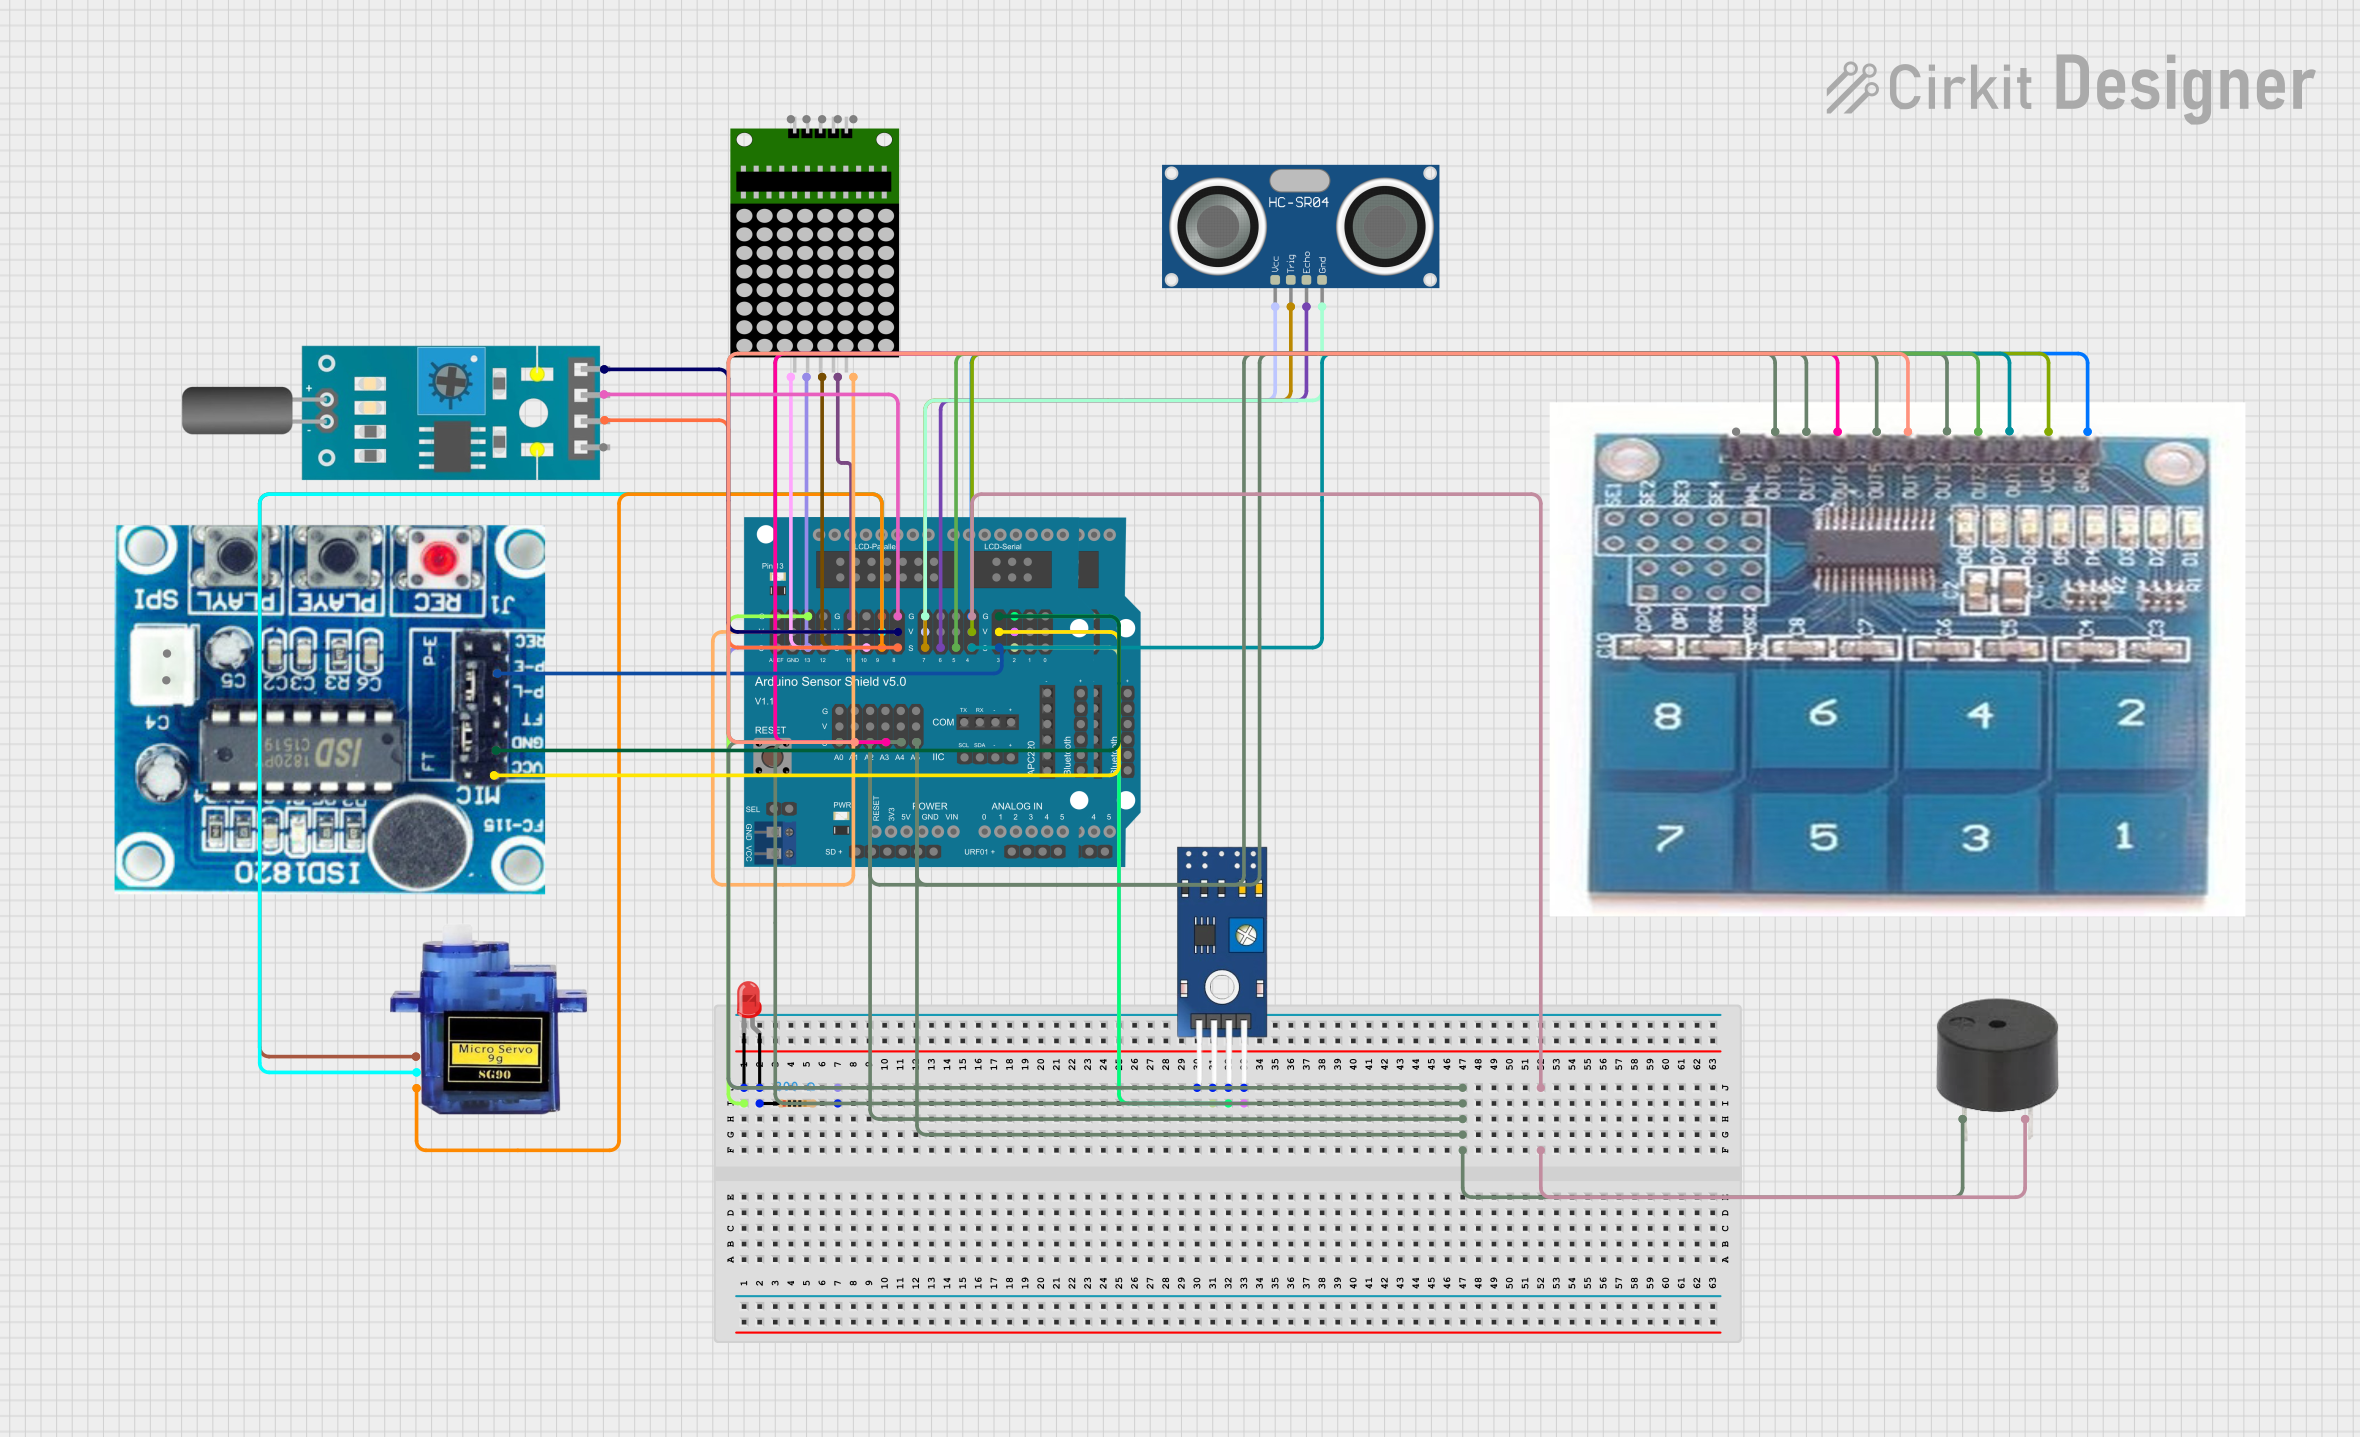
Explore Projects Built with ATHENA SHIELD
Common Applications and Use Cases
- IoT (Internet of Things) projects requiring multiple sensors and communication modules.
- Robotics applications needing motor control and sensor integration.
- Prototyping and testing of embedded systems.
- Educational projects for learning microcontroller programming and interfacing.
Technical Specifications
Key Technical Details
- Operating Voltage: 5V (compatible with Arduino UNO power supply).
- Communication Interfaces: I2C, SPI, UART.
- Integrated Sensors: Temperature, humidity, and light sensors.
- Power Management: Onboard voltage regulator (3.3V and 5V outputs).
- Dimensions: 68.6mm x 53.4mm (standard Arduino shield size).
- Weight: 25g.
- Operating Temperature Range: -20°C to 70°C.
Pin Configuration and Descriptions
The ATHENA SHIELD connects directly to the Arduino UNO headers. Below is the pin configuration:
| Pin | Name | Description |
|---|---|---|
| A0-A5 | Analog Inputs | Analog input pins for connecting external sensors or reading analog signals. |
| D0-D13 | Digital I/O | Digital input/output pins for general-purpose use. |
| SDA | I2C Data | Data line for I2C communication. |
| SCL | I2C Clock | Clock line for I2C communication. |
| TX | UART Transmit | Transmit pin for serial communication. |
| RX | UART Receive | Receive pin for serial communication. |
| 3.3V | Power Output | 3.3V regulated output for powering external components. |
| 5V | Power Output | 5V regulated output for powering external components. |
| GND | Ground | Common ground connection. |
| VIN | Voltage Input | Input voltage for powering the shield (7-12V recommended). |
Usage Instructions
How to Use the ATHENA SHIELD in a Circuit
Mounting the Shield:
- Align the ATHENA SHIELD with the Arduino UNO headers and gently press it into place.
- Ensure all pins are properly seated to avoid loose connections.
Powering the Shield:
- The shield can be powered through the Arduino UNO's power supply (via USB or external adapter).
- Alternatively, supply power directly to the VIN pin (7-12V recommended).
Connecting Sensors and Modules:
- Use the analog (A0-A5) and digital (D0-D13) pins to connect external sensors or actuators.
- For I2C devices, connect them to the SDA and SCL pins.
Programming the Microcontroller:
- Write your code in the Arduino IDE or other compatible environments.
- Upload the code to the Arduino UNO while the shield is connected.
Example Code for Reading Sensors: Below is an example of how to read data from the onboard temperature sensor using an Arduino UNO:
// Include the necessary library for I2C communication
#include <Wire.h>

// Define the I2C address of the temperature sensor
#define TEMP_SENSOR_ADDR 0x48

void setup() {
  // Initialize serial communication for debugging
  Serial.begin(9600);

  // Initialize I2C communication
  Wire.begin();

  // Print a message to indicate setup is complete
  Serial.println("ATHENA SHIELD Temperature Sensor Example");
}

void loop() {
  // Request 2 bytes of data from the temperature sensor
  Wire.beginTransmission(TEMP_SENSOR_ADDR);
  Wire.write(0x00); // Command to read temperature
  Wire.endTransmission();
  Wire.requestFrom(TEMP_SENSOR_ADDR, 2);

  // Wait for data to be available
  if (Wire.available() == 2) {
    // Read the two bytes of temperature data
    int tempHigh = Wire.read();
    int tempLow = Wire.read();

    // Combine the bytes and convert to Celsius
    float temperature = ((tempHigh << 8) | tempLow) / 256.0;

    // Print the temperature to the serial monitor
    Serial.print("Temperature: ");
    Serial.print(temperature);
    Serial.println(" °C");
  }

  // Wait 1 second before the next reading
  delay(1000);
}
Important Considerations and Best Practices
- Ensure the shield is properly aligned with the Arduino UNO headers to avoid damaging the pins.
- Avoid exceeding the recommended input voltage (12V) to prevent damage to the onboard voltage regulator.
- Use appropriate pull-up resistors for I2C communication if required by external devices.
- Keep the shield in a dry and dust-free environment to maintain optimal performance.
Troubleshooting and FAQs
Common Issues and Solutions
The shield is not powering on:
- Ensure the Arduino UNO is properly powered via USB or an external adapter.
- Check the VIN pin for proper voltage input (7-12V recommended).
Sensors are not providing data:
- Verify the connections to the analog or digital pins.
- Check the I2C address of the sensor and ensure it matches the code.
Communication interfaces (I2C, SPI, UART) are not working:
- Confirm that the correct pins are being used for the desired interface.
- Ensure no conflicting devices are connected to the same communication bus.
The shield is overheating:
- Check for excessive input voltage on the VIN pin.
- Ensure the shield is not drawing more current than the Arduino UNO can supply.
FAQs
Q: Can the ATHENA SHIELD be used with microcontrollers other than the Arduino UNO?
A: Yes, the shield is compatible with other Arduino boards and microcontrollers that follow the same pinout standard.
Q: Does the shield support 3.3V-only microcontrollers?
A: Yes, the onboard voltage regulator provides both 3.3V and 5V outputs for compatibility with a wide range of devices.
Q: Can I stack multiple shields on top of the ATHENA SHIELD?
A: Yes, the shield supports stacking, but ensure that the combined current draw does not exceed the power supply limits.
Q: Is the shield compatible with wireless communication modules?
A: Yes, the shield provides I2C, SPI, and UART interfaces, which can be used to connect wireless modules like Bluetooth or Wi-Fi.
This concludes the documentation for the ATHENA SHIELD. For further assistance, refer to the manufacturer's support resources.