How to Use sensor ultrasonik US-026: Examples, Pinouts, and Specs
Introduction
The US-026 is an ultrasonic distance sensor designed to measure the distance to an object using sound waves. It emits ultrasonic pulses and calculates the time it takes for the echo to return, enabling accurate distance measurements. This sensor is widely used in robotics, automation, and IoT applications for tasks such as obstacle detection, distance measurement, and object tracking.
Explore Projects Built with sensor ultrasonik US-026
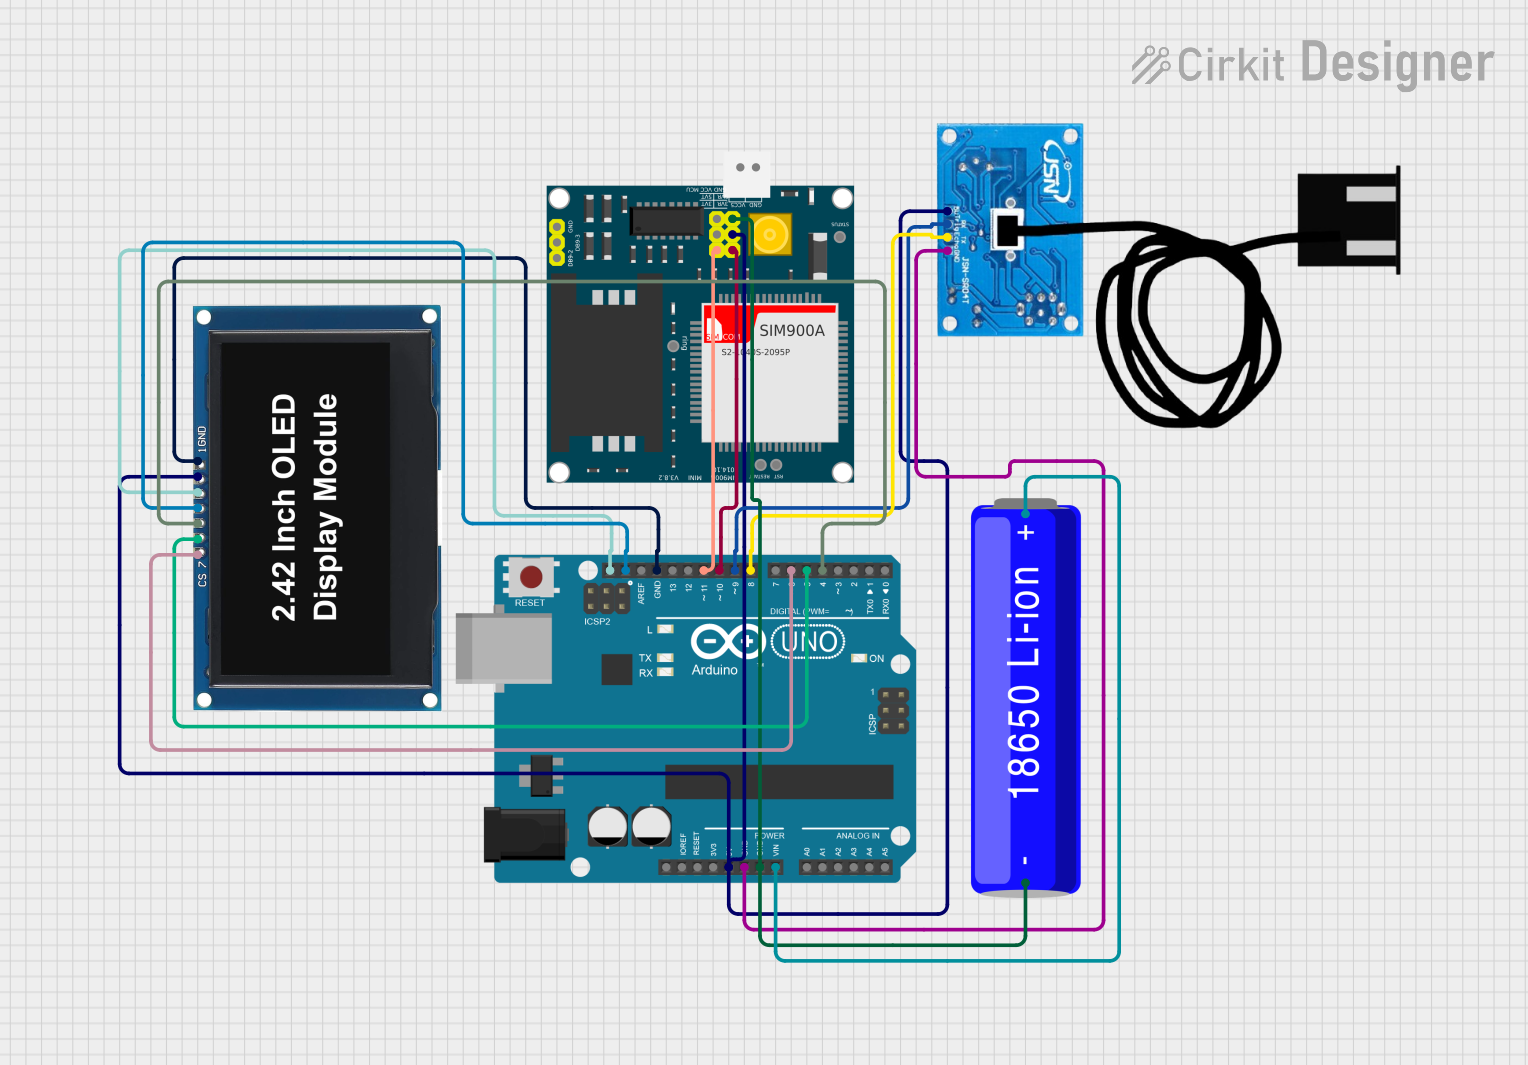
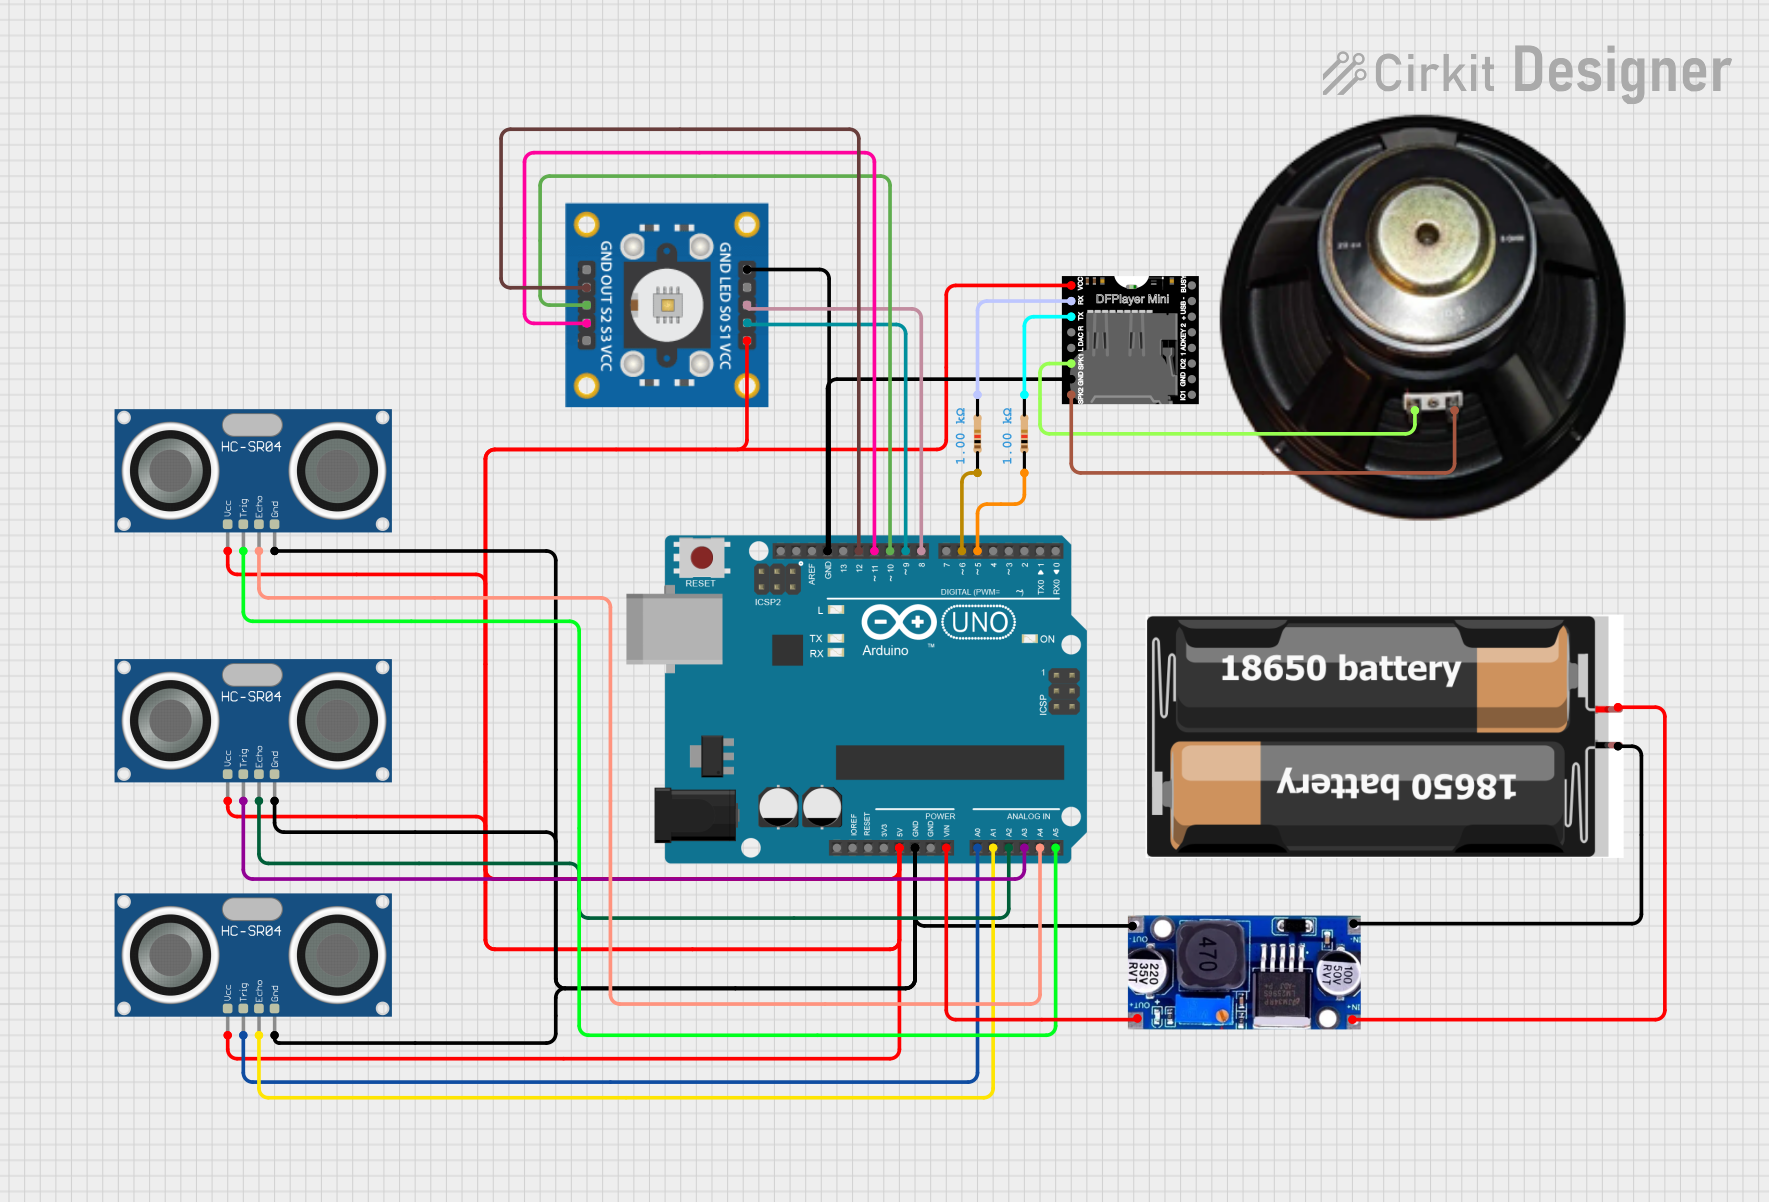

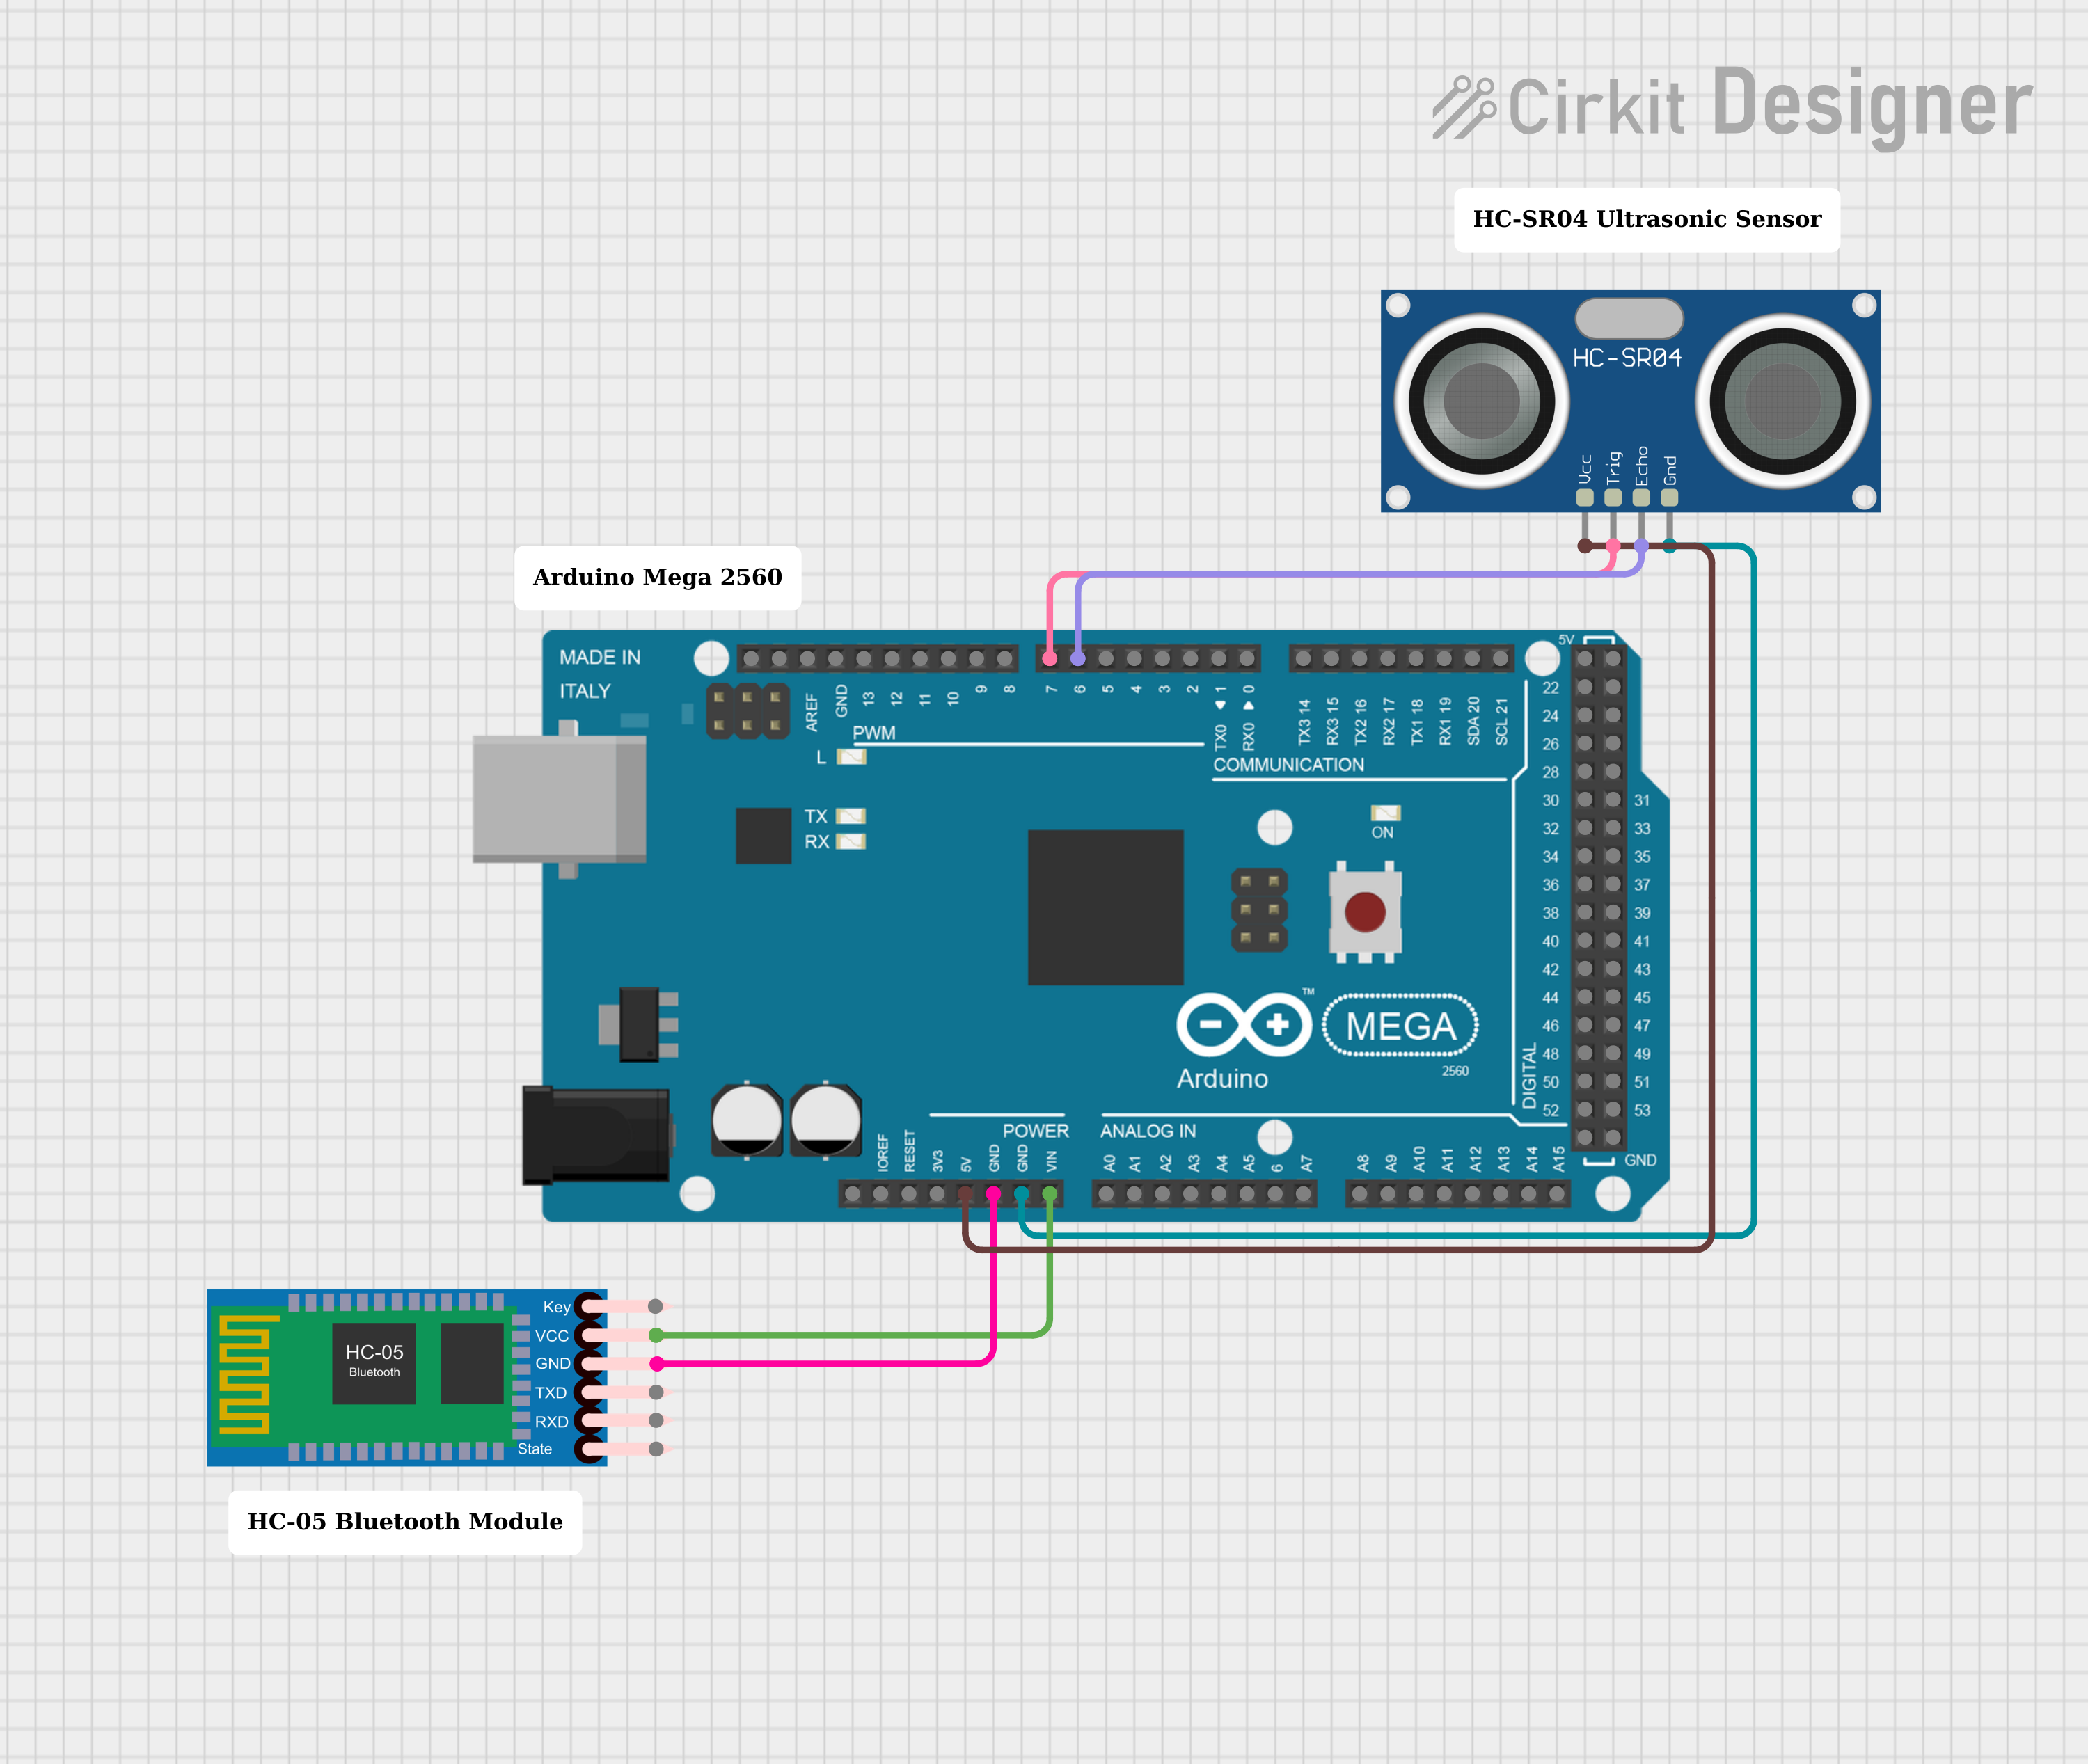
Explore Projects Built with sensor ultrasonik US-026
Common Applications
- Obstacle detection in robotics
- Distance measurement in automation systems
- Parking assistance systems
- Liquid level measurement
- Security and proximity sensing
Technical Specifications
The US-026 sensor is a reliable and versatile component with the following key specifications:
| Parameter | Value |
|---|---|
| Operating Voltage | 3.3V to 5V |
| Operating Current | ≤ 15mA |
| Measuring Range | 2cm to 450cm |
| Measuring Accuracy | ±0.3cm |
| Operating Frequency | 40kHz |
| Output Signal | PWM or UART (selectable) |
| Communication Protocol | UART (9600 baud rate) |
| Dimensions | 45mm x 20mm x 15mm |
| Operating Temperature | -10°C to 70°C |
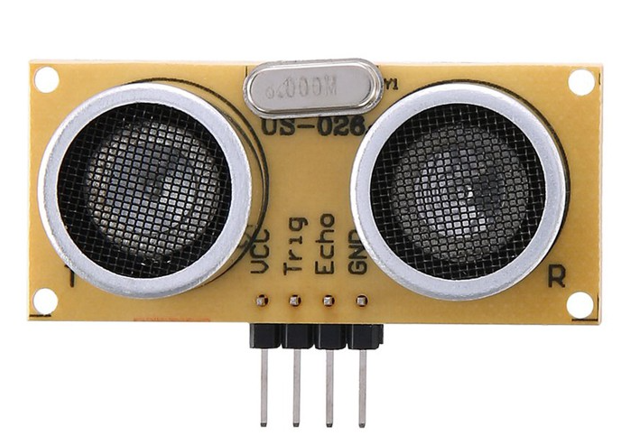
Pin Configuration
The US-026 sensor has four pins, as described in the table below:
| Pin | Name | Description |
|---|---|---|
| 1 | VCC | Power supply pin. Connect to 3.3V or 5V. |
| 2 | TRIG/TX | Trigger pin for PWM mode or TX pin for UART mode. Sends trigger signal or data. |
| 3 | ECHO/RX | Echo pin for PWM mode or RX pin for UART mode. Receives echo signal or data. |
| 4 | GND | Ground pin. Connect to the ground of the circuit. |
Usage Instructions
The US-026 sensor can operate in two modes: PWM mode and UART mode. Below are the steps to use the sensor in a circuit:
Using the Sensor in PWM Mode
Wiring:
- Connect the
VCCpin to a 3.3V or 5V power supply. - Connect the
GNDpin to the ground of the circuit. - Connect the
TRIGpin to a digital output pin of your microcontroller. - Connect the
ECHOpin to a digital input pin of your microcontroller.
- Connect the
Triggering the Sensor:
- Send a 10µs HIGH pulse to the
TRIGpin to initiate a measurement. - The sensor will emit an ultrasonic pulse and set the
ECHOpin HIGH for a duration proportional to the distance.
- Send a 10µs HIGH pulse to the
Calculating Distance:
- Measure the duration of the HIGH signal on the
ECHOpin. - Use the formula:
[ \text{Distance (cm)} = \frac{\text{Time (µs)} \times 0.034}{2} ] where 0.034 cm/µs is the speed of sound in air.
- Measure the duration of the HIGH signal on the
Using the Sensor in UART Mode
Wiring:
- Connect the
VCCandGNDpins as described above. - Connect the
TXpin to the RX pin of your microcontroller. - Connect the
RXpin to the TX pin of your microcontroller.
- Connect the
Communication:
- Configure the UART communication at a baud rate of 9600.
- The sensor will send distance data in a specific format (e.g., ASCII or binary).
Example Code for Arduino UNO (PWM Mode)
// Define pins for the US-026 sensor
const int trigPin = 9; // TRIG pin connected to digital pin 9
const int echoPin = 10; // ECHO pin connected to digital pin 10

void setup() {
  pinMode(trigPin, OUTPUT); // Set TRIG pin as output
  pinMode(echoPin, INPUT);  // Set ECHO pin as input
  Serial.begin(9600);       // Initialize serial communication
}

void loop() {
  // Send a 10µs HIGH pulse to the TRIG pin
  digitalWrite(trigPin, LOW);
  delayMicroseconds(2);
  digitalWrite(trigPin, HIGH);
  delayMicroseconds(10);
  digitalWrite(trigPin, LOW);

  // Measure the duration of the HIGH signal on the ECHO pin
  long duration = pulseIn(echoPin, HIGH);

  // Calculate the distance in cm
  float distance = (duration * 0.034) / 2;

  // Print the distance to the Serial Monitor
  Serial.print("Distance: ");
  Serial.print(distance);
  Serial.println(" cm");

  delay(500); // Wait for 500ms before the next measurement
}
Important Considerations
- Ensure the sensor is not obstructed by objects that could interfere with the ultrasonic waves.
- Avoid using the sensor in environments with high humidity or extreme temperatures, as this may affect accuracy.
- Use decoupling capacitors near the power supply pins to reduce noise.
Troubleshooting and FAQs
Common Issues and Solutions
No Output or Incorrect Readings:
- Ensure the sensor is powered correctly (3.3V or 5V).
- Verify the connections to the microcontroller.
- Check for loose wires or poor soldering.
Inconsistent Measurements:
- Ensure there are no obstacles near the sensor that could cause false echoes.
- Use a stable power supply to avoid voltage fluctuations.
Sensor Not Responding in UART Mode:
- Verify the baud rate is set to 9600.
- Check the TX and RX connections between the sensor and the microcontroller.
FAQs
Q: Can the US-026 measure distances less than 2cm?
A: No, the minimum measurable distance is 2cm. Objects closer than this may not be detected accurately.
Q: Can I use the US-026 with a 3.3V microcontroller?
A: Yes, the sensor supports both 3.3V and 5V operation. Ensure the logic levels are compatible.
Q: How do I switch between PWM and UART modes?
A: The mode is typically selected by configuring the sensor's pins or using specific commands. Refer to the manufacturer's datasheet for details.
Q: What is the maximum range of the US-026?
A: The maximum range is 450cm, but accuracy may decrease at longer distances.