How to Use YL-83 Rain Sensor: Examples, Pinouts, and Specs
Introduction
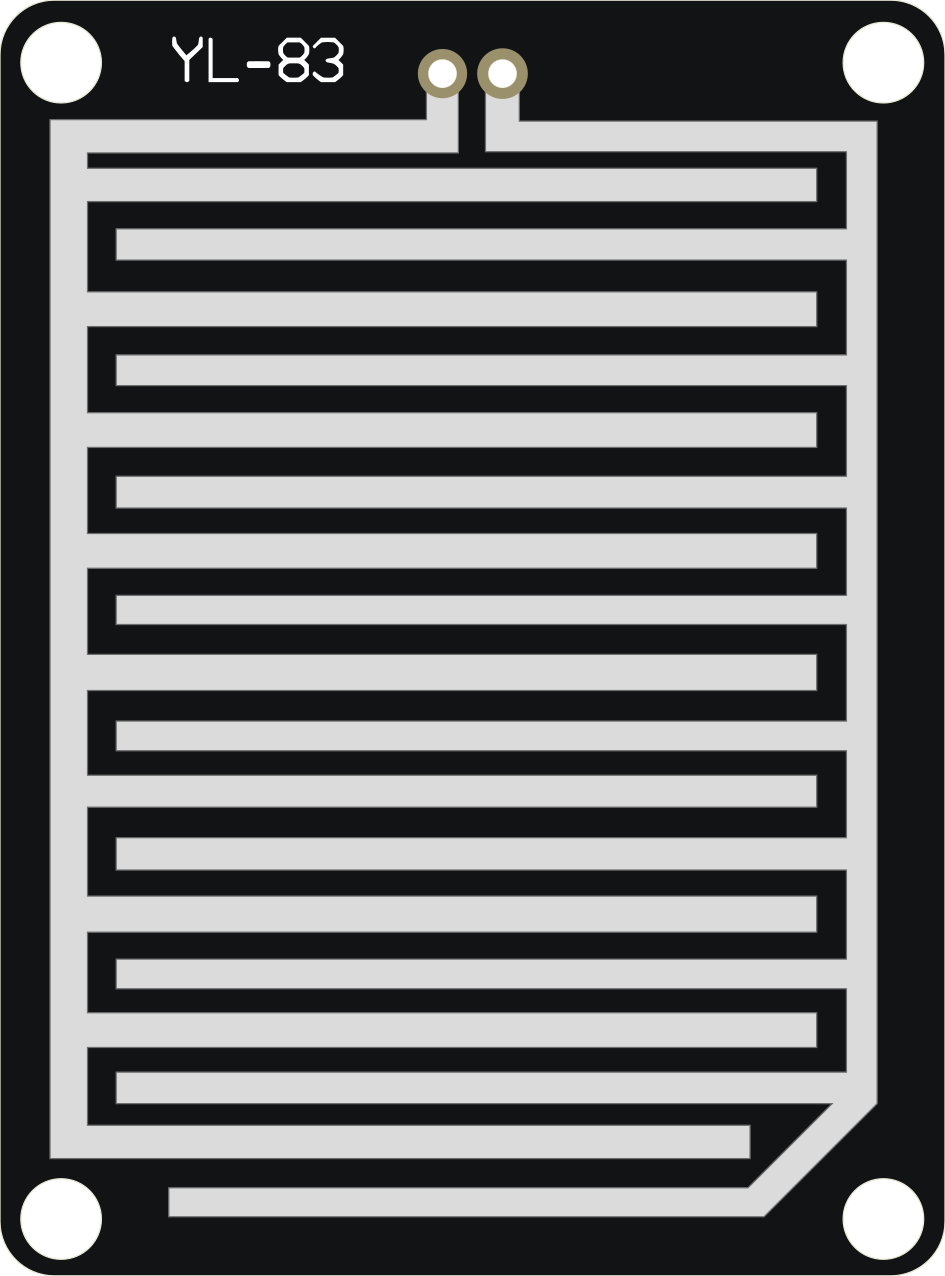
The YL-83 Rain Sensor is a moisture detection device designed to sense rainfall and trigger a response in electronic circuits. It consists of two main parts: a conductive sensor pad and a control module. The sensor pad detects the presence of water through its conductive traces, while the control module processes the signal and provides both analog and digital outputs.
Explore Projects Built with YL-83 Rain Sensor
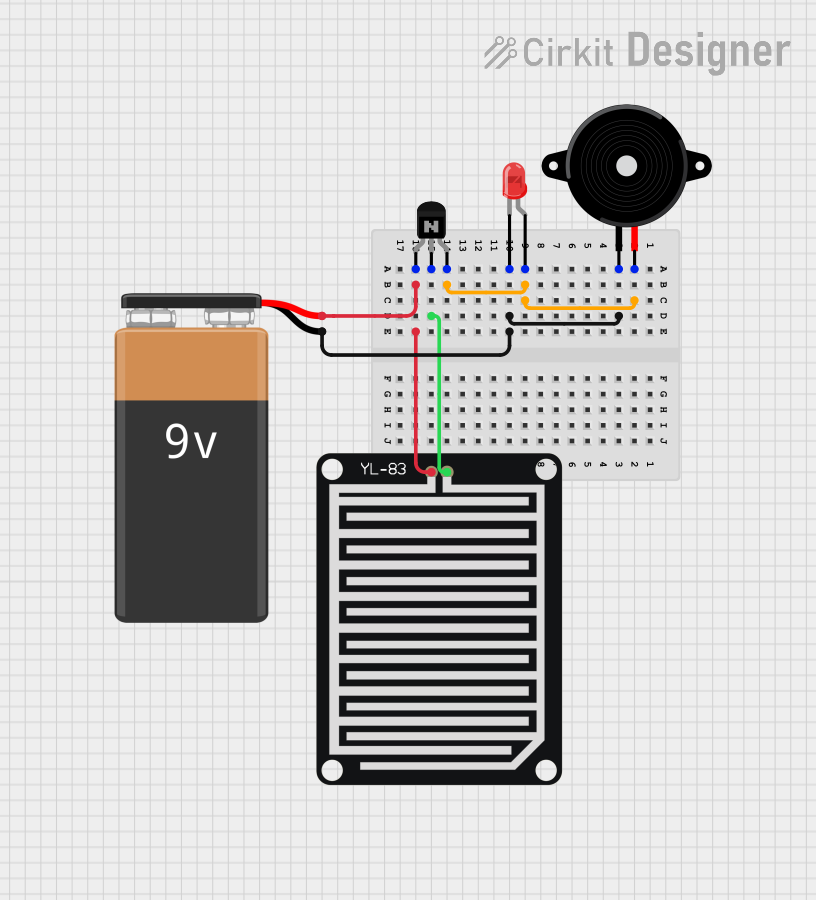
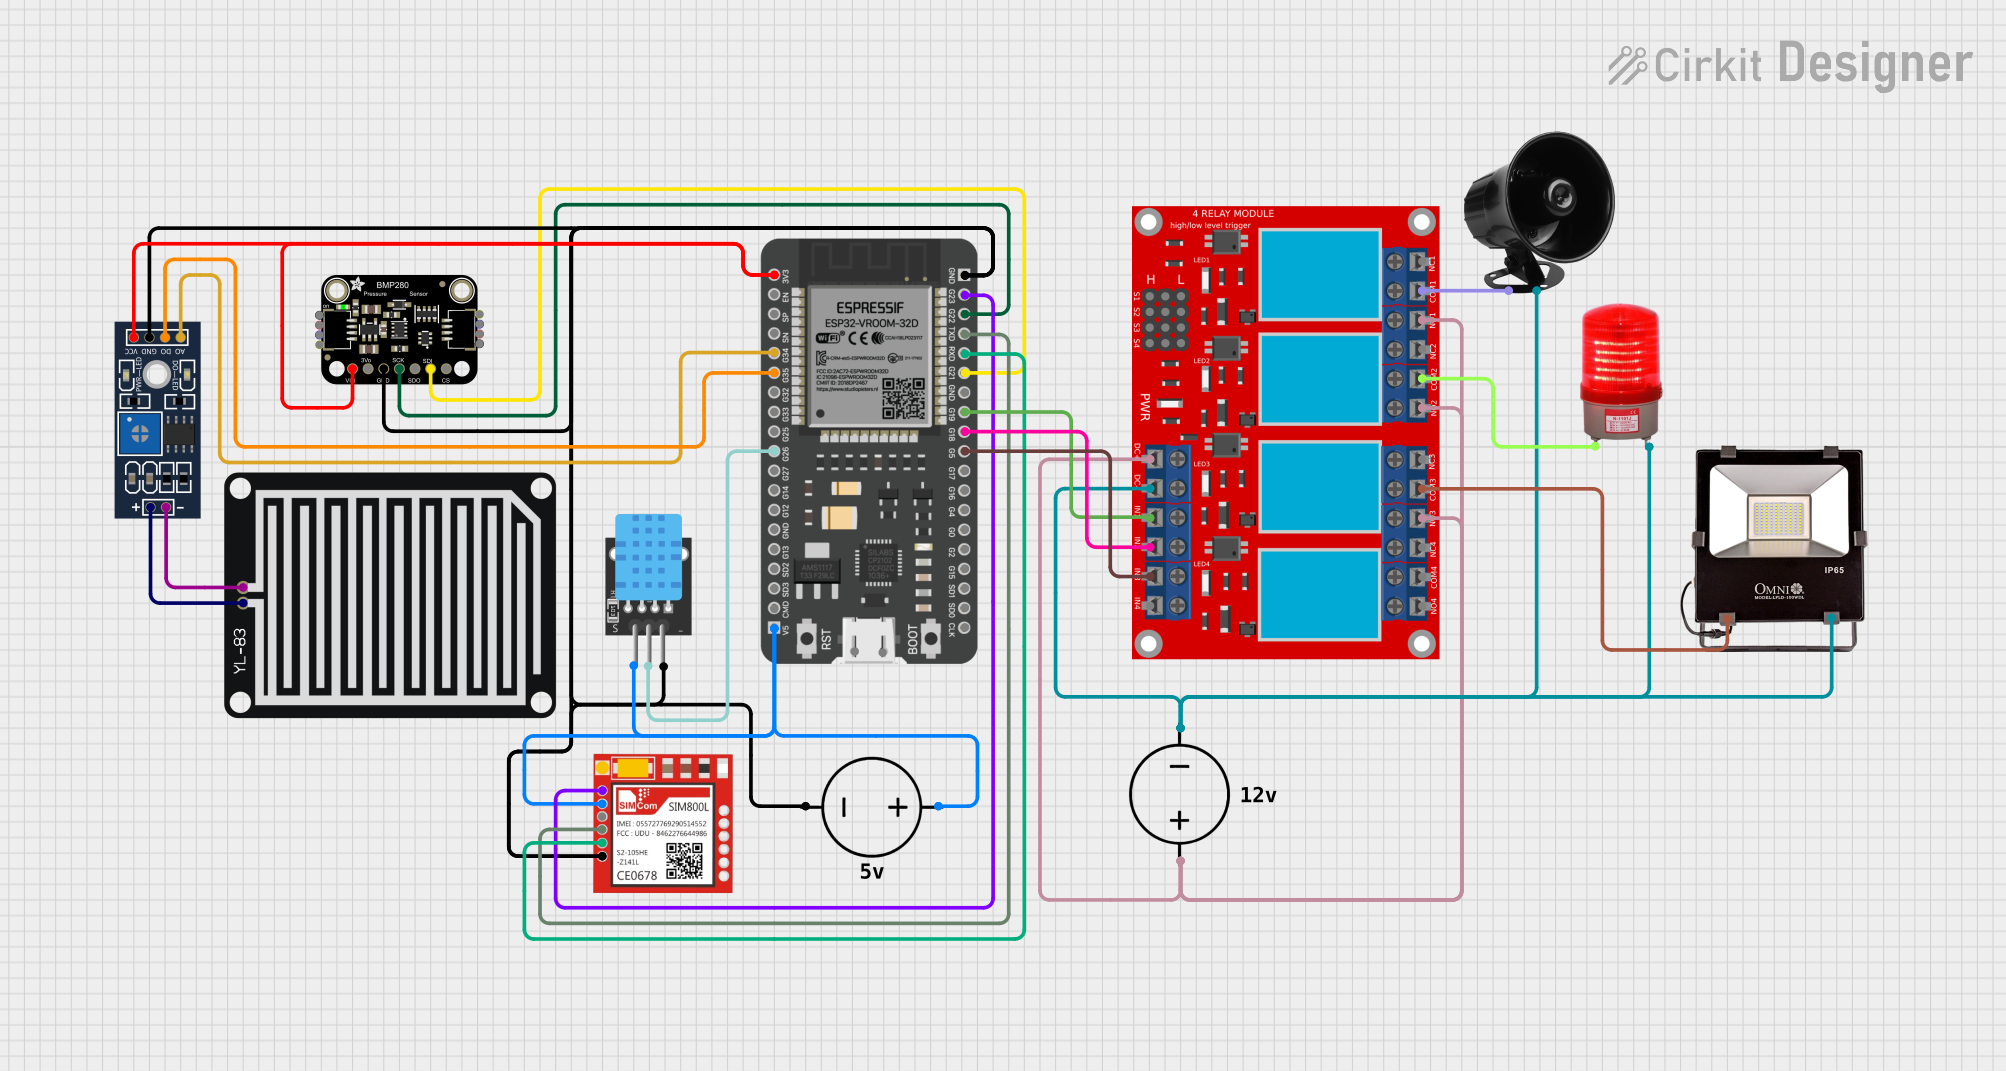
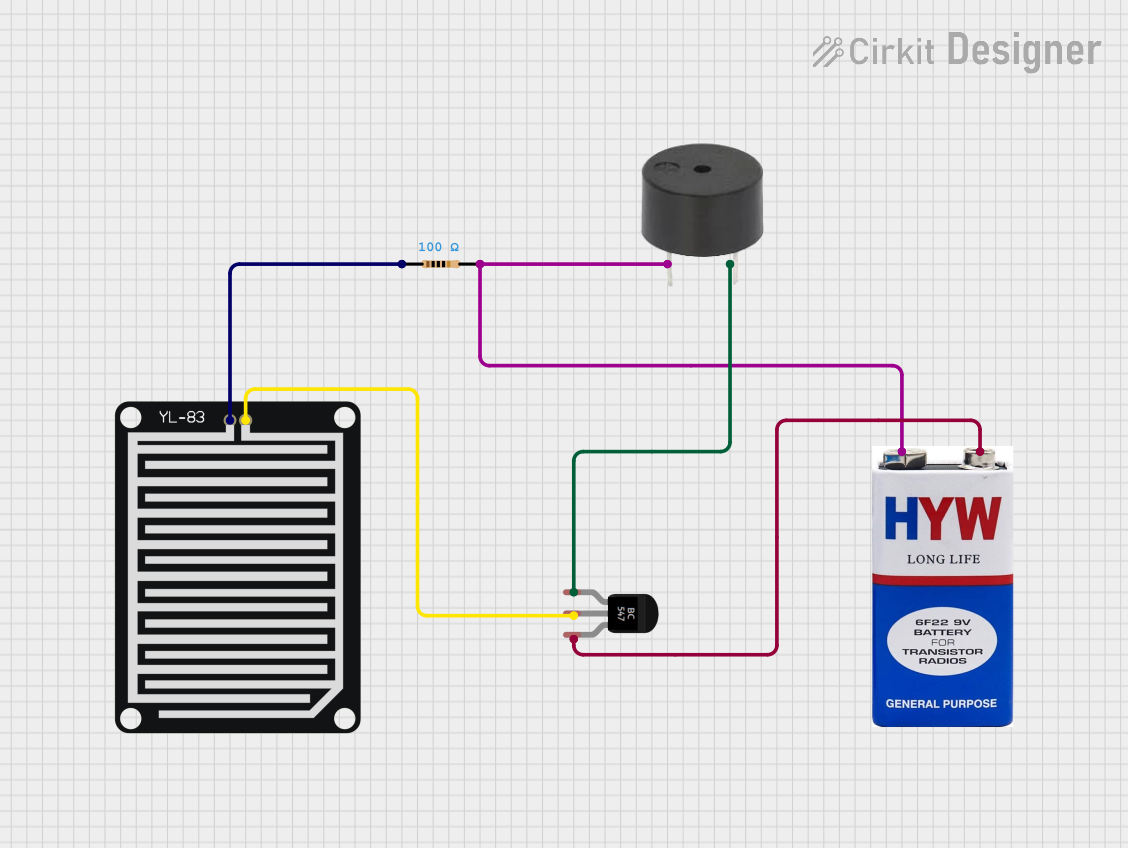
Explore Projects Built with YL-83 Rain Sensor
Common Applications and Use Cases
- Automatic irrigation systems
- Weather monitoring and rainfall detection
- Smart home automation (e.g., closing windows during rain)
- Water leakage detection
- Environmental monitoring systems
Technical Specifications
The YL-83 Rain Sensor is a simple yet versatile component. Below are its key technical details:
General Specifications
- Operating Voltage: 3.3V to 5V DC
- Output Types: Analog (AO) and Digital (DO)
- Control Module Dimensions: 3.1 cm x 1.4 cm
- Sensor Pad Dimensions: 5.4 cm x 4.0 cm
- Output Current: Up to 100 mA
- Adjustable Sensitivity: Via onboard potentiometer
- Indicator LEDs: Power (red) and Digital Output Status (green)
Pin Configuration and Descriptions
Control Module Pinout
| Pin Name | Description |
|---|---|
| VCC | Power supply input (3.3V to 5V DC). |
| GND | Ground connection. |
| AO | Analog output pin. Provides a voltage proportional to the water detected. |
| DO | Digital output pin. Outputs HIGH or LOW based on the set threshold. |
Sensor Pad Connector
| Pin Name | Description |
|---|---|
| S | Signal pin. Connects to the control module for data transmission. |
| + | Power supply input (3.3V to 5V DC). |
| - | Ground connection. |
Usage Instructions
The YL-83 Rain Sensor is easy to integrate into electronic circuits. Follow the steps below to use it effectively:
Connecting the Sensor
Power the Sensor:
- Connect the
VCCpin of the control module to a 3.3V or 5V power source. - Connect the
GNDpin to the ground of your circuit.
- Connect the
Connect the Outputs:
- Use the
AOpin if you need an analog signal to measure the intensity of rainfall. - Use the
DOpin for a digital signal that toggles based on the set threshold.
- Use the
Attach the Sensor Pad:
- Connect the sensor pad to the control module using the provided connector. Ensure proper orientation.
Adjusting Sensitivity
- Use the onboard potentiometer to adjust the sensitivity of the digital output (
DO).- Turn clockwise to increase sensitivity (detects smaller amounts of water).
- Turn counterclockwise to decrease sensitivity.
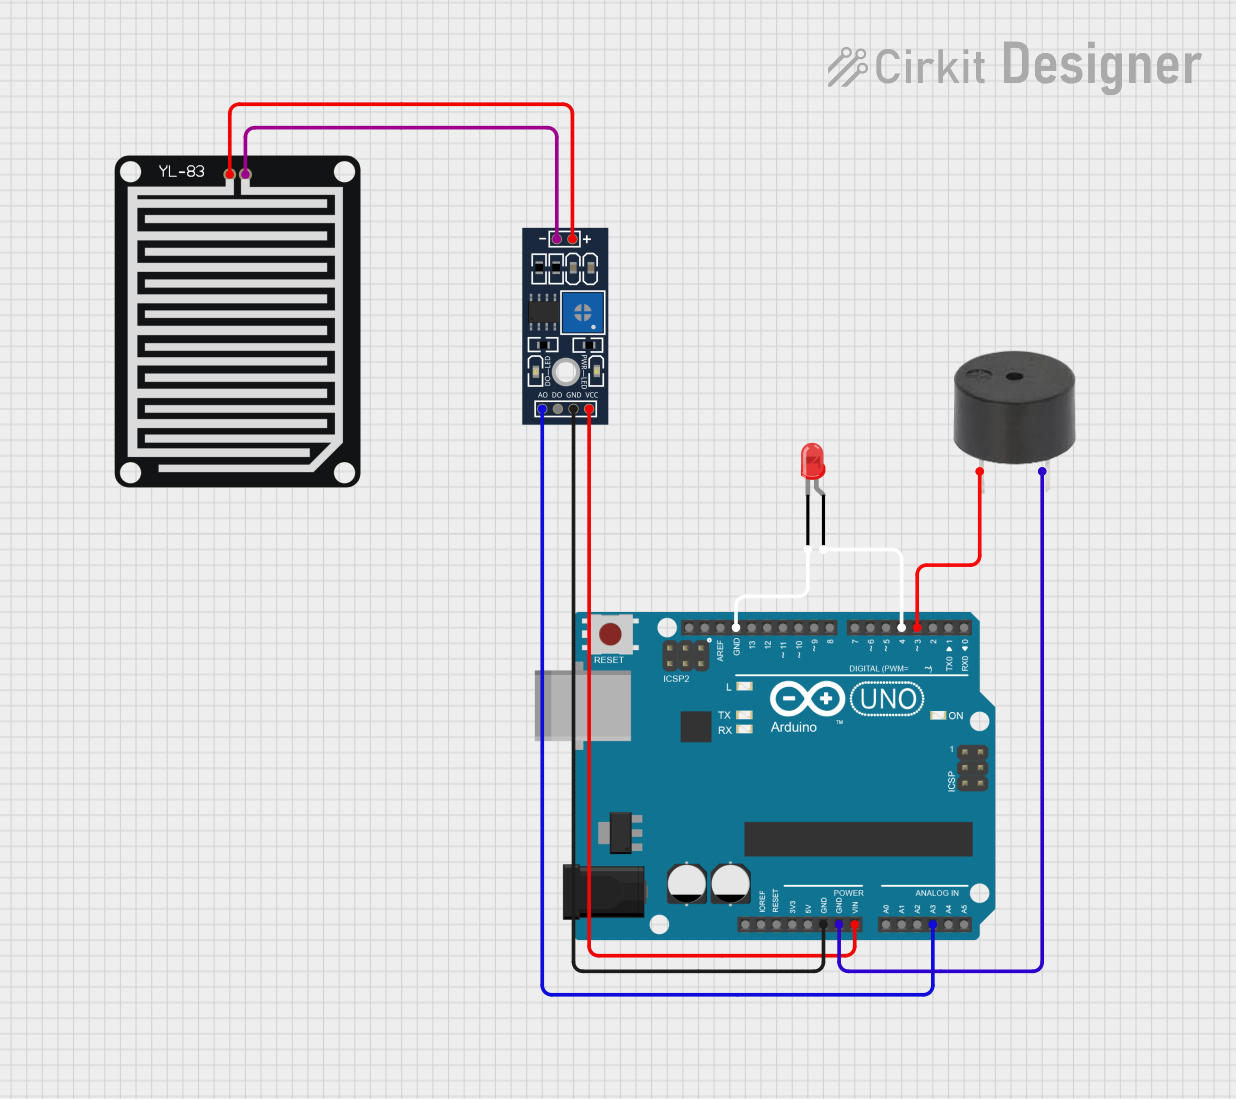
Example Circuit with Arduino UNO
Below is an example of how to connect the YL-83 Rain Sensor to an Arduino UNO and read both analog and digital outputs:
Circuit Diagram
VCC→ Arduino5VGND→ ArduinoGNDAO→ ArduinoA0DO→ ArduinoD2
Arduino Code
// YL-83 Rain Sensor Example Code
// This code reads both analog and digital outputs from the YL-83 Rain Sensor
// and prints the results to the Serial Monitor.

#define DIGITAL_PIN 2  // Digital output pin connected to DO
#define ANALOG_PIN A0  // Analog output pin connected to AO

void setup() {
  pinMode(DIGITAL_PIN, INPUT);  // Set digital pin as input
  Serial.begin(9600);          // Initialize serial communication
}

void loop() {
  int digitalValue = digitalRead(DIGITAL_PIN);  // Read digital output
  int analogValue = analogRead(ANALOG_PIN);    // Read analog output

  // Print the results to the Serial Monitor
  Serial.print("Digital Output: ");
  Serial.print(digitalValue);  // 0 = no rain, 1 = rain detected
  Serial.print(" | Analog Output: ");
  Serial.println(analogValue); // Higher value = more water detected

  delay(500);  // Wait for 500ms before the next reading
}
Important Considerations and Best Practices
- Placement: Ensure the sensor pad is placed in an open area where it can directly detect rainfall.
- Waterproofing: The sensor pad is not waterproof. Avoid submerging it in water to prevent damage.
- Cleaning: Periodically clean the sensor pad to remove dirt or debris that may affect its performance.
- Power Supply: Use a stable power source to avoid erratic readings.
Troubleshooting and FAQs
Common Issues and Solutions
No Output from the Sensor:
- Check all connections to ensure they are secure.
- Verify that the power supply voltage is within the specified range (3.3V to 5V).
- Inspect the sensor pad for damage or dirt.
Erratic or Inconsistent Readings:
- Adjust the sensitivity using the onboard potentiometer.
- Ensure the sensor pad is clean and free of debris.
- Use a decoupling capacitor (e.g., 0.1 µF) across the power supply pins to reduce noise.
Digital Output Always HIGH or LOW:
- Verify the potentiometer setting. Adjust it to change the threshold.
- Check if the sensor pad is wet or dry and confirm the expected behavior.
FAQs
Q: Can the YL-83 Rain Sensor detect the intensity of rainfall?
A: Yes, the analog output (AO) provides a voltage proportional to the amount of water detected, which can be used to estimate rainfall intensity.
Q: Is the sensor pad waterproof?
A: No, the sensor pad is not waterproof. It is designed to detect water on its surface but should not be submerged.
Q: Can I use the YL-83 Rain Sensor with a 3.3V microcontroller?
A: Yes, the sensor operates at 3.3V to 5V, making it compatible with 3.3V microcontrollers like the ESP32 or Raspberry Pi Pico.
Q: How do I clean the sensor pad?
A: Use a soft, dry cloth to gently wipe the sensor pad. Avoid using abrasive materials or liquids.