How to Use Grove - Temperature, Humidity, Pressure and Gas Sensor for Arduino - BME680: Examples, Pinouts, and Specs
Introduction
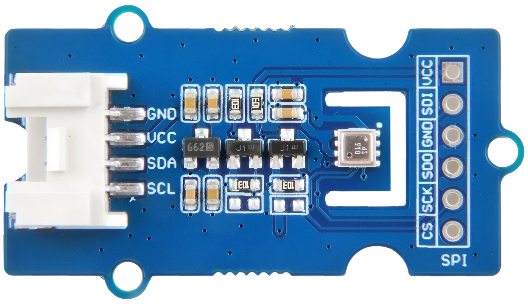
The Grove - Temperature, Humidity, Pressure and Gas Sensor for Arduino - BME680 (Manufacturer Part ID: 101020513) is a highly versatile environmental sensor module. It integrates four key sensing capabilities: temperature, humidity, barometric pressure, and gas (air quality) measurement. This sensor is based on the Bosch BME680 chip and is designed for seamless integration with Arduino and other microcontroller platforms.
The BME680 is ideal for applications such as:
- Weather monitoring systems
- Indoor air quality assessment
- IoT (Internet of Things) devices
- Smart home automation
- Environmental data logging
With its compact design and Grove connector, this sensor is easy to use and highly reliable for both beginners and advanced users.
Explore Projects Built with Grove - Temperature, Humidity, Pressure and Gas Sensor for Arduino - BME680
Explore Projects Built with Grove - Temperature, Humidity, Pressure and Gas Sensor for Arduino - BME680
Technical Specifications
Key Technical Details
| Parameter | Value |
|---|---|
| Operating Voltage | 3.3V / 5V |
| Operating Current | ~2.1mA (typical) |
| Temperature Range | -40°C to +85°C |
| Humidity Range | 0% to 100% RH |
| Pressure Range | 300 hPa to 1100 hPa |
| Gas Measurement Range | 0 to 500 ppm (approximate air quality) |
| Interface | I2C |
| Dimensions | 20mm x 40mm |
Pin Configuration and Descriptions
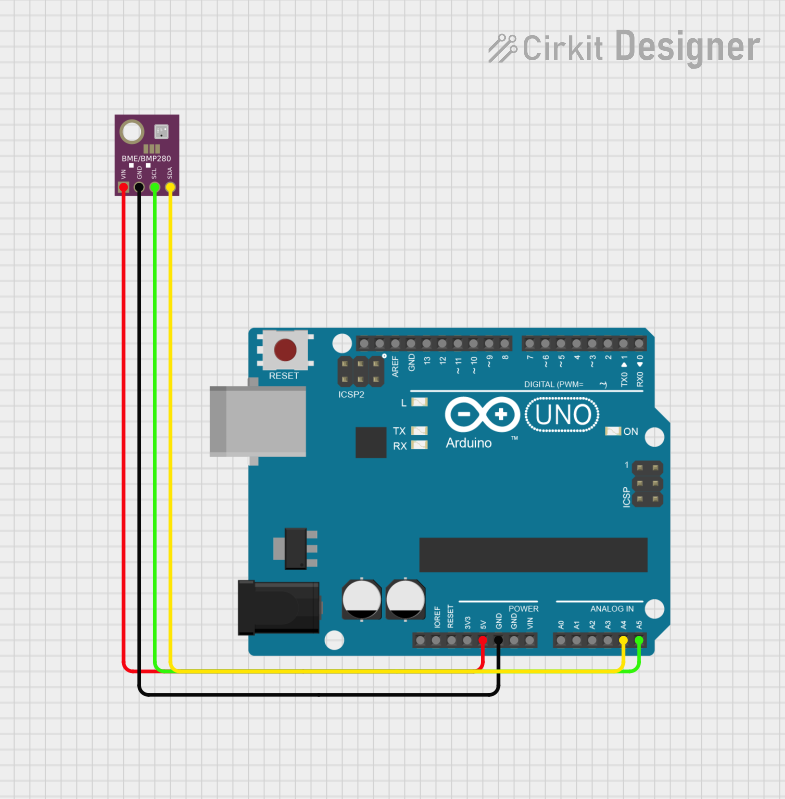
The Grove - BME680 sensor module uses a standard 4-pin Grove connector for I2C communication. Below is the pinout:
| Pin Number | Pin Name | Description |
|---|---|---|
| 1 | VCC | Power supply (3.3V or 5V) |
| 2 | GND | Ground |
| 3 | SDA | I2C data line |
| 4 | SCL | I2C clock line |
Usage Instructions
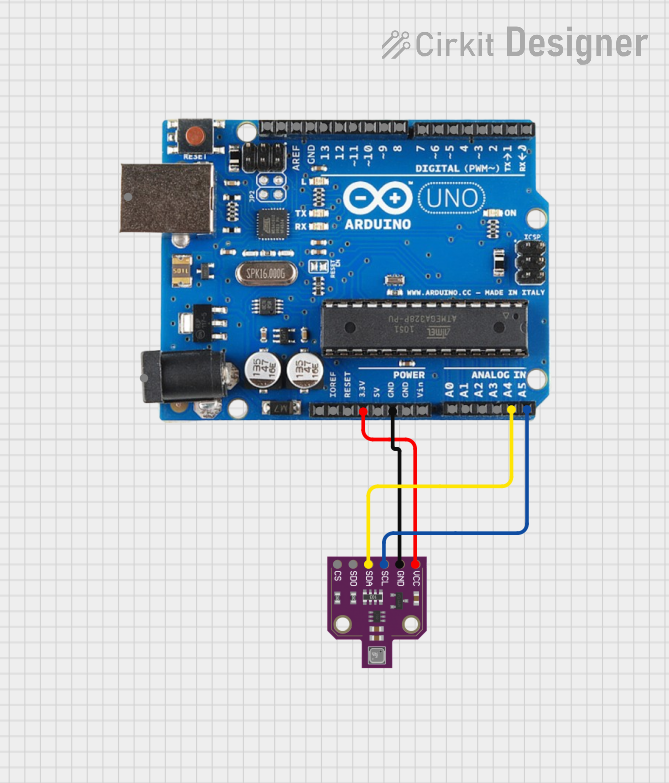
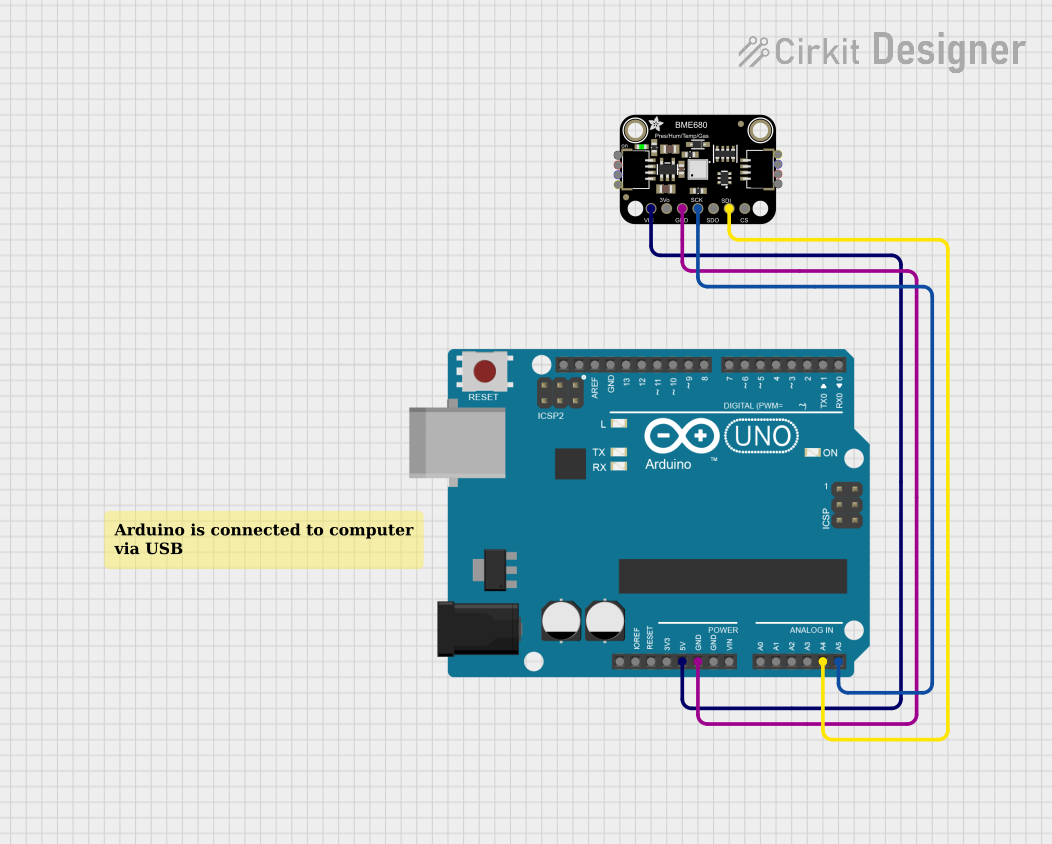
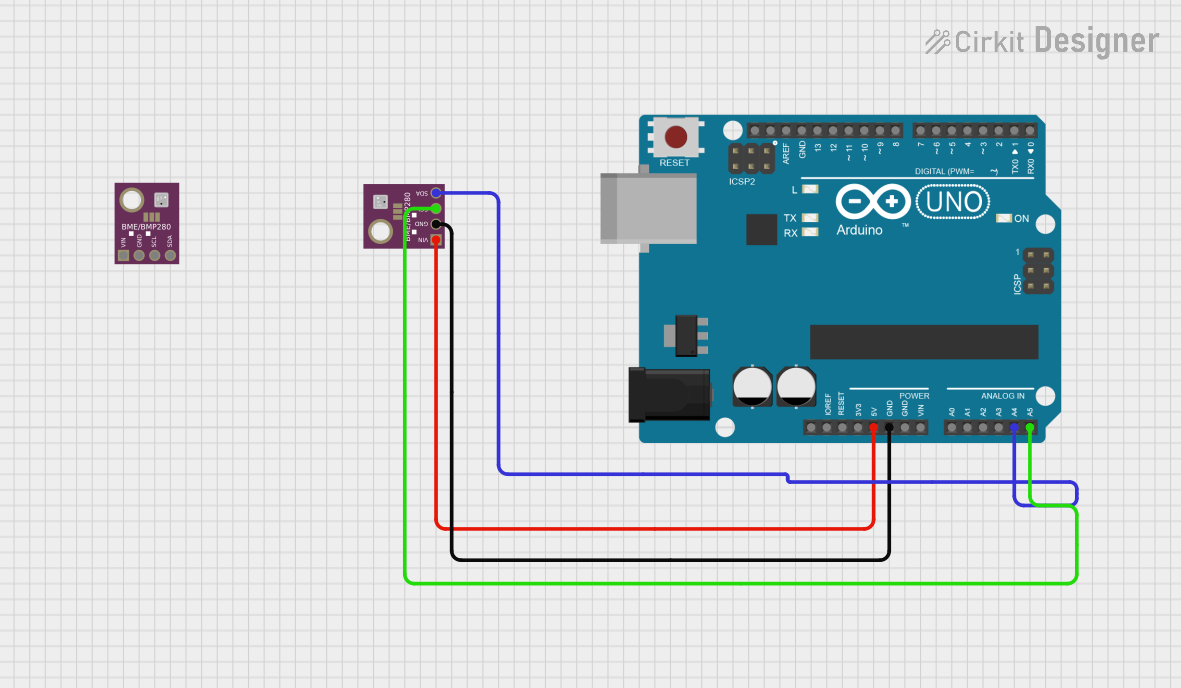
Connecting the Sensor
Hardware Setup:
- Connect the Grove - BME680 sensor to an Arduino board using a Grove Base Shield.
- Plug the sensor into an I2C port on the Base Shield (e.g., I2C-1 or I2C-2).
Software Setup:
- Install the required libraries:
- Open the Arduino IDE.
- Go to Sketch > Include Library > Manage Libraries.
- Search for and install the Adafruit BME680 library.
- Also, install the Adafruit Sensor library if not already installed.
- Install the required libraries:
Arduino Code Example: Use the following example code to read temperature, humidity, pressure, and gas data from the sensor:
// Include the necessary libraries
#include <Wire.h>
#include <Adafruit_Sensor.h>
#include <Adafruit_BME680.h>

// Create an instance of the BME680 sensor
Adafruit_BME680 bme;

void setup() {
  Serial.begin(9600); // Initialize serial communication
  while (!Serial);    // Wait for the serial monitor to open

  // Initialize the BME680 sensor
  if (!bme.begin()) {
    Serial.println("Could not find a valid BME680 sensor, check wiring!");
    while (1);
  }

  // Configure the sensor settings
  bme.setTemperatureOversampling(BME680_OS_8X);
  bme.setHumidityOversampling(BME680_OS_2X);
  bme.setPressureOversampling(BME680_OS_4X);
  bme.setIIRFilterSize(BME680_FILTER_SIZE_3);
  bme.setGasHeater(320, 150); // 320°C for 150 ms
}

void loop() {
  // Perform a measurement
  if (!bme.performReading()) {
    Serial.println("Failed to perform reading!");
    return;
  }

  // Print sensor readings to the serial monitor
  Serial.print("Temperature = ");
  Serial.print(bme.temperature);
  Serial.println(" °C");

  Serial.print("Humidity = ");
  Serial.print(bme.humidity);
  Serial.println(" %");

  Serial.print("Pressure = ");
  Serial.print(bme.pressure / 100.0);
  Serial.println(" hPa");

  Serial.print("Gas = ");
  Serial.print(bme.gas_resistance / 1000.0);
  Serial.println(" kOhms");

  Serial.println();
  delay(2000); // Wait 2 seconds before the next reading
}
Important Considerations
- Power Supply: Ensure the sensor is powered with the correct voltage (3.3V or 5V). Using an incorrect voltage may damage the sensor.
- I2C Address: The default I2C address of the BME680 is
0x77. If there are address conflicts, you can change it to0x76by modifying the hardware configuration (refer to the sensor's datasheet for details). - Gas Sensor Warm-Up: The gas sensor requires a warm-up period (typically a few minutes) to stabilize and provide accurate readings.
Troubleshooting and FAQs
Common Issues and Solutions
Sensor Not Detected:
- Cause: Incorrect wiring or I2C address mismatch.
- Solution: Double-check the connections and ensure the sensor is connected to the correct I2C port. Verify the I2C address in the code matches the sensor's address.
Inaccurate Readings:
- Cause: Insufficient warm-up time or environmental interference.
- Solution: Allow the sensor to warm up for at least 5 minutes before taking measurements. Avoid placing the sensor near heat sources or in direct sunlight.
Gas Resistance Value is Zero:
- Cause: Gas sensor not properly initialized.
- Solution: Ensure the gas heater settings are correctly configured in the code (e.g.,
bme.setGasHeater(320, 150)).
Compilation Errors:
- Cause: Missing or outdated libraries.
- Solution: Ensure the Adafruit BME680 and Adafruit Sensor libraries are installed and up to date in the Arduino IDE.
FAQs
Q1: Can I use this sensor with a Raspberry Pi?
Yes, the BME680 is compatible with Raspberry Pi. You can use Python libraries such as Adafruit_BME680 to interface with the sensor.
Q2: How do I interpret the gas resistance value?
The gas resistance value is an indicator of air quality. Lower resistance typically indicates higher levels of volatile organic compounds (VOCs) in the air.
Q3: Can I use multiple BME680 sensors on the same I2C bus?
Yes, but you must configure each sensor with a unique I2C address. This can be done by modifying the hardware configuration of the sensor.
Q4: What is the typical lifespan of the gas sensor?
The gas sensor has a typical lifespan of several years under normal operating conditions. However, exposure to extreme environments may reduce its lifespan.
This concludes the documentation for the Grove - Temperature, Humidity, Pressure and Gas Sensor for Arduino - BME680. For further assistance, refer to the official Grove documentation or contact technical support.