How to Use Adafruit ESP32 Huzzah Breakout: Examples, Pinouts, and Specs
Introduction
The Adafruit ESP32 Huzzah Breakout is a versatile and powerful microcontroller board that harnesses the capabilities of the ESP32 chip. It is designed for a wide range of Internet of Things (IoT) applications due to its built-in Wi-Fi and Bluetooth functionalities. This board is ideal for projects that require wireless data communication, home automation, sensor networks, and many other innovative applications.
Explore Projects Built with Adafruit ESP32 Huzzah Breakout
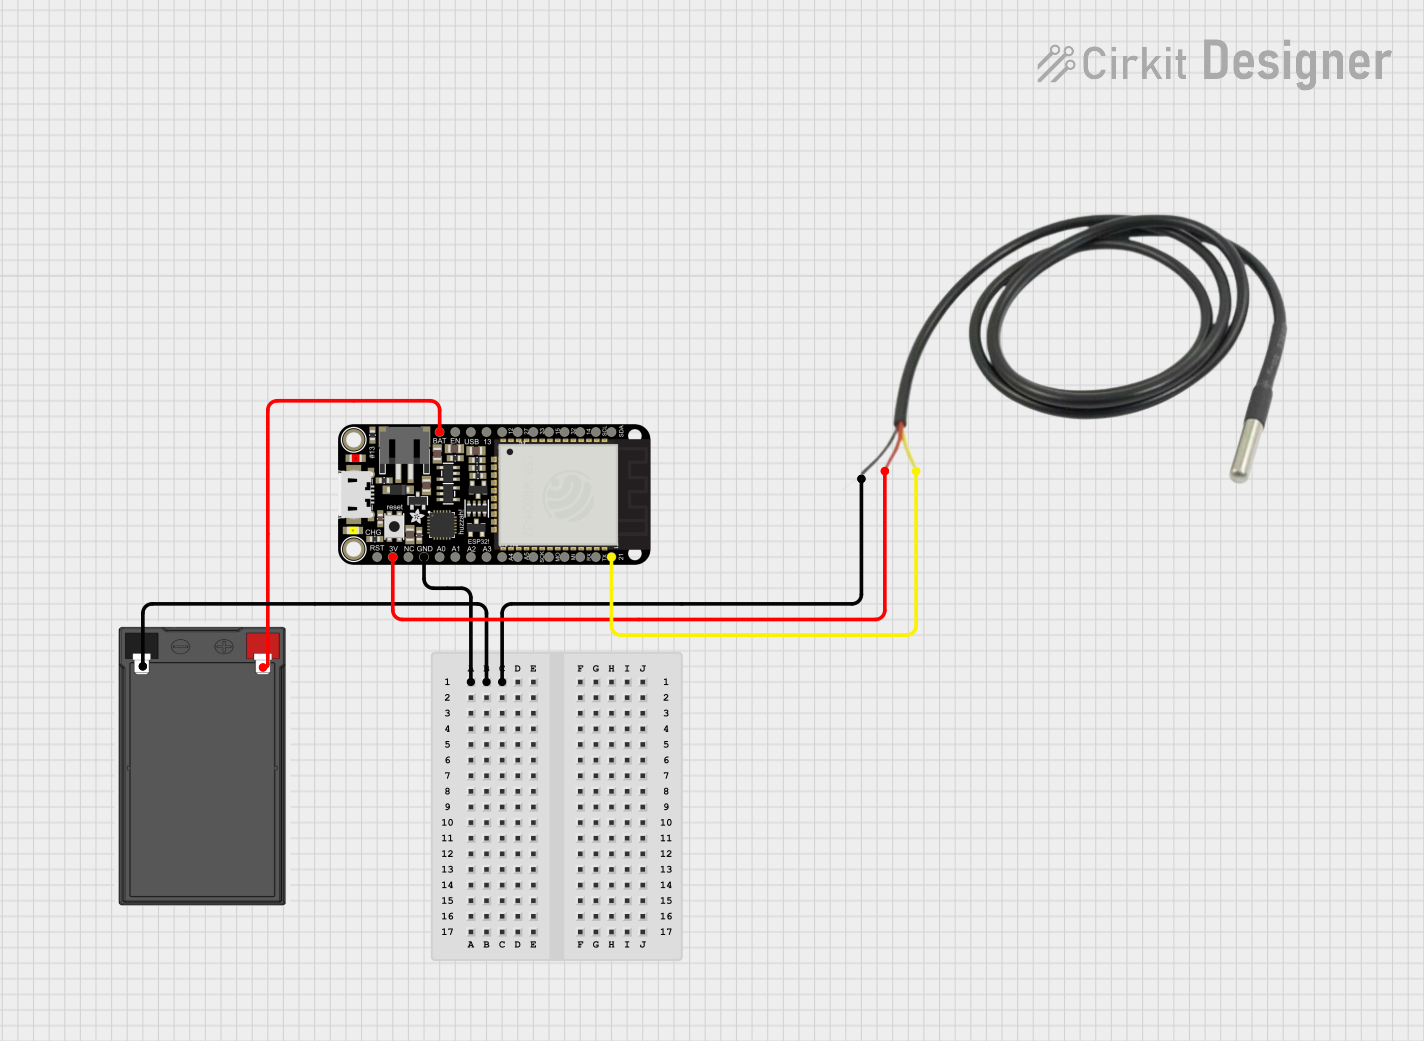

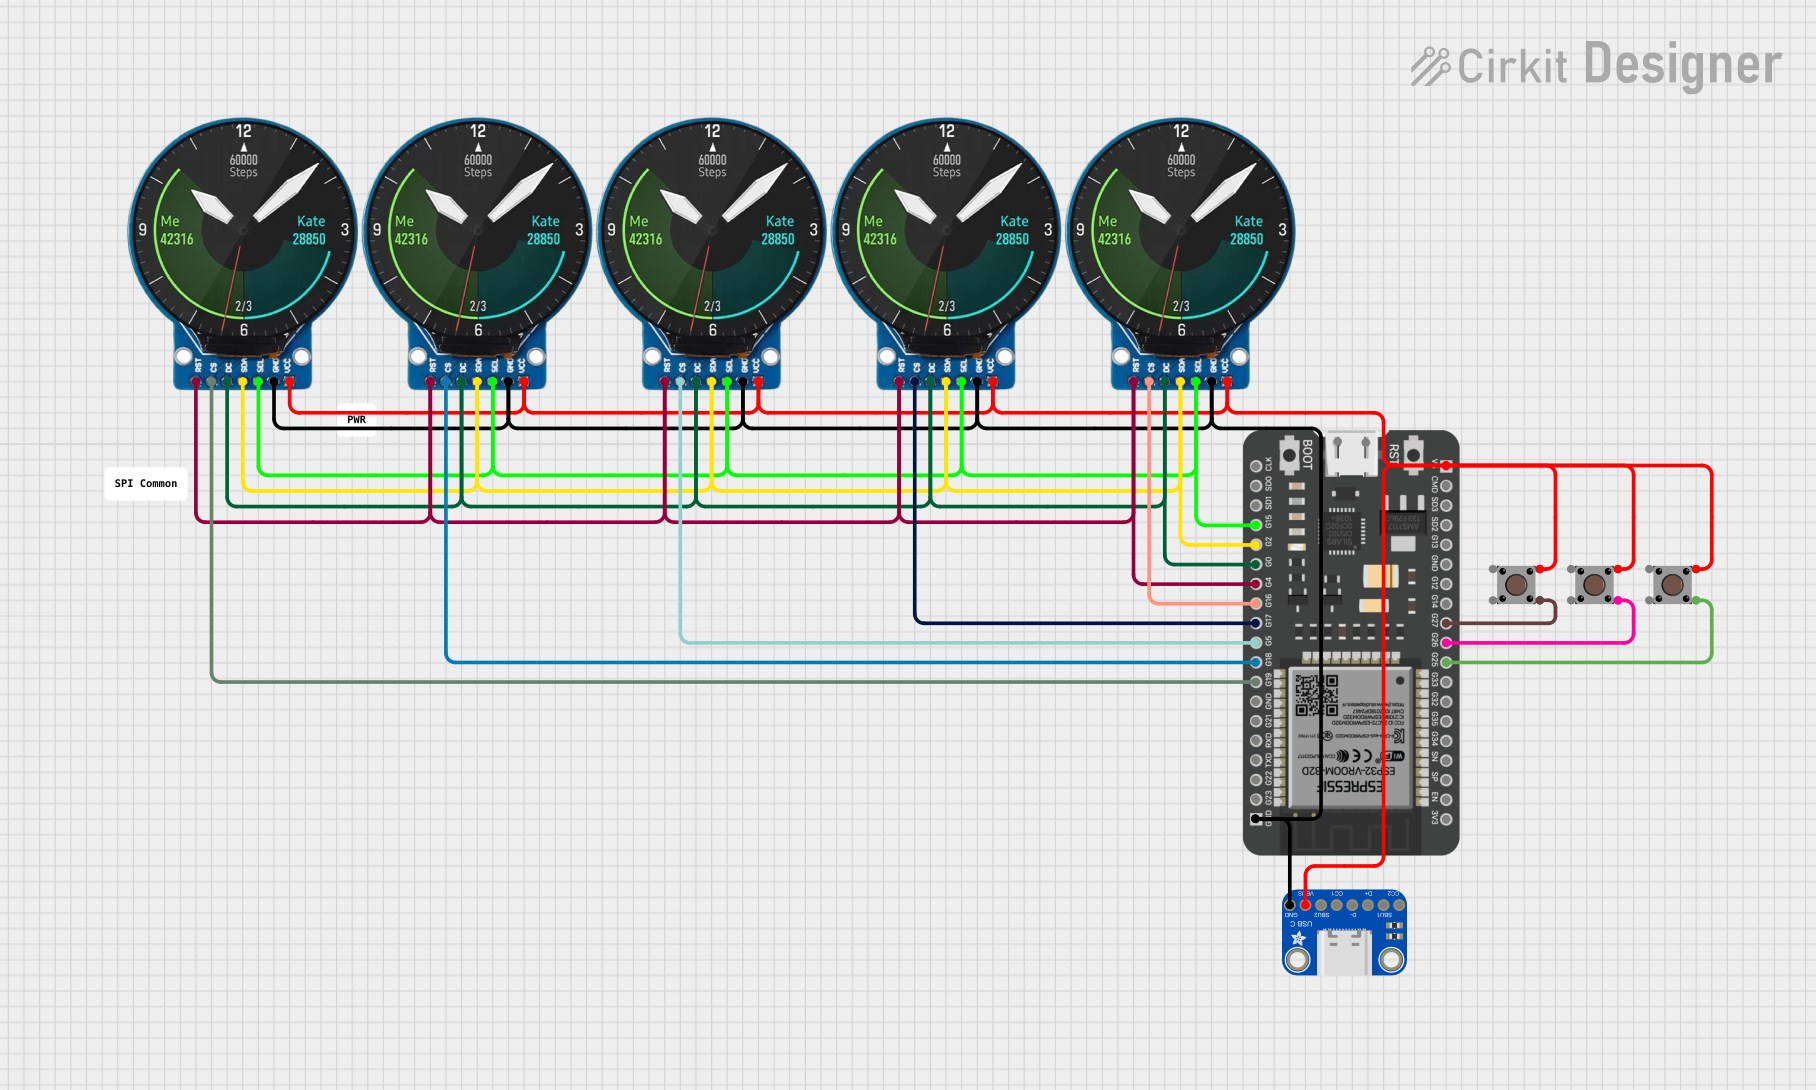
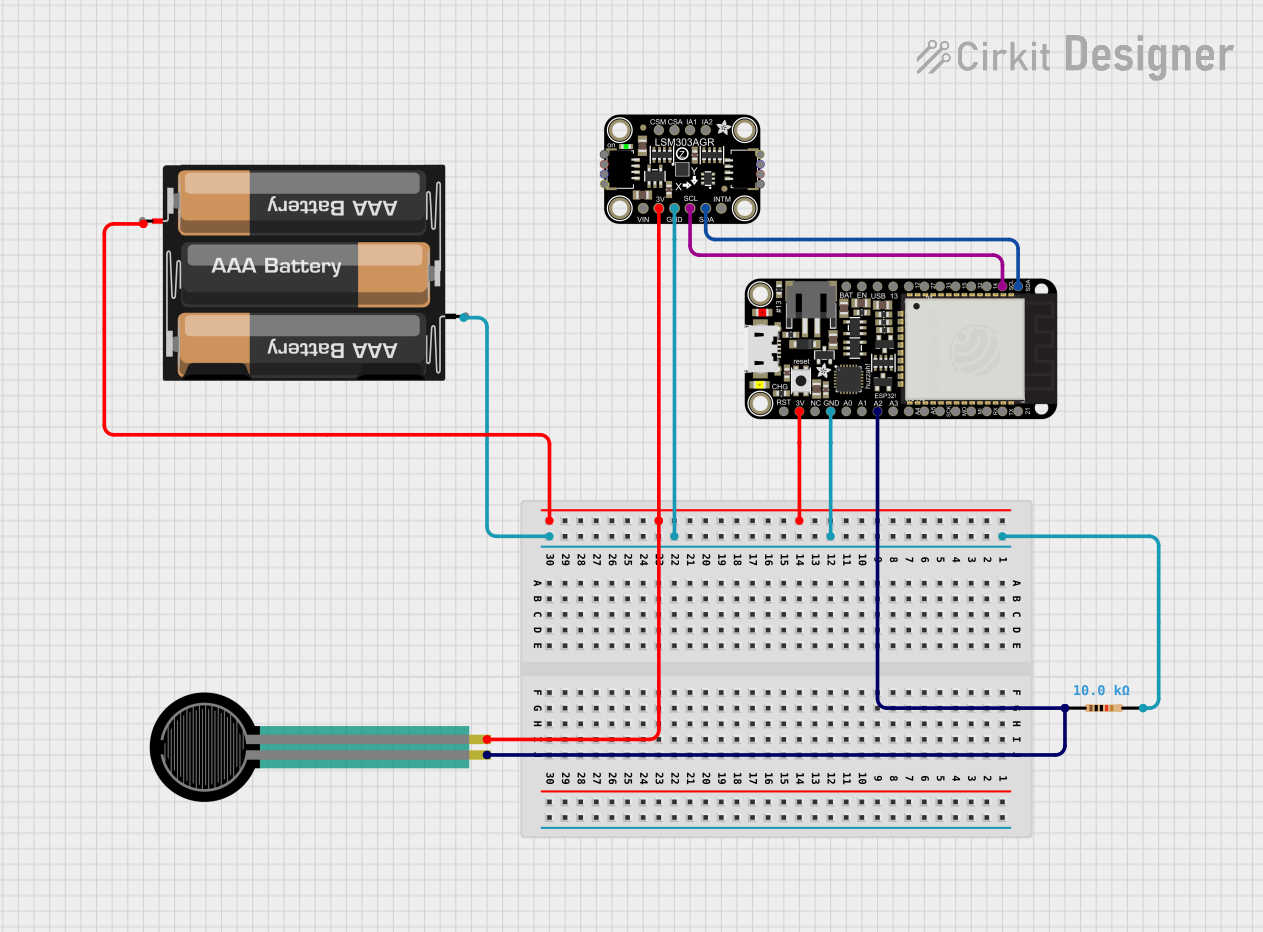
Explore Projects Built with Adafruit ESP32 Huzzah Breakout
Technical Specifications
Key Technical Details
- Microcontroller: ESP32
- Operating Voltage: 3.3V
- Input Voltage: 5V via USB or Battery (LiPo or LiIon only)
- Digital I/O Pins: 25
- Analog Input Pins: 6 (12-bit ADC)
- Analog Outputs: 2 (8-bit DAC)
- Flash Memory: 4 MB
- SRAM: 520 KB
- Clock Speed: 240 MHz
- Wi-Fi: 802.11 b/g/n
- Bluetooth: Bluetooth 4.2 BR/EDR and BLE
- Dimensions: 1.0" x 2.0" x 0.28" (25.4mm x 50.8mm x 7mm) without headers
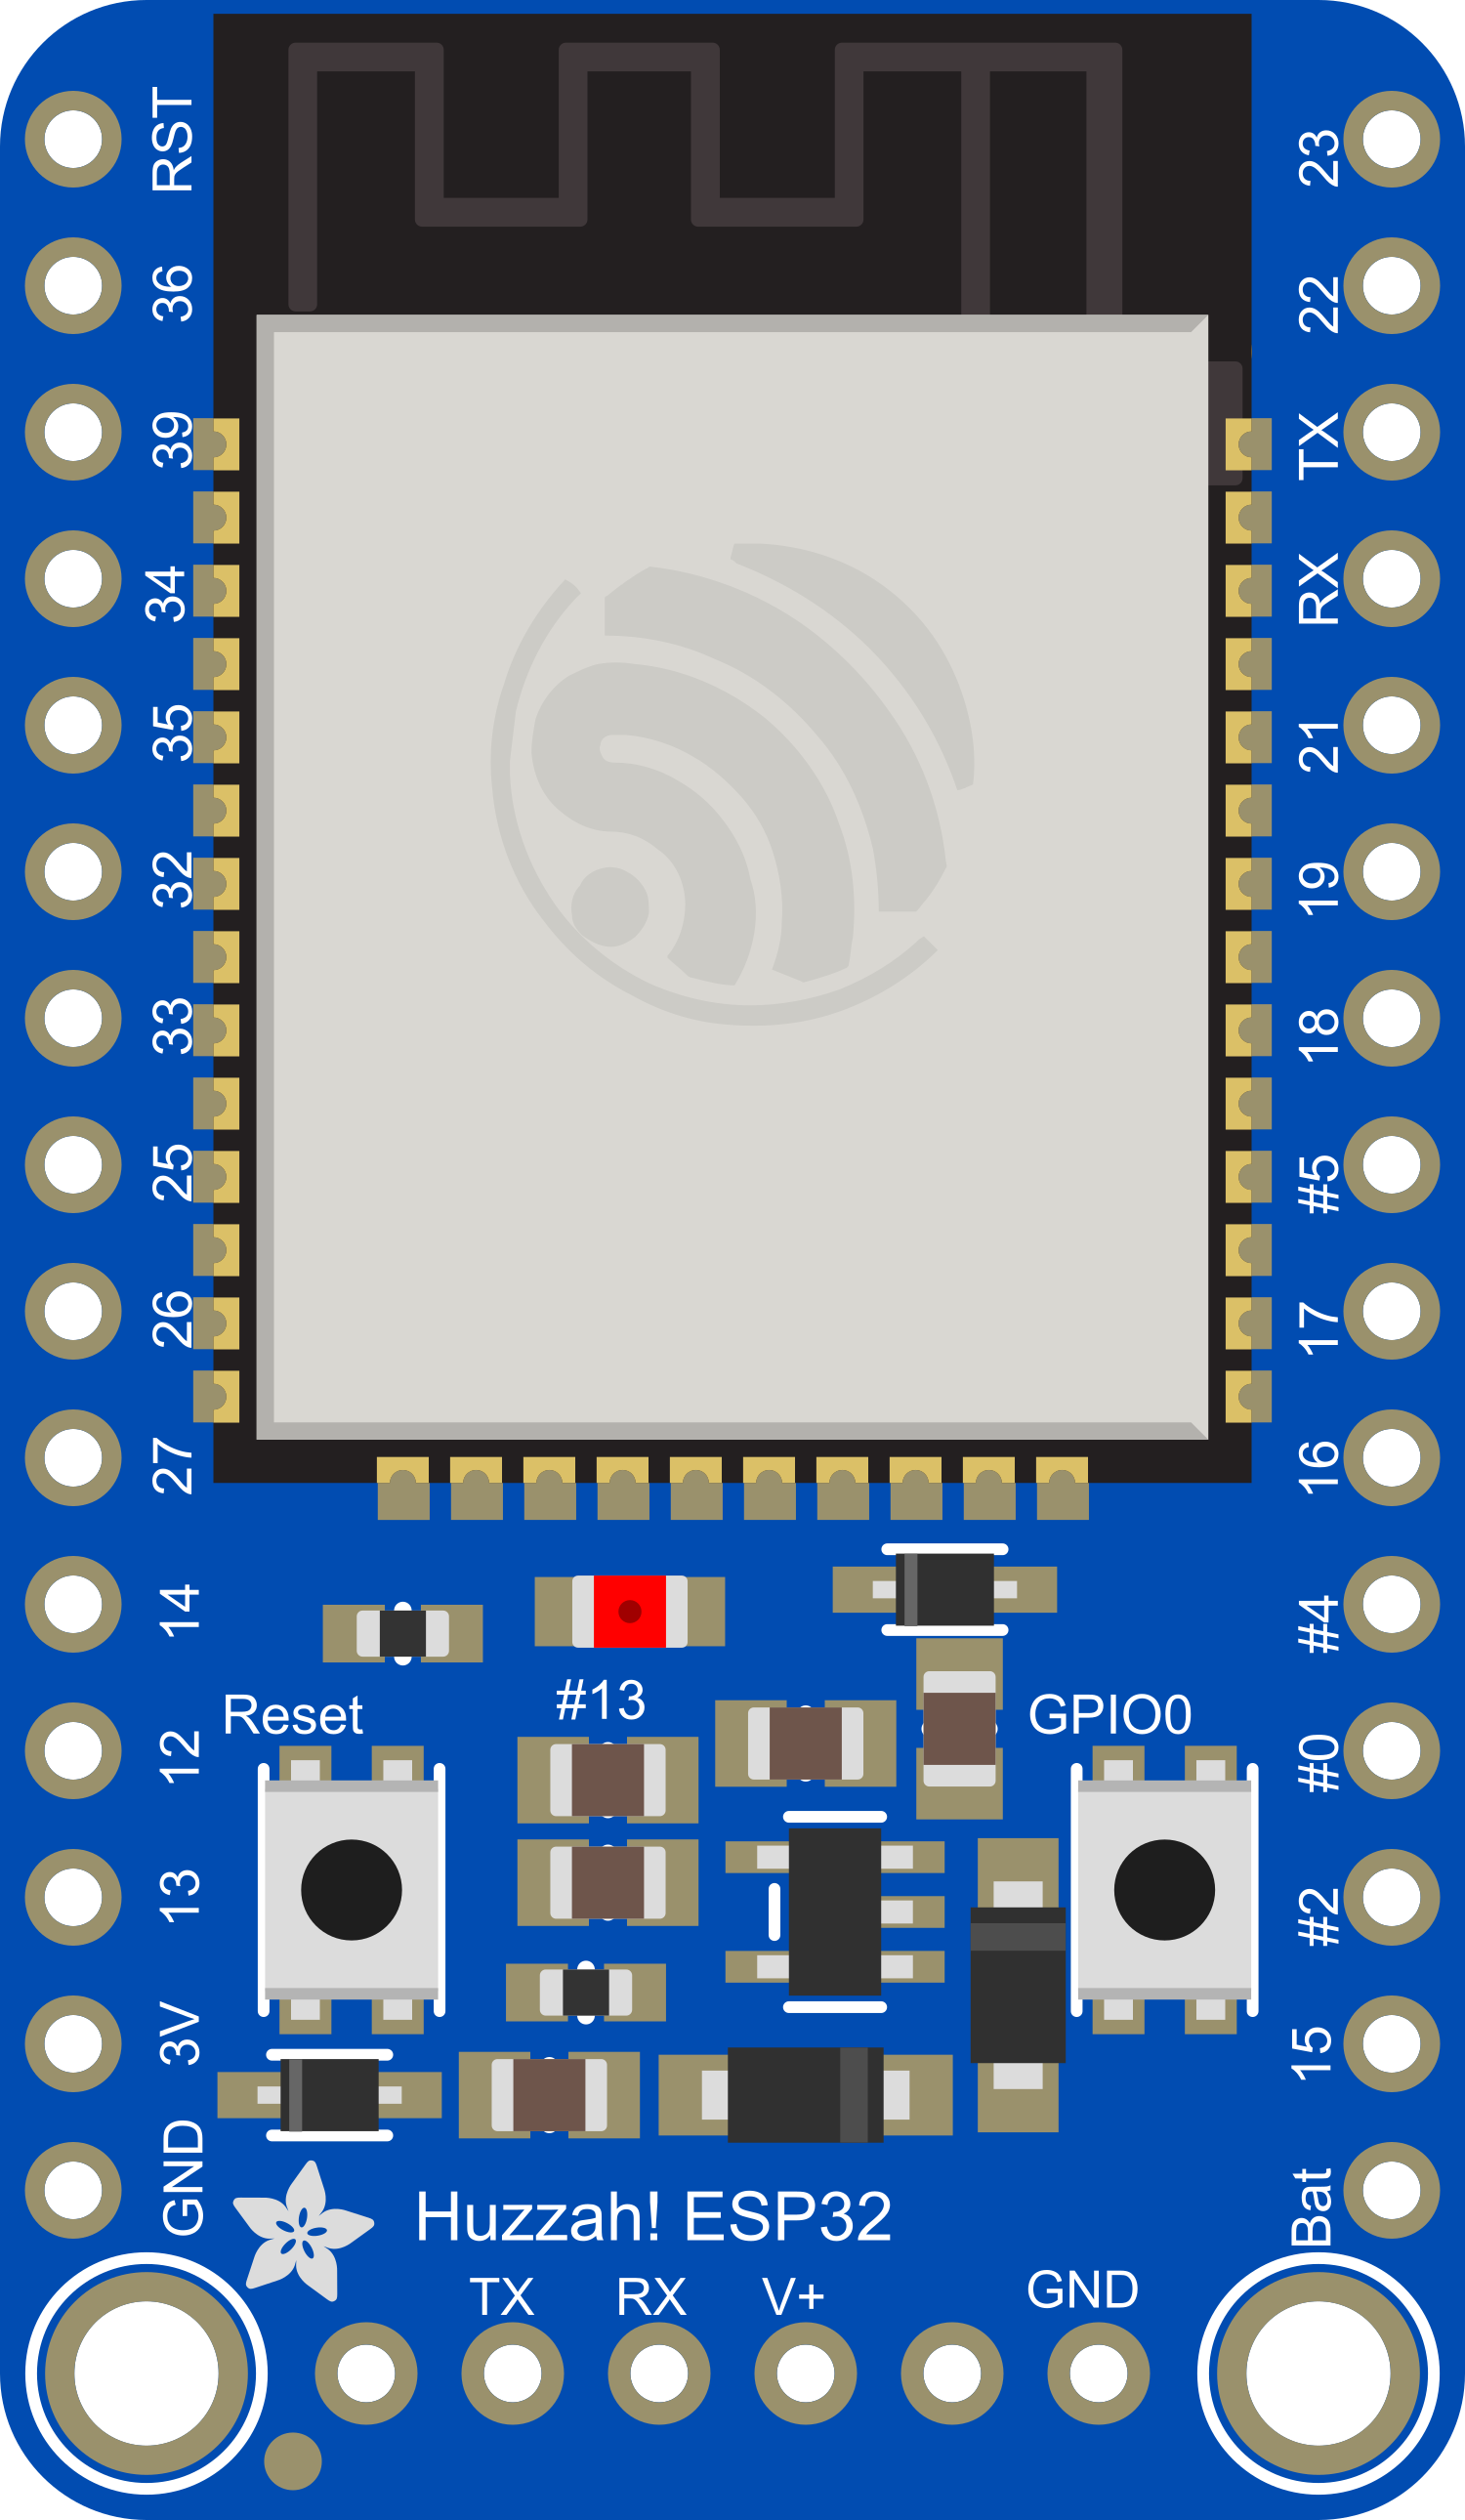
Pin Configuration and Descriptions
| Pin Number | Function | Description |
|---|---|---|
| 1 | 3V | 3.3V power supply pin |
| 2 | EN | Chip enable, active high |
| 3 | GND | Ground |
| 4 | 5V | USB or battery power supply pin |
| 5-29 | GPIO0 - GPIO24 | General Purpose Input/Output pins |
| 30 | A0 - A5 | Analog input pins |
| 31-32 | DAC1 - DAC2 | Digital to Analog Converter output pins |
| 33 | VIN | Voltage input for battery (up to 6V) |
| 34 | RST | Reset pin, active low |
Usage Instructions
Integrating with a Circuit
To use the Adafruit ESP32 Huzzah Breakout in a circuit:
Powering the Board:
- Connect the USB cable to the board and your computer or a 5V USB power source.
- Alternatively, connect a 3.7V LiPo battery to the JST connector for portable applications.
Connecting to Wi-Fi:
- Utilize the Wi-Fi capabilities of the ESP32 by using the appropriate libraries in your code.
Interfacing with Sensors/Actuators:
- Connect sensors to the analog pins for reading environmental data.
- Use the digital I/O pins to control actuators like LEDs, motors, or relays.
Best Practices
- Always ensure that the power supply is within the specified range to prevent damage.
- When programming the board, make sure to select the correct board and port in your IDE.
- Use a logic level converter if you need to interface with 5V components.
Example Code for Arduino UNO
Here is a simple example of how to connect the Adafruit ESP32 Huzzah Breakout to an Arduino UNO and read analog sensor data:
// Include the required libraries
#include <WiFi.h>

// Replace with your network credentials
const char* ssid = "your_SSID";
const char* password = "your_PASSWORD";

void setup() {
  Serial.begin(115200);

  // Connect to Wi-Fi
  WiFi.begin(ssid, password);
  while (WiFi.status() != WL_CONNECTED) {
    delay(500);
    Serial.println("Connecting to WiFi...");
  }
  Serial.println("Connected to WiFi");
}

void loop() {
  // Read the value of the analog sensor on pin A0
  int sensorValue = analogRead(A0);
  Serial.println(sensorValue);
  delay(1000);
}
Troubleshooting and FAQs
Common Issues
- Wi-Fi Connection Issues: Ensure the SSID and password are correct and that the ESP32 is within range of the router.
- Board Not Recognized by Computer: Check the USB cable and drivers; try a different USB port or cable.
- Unexpected Resets: Make sure the power supply is stable and within the recommended voltage range.
Solutions and Tips
- Updating Firmware: Periodically check for firmware updates to ensure the board has the latest features and fixes.
- Power Supply: Use a high-quality power supply to prevent brownouts or power-related issues.
FAQs
Q: Can I use the ESP32 Huzzah Breakout with the Arduino IDE? A: Yes, you can program the ESP32 using the Arduino IDE by installing the ESP32 board package.
Q: What is the maximum voltage that can be applied to the GPIO pins? A: The maximum voltage for any I/O pin is 3.3V. Exceeding this voltage can damage the board.
Q: How do I put the ESP32 into deep sleep mode?
A: You can use the esp_deep_sleep_start() function after configuring the wake-up source with the appropriate ESP-IDF functions.
This documentation provides an overview of the Adafruit ESP32 Huzzah Breakout board, its technical specifications, usage instructions, example code, and troubleshooting tips. For more detailed information, refer to the manufacturer's datasheets and user guides.