How to Use DFMiniPlayer: Examples, Pinouts, and Specs
Introduction
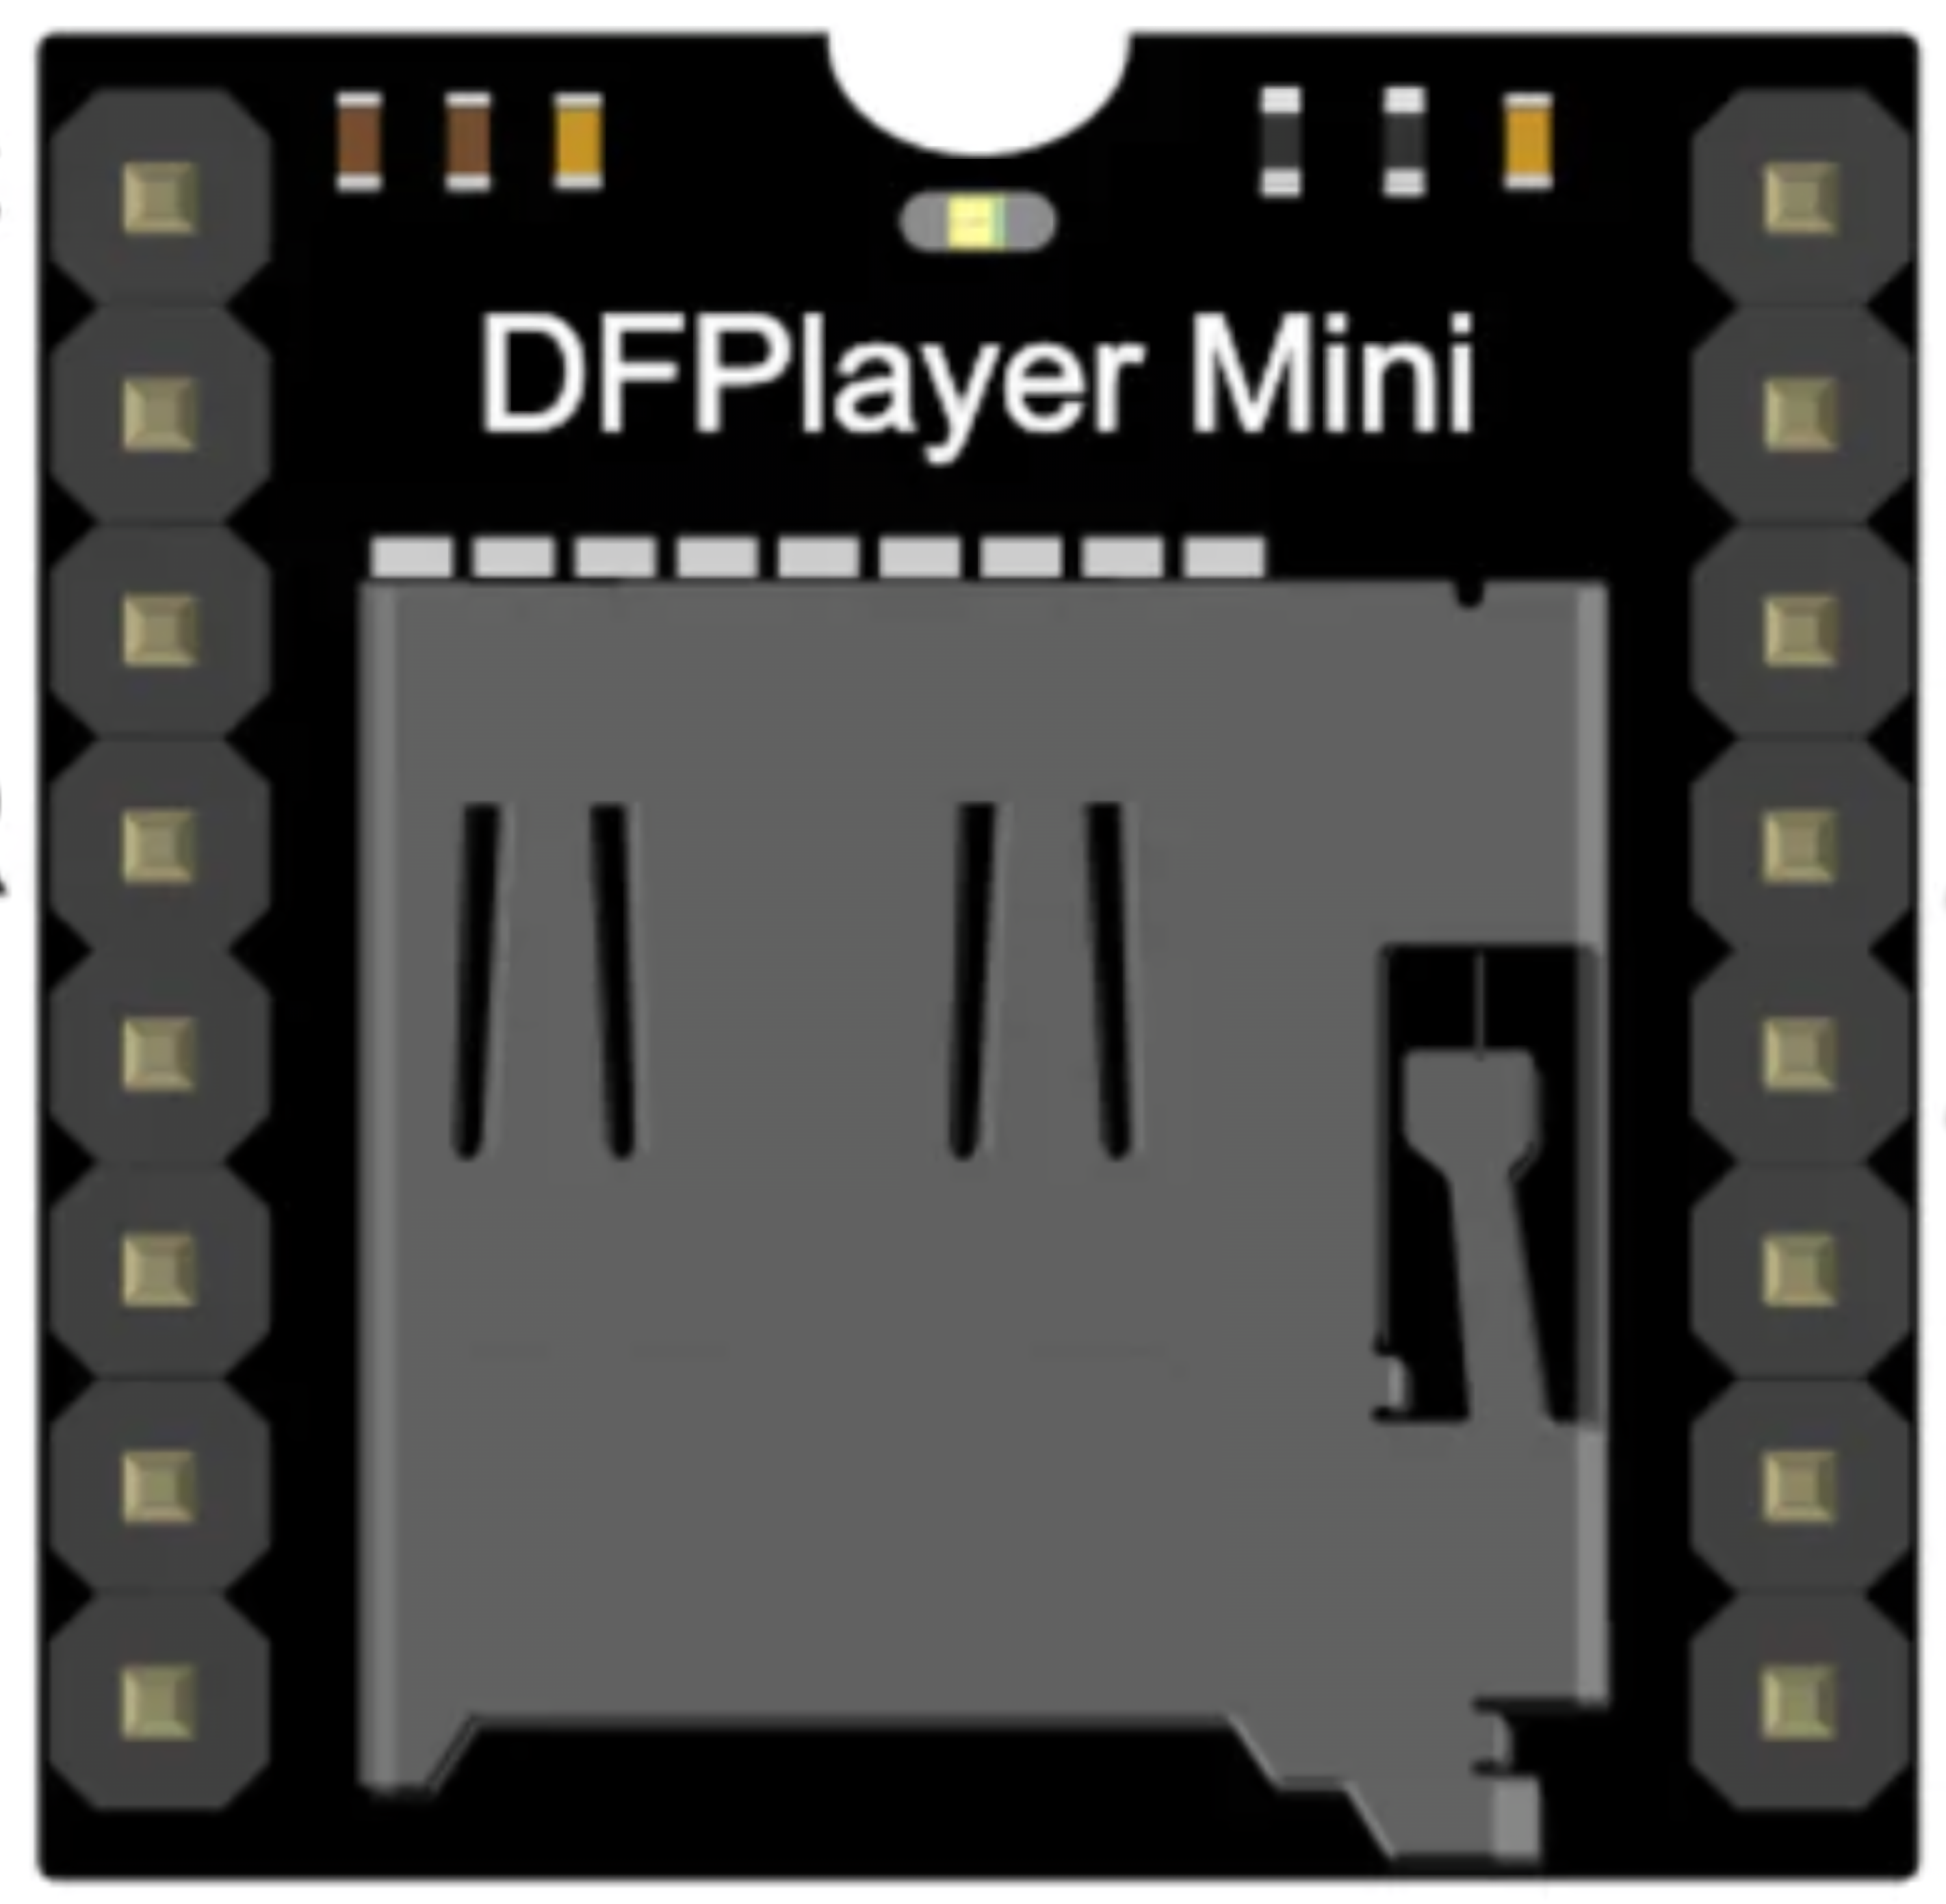
The DFMiniPlayer (Manufacturer Part ID: 30C) is a compact MP3 player module designed and manufactured by ESP32. It is capable of playing audio files stored on a microSD card and can be controlled via serial commands. This module is widely used in embedded systems where audio playback is required, such as in IoT devices, interactive kiosks, toys, and home automation systems.
Explore Projects Built with DFMiniPlayer

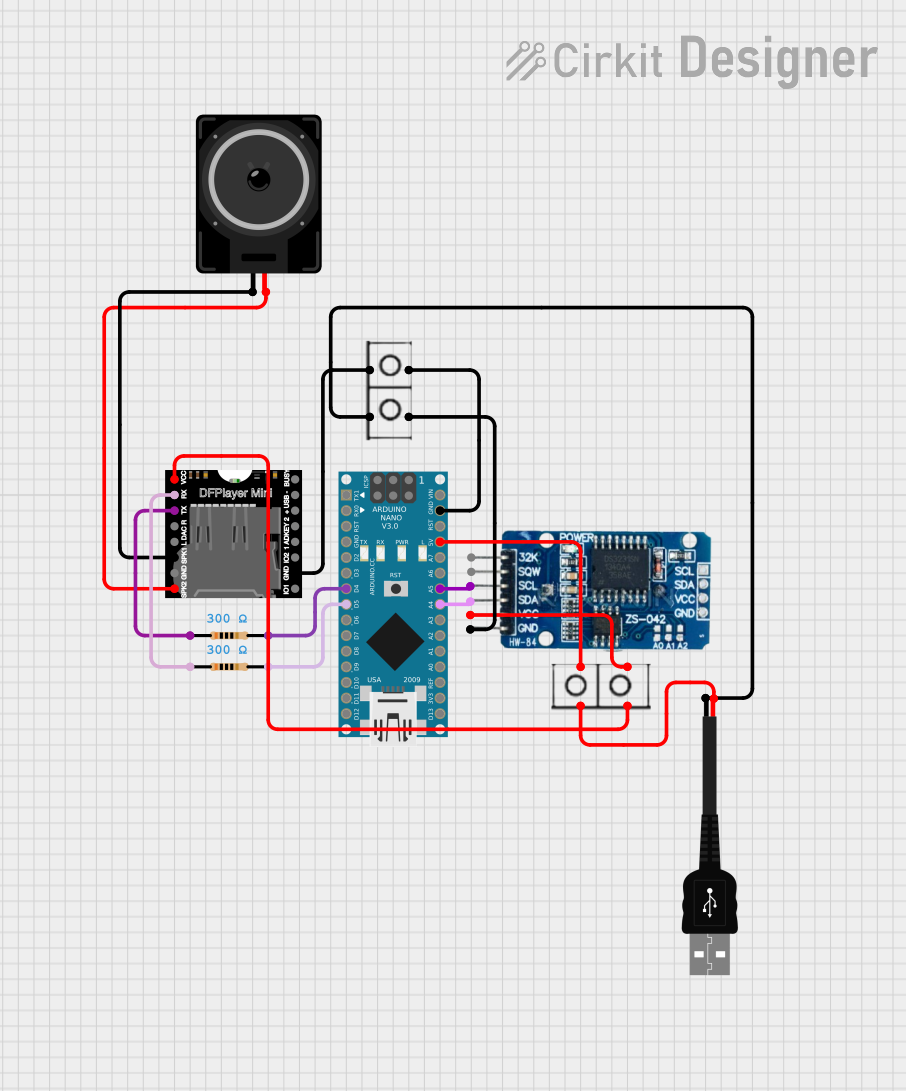
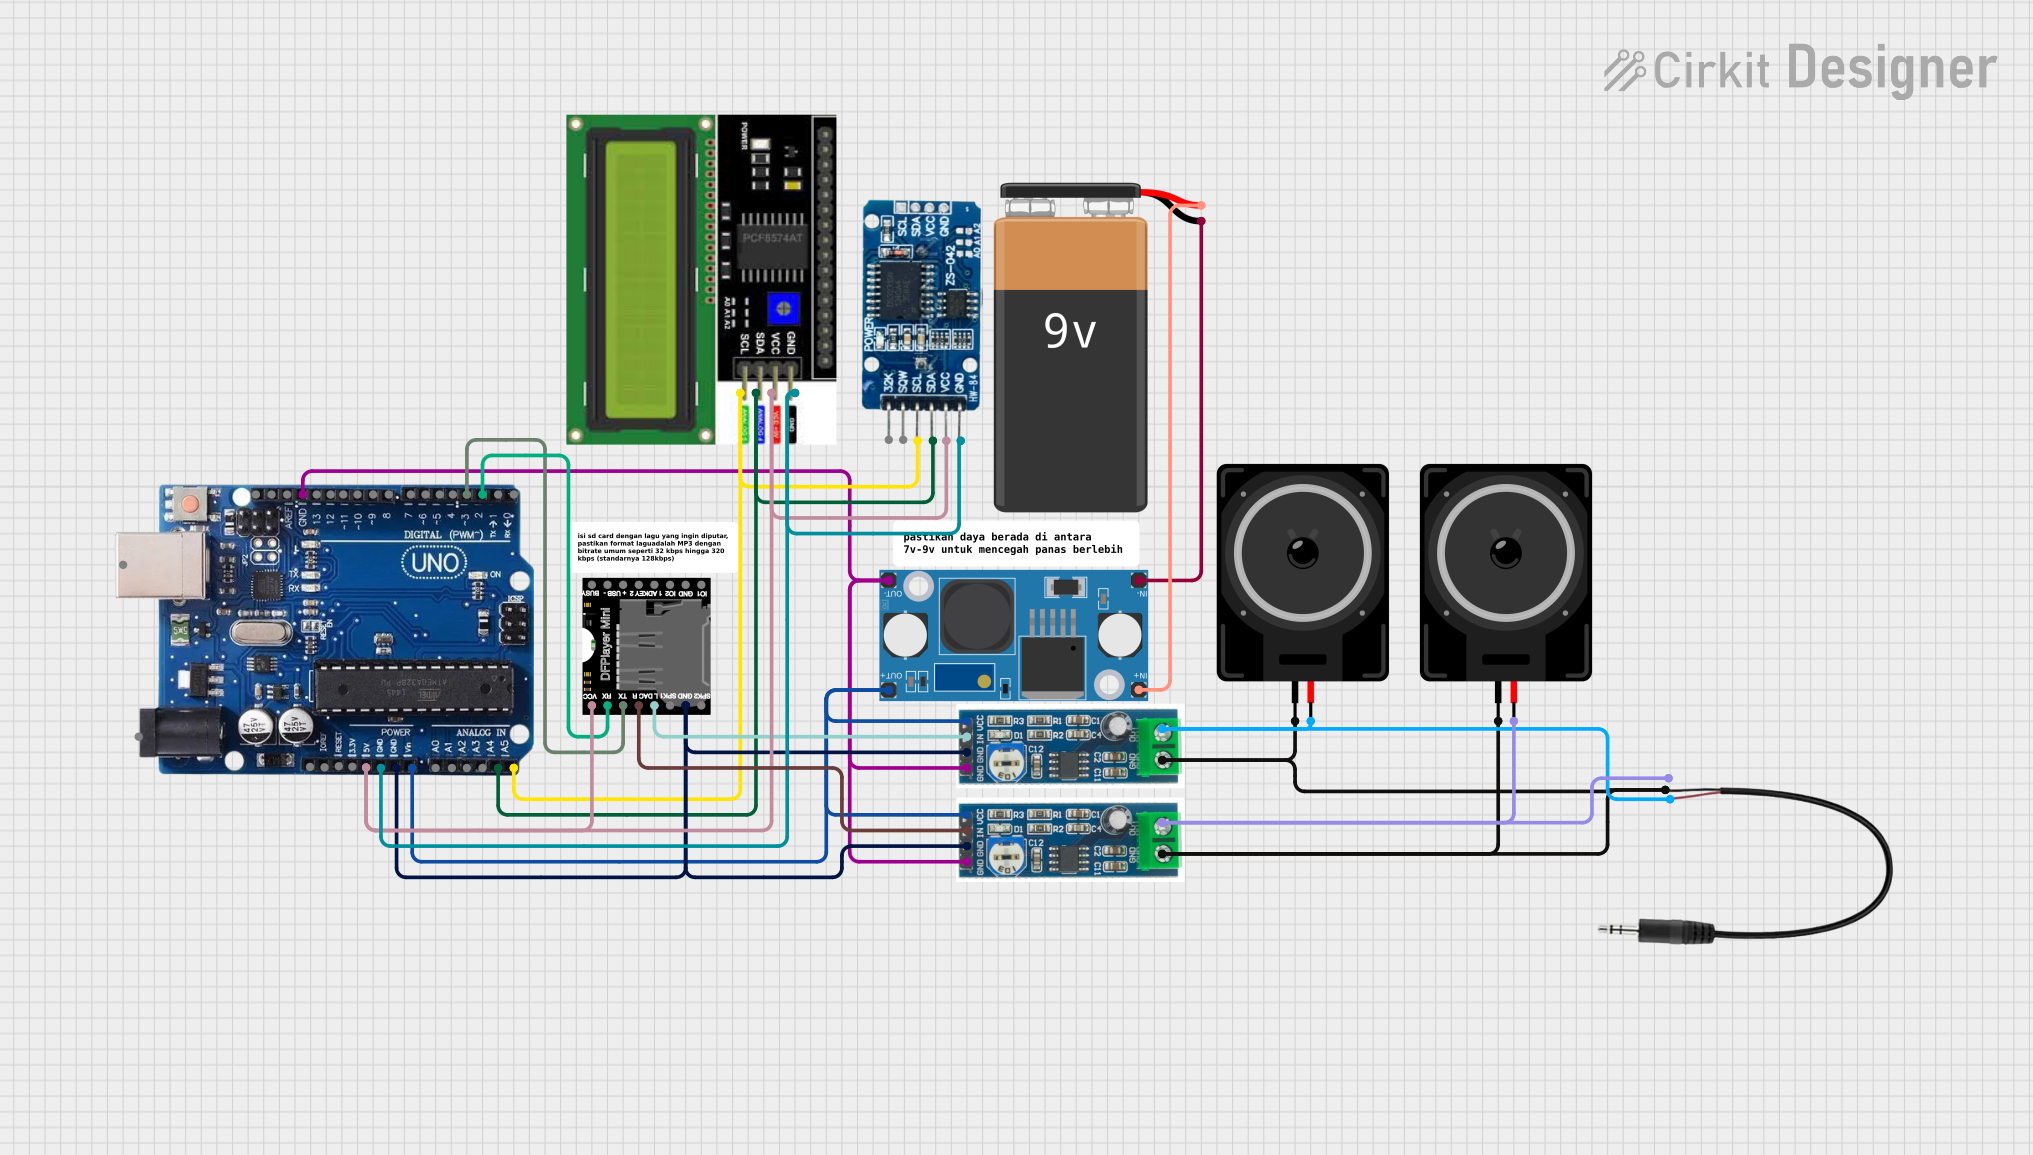
Explore Projects Built with DFMiniPlayer
Common Applications
- Audio playback in IoT devices
- Voice prompts in interactive systems
- Background music for embedded projects
- Sound effects in toys and games
- Announcements in public address systems
Technical Specifications
The DFMiniPlayer is a versatile module with the following key technical details:
General Specifications
| Parameter | Value |
|---|---|
| Manufacturer | ESP32 |
| Part ID | 30C |
| Power Supply Voltage | 3.2V to 5.0V |
| Communication Protocol | UART (Serial) |
| Audio File Format | MP3, WAV, WMA |
| Storage Medium | microSD card (up to 32GB) |
| Output Modes | Speaker (4Ω/3W) or Headphones |
| Dimensions | 22mm x 30mm x 11mm |
Pin Configuration
The DFMiniPlayer module has 8 pins, as described in the table below:
| Pin Number | Pin Name | Description |
|---|---|---|
| 1 | VCC | Power supply input (3.2V to 5.0V) |
| 2 | GND | Ground connection |
| 3 | RX | UART Receive pin (connect to TX of microcontroller) |
| 4 | TX | UART Transmit pin (connect to RX of microcontroller) |
| 5 | SPK_1 | Speaker output 1 (connect to one terminal of a speaker) |
| 6 | SPK_2 | Speaker output 2 (connect to the other terminal of a speaker) |
| 7 | DAC_R | Right channel audio output (for headphones or external amplifier) |
| 8 | DAC_L | Left channel audio output (for headphones or external amplifier) |
Usage Instructions
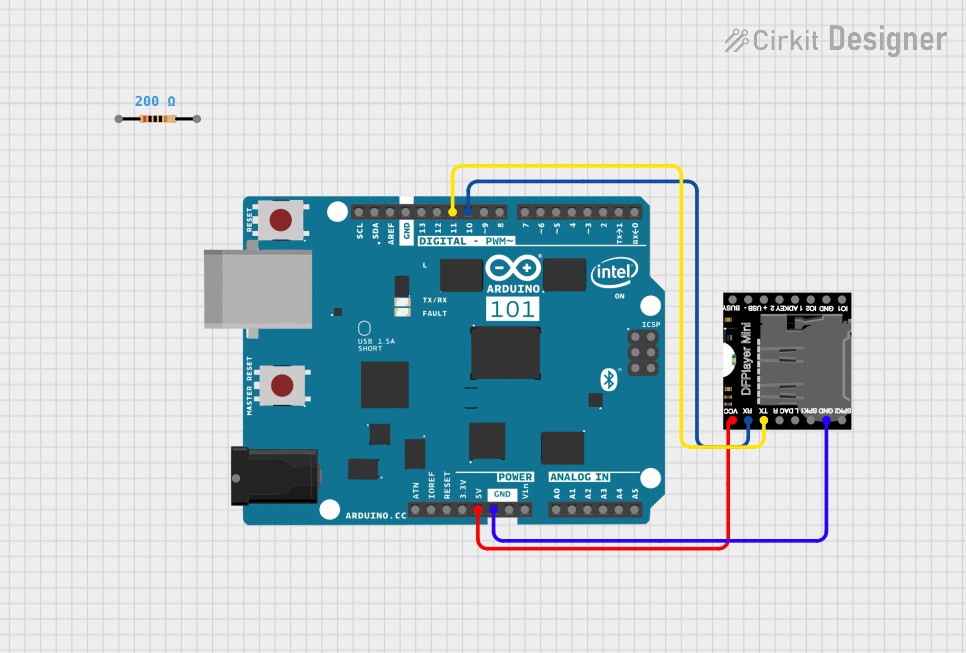
Connecting the DFMiniPlayer to a Microcontroller
To use the DFMiniPlayer, connect it to a microcontroller (e.g., Arduino UNO) as follows:
- Connect the
VCCpin to a 5V power source. - Connect the
GNDpin to the ground of the power source. - Connect the
RXpin of the DFMiniPlayer to theTXpin of the microcontroller. - Connect the
TXpin of the DFMiniPlayer to theRXpin of the microcontroller. - Optionally, connect a speaker to the
SPK_1andSPK_2pins or headphones to theDAC_RandDAC_Lpins.
Example Code for Arduino UNO
Below is an example Arduino sketch to control the DFMiniPlayer using the DFRobotDFPlayerMini library:
#include "SoftwareSerial.h"
#include "DFRobotDFPlayerMini.h"

// Define RX and TX pins for SoftwareSerial
SoftwareSerial mySerial(10, 11); // RX = Pin 10, TX = Pin 11

DFRobotDFPlayerMini myDFPlayer;

void setup() {
  Serial.begin(9600); // Initialize Serial Monitor for debugging
  mySerial.begin(9600); // Initialize SoftwareSerial for DFMiniPlayer

  if (!myDFPlayer.begin(mySerial)) {
    // Check if the DFMiniPlayer is connected properly
    Serial.println("DFMiniPlayer initialization failed!");
    Serial.println("Please check the connections and try again.");
    while (true);
  }

  Serial.println("DFMiniPlayer initialized successfully!");

  myDFPlayer.volume(20); // Set volume (range: 0-30)
  myDFPlayer.play(1);    // Play the first audio file on the microSD card
}

void loop() {
  // Add your code here to control the DFMiniPlayer
}
Important Considerations
- Ensure the microSD card is formatted as FAT16 or FAT32 and contains audio files in supported formats (MP3, WAV, WMA).
- Use a regulated power supply to avoid damaging the module.
- Avoid connecting both the speaker and headphone outputs simultaneously.
- Use a resistor divider or level shifter if connecting to a 3.3V microcontroller.
Troubleshooting and FAQs
Common Issues and Solutions
DFMiniPlayer does not initialize:
- Ensure the
RXandTXpins are correctly connected. - Verify that the microSD card is properly inserted and formatted as FAT16 or FAT32.
- Check the power supply voltage (3.2V to 5.0V).
- Ensure the
No sound output:
- Verify the speaker or headphone connections.
- Check the volume setting using the
volume()function. - Ensure the audio files are in a supported format and correctly named.
Audio playback is distorted:
- Use a speaker with the recommended impedance (4Ω) and power rating (3W).
- Ensure the power supply is stable and within the specified range.
Module resets or behaves erratically:
- Check for loose connections or poor soldering.
- Avoid using long wires for the
RXandTXconnections to minimize noise.
FAQs
Q: Can I use the DFMiniPlayer with a 3.3V microcontroller?
A: Yes, but you must use a level shifter or resistor divider for the RX pin to avoid damaging the module.
Q: How do I organize audio files on the microSD card?
A: Place audio files in the root directory or folders named 01, 02, etc. Files should be named 001.mp3, 002.mp3, and so on.
Q: Can I control the DFMiniPlayer without a microcontroller?
A: Yes, the module can be controlled using simple push buttons connected to specific pins, but this limits functionality.
Q: What is the maximum storage capacity supported?
A: The DFMiniPlayer supports microSD cards up to 32GB.
By following this documentation, you can effectively integrate the DFMiniPlayer into your projects and troubleshoot common issues.