How to Use Seeed Studio XIAO Expansion Board: Examples, Pinouts, and Specs
Introduction
The Seeed Studio XIAO Expansion Board is a compact and versatile add-on designed to enhance the functionality of the Seeed Studio XIAO series microcontrollers. This expansion board provides additional GPIO pins, interfaces, and power options, making it an ideal choice for prototyping, development, and small-scale production projects. Its compact design ensures it fits seamlessly into space-constrained applications while offering robust connectivity and ease of use.
Explore Projects Built with Seeed Studio XIAO Expansion Board

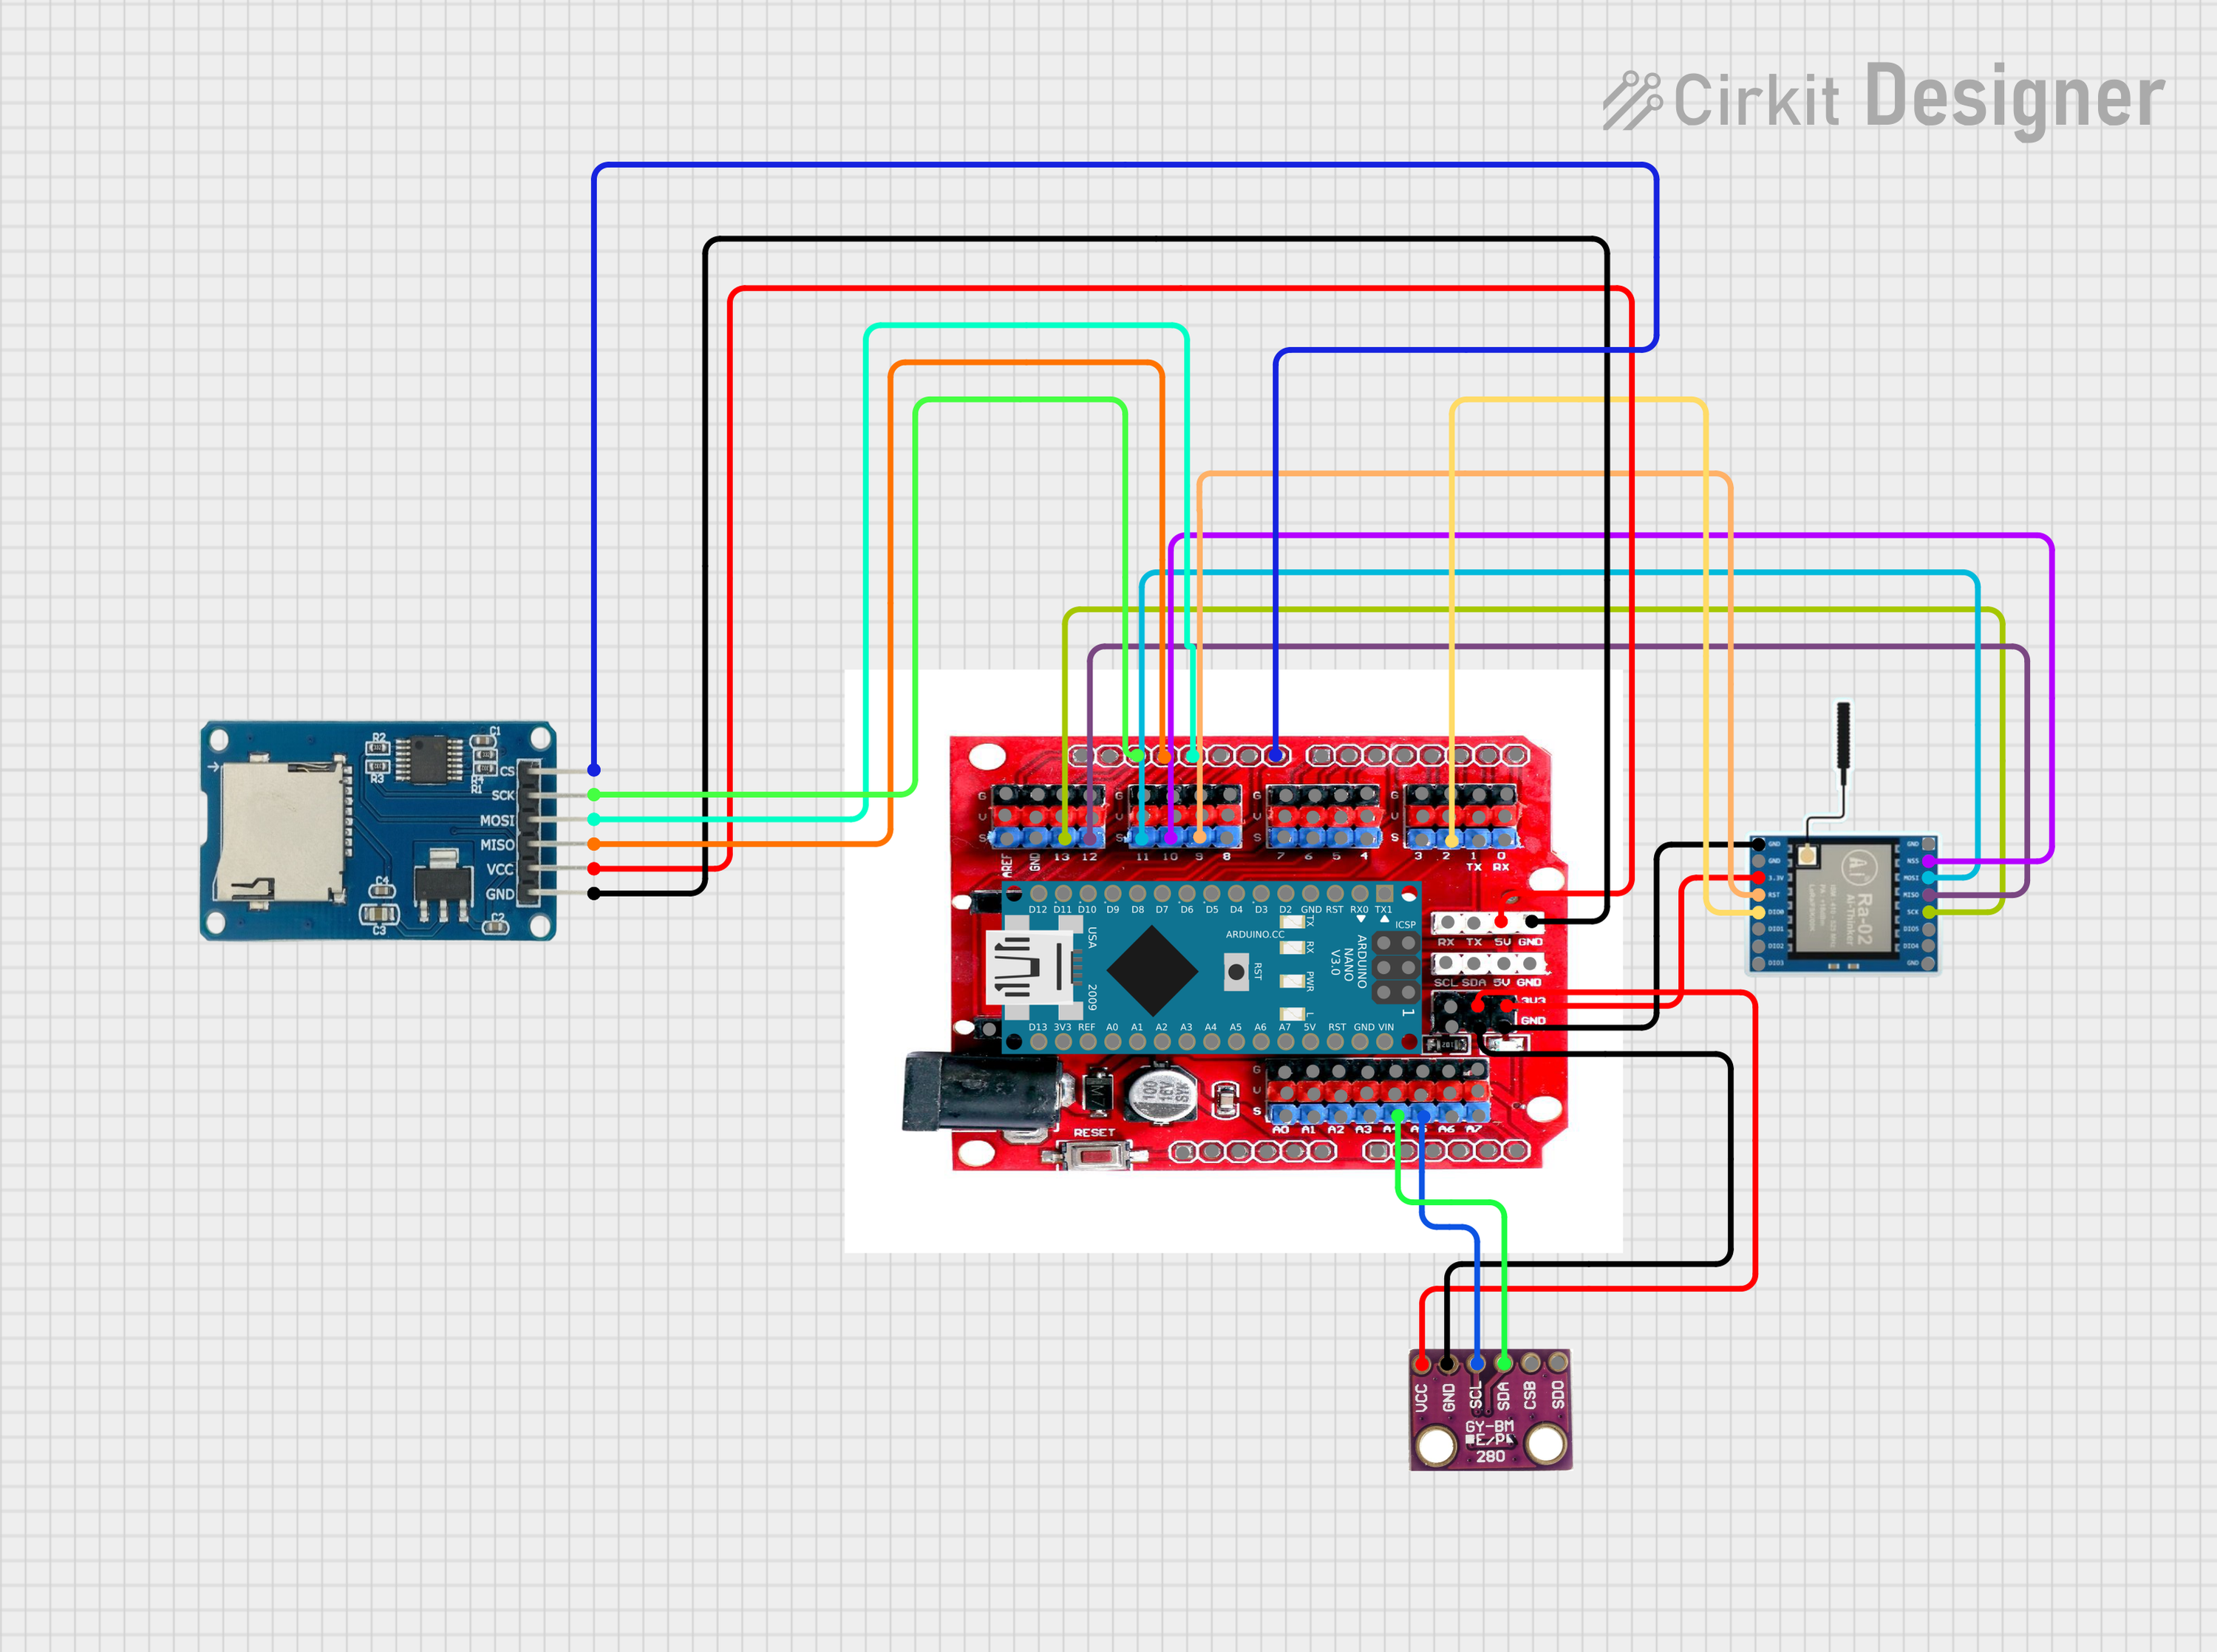

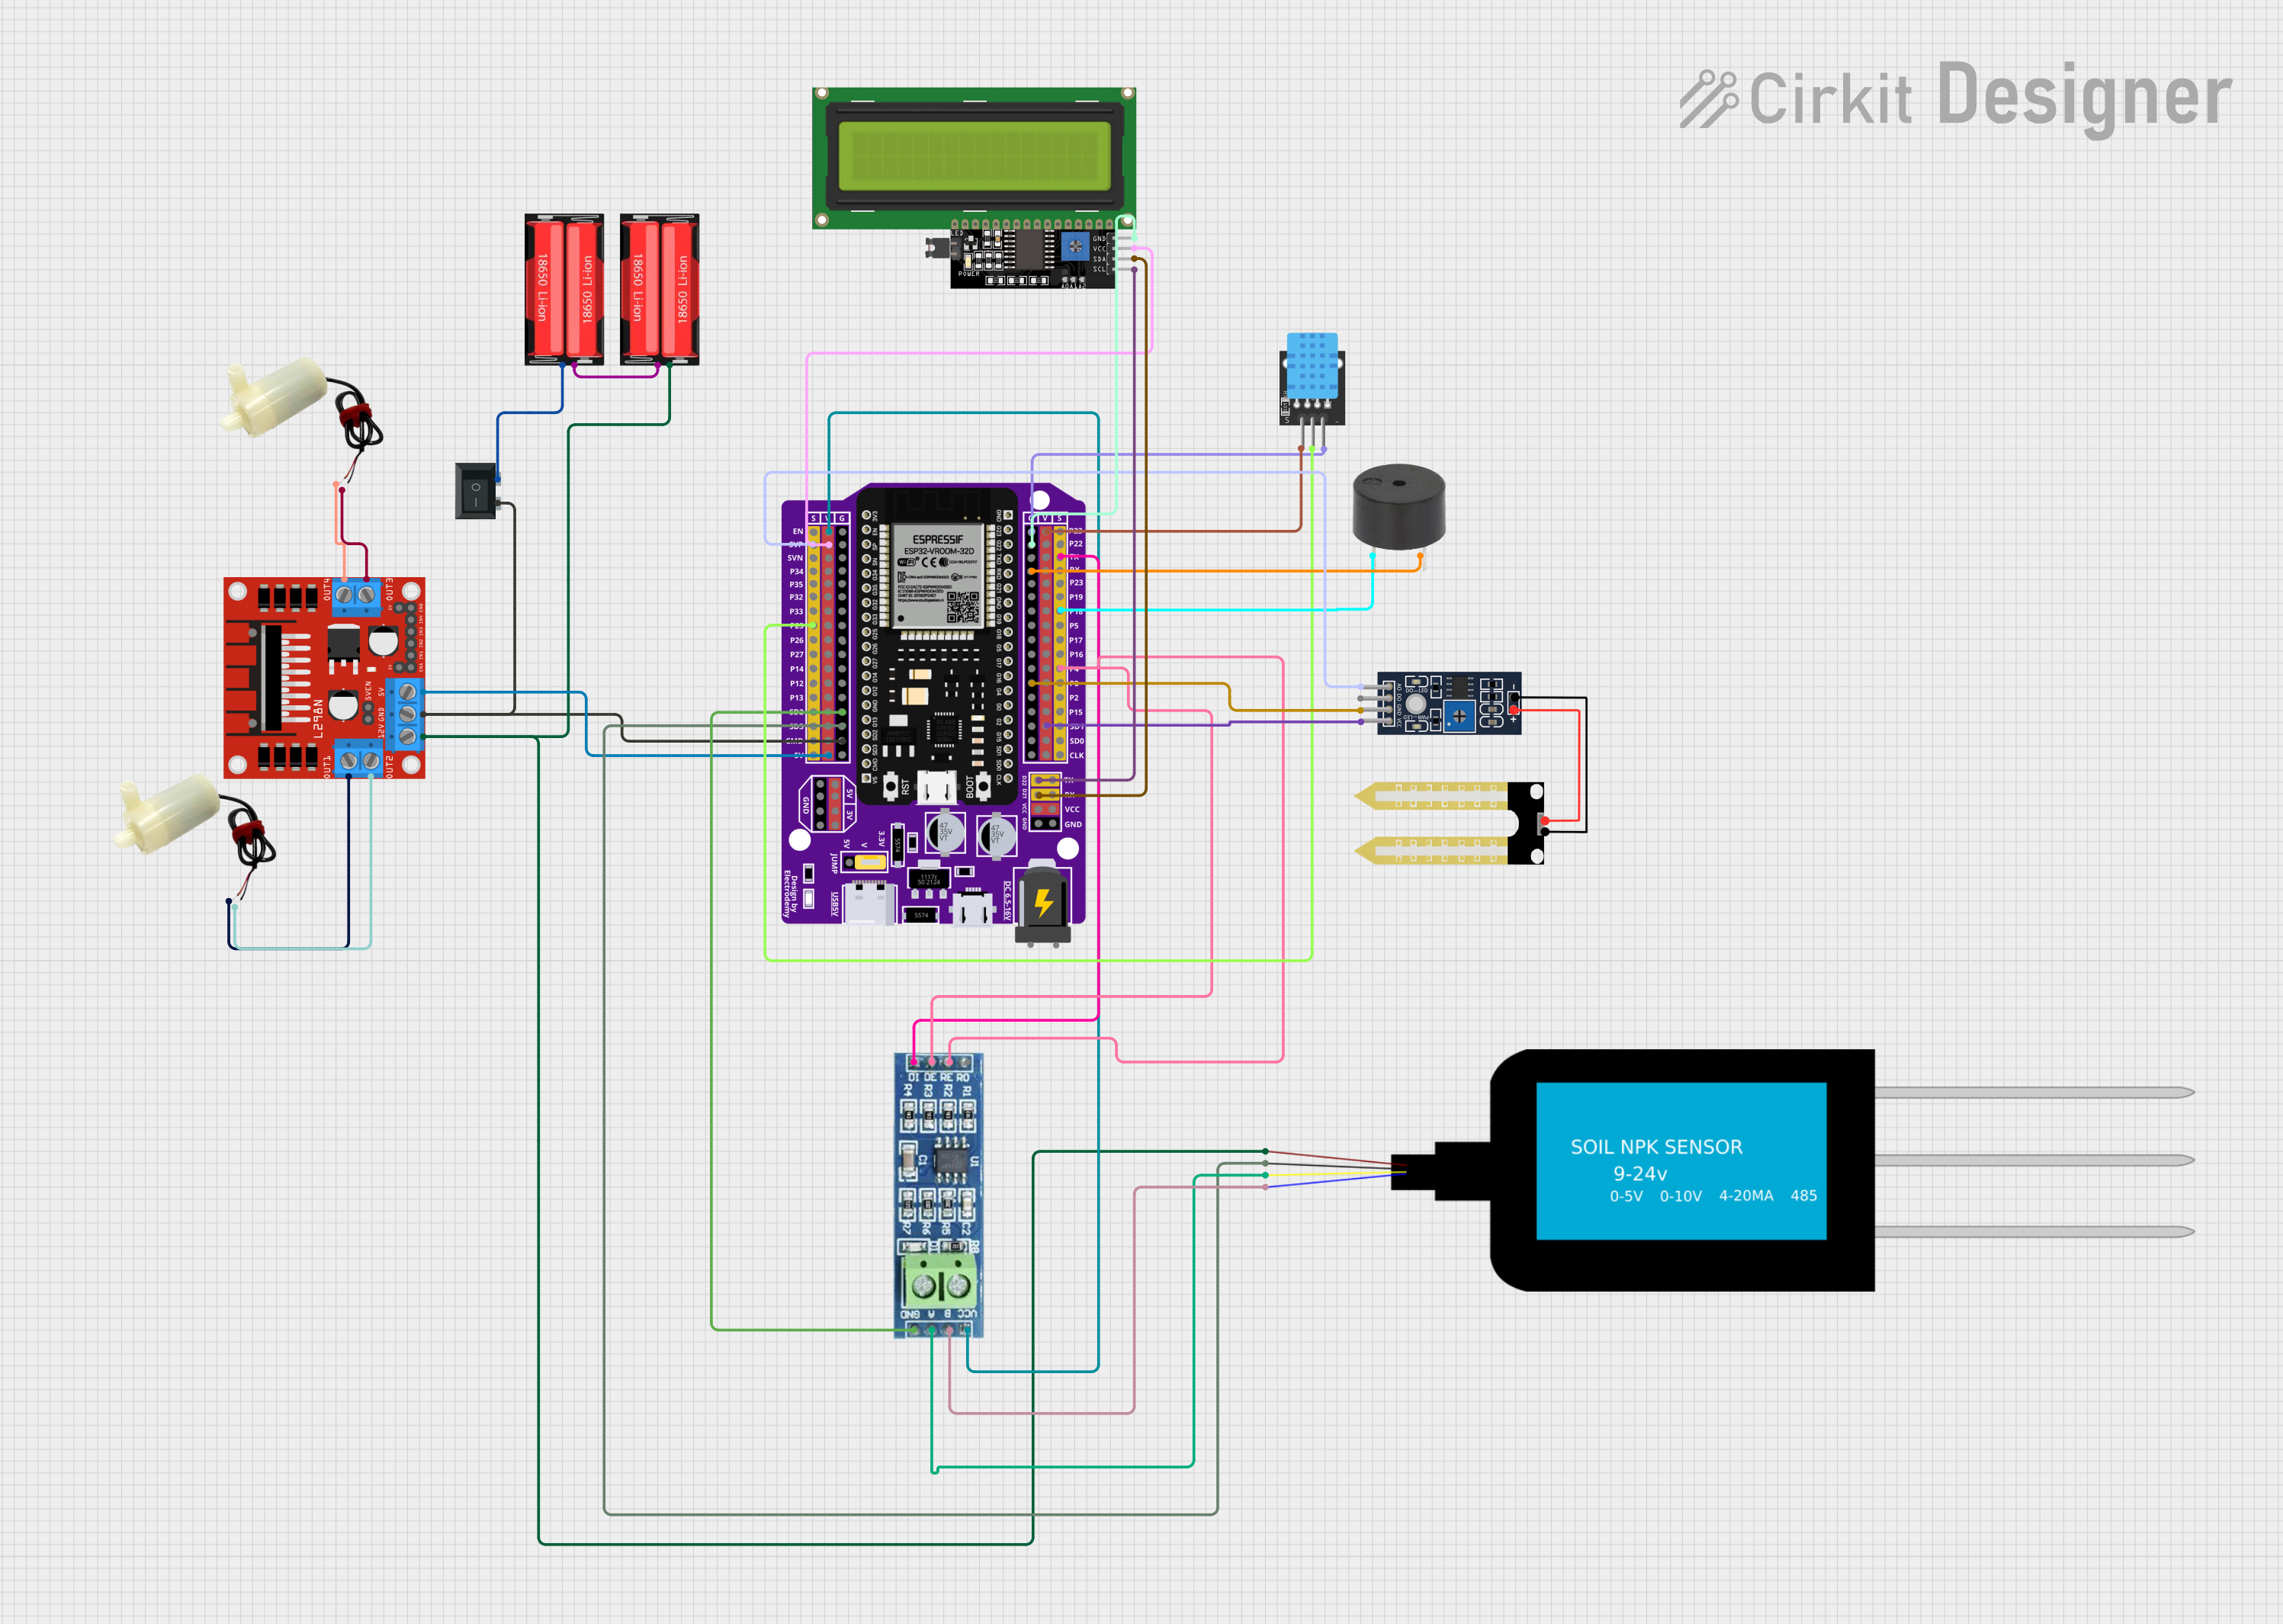
Explore Projects Built with Seeed Studio XIAO Expansion Board
Common Applications and Use Cases
- Rapid prototyping and development with Seeed Studio XIAO microcontrollers
- IoT (Internet of Things) projects requiring additional GPIOs and interfaces
- Robotics and automation systems
- Wearable devices and compact electronics
- Educational projects and maker activities
Technical Specifications
The Seeed Studio XIAO Expansion Board is designed to complement the XIAO series microcontrollers. Below are its key technical details:
Key Features
- Power Supply Options: Supports USB-C and battery power input (3.7V Li-Po battery).
- GPIO Expansion: Breaks out all GPIO pins of the XIAO microcontroller.
- Interfaces: Includes I2C, UART, SPI, and analog pins.
- Onboard Components:
- Reset button for the XIAO microcontroller
- Power switch for battery control
- Battery charging circuit
- Compact Size: Designed to match the small form factor of the XIAO series.
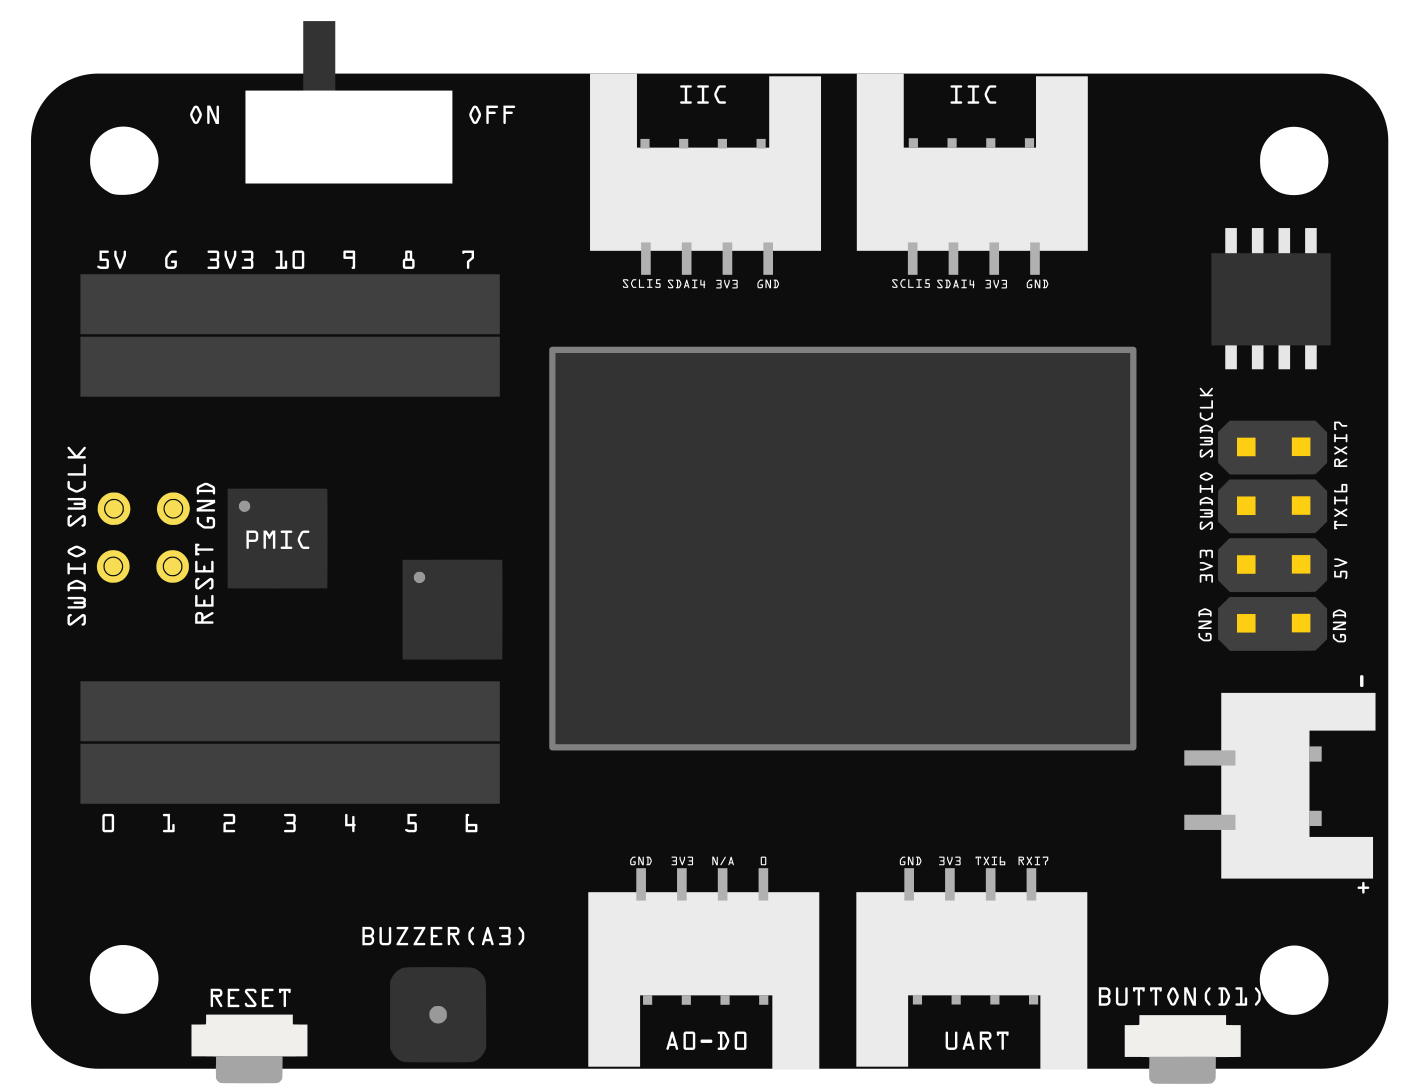
Pin Configuration and Descriptions
The expansion board provides access to all the GPIO pins of the XIAO microcontroller. Below is the pinout description:
| Pin Name | Function | Description |
|---|---|---|
| 3V3 | Power Output | 3.3V power output from the XIAO microcontroller. |
| GND | Ground | Common ground for the circuit. |
| D0-D13 | Digital I/O Pins | General-purpose digital input/output pins. |
| A0-A5 | Analog Input Pins | Analog input pins for reading sensor data. |
| I2C (SDA/SCL) | I2C Communication Interface | Pins for connecting I2C devices (e.g., sensors, displays). |
| UART (TX/RX) | UART Communication Interface | Serial communication pins for connecting to other devices or debugging. |
| SPI (MISO/MOSI/SCK) | SPI Communication Interface | Pins for connecting SPI devices (e.g., SD cards, displays). |
| BAT+ | Battery Input | Connect a 3.7V Li-Po battery for portable power. |
| USB-C | Power and Data | USB-C port for power input and data communication with the XIAO microcontroller. |
Usage Instructions
How to Use the Seeed Studio XIAO Expansion Board
Attach the XIAO Microcontroller:
- Align the XIAO microcontroller with the pin headers on the expansion board.
- Gently press the XIAO onto the headers until it is securely connected.
Power the Board:
- Connect a USB-C cable to the expansion board for power and data communication.
- Alternatively, connect a 3.7V Li-Po battery to the BAT+ pin for portable operation.
Connect Peripherals:
- Use the GPIO pins to connect sensors, actuators, or other peripherals.
- Ensure proper pin mapping and voltage levels for connected devices.
Program the XIAO Microcontroller:
- Use the Arduino IDE or other compatible development environments to upload code to the XIAO microcontroller.
- The USB-C port on the expansion board can be used for programming and serial communication.
Important Considerations and Best Practices
- Voltage Levels: Ensure that connected peripherals operate at 3.3V logic levels to avoid damaging the XIAO microcontroller.
- Battery Safety: Use only compatible 3.7V Li-Po batteries and avoid overcharging or deep discharging.
- Pin Usage: Refer to the XIAO microcontroller's datasheet for detailed pin functions and limitations.
- Reset Button: Use the onboard reset button to restart the XIAO microcontroller if needed.
Example: Connecting to an Arduino UNO
The Seeed Studio XIAO Expansion Board can be used with the Arduino IDE for programming. Below is an example code snippet to blink an LED connected to pin D10:
// Blink an LED connected to pin D10 on the Seeed Studio XIAO Expansion Board

void setup() {
  pinMode(10, OUTPUT); // Set pin D10 as an output
}

void loop() {
  digitalWrite(10, HIGH); // Turn the LED on
  delay(1000);            // Wait for 1 second
  digitalWrite(10, LOW);  // Turn the LED off
  delay(1000);            // Wait for 1 second
}
Troubleshooting and FAQs
Common Issues and Solutions
XIAO Microcontroller Not Detected by Computer:
- Ensure the USB-C cable is properly connected and supports data transfer.
- Press the reset button on the expansion board to restart the microcontroller.
Peripherals Not Responding:
- Verify the wiring and connections to the GPIO pins.
- Check that the peripherals are compatible with 3.3V logic levels.
Battery Not Charging:
- Ensure the battery is properly connected to the BAT+ pin.
- Check the USB-C power source for sufficient voltage and current.
Code Upload Fails:
- Confirm that the correct board and port are selected in the Arduino IDE.
- Double-check the USB-C connection and try pressing the reset button.
FAQs
Q: Can I use 5V peripherals with the expansion board?
A: No, the XIAO microcontroller operates at 3.3V logic levels. Using 5V peripherals may damage the microcontroller.
Q: How do I know if the battery is charging?
A: The onboard charging circuit includes an LED indicator that lights up during charging.
Q: Can I use the expansion board without a battery?
A: Yes, the board can be powered directly via the USB-C port without a battery.
Q: Is the expansion board compatible with all XIAO series microcontrollers?
A: Yes, the expansion board is designed to work with all Seeed Studio XIAO series microcontrollers.