Cirkit Designer
Your all-in-one circuit design IDE
Home /
Component Documentation
How to Use vcc 12v: Examples, Pinouts, and Specs

Introduction
- The VCC 12V is a 12-volt voltage supply commonly used as a power source in electronic circuits. It provides a stable 12V DC output, which is essential for powering various electronic components and modules.
- Common applications include powering motors, relays, LED strips, sensors, and microcontroller-based systems. It is also widely used in automotive electronics, home automation, and industrial control systems.
Explore Projects Built with vcc 12v
Solar Panel to 12V Battery Charging Circuit
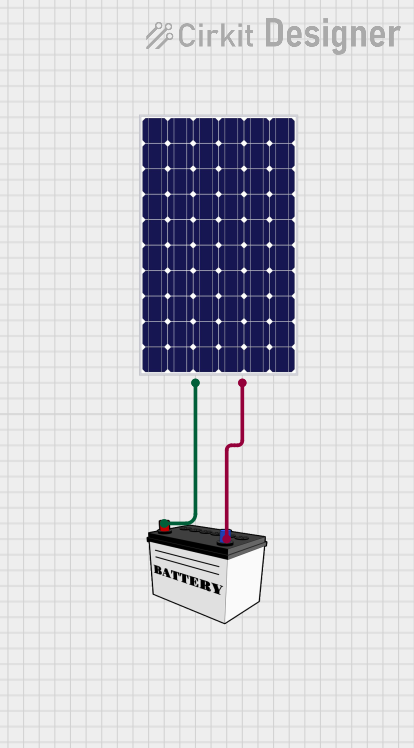
This circuit connects a solar panel to a 12V battery for charging purposes. The positive terminal of the solar panel is connected to the VCC of the battery, and the negative terminal is connected to the GND of the battery, allowing for energy transfer from the solar panel to the battery.
High Voltage Generator with Push Switch Activation
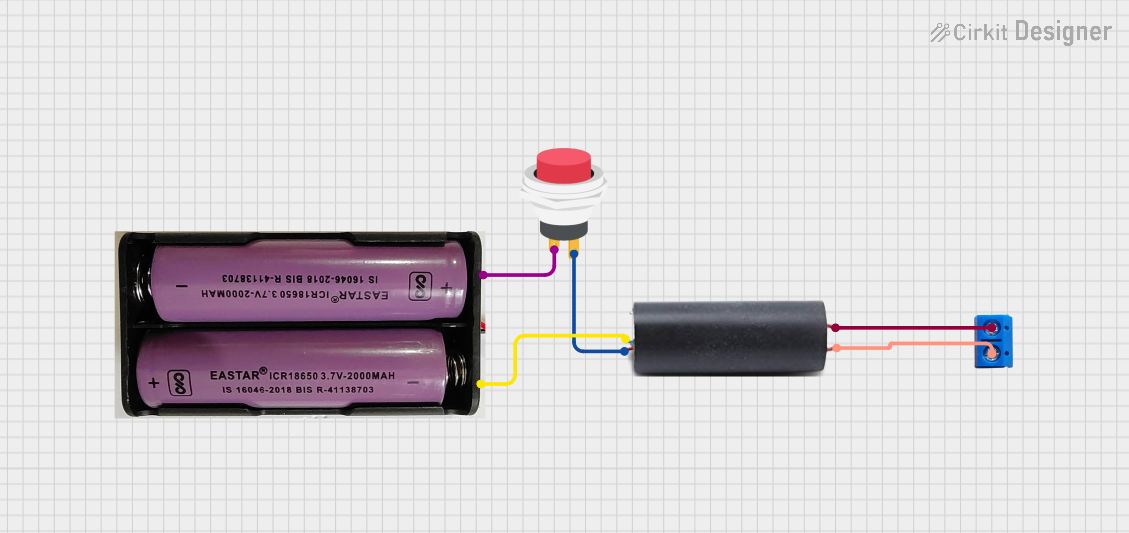
This circuit features a high voltage generator connected to a terminal PCB for output, with its power supply controlled by a 2-pin push switch. The high voltage generator's VCC is connected through the switch, allowing the user to turn the high voltage output on and off. The circuit is powered by a 7.4V battery, with the positive terminal connected to the switch and the negative terminal connected to the generator's ground.
Battery-Powered 12V High-Power LED Light

This circuit consists of a 12V battery connected to a 12V, 10W power LED. The battery provides the necessary voltage and current to power the LED, enabling it to emit light.
Adjustable LED Driver with LM317 Voltage Regulator and Potentiometer
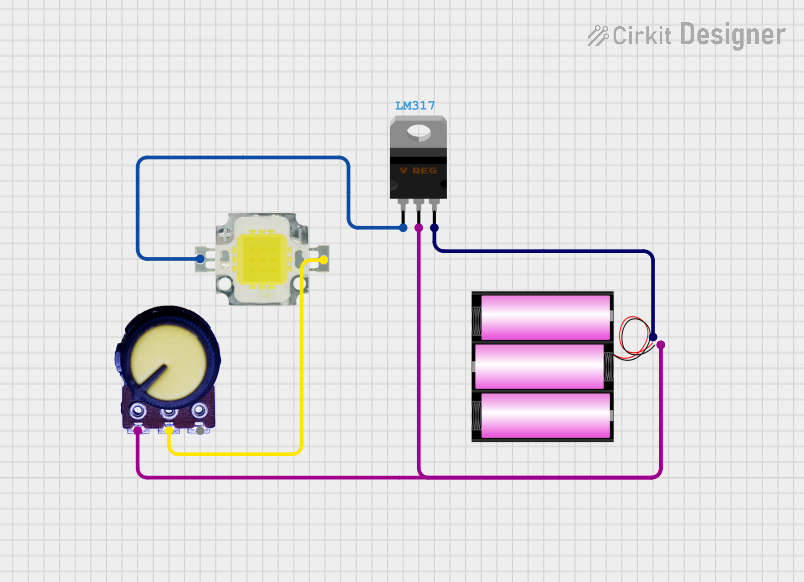
This circuit is a regulated power supply for a 12V, 10W LED, using an LM317 voltage regulator to control the output voltage. A potentiometer is used to adjust the voltage, and a 12V battery provides the input power.
Explore Projects Built with vcc 12v
Solar Panel to 12V Battery Charging Circuit
This circuit connects a solar panel to a 12V battery for charging purposes. The positive terminal of the solar panel is connected to the VCC of the battery, and the negative terminal is connected to the GND of the battery, allowing for energy transfer from the solar panel to the battery.
High Voltage Generator with Push Switch Activation
This circuit features a high voltage generator connected to a terminal PCB for output, with its power supply controlled by a 2-pin push switch. The high voltage generator's VCC is connected through the switch, allowing the user to turn the high voltage output on and off. The circuit is powered by a 7.4V battery, with the positive terminal connected to the switch and the negative terminal connected to the generator's ground.
Battery-Powered 12V High-Power LED Light
This circuit consists of a 12V battery connected to a 12V, 10W power LED. The battery provides the necessary voltage and current to power the LED, enabling it to emit light.
Adjustable LED Driver with LM317 Voltage Regulator and Potentiometer
This circuit is a regulated power supply for a 12V, 10W LED, using an LM317 voltage regulator to control the output voltage. A potentiometer is used to adjust the voltage, and a 12V battery provides the input power.
Technical Specifications
- Input Voltage: Typically 12V DC (can vary depending on the source, e.g., battery or adapter)
- Output Voltage: 12V DC
- Maximum Current: Depends on the power supply or regulator used (e.g., 1A, 2A, or higher)
- Polarity: Positive terminal (VCC) and negative terminal (GND)
- Ripple Voltage: Typically less than 50mV (depending on the quality of the power supply)
Pin Configuration and Descriptions
| Pin Name | Description |
|---|---|
| VCC | Positive terminal for 12V DC output |
| GND | Ground terminal (0V reference) |
Usage Instructions
Connecting the VCC 12V to a Circuit:
- Identify the positive (VCC) and negative (GND) terminals of the 12V power supply.
- Connect the VCC terminal to the positive power rail of your circuit.
- Connect the GND terminal to the ground rail of your circuit.
- Ensure that the components in your circuit are rated for 12V operation to avoid damage.
Important Considerations:
- Polarity: Always double-check the polarity of the connections. Reversing the polarity can damage components.
- Current Rating: Ensure that the power supply can provide sufficient current for all connected components. Exceeding the current limit may cause the power supply to overheat or shut down.
- Voltage Regulation: If your circuit requires a lower voltage, use a voltage regulator (e.g., LM7805 for 5V) to step down the 12V supply.
- Decoupling Capacitors: Add decoupling capacitors (e.g., 100µF and 0.1µF) near sensitive components to reduce noise and stabilize the voltage.
Using with Arduino UNO:
- The Arduino UNO can be powered using a 12V supply via its barrel jack or VIN pin. However, ensure that the current rating of the supply is sufficient for both the Arduino and any connected peripherals.
// Example: Blinking an LED using Arduino UNO powered by a 12V supply

// Connect the 12V supply to the Arduino's barrel jack or VIN pin.
// Ensure the LED is connected to pin 13 with a current-limiting resistor (220 ohms).

void setup() {
  pinMode(13, OUTPUT); // Set pin 13 as an output
}

void loop() {
  digitalWrite(13, HIGH); // Turn the LED on
  delay(1000);            // Wait for 1 second
  digitalWrite(13, LOW);  // Turn the LED off
  delay(1000);            // Wait for 1 second
}
Troubleshooting and FAQs
Common Issues
No Output Voltage:
- Cause: The power supply is not connected properly or is faulty.
- Solution: Verify the connections and ensure the power supply is functional.
Overheating Components:
- Cause: Components in the circuit are not rated for 12V operation.
- Solution: Check the voltage ratings of all components and use a voltage regulator if necessary.
Voltage Drops Under Load:
- Cause: The power supply cannot provide sufficient current.
- Solution: Use a power supply with a higher current rating.
Noise or Voltage Fluctuations:
- Cause: Insufficient filtering or decoupling in the circuit.
- Solution: Add decoupling capacitors near sensitive components.
FAQs
Can I use a 12V VCC to power a 5V device?
- No, you must use a voltage regulator or step-down converter to reduce the voltage to 5V.
What happens if I reverse the polarity?
- Reversing the polarity can damage components. Always double-check connections before powering the circuit.
Can I use a 12V VCC to power an Arduino UNO?
- Yes, you can connect the 12V supply to the barrel jack or VIN pin. However, ensure the supply provides sufficient current for the Arduino and any connected peripherals.