How to Use Emergency STOP: Examples, Pinouts, and Specs
Introduction
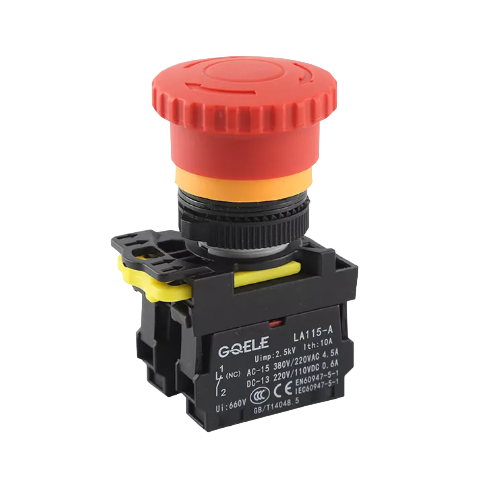
The Emergency STOP button is a crucial safety mechanism designed to immediately shut down machinery or equipment in case of an emergency. This component is essential in industrial environments, laboratories, and any setting where machinery operation poses potential risks to human safety or equipment integrity. By pressing the Emergency STOP button, operators can quickly halt operations, preventing harm or damage.
Explore Projects Built with Emergency STOP


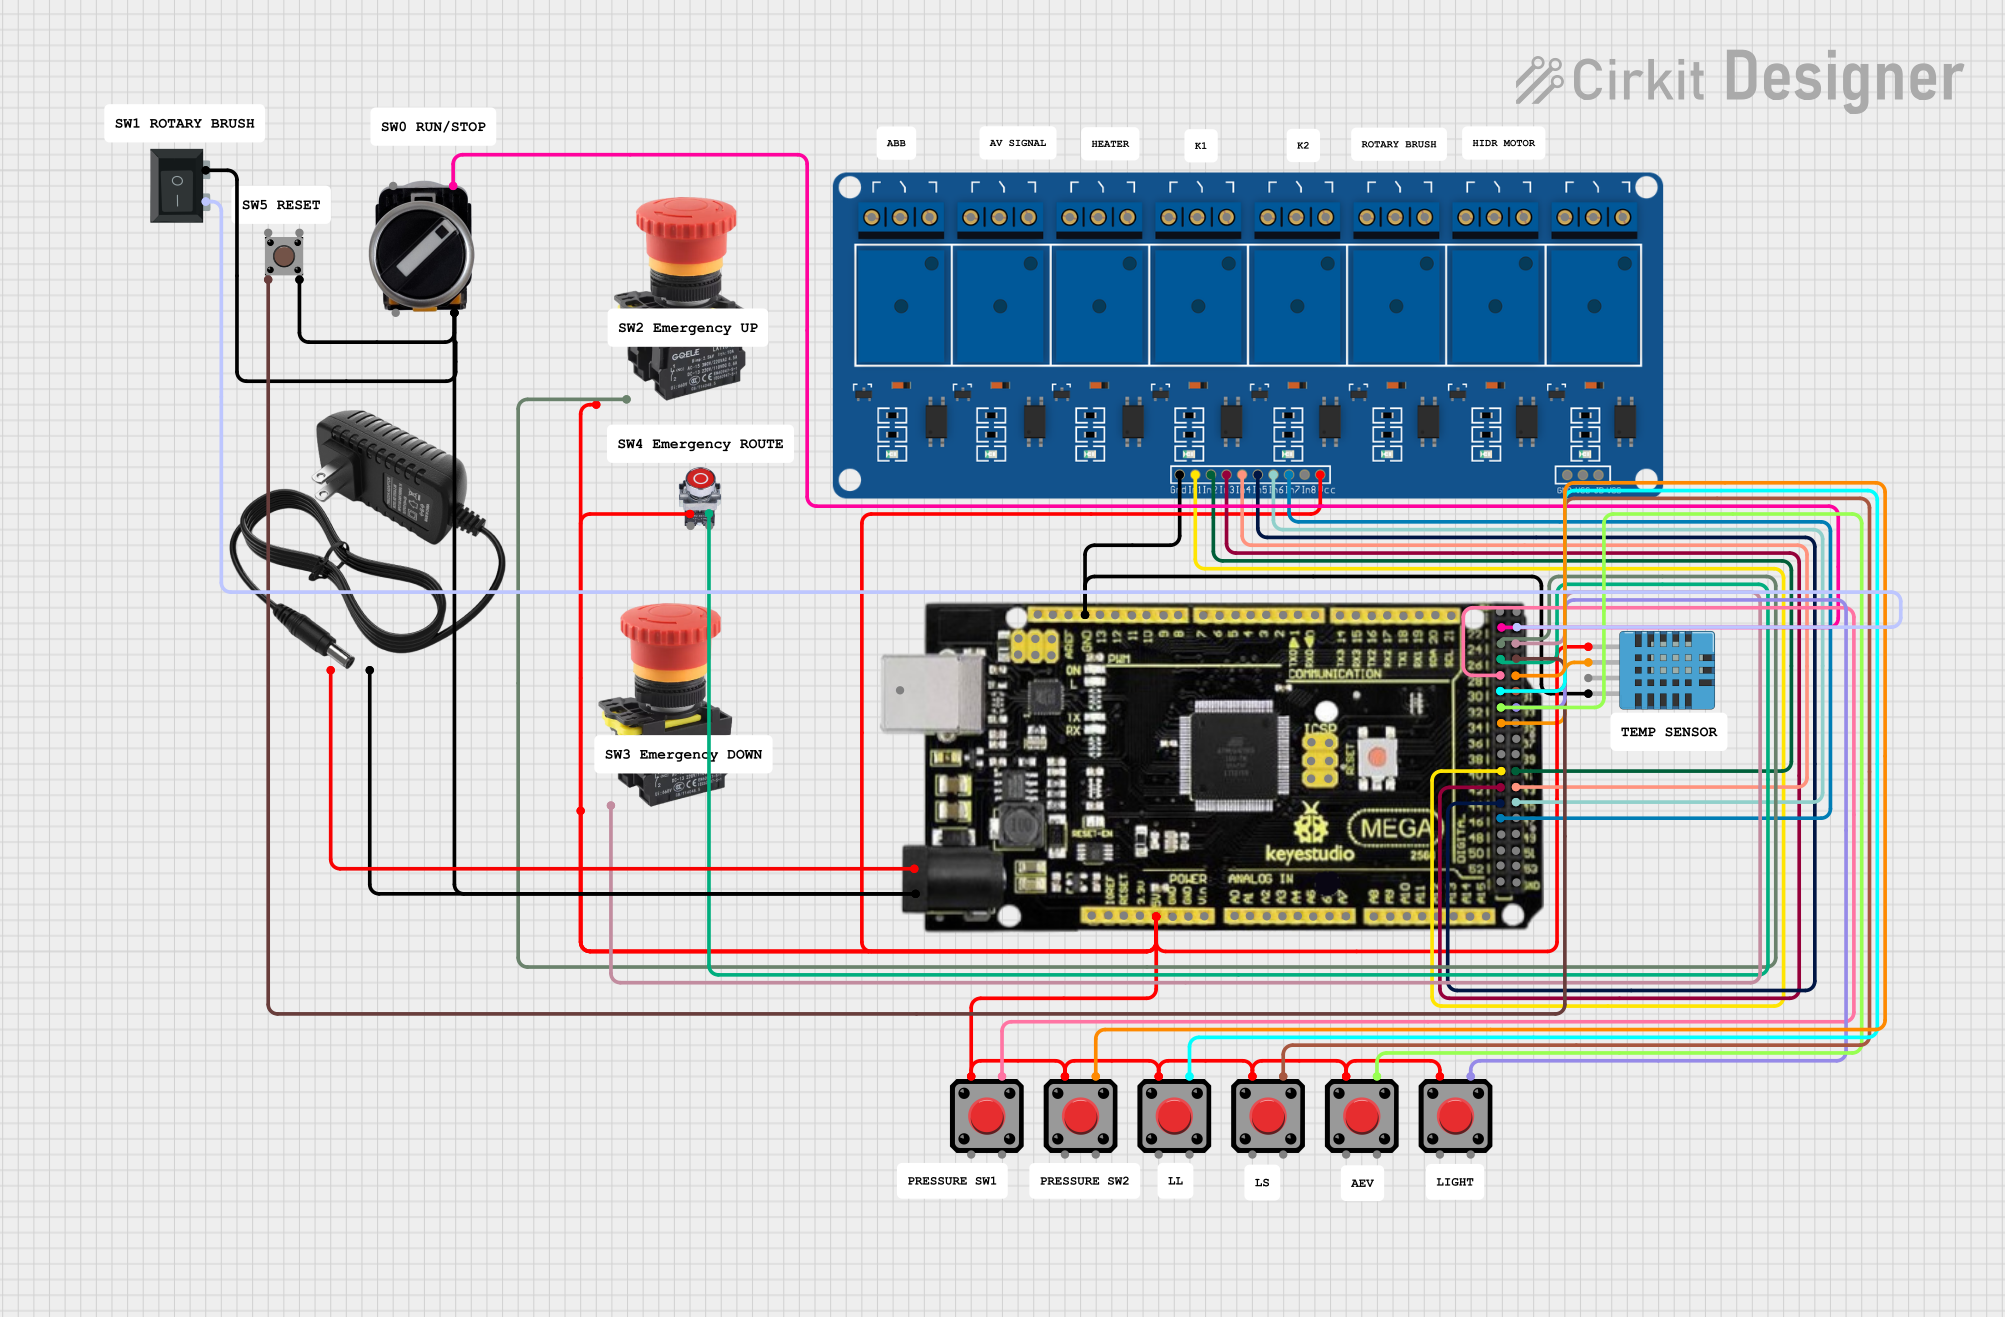
Explore Projects Built with Emergency STOP
Common Applications and Use Cases
- Industrial machinery and manufacturing equipment
- Laboratory instruments and experimental setups
- Automated systems and robotics
- Heavy machinery and construction equipment
- Any environment where immediate shutdown is necessary for safety
Technical Specifications
Key Technical Details
| Parameter | Value |
|---|---|
| Operating Voltage | 24V DC / 120V AC / 240V AC |
| Current Rating | 10A |
| Contact Configuration | 1 NO (Normally Open) + 1 NC (Normally Closed) |
| Mechanical Life | 500,000 cycles |
| Electrical Life | 50,000 cycles |
| Mounting Hole Size | 22mm |
| Operating Temperature | -25°C to +55°C |
Pin Configuration and Descriptions
| Pin Number | Pin Name | Description |
|---|---|---|
| 1 | NO | Normally Open contact |
| 2 | NC | Normally Closed contact |
| 3 | COM | Common terminal for both NO and NC contacts |
Usage Instructions
How to Use the Emergency STOP Button in a Circuit
Wiring the Button:
- Connect the
COMterminal to the power source or control signal. - Connect the
NOterminal to the circuit that needs to be activated when the button is pressed. - Connect the
NCterminal to the circuit that needs to be deactivated when the button is pressed.
- Connect the
Mounting the Button:
- Drill a 22mm hole in the desired mounting surface.
- Insert the button into the hole and secure it using the provided mounting hardware.
Testing the Button:
- Ensure the machinery or equipment is powered off.
- Press the Emergency STOP button to verify that it halts the operation.
- Reset the button (if applicable) and ensure the machinery resumes normal operation.
Important Considerations and Best Practices
- Regular Maintenance: Periodically test the Emergency STOP button to ensure it functions correctly.
- Clear Labeling: Clearly label the Emergency STOP button to ensure it is easily identifiable in an emergency.
- Accessibility: Install the button in an easily accessible location to allow quick response in case of an emergency.
- Compliance: Ensure the installation complies with relevant safety standards and regulations.
Troubleshooting and FAQs
Common Issues and Solutions
Button Does Not Halt Operation:
- Solution: Check the wiring connections to ensure they are correct and secure. Verify that the
COM,NO, andNCterminals are connected as per the circuit requirements.
- Solution: Check the wiring connections to ensure they are correct and secure. Verify that the
Button Sticks or Does Not Reset:
- Solution: Inspect the button for any physical obstructions or damage. Clean the button mechanism and ensure it moves freely. If the problem persists, consider replacing the button.
Intermittent Operation:
- Solution: Check for loose or corroded connections. Ensure the button is securely mounted and the terminals are properly connected.
FAQs
Q1: Can the Emergency STOP button be used with an Arduino UNO?
- A1: Yes, the Emergency STOP button can be integrated with an Arduino UNO for safety applications. Below is an example code snippet for using the button with an Arduino UNO:
const int stopButtonPin = 2; // Pin connected to the Emergency STOP button
const int ledPin = 13;       // Pin connected to an LED for indication

void setup() {
  pinMode(stopButtonPin, INPUT_PULLUP); // Set the button pin as input with pull-up resistor
  pinMode(ledPin, OUTPUT);              // Set the LED pin as output
  digitalWrite(ledPin, HIGH);           // Turn on the LED (indicating normal operation)
}

void loop() {
  int buttonState = digitalRead(stopButtonPin); // Read the button state

  if (buttonState == LOW) { // If the button is pressed
    digitalWrite(ledPin, LOW); // Turn off the LED (indicating emergency stop)
    // Add code here to halt machinery or equipment
  } else {
    digitalWrite(ledPin, HIGH); // Turn on the LED (indicating normal operation)
  }
}
Q2: How often should the Emergency STOP button be tested?
- A2: It is recommended to test the Emergency STOP button at least once a month to ensure it is functioning correctly.
Q3: Can the Emergency STOP button be used in outdoor environments?
- A3: The button can be used in outdoor environments if it is rated for outdoor use and protected from extreme weather conditions.
By following this documentation, users can effectively integrate and maintain the Emergency STOP button in their safety systems, ensuring reliable and immediate response in case of emergencies.