Cirkit Designer Logo
Cirkit Designer
Your all-in-one circuit design IDE
Home / 
Component Documentation

How to Use Humidity Sensor - HIH-4030 Breakout: Examples, Pinouts, and Specs
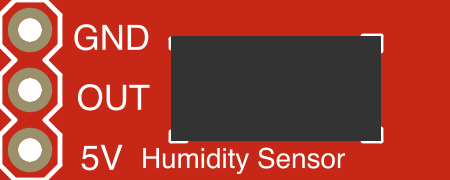

Image of Humidity Sensor - HIH-4030 Breakout
Cirkit Designer LogoDesign with Humidity Sensor - HIH-4030 Breakout in Cirkit Designer

Introduction

The HIH-4030 Breakout (Manufacturer Part ID: SEN-09569) by SparkFun Electronics is a high-performance humidity sensor designed for accurate and reliable relative humidity (RH) measurements. This sensor outputs an analog voltage directly proportional to the relative humidity, making it simple to integrate into a wide range of electronic applications.

Explore Projects Built with Humidity Sensor - HIH-4030 Breakout
Use Cirkit Designer to design, explore, and prototype these projects online. Some projects support real-time simulation. Click "Open Project" to start designing instantly!
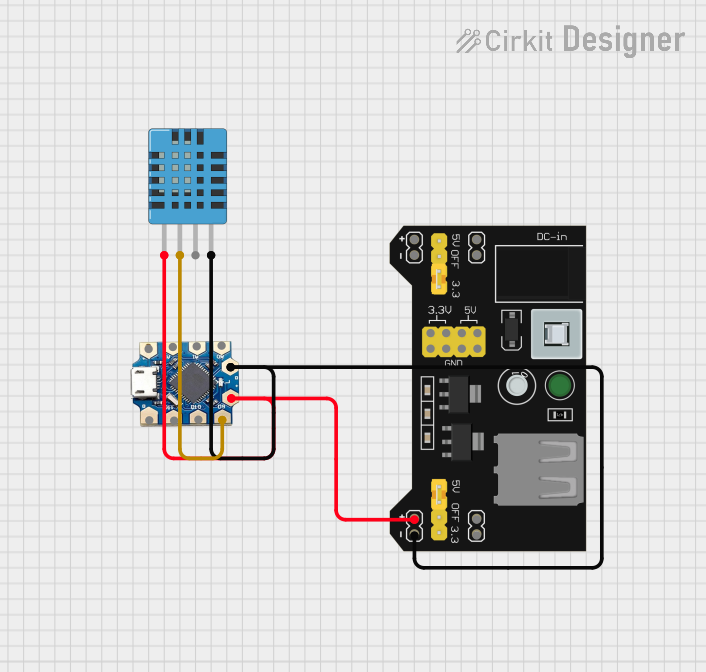
Arduino Leonardo Tiny Weather Station with DHT11 Sensor
Image of Hydroponics Project: A project utilizing Humidity Sensor - HIH-4030 Breakout in a practical application
This circuit uses an Atmega32U4 microcontroller to read temperature and humidity data from a DHT11 sensor. The microcontroller is powered by an MB102 Breadboard Power Supply Module, which provides the necessary 5V and ground connections. The collected data is then printed to the serial monitor for monitoring purposes.
Cirkit Designer LogoOpen Project in Cirkit Designer
ESP32-Based Environmental and Distance Sensing System
Image of Low Cost Water Level Sensor: A project utilizing Humidity Sensor - HIH-4030 Breakout in a practical application
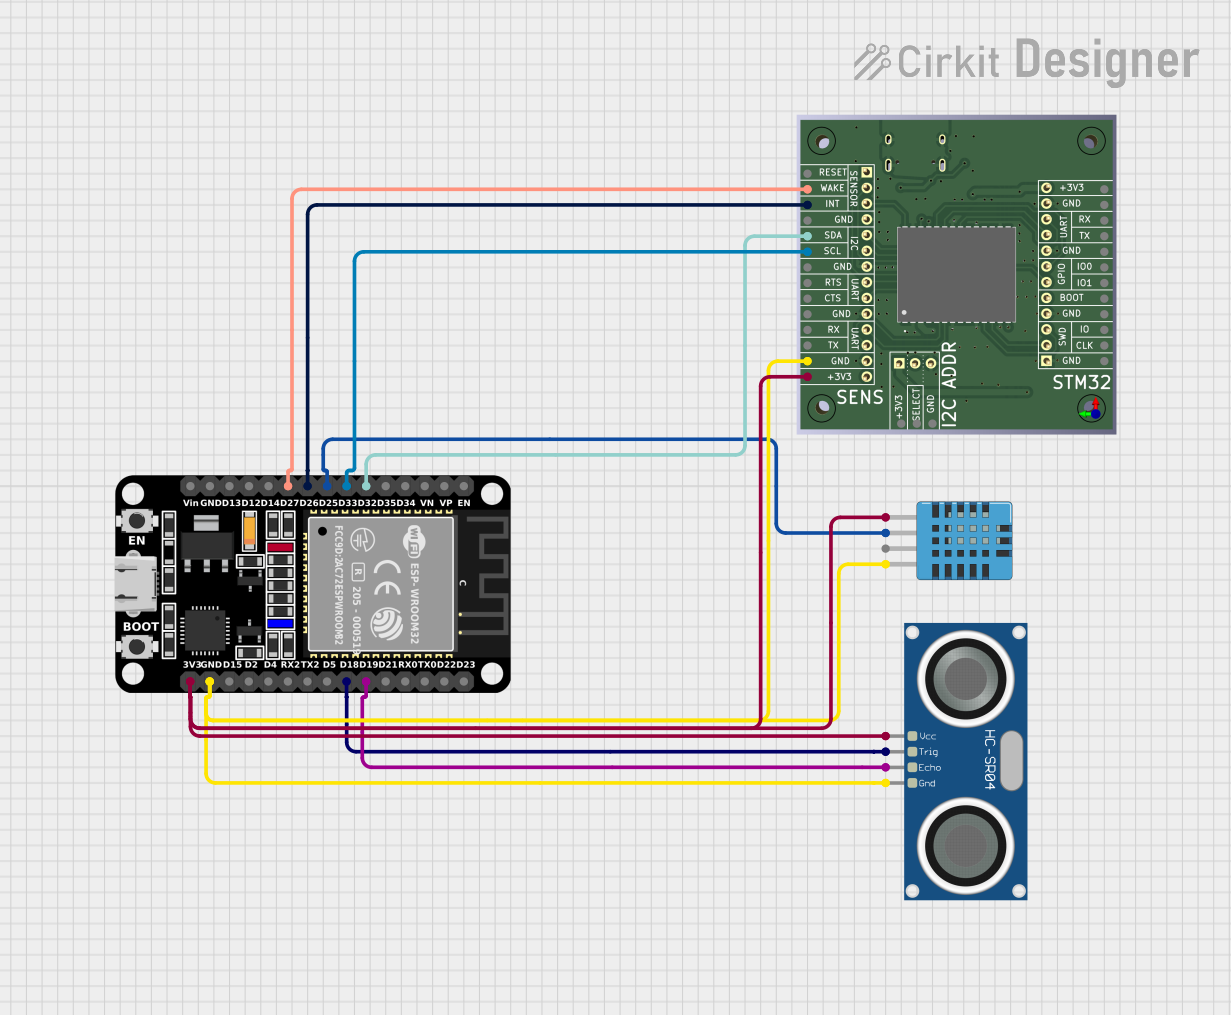
This circuit features an ESP32 microcontroller connected to a DHT11 humidity and temperature sensor, an HC-SR04 ultrasonic sensor, and an XM125 radar breakout module. The ESP32 uses its GPIO pins to interface with the DHT11 sensor for environmental data, control and receive signals from the HC-SR04 for distance measurements, and communicate with the XM125 via I2C and control lines for radar-based detection. The circuit is likely designed for a multi-sensor monitoring or detection system, integrating environmental sensing, distance measurement, and radar signal processing.
Cirkit Designer LogoOpen Project in Cirkit Designer
ESP32-Based Smart Humidity and Temperature Controller with Wi-Fi Connectivity
Image of FINAL PROJECT: A project utilizing Humidity Sensor - HIH-4030 Breakout in a practical application
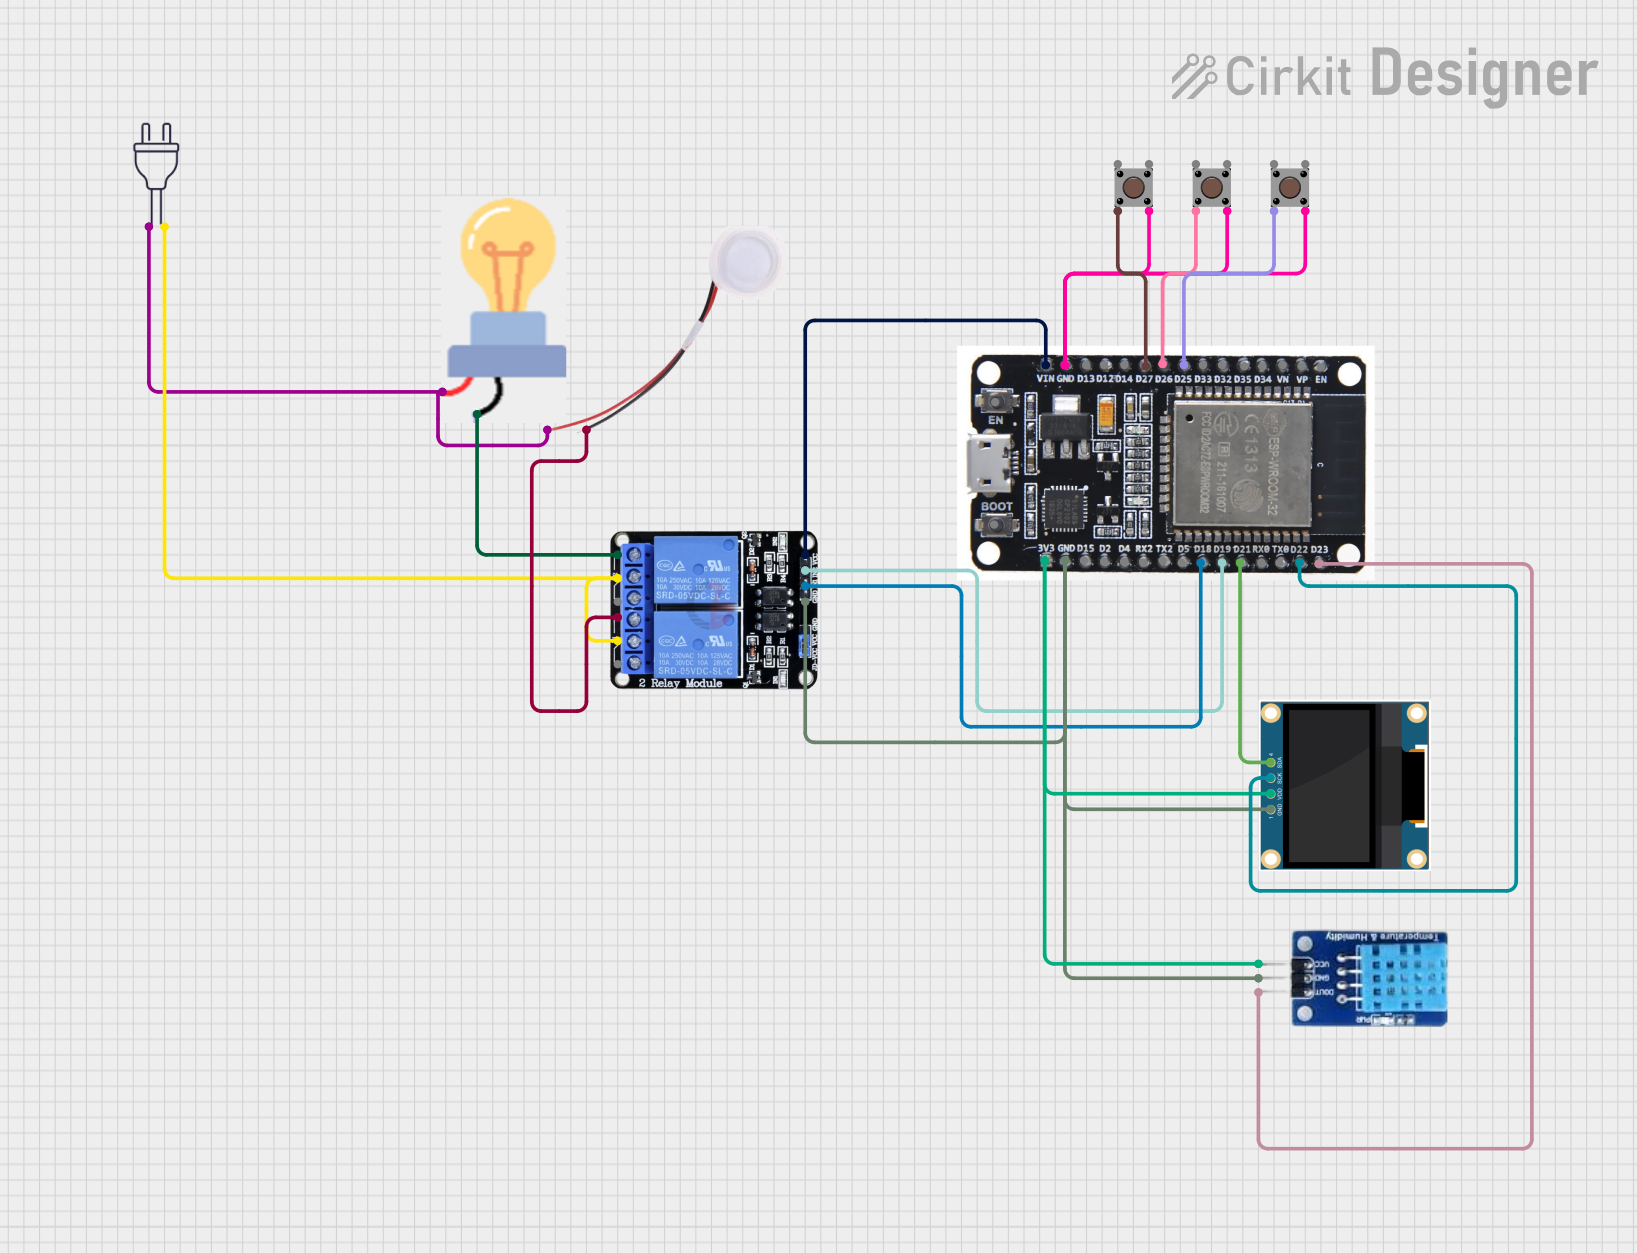
This circuit is designed to monitor and control temperature and humidity using an ESP32 microcontroller, which interfaces with a DHT11 sensor, an OLED display, and a two-channel relay. The ESP32 uses Blynk for IoT connectivity, allowing remote monitoring and control of a connected humidifier and a bulb (as a heater). Pushbuttons are included for manual control, and the system operates in either automatic or manual mode to maintain desired environmental conditions.
Cirkit Designer LogoOpen Project in Cirkit Designer
Arduino Nano-Based Bluetooth Temperature and Humidity Monitor with OLED Display and Alert Buzzer
Image of My project (DK): A project utilizing Humidity Sensor - HIH-4030 Breakout in a practical application
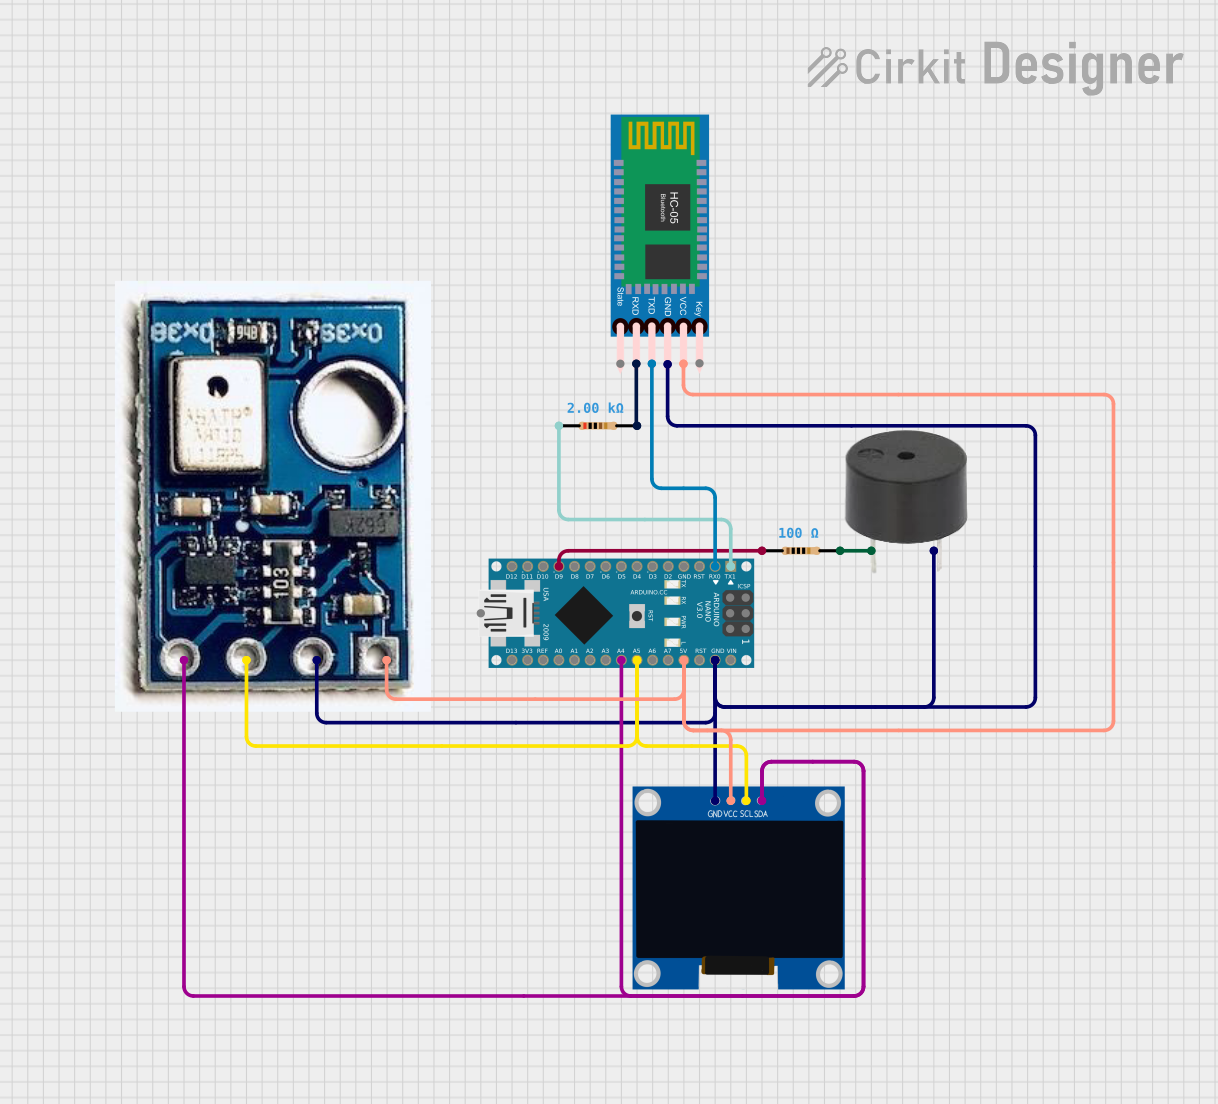
This circuit features an Arduino Nano microcontroller interfaced with an AHT10 temperature and humidity sensor, an HC-05 Bluetooth module, a 128x64 OLED display, and a buzzer with a series resistor. The Arduino Nano reads temperature and humidity data from the AHT10 sensor and displays it on the OLED screen. If the temperature exceeds a predefined threshold, the buzzer is activated. The HC-05 Bluetooth module allows for wireless communication, likely to send sensor data to another device such as a smartphone or computer.
Cirkit Designer LogoOpen Project in Cirkit Designer

Explore Projects Built with Humidity Sensor - HIH-4030 Breakout

Use Cirkit Designer to design, explore, and prototype these projects online. Some projects support real-time simulation. Click "Open Project" to start designing instantly!
Image of Hydroponics Project: A project utilizing Humidity Sensor - HIH-4030 Breakout in a practical application
Arduino Leonardo Tiny Weather Station with DHT11 Sensor
This circuit uses an Atmega32U4 microcontroller to read temperature and humidity data from a DHT11 sensor. The microcontroller is powered by an MB102 Breadboard Power Supply Module, which provides the necessary 5V and ground connections. The collected data is then printed to the serial monitor for monitoring purposes.
Cirkit Designer LogoOpen Project in Cirkit Designer
Image of Low Cost Water Level Sensor: A project utilizing Humidity Sensor - HIH-4030 Breakout in a practical application
ESP32-Based Environmental and Distance Sensing System
This circuit features an ESP32 microcontroller connected to a DHT11 humidity and temperature sensor, an HC-SR04 ultrasonic sensor, and an XM125 radar breakout module. The ESP32 uses its GPIO pins to interface with the DHT11 sensor for environmental data, control and receive signals from the HC-SR04 for distance measurements, and communicate with the XM125 via I2C and control lines for radar-based detection. The circuit is likely designed for a multi-sensor monitoring or detection system, integrating environmental sensing, distance measurement, and radar signal processing.
Cirkit Designer LogoOpen Project in Cirkit Designer
Image of FINAL PROJECT: A project utilizing Humidity Sensor - HIH-4030 Breakout in a practical application
ESP32-Based Smart Humidity and Temperature Controller with Wi-Fi Connectivity
This circuit is designed to monitor and control temperature and humidity using an ESP32 microcontroller, which interfaces with a DHT11 sensor, an OLED display, and a two-channel relay. The ESP32 uses Blynk for IoT connectivity, allowing remote monitoring and control of a connected humidifier and a bulb (as a heater). Pushbuttons are included for manual control, and the system operates in either automatic or manual mode to maintain desired environmental conditions.
Cirkit Designer LogoOpen Project in Cirkit Designer
Image of My project (DK): A project utilizing Humidity Sensor - HIH-4030 Breakout in a practical application
Arduino Nano-Based Bluetooth Temperature and Humidity Monitor with OLED Display and Alert Buzzer
This circuit features an Arduino Nano microcontroller interfaced with an AHT10 temperature and humidity sensor, an HC-05 Bluetooth module, a 128x64 OLED display, and a buzzer with a series resistor. The Arduino Nano reads temperature and humidity data from the AHT10 sensor and displays it on the OLED screen. If the temperature exceeds a predefined threshold, the buzzer is activated. The HC-05 Bluetooth module allows for wireless communication, likely to send sensor data to another device such as a smartphone or computer.
Cirkit Designer LogoOpen Project in Cirkit Designer

Common Applications

  • Weather monitoring systems
  • HVAC (Heating, Ventilation, and Air Conditioning) control
  • Industrial process monitoring
  • Environmental data logging
  • Agricultural systems (e.g., greenhouse monitoring)

Technical Specifications

The HIH-4030 Breakout is built for precision and ease of use. Below are its key technical details:

Key Specifications

Parameter Value
Supply Voltage (Vcc) 4 V to 5.8 V
Typical Operating Voltage 5 V
Current Consumption 200 µA (typical)
Output Voltage Range 0.8 V to 3.9 V (proportional to RH)
Humidity Range 0% to 100% RH
Accuracy ±3.5% RH (at 25°C, 20% to 80% RH)
Response Time 5 seconds (typical)
Operating Temperature -40°C to +85°C

Pin Configuration

The HIH-4030 Breakout has a simple 3-pin interface for easy integration. Below is the pinout:

Pin Number Pin Name Description
1 VCC Power supply input (4 V to 5.8 V)
2 GND Ground
3 OUT Analog output voltage (proportional to RH)

Usage Instructions

The HIH-4030 Breakout is straightforward to use in a circuit. Follow the steps below to integrate it into your project:

Connecting the Sensor

  1. Power Supply: Connect the VCC pin to a 5 V power source and the GND pin to ground.
  2. Analog Output: Connect the OUT pin to an analog input pin on your microcontroller or data acquisition system.

Calculating Relative Humidity

The sensor outputs an analog voltage proportional to the relative humidity. Use the following formula to calculate RH:

[ RH = \frac{(V_{OUT} - V_{MIN})}{(V_{MAX} - V_{MIN})} \times 100 ]

Where:

  • ( V_{OUT} ) is the sensor's output voltage
  • ( V_{MIN} ) is the minimum output voltage (0.8 V at 0% RH)
  • ( V_{MAX} ) is the maximum output voltage (3.9 V at 100% RH)

Example: Using with Arduino UNO

Below is an example code snippet to read the HIH-4030 sensor's output and calculate the relative humidity using an Arduino UNO:

// Define the analog pin connected to the HIH-4030 OUT pin
const int sensorPin = A0;

// Define the voltage range of the sensor
const float V_MIN = 0.8; // Minimum output voltage at 0% RH
const float V_MAX = 3.9; // Maximum output voltage at 100% RH
const float V_REF = 5.0; // Reference voltage of Arduino UNO

void setup() {
  Serial.begin(9600); // Initialize serial communication
}

void loop() {
  // Read the analog value from the sensor
  int sensorValue = analogRead(sensorPin);

  // Convert the analog value to voltage
  float voltage = (sensorValue / 1023.0) * V_REF;

  // Calculate relative humidity
  float humidity = ((voltage - V_MIN) / (V_MAX - V_MIN)) * 100.0;

  // Print the results to the Serial Monitor
  Serial.print("Voltage: ");
  Serial.print(voltage);
  Serial.print(" V, Humidity: ");
  Serial.print(humidity);
  Serial.println(" %");

  delay(1000); // Wait for 1 second before the next reading
}

Best Practices

  • Ensure the sensor is not exposed to water or condensation, as this may damage the device.
  • Avoid placing the sensor near heat sources or in direct sunlight, as this can affect accuracy.
  • Use a decoupling capacitor (e.g., 0.1 µF) between VCC and GND to reduce noise in the power supply.

Troubleshooting and FAQs

Common Issues

  1. No Output Voltage:

    • Cause: Incorrect wiring or insufficient power supply.
    • Solution: Verify the connections and ensure the supply voltage is within the specified range (4 V to 5.8 V).
  2. Inaccurate Humidity Readings:

    • Cause: Calibration error or environmental factors (e.g., temperature fluctuations).
    • Solution: Ensure the sensor is operating within its specified temperature range. If necessary, recalibrate the sensor using a known humidity reference.
  3. Fluctuating Output:

    • Cause: Electrical noise or unstable power supply.
    • Solution: Add a decoupling capacitor (0.1 µF) between VCC and GND.

FAQs

Q: Can the HIH-4030 measure humidity in high-temperature environments?
A: Yes, the sensor operates reliably in temperatures up to 85°C. However, accuracy may vary slightly at extreme temperatures.

Q: How do I protect the sensor from dust or contaminants?
A: Use a protective enclosure with a breathable membrane to shield the sensor from dust and debris while allowing air to pass through.

Q: Can I use the HIH-4030 with a 3.3 V microcontroller?
A: The HIH-4030 requires a minimum supply voltage of 4 V. You can use a level shifter or voltage regulator to interface it with a 3.3 V system.

By following this documentation, you can effectively integrate the HIH-4030 Breakout into your projects for reliable humidity measurements.