Cirkit Designer Logo
Cirkit Designer
Your all-in-one circuit design IDE
Home / 
Component Documentation

How to Use hxj8002: Examples, Pinouts, and Specs

Image of hxj8002
Cirkit Designer LogoDesign with hxj8002 in Cirkit Designer

Introduction

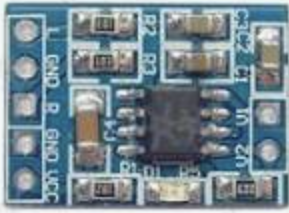
The HXJ8002 is a high-performance integrated circuit (IC) designed by Arduino for a wide range of applications, including power management and signal processing. This IC is known for its low power consumption and high efficiency, making it an ideal choice for battery-operated devices and portable electronics. Its compact design and robust functionality allow it to be used in various consumer electronics, audio systems, and embedded systems.

Explore Projects Built with hxj8002

Use Cirkit Designer to design, explore, and prototype these projects online. Some projects support real-time simulation. Click "Open Project" to start designing instantly!
Arduino Mega 2560 Based Security System with Fingerprint Authentication and SMS Alerts
Image of Door security system: A project utilizing hxj8002 in a practical application
This circuit features an Arduino Mega 2560 microcontroller interfaced with a SIM800L GSM module, two fingerprint scanners, an I2C LCD display, an IR sensor, and a piezo buzzer. Power management is handled by a PowerBoost 1000 Basic Pad USB, a TP4056 charging module, and a Li-ion 18650 battery, with an option to use a Mini AC-DC 110V-230V to 5V 700mA module for direct power supply. The primary functionality appears to be a security system with GSM communication capabilities, biometric access control, and visual/audible feedback.
Cirkit Designer LogoOpen Project in Cirkit Designer
Battery-Powered Emergency Alert System with NUCLEO-F072RB, SIM800L, and GPS NEO 6M
Image of women safety: A project utilizing hxj8002 in a practical application
This circuit is an emergency alert system that uses a NUCLEO-F072RB microcontroller to send SMS alerts and make calls via a SIM800L GSM module, while obtaining location data from a GPS NEO 6M module. The system is powered by a Li-ion battery and includes a TP4056 module for battery charging and protection, with a rocker switch to control power to the microcontroller.
Cirkit Designer LogoOpen Project in Cirkit Designer
Arduino Nano Joystick-Controlled Bluetooth Module with Battery Power
Image of padelpro transmitter: A project utilizing hxj8002 in a practical application
This circuit is a wireless joystick controller that uses an Arduino Nano to read analog signals from a KY-023 Dual Axis Joystick Module and transmits the data via an HC-05 Bluetooth Module. The system is powered by a 18650 Li-Ion battery with a rocker switch for power control.
Cirkit Designer LogoOpen Project in Cirkit Designer
Solar-Powered GSM/GPRS+GPS Tracker with Seeeduino XIAO
Image of SOS System : A project utilizing hxj8002 in a practical application
This circuit features an Ai Thinker A9G development board for GSM/GPRS and GPS/BDS connectivity, interfaced with a Seeeduino XIAO microcontroller for control and data processing. A solar cell, coupled with a TP4056 charging module, charges a 3.3V battery, which powers the system through a 3.3V regulator ensuring stable operation. The circuit likely serves for remote data communication and location tracking, with the capability to be powered by renewable energy and interfaced with additional sensors or input devices via the Seeeduino XIAO.
Cirkit Designer LogoOpen Project in Cirkit Designer

Explore Projects Built with hxj8002

Use Cirkit Designer to design, explore, and prototype these projects online. Some projects support real-time simulation. Click "Open Project" to start designing instantly!
Image of Door security system: A project utilizing hxj8002 in a practical application
Arduino Mega 2560 Based Security System with Fingerprint Authentication and SMS Alerts
This circuit features an Arduino Mega 2560 microcontroller interfaced with a SIM800L GSM module, two fingerprint scanners, an I2C LCD display, an IR sensor, and a piezo buzzer. Power management is handled by a PowerBoost 1000 Basic Pad USB, a TP4056 charging module, and a Li-ion 18650 battery, with an option to use a Mini AC-DC 110V-230V to 5V 700mA module for direct power supply. The primary functionality appears to be a security system with GSM communication capabilities, biometric access control, and visual/audible feedback.
Cirkit Designer LogoOpen Project in Cirkit Designer
Image of women safety: A project utilizing hxj8002 in a practical application
Battery-Powered Emergency Alert System with NUCLEO-F072RB, SIM800L, and GPS NEO 6M
This circuit is an emergency alert system that uses a NUCLEO-F072RB microcontroller to send SMS alerts and make calls via a SIM800L GSM module, while obtaining location data from a GPS NEO 6M module. The system is powered by a Li-ion battery and includes a TP4056 module for battery charging and protection, with a rocker switch to control power to the microcontroller.
Cirkit Designer LogoOpen Project in Cirkit Designer
Image of padelpro transmitter: A project utilizing hxj8002 in a practical application
Arduino Nano Joystick-Controlled Bluetooth Module with Battery Power
This circuit is a wireless joystick controller that uses an Arduino Nano to read analog signals from a KY-023 Dual Axis Joystick Module and transmits the data via an HC-05 Bluetooth Module. The system is powered by a 18650 Li-Ion battery with a rocker switch for power control.
Cirkit Designer LogoOpen Project in Cirkit Designer
Image of SOS System : A project utilizing hxj8002 in a practical application
Solar-Powered GSM/GPRS+GPS Tracker with Seeeduino XIAO
This circuit features an Ai Thinker A9G development board for GSM/GPRS and GPS/BDS connectivity, interfaced with a Seeeduino XIAO microcontroller for control and data processing. A solar cell, coupled with a TP4056 charging module, charges a 3.3V battery, which powers the system through a 3.3V regulator ensuring stable operation. The circuit likely serves for remote data communication and location tracking, with the capability to be powered by renewable energy and interfaced with additional sensors or input devices via the Seeeduino XIAO.
Cirkit Designer LogoOpen Project in Cirkit Designer

Common Applications

  • Battery-powered devices
  • Audio amplification systems
  • Signal processing circuits
  • Portable consumer electronics
  • Embedded systems requiring efficient power management

Technical Specifications

Key Technical Details

Parameter Value
Manufacturer Arduino
Part ID HXJ8002
Operating Voltage Range 2.5V to 5.5V
Output Power 3W (at 4Ω load, 5V supply)
Efficiency Up to 90%
Quiescent Current < 10mA
Operating Temperature -40°C to +85°C
Package Type SOP-8

Pin Configuration and Descriptions

Pin Number Pin Name Description
1 IN+ Non-inverting input for the audio signal
2 IN- Inverting input for the audio signal
3 GND Ground connection
4 VDD Power supply input (2.5V to 5.5V)
5 OUT+ Positive output for the amplified signal
6 OUT- Negative output for the amplified signal
7 SHDN Shutdown control pin (active low)
8 NC No connection (leave unconnected or grounded)

Usage Instructions

How to Use the HXJ8002 in a Circuit

  1. Power Supply: Connect the VDD pin to a stable power source within the range of 2.5V to 5.5V. Ensure proper decoupling capacitors (e.g., 0.1µF and 10µF) are placed close to the VDD pin to minimize noise.
  2. Input Signal: Feed the audio or signal input to the IN+ and IN- pins. Use appropriate coupling capacitors (e.g., 1µF) to block DC components in the input signal.
  3. Output Load: Connect the OUT+ and OUT- pins to the load (e.g., a speaker or other device). Ensure the load impedance matches the IC's specifications (e.g., 4Ω or 8Ω).
  4. Shutdown Control: Use the SHDN pin to enable or disable the IC. Pull the SHDN pin high to enable the IC, or pull it low to put the IC into shutdown mode to save power.
  5. Grounding: Connect the GND pin to the circuit's ground. Ensure a solid ground plane to reduce noise and improve performance.

Important Considerations and Best Practices

  • Thermal Management: Ensure adequate ventilation or heat dissipation if the IC operates at high power levels for extended periods.
  • Signal Integrity: Use short and direct traces for the input and output signals to minimize noise and distortion.
  • Decoupling: Always use decoupling capacitors near the VDD pin to stabilize the power supply and reduce noise.
  • Shutdown Pin: If the SHDN pin is not used, connect it to VDD to keep the IC enabled.

Example: Connecting HXJ8002 to an Arduino UNO

The HXJ8002 can be used with an Arduino UNO to amplify audio signals. Below is an example code snippet to generate a simple PWM signal for audio output:

// Example: Generating a PWM signal for HXJ8002 using Arduino UNO
// Connect Arduino pin 9 to the IN+ pin of HXJ8002
// Connect GND of Arduino to GND of HXJ8002

void setup() {
  pinMode(9, OUTPUT); // Set pin 9 as an output pin
}

void loop() {
  // Generate a simple PWM signal
  analogWrite(9, 128); // 50% duty cycle (128 out of 255)
  delay(1000);         // Wait for 1 second
  analogWrite(9, 64);  // 25% duty cycle (64 out of 255)
  delay(1000);         // Wait for 1 second
}

Note: Use a low-pass filter (e.g., an RC filter) between the Arduino output and the HXJ8002 input to smooth the PWM signal into an analog waveform.

Troubleshooting and FAQs

Common Issues and Solutions

  1. No Output Signal

    • Cause: The SHDN pin is not properly configured.
    • Solution: Ensure the SHDN pin is pulled high to enable the IC.
  2. Distorted Output

    • Cause: Input signal is too strong or improperly coupled.
    • Solution: Use appropriate coupling capacitors and ensure the input signal is within the IC's acceptable range.
  3. Overheating

    • Cause: Excessive power dissipation or insufficient ventilation.
    • Solution: Reduce the load or improve heat dissipation with a heatsink or better airflow.
  4. Noise in Output

    • Cause: Poor grounding or insufficient decoupling.
    • Solution: Ensure a solid ground connection and use decoupling capacitors near the VDD pin.

FAQs

Q1: Can the HXJ8002 drive a 2Ω load?
A1: No, the HXJ8002 is designed for a minimum load impedance of 4Ω. Using a 2Ω load may cause overheating or damage.

Q2: What happens if the SHDN pin is left floating?
A2: Leaving the SHDN pin floating may result in unpredictable behavior. Always pull it high (to VDD) or low (to GND) as needed.

Q3: Can I use the HXJ8002 for stereo audio applications?
A3: The HXJ8002 is a mono amplifier. For stereo applications, you will need two HXJ8002 ICs, one for each channel.

Q4: Is the HXJ8002 suitable for high-fidelity audio applications?
A4: The HXJ8002 is optimized for efficiency and general-purpose audio amplification. For high-fidelity applications, consider using a dedicated audio amplifier IC with lower distortion and noise levels.