How to Use TP-Link Omada: Examples, Pinouts, and Specs
Introduction
The TP-Link Omada is a comprehensive network management solution designed to provide centralized control over wireless access points, switches, and gateways. It offers a range of features including seamless roaming, robust security, and easy scalability, making it an ideal choice for both small and large network environments. Common applications include enterprise networks, educational institutions, hospitality, and retail environments where reliable and secure network management is crucial.
Explore Projects Built with TP-Link Omada
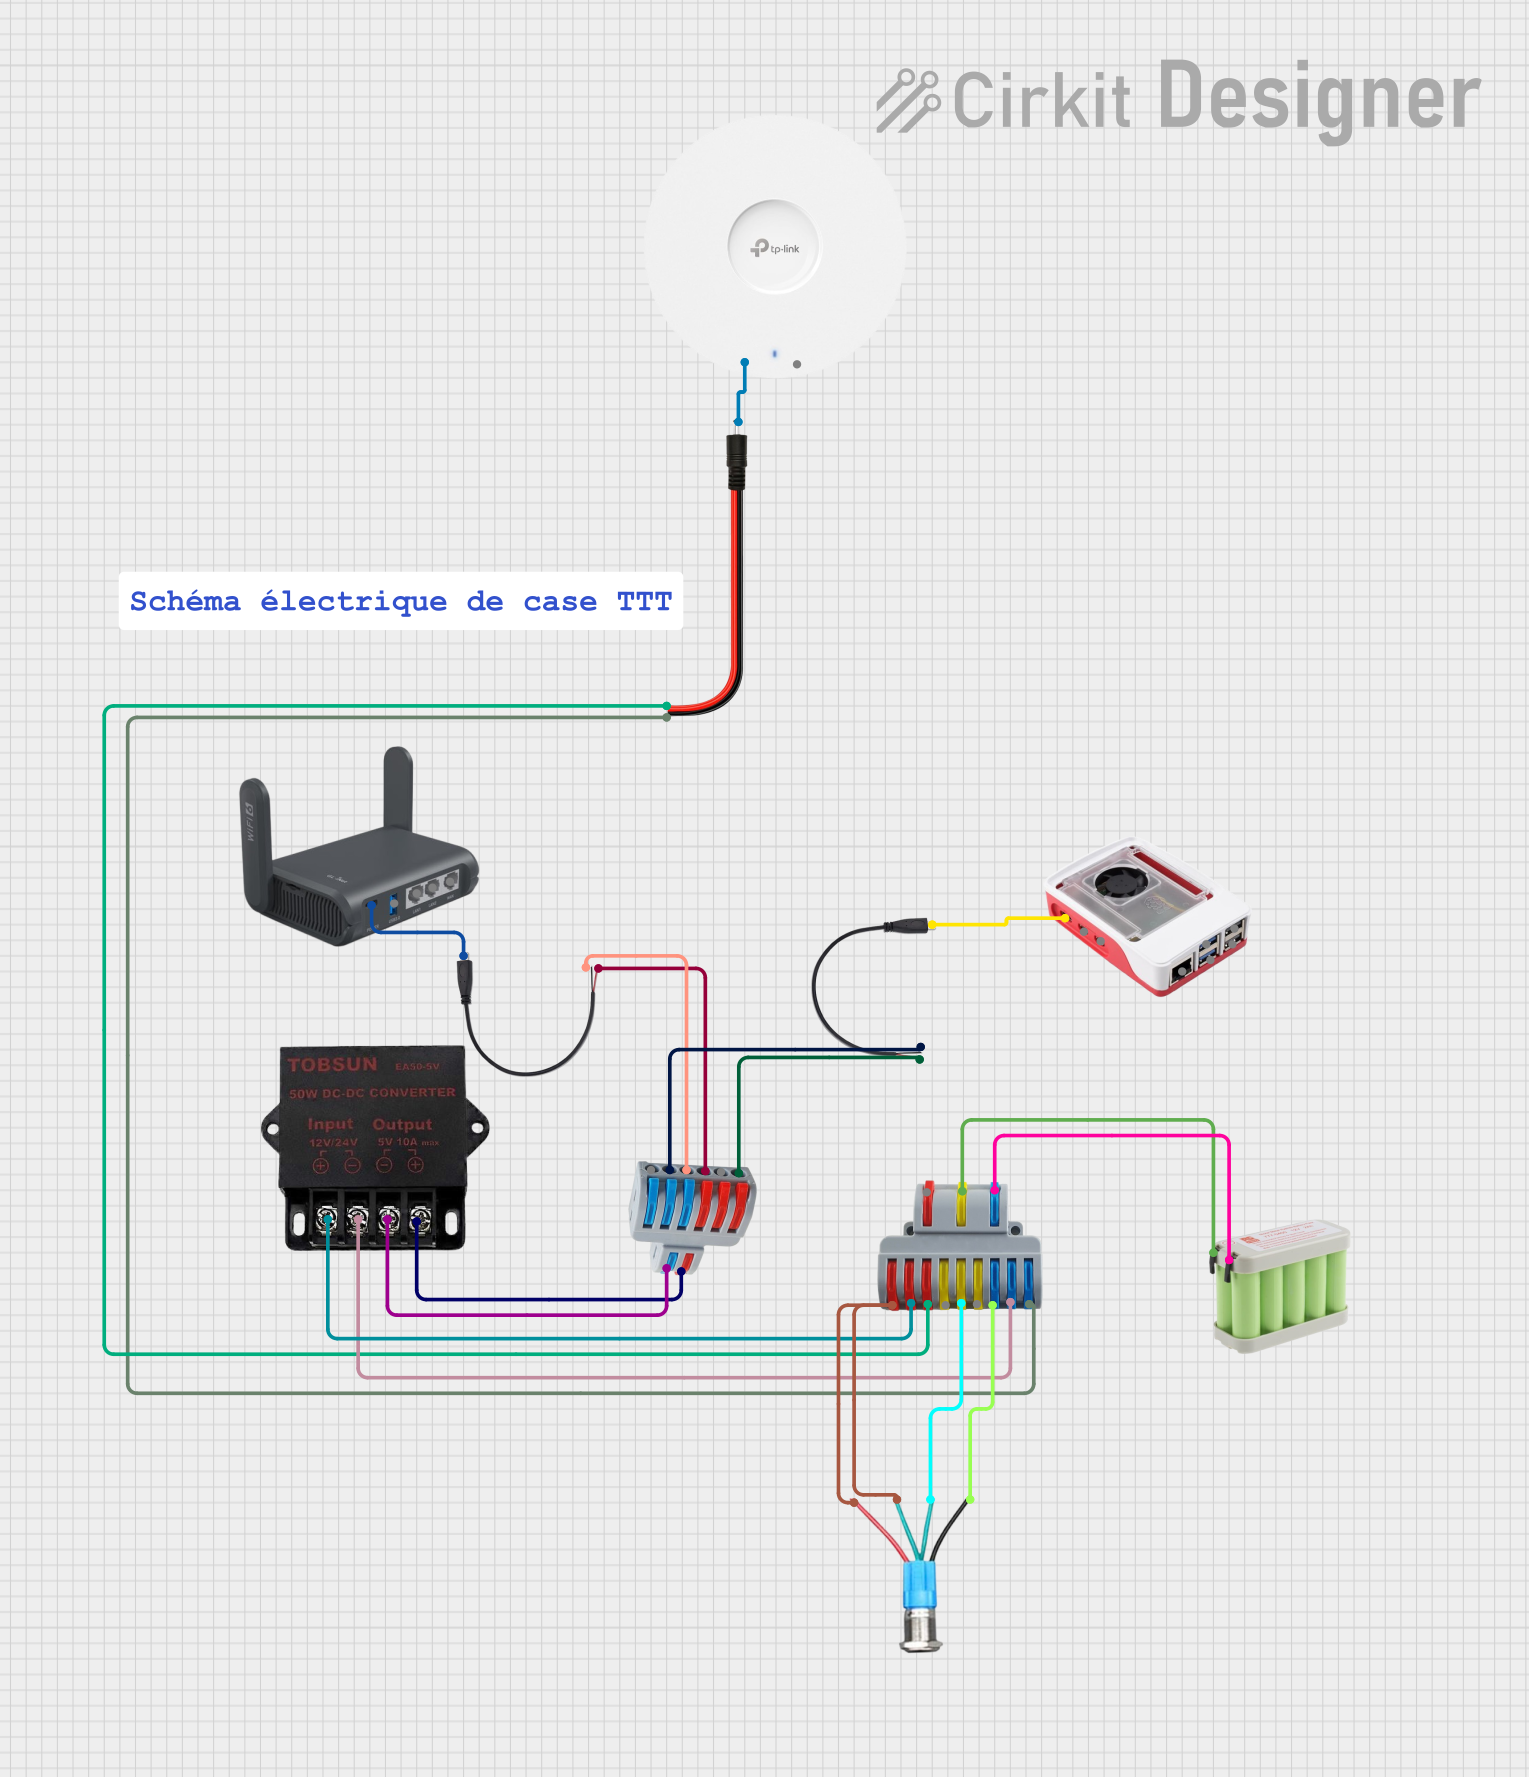
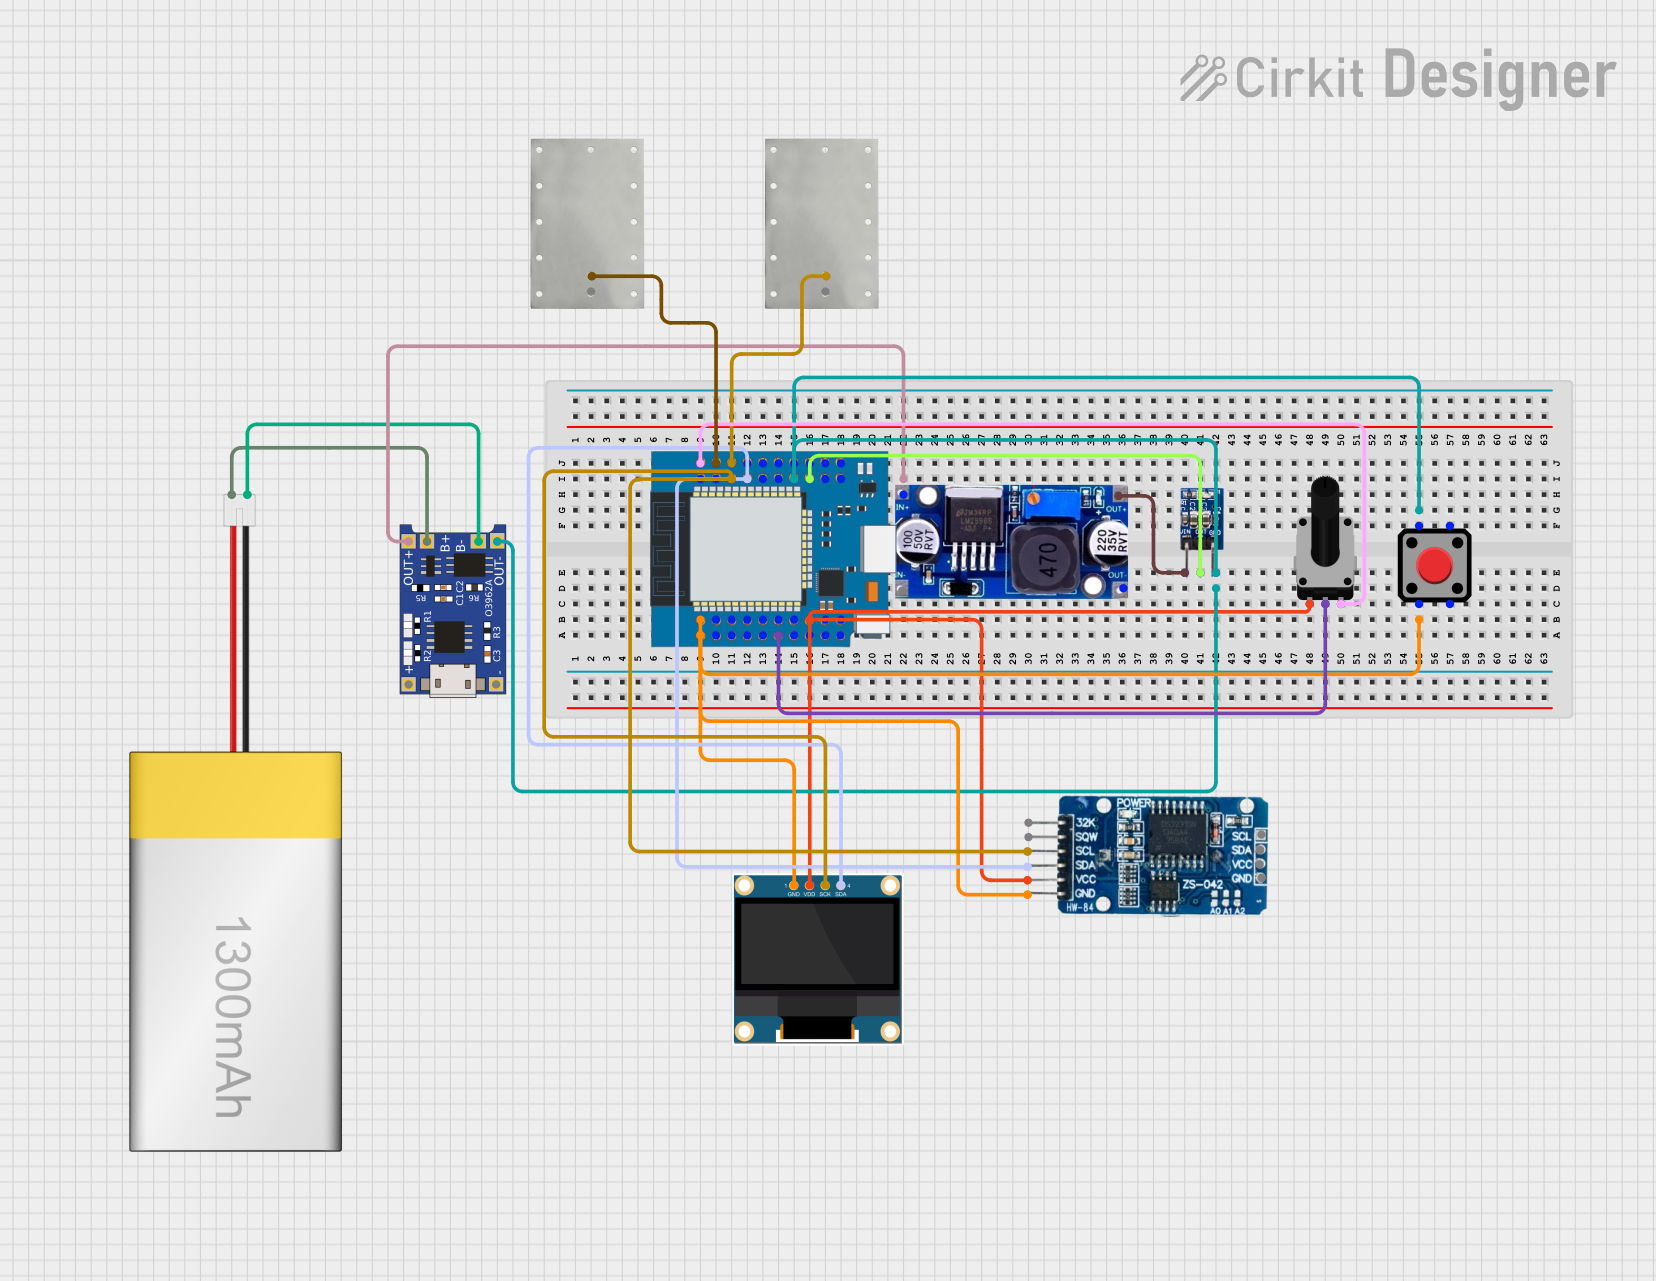
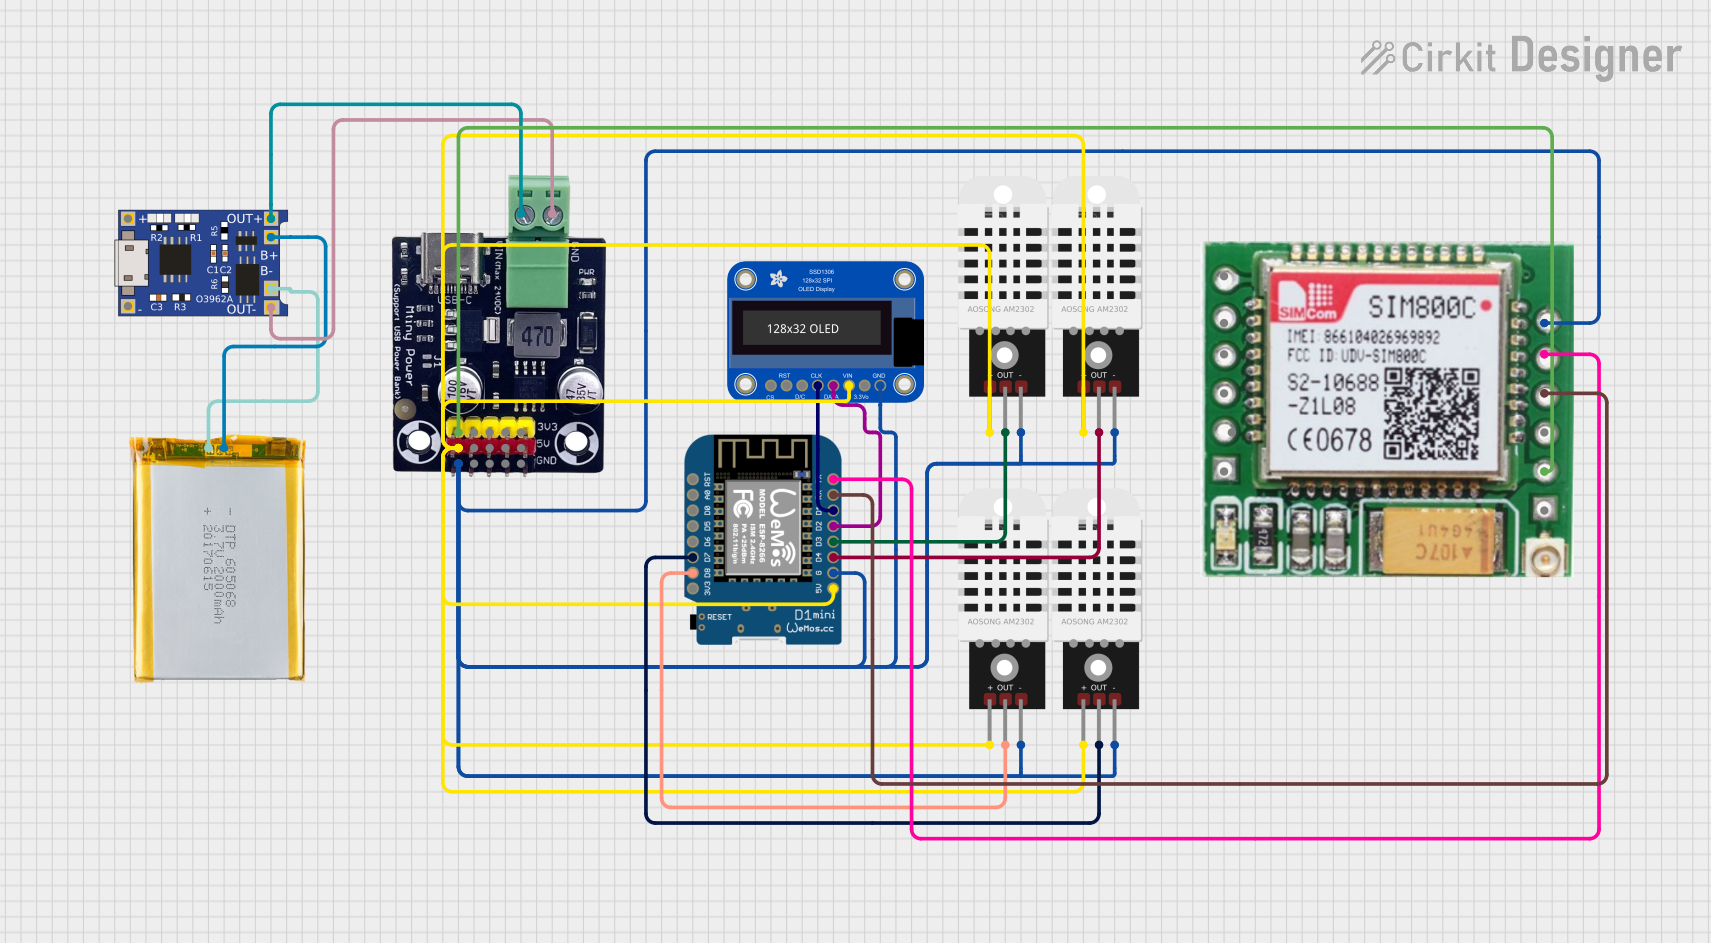

Explore Projects Built with TP-Link Omada
Technical Specifications
Key Technical Details
| Specification | Details |
|---|---|
| Model | TP-Link Omada |
| Management Type | Centralized Management |
| Supported Devices | Wireless Access Points, Switches, Gateways |
| Roaming | Seamless Roaming |
| Security | WPA3, VLAN, Access Control, Guest Network |
| Scalability | Supports up to 500 devices |
| Power Supply | PoE (Power over Ethernet) |
| Operating Temperature | 0°C to 40°C (32°F to 104°F) |
| Storage Temperature | -40°C to 70°C (-40°F to 158°F) |
| Humidity | 10% to 90% non-condensing |
Pin Configuration and Descriptions
While the TP-Link Omada itself does not have a pin configuration, it interfaces with various network devices that do. Below is a typical pin configuration for a PoE-enabled Ethernet port used to connect to the Omada system.
| Pin Number | Signal Name | Description |
|---|---|---|
| 1 | TX+ | Transmit Data Positive |
| 2 | TX- | Transmit Data Negative |
| 3 | RX+ | Receive Data Positive |
| 4 | PoE+ | Power over Ethernet Positive |
| 5 | PoE+ | Power over Ethernet Positive |
| 6 | RX- | Receive Data Negative |
| 7 | PoE- | Power over Ethernet Negative |
| 8 | PoE- | Power over Ethernet Negative |
Usage Instructions
How to Use the Component in a Network
Setup the Omada Controller:
- Install the Omada Controller software on a dedicated server or use the Omada Cloud Controller.
- Connect the controller to your network.
Connect Devices:
- Connect your wireless access points, switches, and gateways to the network.
- Ensure that PoE is enabled if required.
Adopt Devices:
- Log in to the Omada Controller interface.
- Navigate to the "Devices" section and adopt the connected devices.
Configure Network Settings:
- Set up SSIDs, VLANs, and security settings as per your network requirements.
- Configure seamless roaming and guest networks if needed.
Monitor and Manage:
- Use the Omada Controller dashboard to monitor network performance.
- Apply firmware updates and manage device configurations centrally.
Important Considerations and Best Practices
- Network Planning: Ensure proper network planning to avoid interference and ensure optimal coverage.
- Security: Regularly update firmware and use strong security protocols like WPA3.
- Scalability: Plan for future expansion by considering the maximum number of supported devices.
- Backup: Regularly back up your Omada Controller configuration to prevent data loss.
Troubleshooting and FAQs
Common Issues and Solutions
Devices Not Adopting:
- Solution: Ensure that the devices are on the same network as the Omada Controller. Check for IP conflicts and ensure that PoE is enabled if required.
Poor Network Performance:
- Solution: Check for interference from other wireless devices. Ensure that access points are optimally placed and that the network is not overloaded.
Firmware Update Failures:
- Solution: Ensure a stable network connection during the update process. If the update fails, try rebooting the device and retrying the update.
FAQs
Q: Can I manage my network remotely with TP-Link Omada?
- A: Yes, you can manage your network remotely using the Omada Cloud Controller or the Omada app.
Q: How many devices can TP-Link Omada support?
- A: TP-Link Omada can support up to 500 devices, making it suitable for large network environments.
Q: What security features does TP-Link Omada offer?
- A: TP-Link Omada offers robust security features including WPA3, VLAN, access control, and guest network isolation.
Q: Is it possible to integrate TP-Link Omada with an existing network?
- A: Yes, TP-Link Omada can be integrated with existing network infrastructure, allowing for centralized management of both new and existing devices.
Conclusion
The TP-Link Omada is a versatile and powerful network management solution that simplifies the management of complex network environments. By following the usage instructions and best practices outlined in this documentation, users can ensure a secure, scalable, and efficient network setup. For further assistance, refer to the troubleshooting section or consult the TP-Link support resources.