How to Use Adafruit DPS310 Precision Barometric Pressure and Altitude Sensor: Examples, Pinouts, and Specs
Introduction
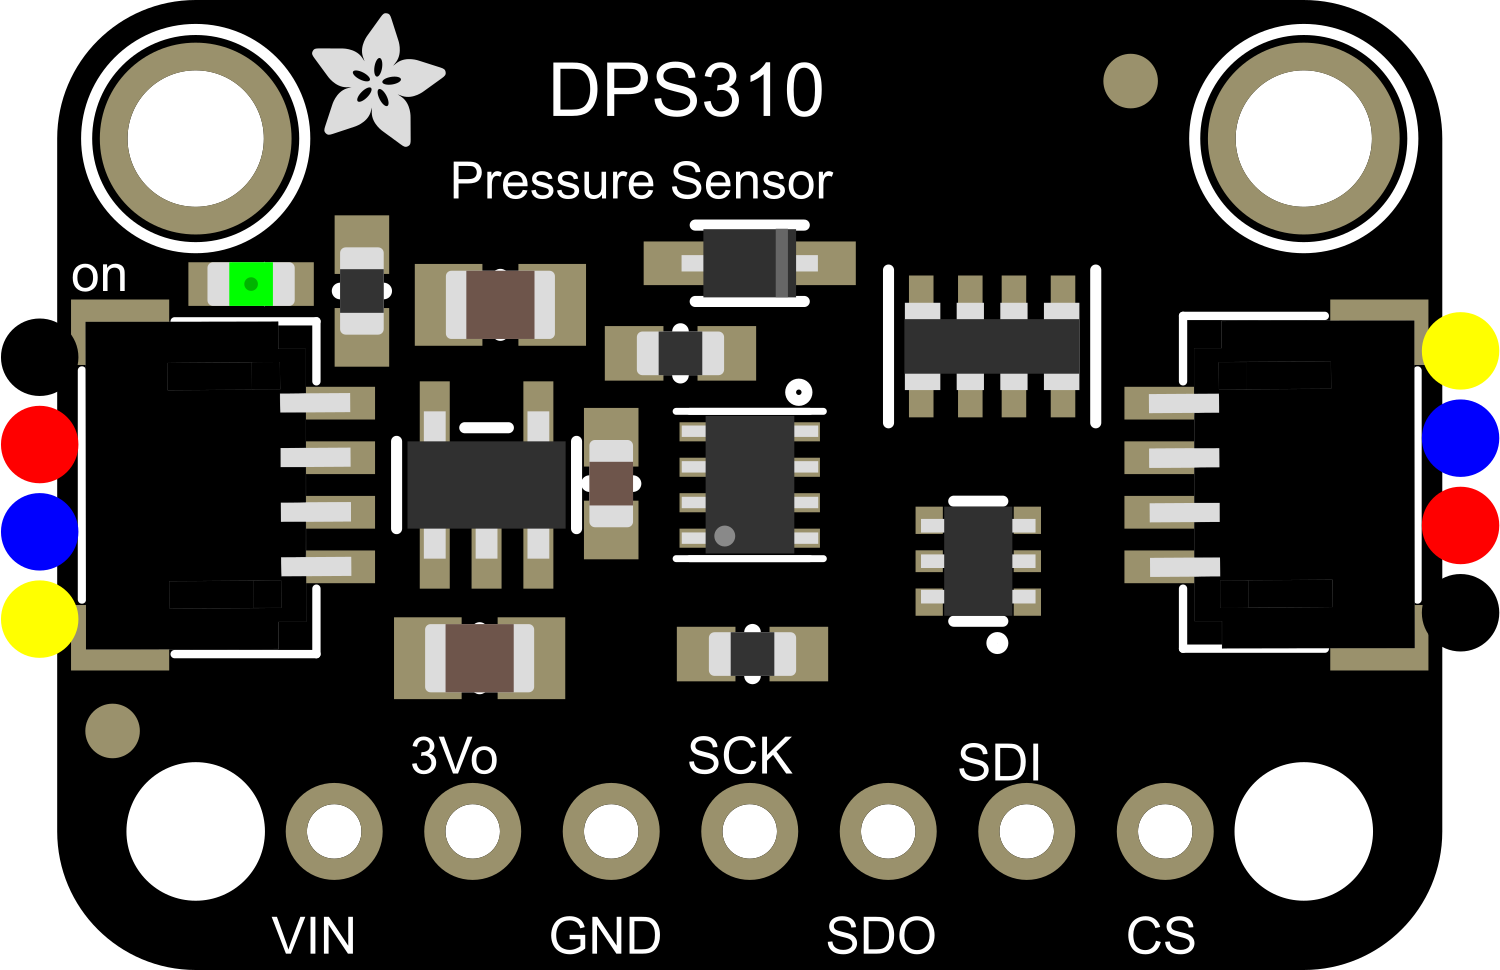
The Adafruit DPS310 is a precision sensor capable of measuring barometric pressure and altitude with high accuracy. It communicates via I2C or SPI digital interface, making it compatible with a wide range of microcontrollers, including Arduino and Raspberry Pi. This sensor is ideal for applications such as personal weather stations, altimeters in drones or handheld devices, and any project where environmental monitoring is required.
Explore Projects Built with Adafruit DPS310 Precision Barometric Pressure and Altitude Sensor
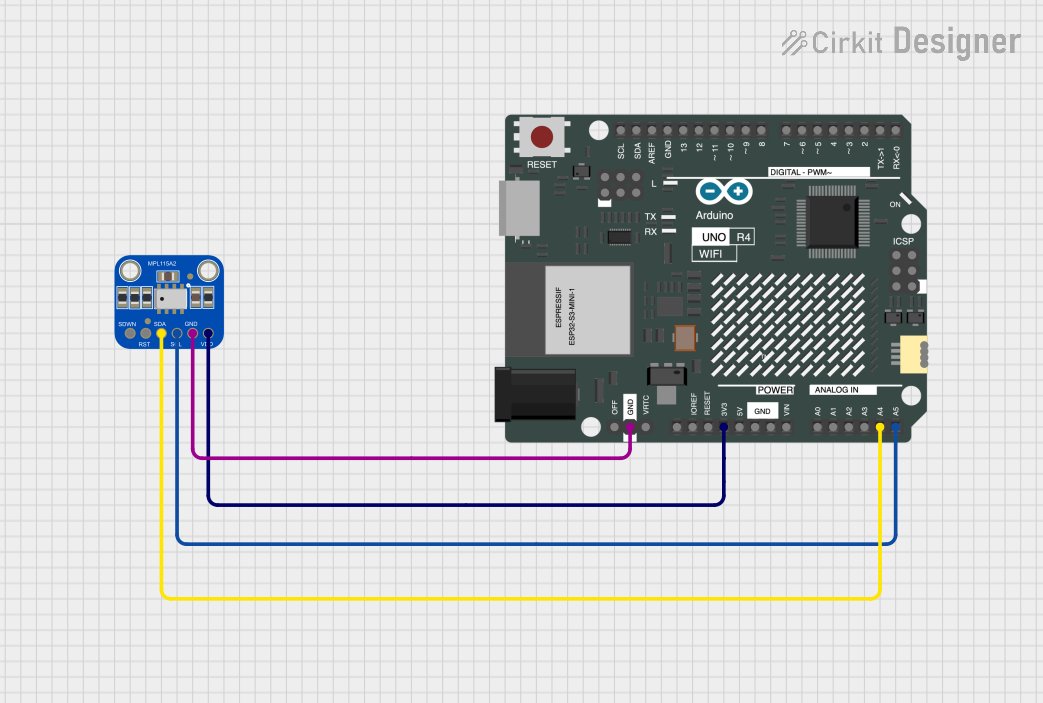
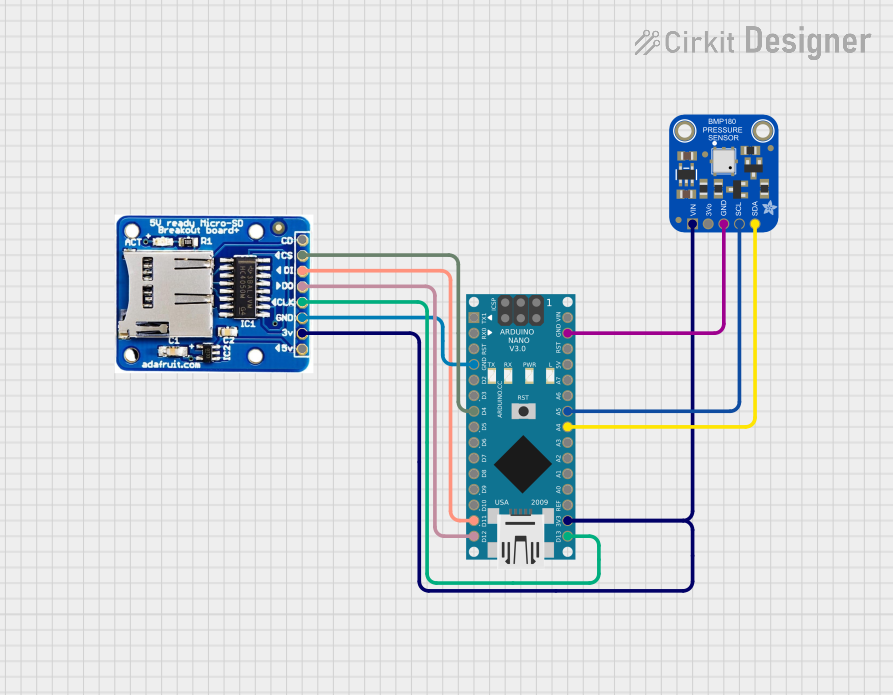
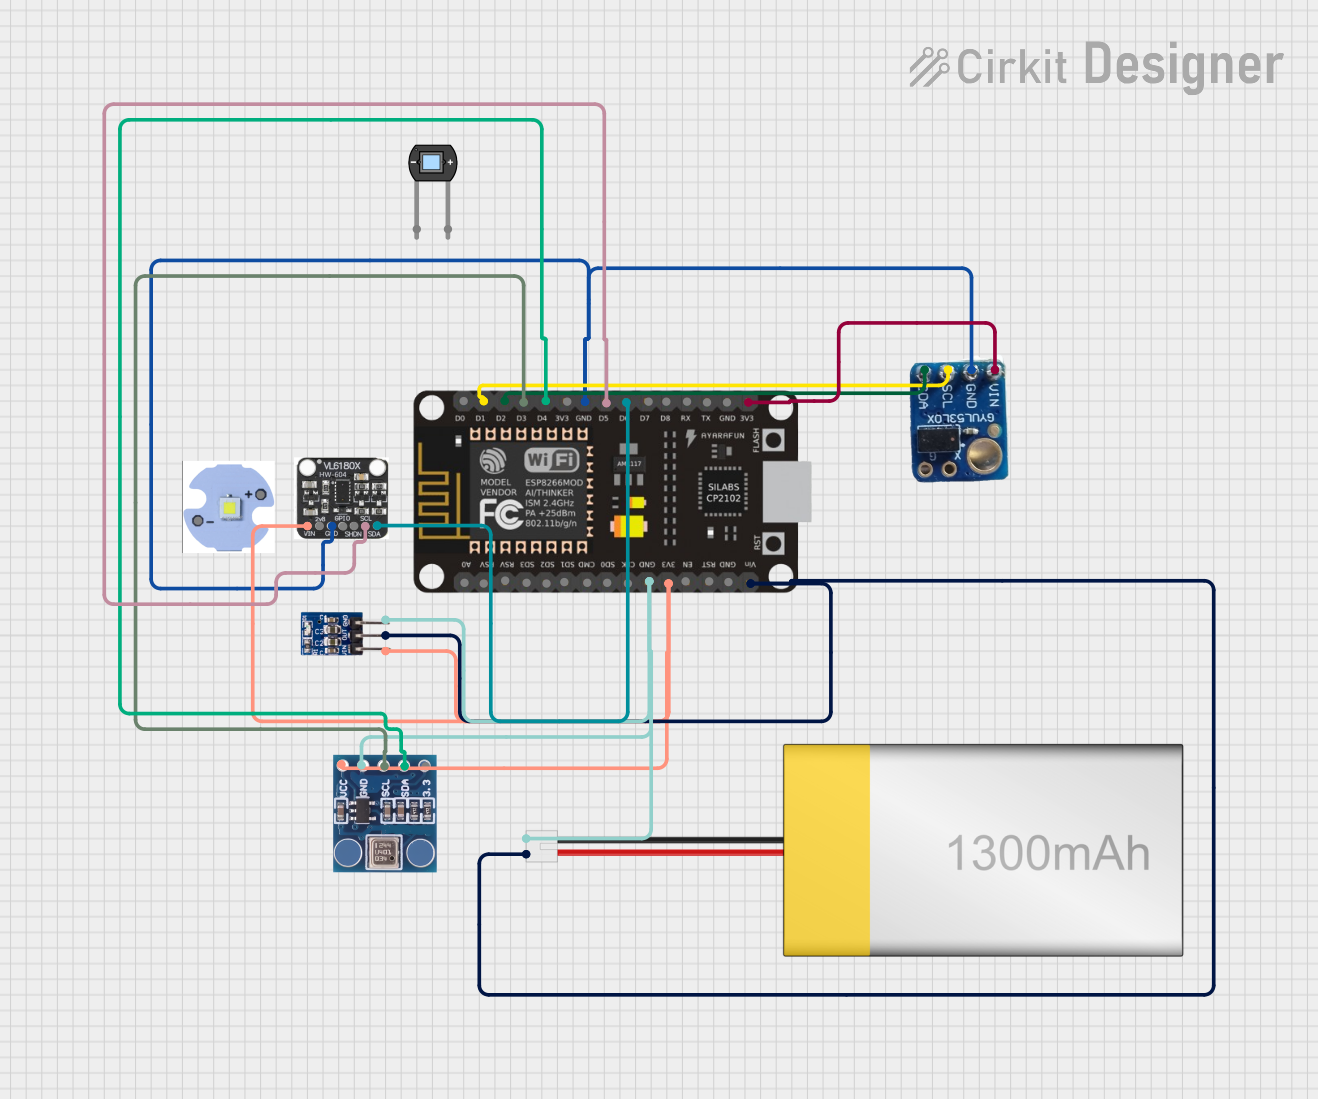

Explore Projects Built with Adafruit DPS310 Precision Barometric Pressure and Altitude Sensor
Technical Specifications
Key Features
- Pressure sensing range: 300 to 1200 hPa
- Relative accuracy: ±0.002 hPa (or ±0.02 m)
- Absolute accuracy: ±1 hPa (or ±8 m)
- Temperature accuracy: ±0.5°C
- Operating voltage: 2.7V to 3.3V
- Interface: I2C (up to 400kHz) and SPI (up to 10MHz)
- Operating temperature range: -40°C to +85°C
Pin Configuration and Descriptions
| Pin Number | Name | Description |
|---|---|---|
| 1 | VDD | Power supply (2.7V to 3.3V) |
| 2 | GND | Ground connection |
| 3 | SCL | I2C clock line / SPI clock line |
| 4 | SDA | I2C data line / SPI data input (MOSI) |
| 5 | CSB | SPI chip select (active low) |
| 6 | SDI | SPI data output (MISO) - not used in I2C mode |
| 7 | SDO | I2C address selection / SPI data output (MISO) |
Usage Instructions
Integration into a Circuit
- Connect VDD to a 2.7V to 3.3V power supply.
- Connect GND to the ground of your power supply.
- For I2C communication:
- Connect SCL to the I2C clock line of your microcontroller.
- Connect SDA to the I2C data line of your microcontroller.
- Optionally, connect SDO to GND or VDD to select the I2C address.
- For SPI communication:
- Connect SCL to the SPI clock line of your microcontroller.
- Connect SDA to the SPI MOSI line of your microcontroller.
- Connect CSB to a digital pin for chip select.
- Connect SDI to the SPI MISO line of your microcontroller.
Best Practices
- Use pull-up resistors on the I2C lines (SCL and SDA) if your microcontroller does not have built-in pull-ups.
- Ensure that the power supply is stable and within the specified voltage range.
- Avoid placing the sensor near heat sources to prevent inaccurate temperature readings.
- For accurate pressure readings, calibrate the sensor at a known altitude and pressure.
Example Code for Arduino UNO
#include <Wire.h>
#include <Adafruit_DPS310.h>

Adafruit_DPS310 dps;

void setup() {
  Serial.begin(9600);
  if (!dps.begin()) {
    Serial.println("Failed to find DPS310 sensor");
    while (1);
  }
  Serial.println("DPS310 sensor found!");
}

void loop() {
  float temperature = dps.readTemperature();
  float pressure = dps.readPressure();
  float altitude = dps.pressureToAltitude(pressure);

  Serial.print("Temperature = ");
  Serial.print(temperature);
  Serial.println(" *C");

  Serial.print("Pressure = ");
  Serial.print(pressure);
  Serial.println(" hPa");

  Serial.print("Altitude = ");
  Serial.print(altitude);
  Serial.println(" m");

  delay(5000);
}
Troubleshooting and FAQs
Common Issues
- Sensor not detected: Ensure that the wiring is correct and that the sensor is properly powered.
- Inaccurate readings: Verify that the sensor is calibrated and that it's not exposed to sudden temperature changes or airflow.
- Communication errors: Check the pull-up resistors on the I2C lines and the integrity of the SPI connections.
FAQs
Q: Can the DPS310 sensor be used outdoors? A: Yes, the DPS310 is suitable for outdoor applications, but it should be protected from direct exposure to water and extreme conditions.
Q: How do I change the I2C address? A: The I2C address can be changed by connecting the SDO pin to either GND or VDD. The default address is 0x77, and connecting SDO to VDD changes it to 0x76.
Q: What is the maximum sampling rate of the DPS310? A: The DPS310 can perform measurements at a maximum rate of 128 samples per second.
Q: How long does the sensor take to stabilize after power-up? A: It is recommended to allow a few seconds after power-up for the sensor to stabilize before taking measurements.
For further assistance, consult the Adafruit DPS310 datasheet and the Adafruit support forums.