How to Use BT137 600E: Examples, Pinouts, and Specs
Introduction
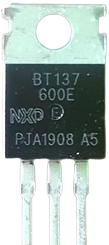
The BT137 600E is a TRIAC (Triode for Alternating Current) manufactured by NXP. It is a robust and reliable electronic component designed for controlling AC power in various applications. With a voltage rating of up to 600V and a current handling capacity of 4A, the BT137 600E is widely used in light dimmers, motor speed controllers, and other AC switching circuits. Its bidirectional switching capability makes it ideal for controlling AC loads efficiently.
Explore Projects Built with BT137 600E


Explore Projects Built with BT137 600E
Common Applications
- Light dimmers for incandescent and LED lighting
- Motor speed controllers for fans and small appliances
- AC power control in industrial and home automation systems
- Temperature control systems using resistive heating elements
- Phase control circuits for AC loads
Technical Specifications
Key Specifications
| Parameter | Value |
|---|---|
| Manufacturer | NXP |
| Part ID | TRIAC |
| Maximum Repetitive Voltage (VDRM) | 600V |
| Maximum RMS On-State Current (IT(RMS)) | 4A |
| Gate Trigger Current (IGT) | 5mA |
| Holding Current (IH) | 2mA |
| Peak Gate Trigger Voltage (VGT) | 1.5V |
| Maximum Surge Current (ITSM) | 25A |
| Operating Temperature Range | -40°C to +125°C |
| Package Type | TO-220 |
Pin Configuration
The BT137 600E comes in a TO-220 package with three pins. The pin configuration is as follows:
| Pin Number | Pin Name | Description |
|---|---|---|
| 1 | MT1 | Main Terminal 1 (AC load connection) |
| 2 | MT2 | Main Terminal 2 (AC load connection) |
| 3 | Gate | Gate (control input) |
Usage Instructions
How to Use the BT137 600E in a Circuit
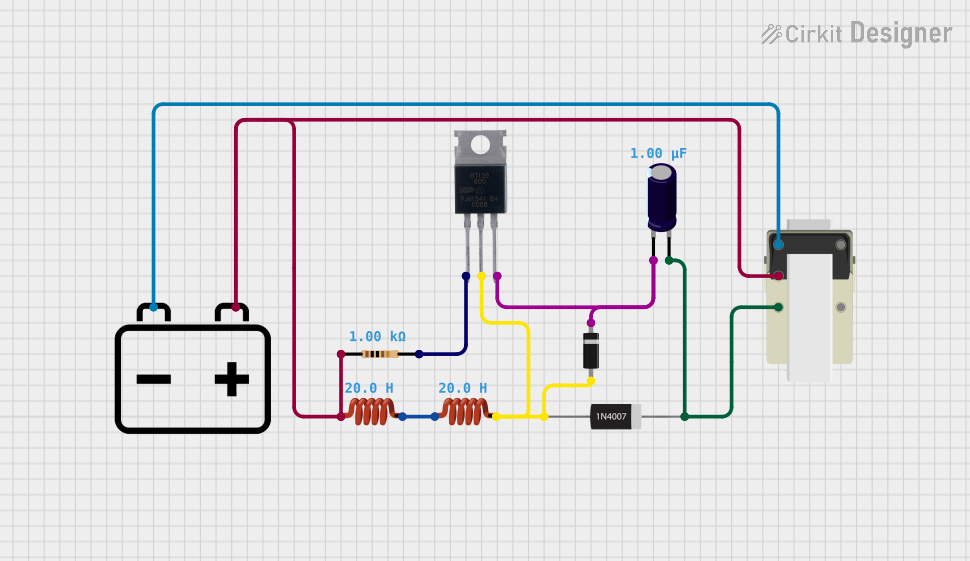
Basic Circuit Setup:
- Connect the AC load between MT2 and the AC supply.
- Connect MT1 to the neutral or return line of the AC supply.
- Use a resistor to limit the current to the Gate pin. The resistor value is typically chosen to ensure the gate current exceeds the trigger current (IGT) of 5mA.
Gate Triggering:
- Apply a small voltage (typically 1.5V) to the Gate pin to trigger the TRIAC.
- Once triggered, the TRIAC will remain in the conducting state until the current through it drops below the holding current (IH).
Snubber Circuit:
- For inductive loads, include a snubber circuit (a resistor and capacitor in series) across the TRIAC to prevent false triggering due to voltage spikes.
Isolation:
- Use an optocoupler or optoisolator for isolating the control circuit from the high-voltage AC circuit.
Example: Controlling AC Load with Arduino UNO
The BT137 600E can be controlled using an Arduino UNO. Below is an example circuit and code for switching an AC load:
Circuit Connections
- Connect MT1 to the neutral line of the AC supply.
- Connect MT2 to one terminal of the AC load, and the other terminal of the load to the live AC line.
- Connect the Gate pin to an Arduino digital pin (e.g., D3) through a 330Ω resistor.
- Use an optocoupler (e.g., MOC3021) for isolation between the Arduino and the TRIAC.
Arduino Code
// Arduino code to control BT137 600E TRIAC
// This code toggles an AC load ON and OFF every 2 seconds

const int triacGatePin = 3; // Pin connected to the TRIAC Gate via optocoupler

void setup() {
  pinMode(triacGatePin, OUTPUT); // Set the TRIAC Gate pin as output
}

void loop() {
  digitalWrite(triacGatePin, HIGH); // Trigger the TRIAC to turn ON the load
  delay(2000); // Keep the load ON for 2 seconds

  digitalWrite(triacGatePin, LOW); // Turn OFF the TRIAC (load will turn OFF
                                   // when the AC current crosses zero)
  delay(2000); // Keep the load OFF for 2 seconds
}
Important Considerations
- Ensure the TRIAC is properly heat-sinked to handle high currents.
- Use appropriate safety precautions when working with high-voltage AC circuits.
- Verify the load current and voltage ratings to ensure they are within the TRIAC's specifications.
Troubleshooting and FAQs
Common Issues and Solutions
| Issue | Possible Cause | Solution |
|---|---|---|
| TRIAC does not turn ON | Insufficient gate current | Check the gate resistor value and ensure |
| the gate current exceeds 5mA. | ||
| TRIAC turns ON but does not turn OFF | Load current is below holding current | Ensure the load current is above 2mA. |
| False triggering of the TRIAC | Voltage spikes from inductive loads | Add a snubber circuit across the TRIAC. |
| Overheating of the TRIAC | Excessive load current | Use a heat sink to dissipate heat. |
FAQs
Can the BT137 600E handle inductive loads?
- Yes, but a snubber circuit is recommended to prevent false triggering due to voltage spikes.
What is the maximum AC voltage the BT137 600E can handle?
- The maximum repetitive voltage (VDRM) is 600V.
Can I use the BT137 600E for DC switching?
- No, the BT137 600E is designed for AC switching and will not function properly in DC circuits.
Do I need an optocoupler for controlling the TRIAC with a microcontroller?
- Yes, an optocoupler is recommended for isolating the low-voltage control circuit from the high-voltage AC circuit.
By following this documentation, you can effectively use the BT137 600E TRIAC in your AC power control applications.