How to Use Xensiv PAS CO2 Sensor: Examples, Pinouts, and Specs
Introduction
The Xensiv PAS CO2 Sensor, manufactured by Infineon, is a high-precision sensor designed to measure carbon dioxide (CO2) levels in the air. It leverages photoacoustic spectroscopy (PAS) technology to deliver accurate and reliable readings in a compact form factor. This sensor is ideal for applications such as indoor air quality monitoring, HVAC systems, smart home devices, and industrial environments where CO2 concentration tracking is critical.
The Xensiv PAS CO2 Sensor stands out for its low power consumption, high sensitivity, and robust performance, making it suitable for both portable and stationary devices.
Explore Projects Built with Xensiv PAS CO2 Sensor
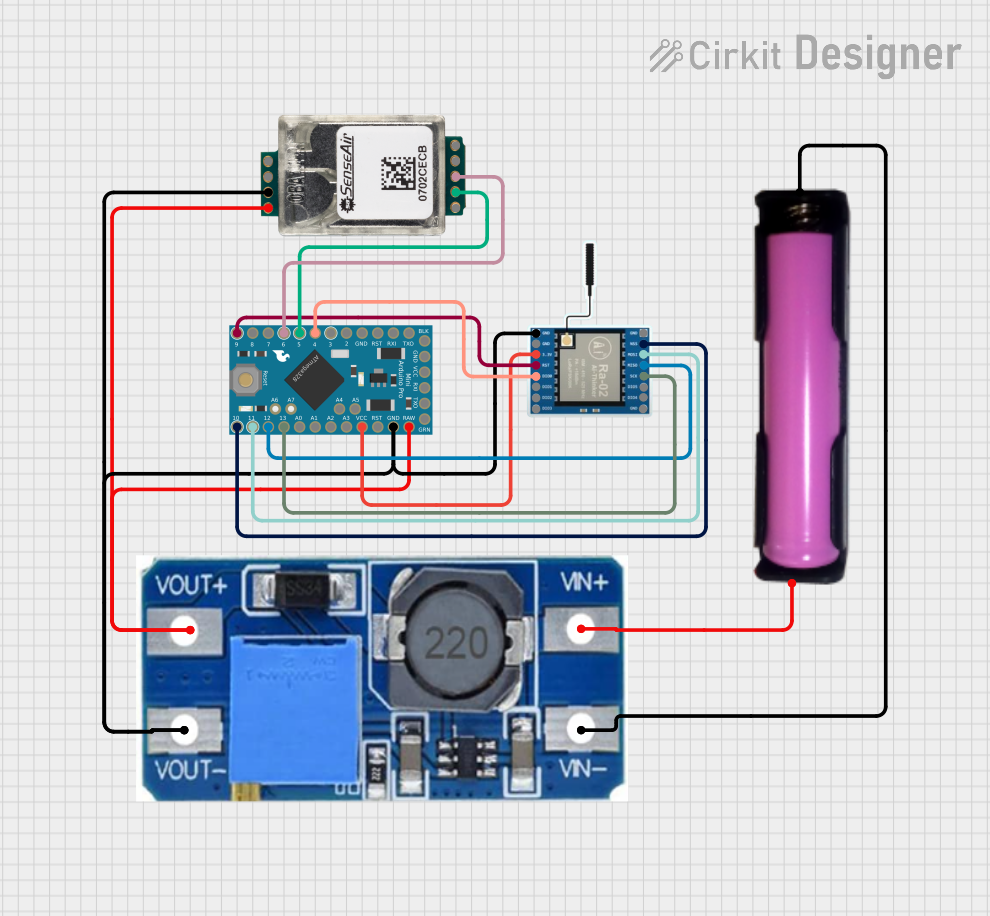
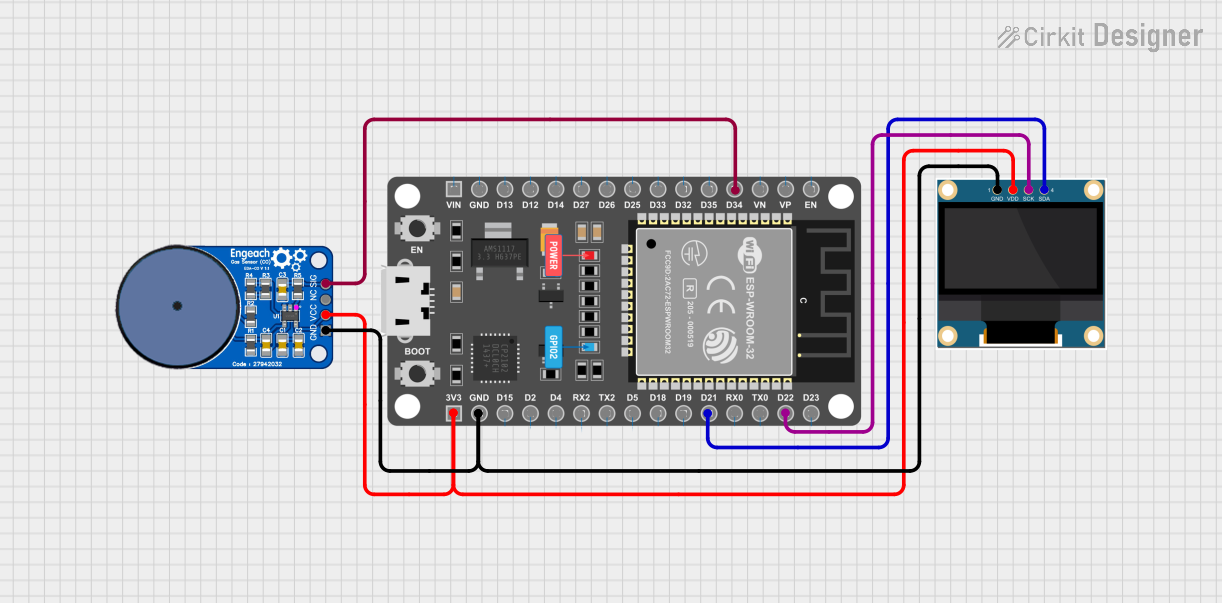
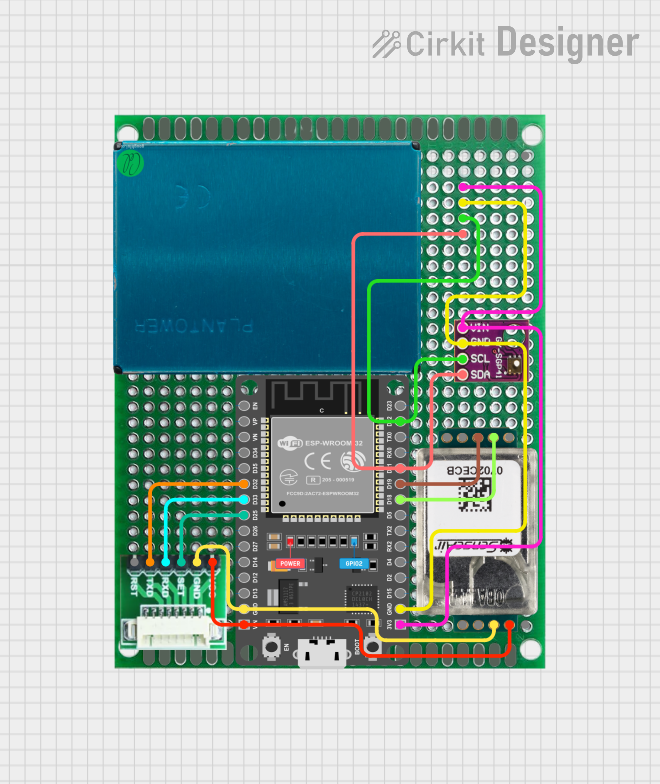
Explore Projects Built with Xensiv PAS CO2 Sensor
Technical Specifications
Below are the key technical details of the Xensiv PAS CO2 Sensor:
| Parameter | Value |
|---|---|
| Measurement Range | 0 - 10,000 ppm |
| Accuracy | ±(30 ppm + 3% of reading) |
| Operating Voltage | 3.3 V |
| Power Consumption | < 30 mW |
| Interface | I²C, UART |
| Operating Temperature Range | -10°C to +60°C |
| Humidity Range | 0% - 95% RH (non-condensing) |
| Dimensions | 14 mm x 13.8 mm x 7.5 mm |
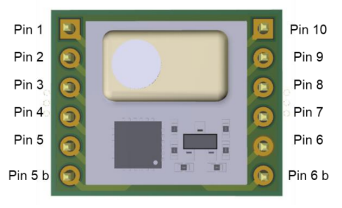
Pin Configuration and Descriptions
The Xensiv PAS CO2 Sensor has the following pinout:
| Pin | Name | Description |
|---|---|---|
| 1 | VDD | Power supply (3.3 V) |
| 2 | GND | Ground |
| 3 | SDA | I²C data line |
| 4 | SCL | I²C clock line |
| 5 | TX | UART transmit line |
| 6 | RX | UART receive line |
| 7 | NC | Not connected (leave unconnected) |
Usage Instructions
How to Use the Xensiv PAS CO2 Sensor in a Circuit
- Power Supply: Connect the VDD pin to a 3.3 V power source and the GND pin to ground.
- Communication Interface: Choose between I²C or UART for communication:
- For I²C, connect the SDA and SCL pins to the corresponding lines on your microcontroller.
- For UART, connect the TX and RX pins to the UART interface of your microcontroller.
- Pull-Up Resistors: If using I²C, ensure pull-up resistors (typically 4.7 kΩ) are connected to the SDA and SCL lines.
- Initialization: Configure the microcontroller to communicate with the sensor using the selected interface. Refer to the datasheet for initialization commands and register settings.
Important Considerations and Best Practices
- Calibration: The sensor is factory-calibrated, but periodic recalibration may be required for optimal accuracy in long-term use.
- Placement: Avoid placing the sensor in areas with high humidity or direct exposure to water, as it is non-condensing.
- Power Supply Stability: Ensure a stable 3.3 V power supply to avoid measurement inaccuracies.
- Warm-Up Time: Allow the sensor to warm up for a few seconds after powering on before taking measurements.
Example Code for Arduino UNO (I²C Interface)
Below is an example of how to interface the Xensiv PAS CO2 Sensor with an Arduino UNO using the I²C protocol:
#include <Wire.h>

// I²C address of the Xensiv PAS CO2 Sensor
#define SENSOR_I2C_ADDRESS 0x28

void setup() {
  Wire.begin(); // Initialize I²C communication
  Serial.begin(9600); // Initialize serial communication for debugging

  // Wait for the sensor to initialize
  delay(1000);
  Serial.println("Xensiv PAS CO2 Sensor Initialized");
}

void loop() {
  Wire.beginTransmission(SENSOR_I2C_ADDRESS);
  Wire.write(0x00); // Command to request CO2 measurement
  Wire.endTransmission();

  delay(100); // Wait for the sensor to process the request

  Wire.requestFrom(SENSOR_I2C_ADDRESS, 2); // Request 2 bytes of data
  if (Wire.available() == 2) {
    uint16_t co2 = Wire.read() << 8 | Wire.read(); // Combine MSB and LSB
    Serial.print("CO2 Concentration: ");
    Serial.print(co2);
    Serial.println(" ppm");
  } else {
    Serial.println("Error: No data received from sensor");
  }

  delay(2000); // Wait 2 seconds before the next reading
}
Troubleshooting and FAQs
Common Issues and Solutions
No Data Received from Sensor
- Cause: Incorrect I²C address or wiring.
- Solution: Verify the I²C address (default is 0x28) and ensure proper connections for SDA and SCL.
Inaccurate Readings
- Cause: Sensor not warmed up or exposed to extreme environmental conditions.
- Solution: Allow the sensor to warm up for a few seconds and ensure it is used within the specified temperature and humidity range.
Communication Errors
- Cause: Missing pull-up resistors on I²C lines.
- Solution: Add 4.7 kΩ pull-up resistors to the SDA and SCL lines.
Sensor Not Responding
- Cause: Insufficient power supply or incorrect voltage.
- Solution: Ensure the sensor is powered with a stable 3.3 V supply.
FAQs
Q: Can the Xensiv PAS CO2 Sensor be used outdoors?
A: The sensor is designed for indoor use. If used outdoors, ensure it is protected from direct exposure to water and extreme humidity.
Q: How often should the sensor be recalibrated?
A: Recalibration frequency depends on the application. For most use cases, recalibration every 6-12 months is recommended.
Q: Can the sensor measure other gases?
A: No, the Xensiv PAS CO2 Sensor is specifically designed to measure CO2 concentrations.
Q: Is the sensor compatible with 5 V systems?
A: The sensor operates at 3.3 V. Use a level shifter if interfacing with a 5 V system.