How to Use AI Vision Blox: Examples, Pinouts, and Specs
Introduction
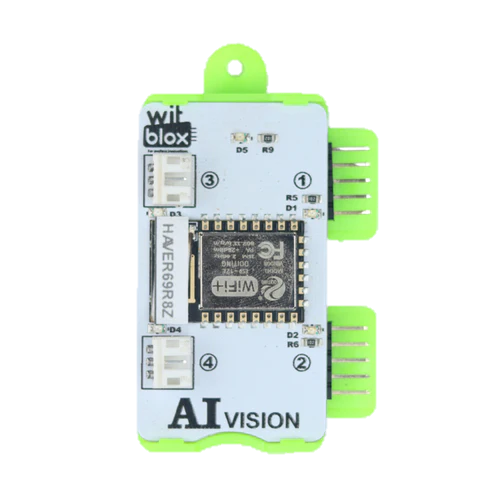
The AI Vision Blox is a modular AI-powered vision system designed for image recognition, object detection, and machine learning applications. This versatile component is widely used in various industries, including manufacturing, robotics, security, and healthcare. Its advanced AI capabilities enable it to process and analyze visual data in real-time, making it an essential tool for modern automation and intelligent systems.
Explore Projects Built with AI Vision Blox
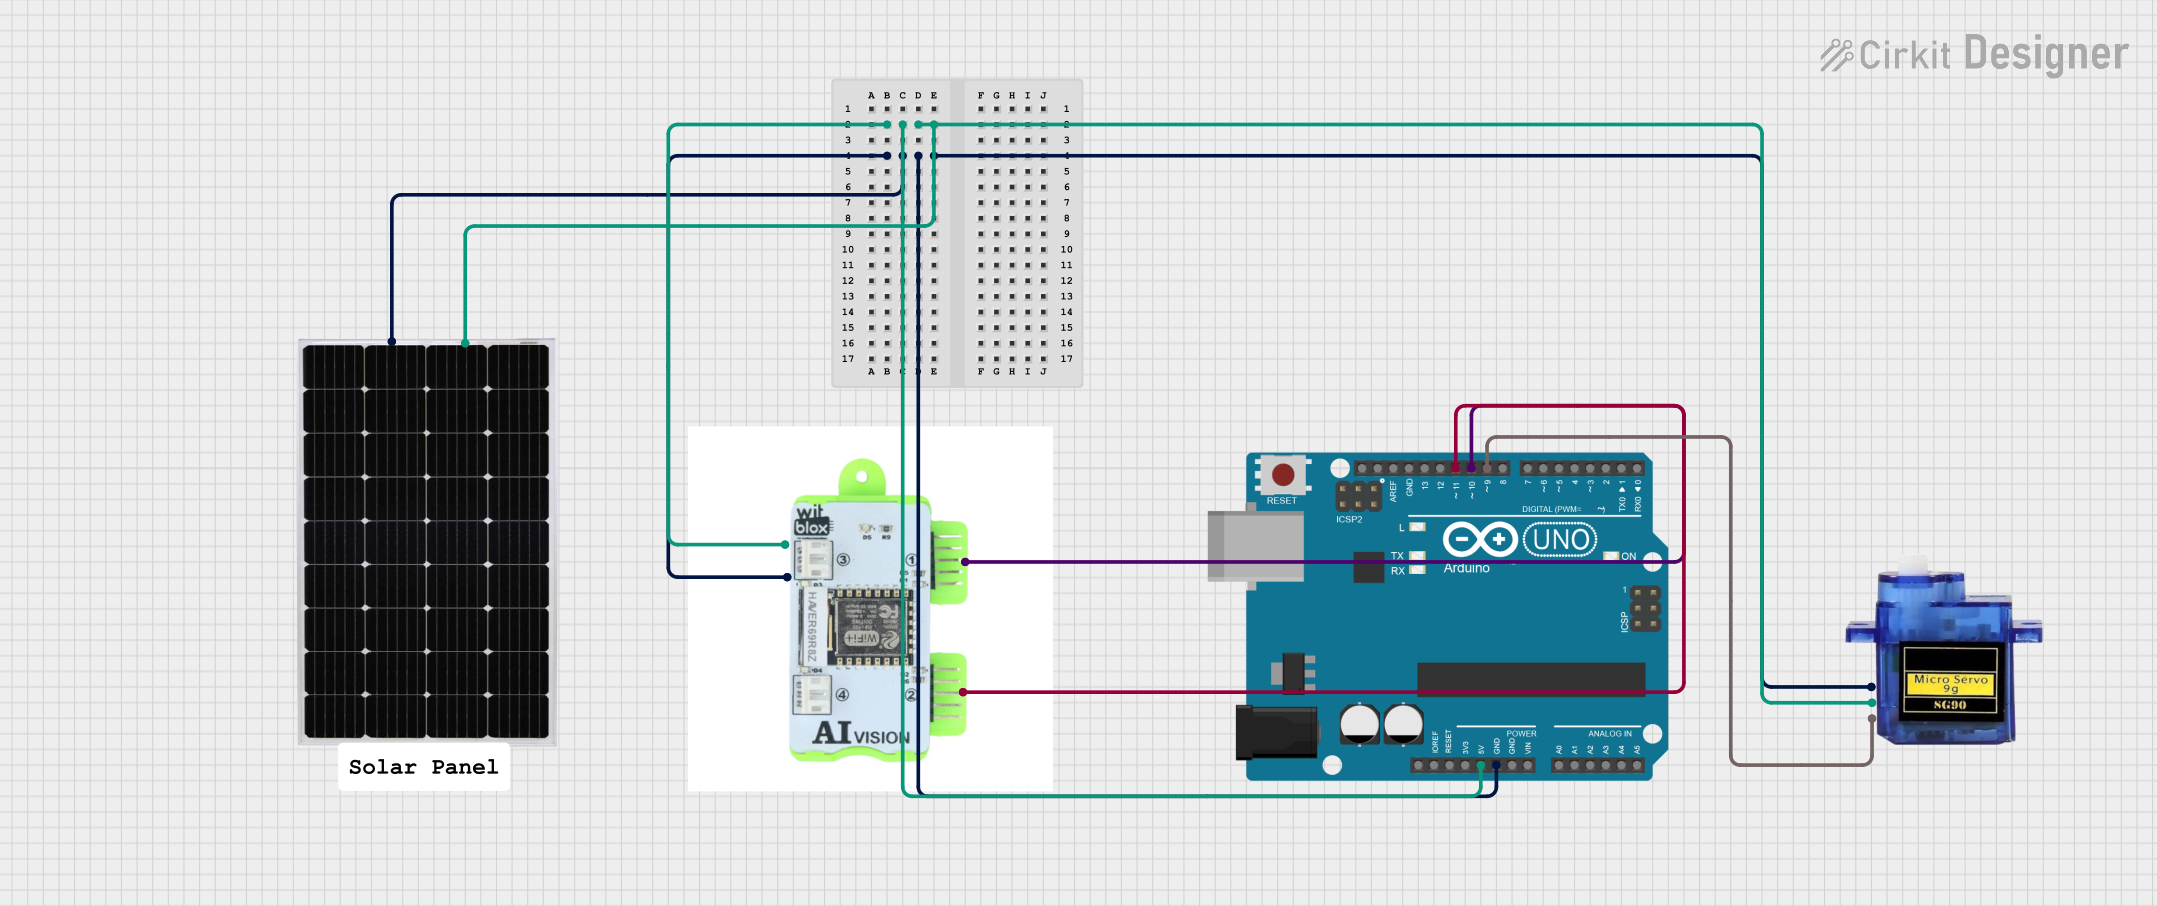
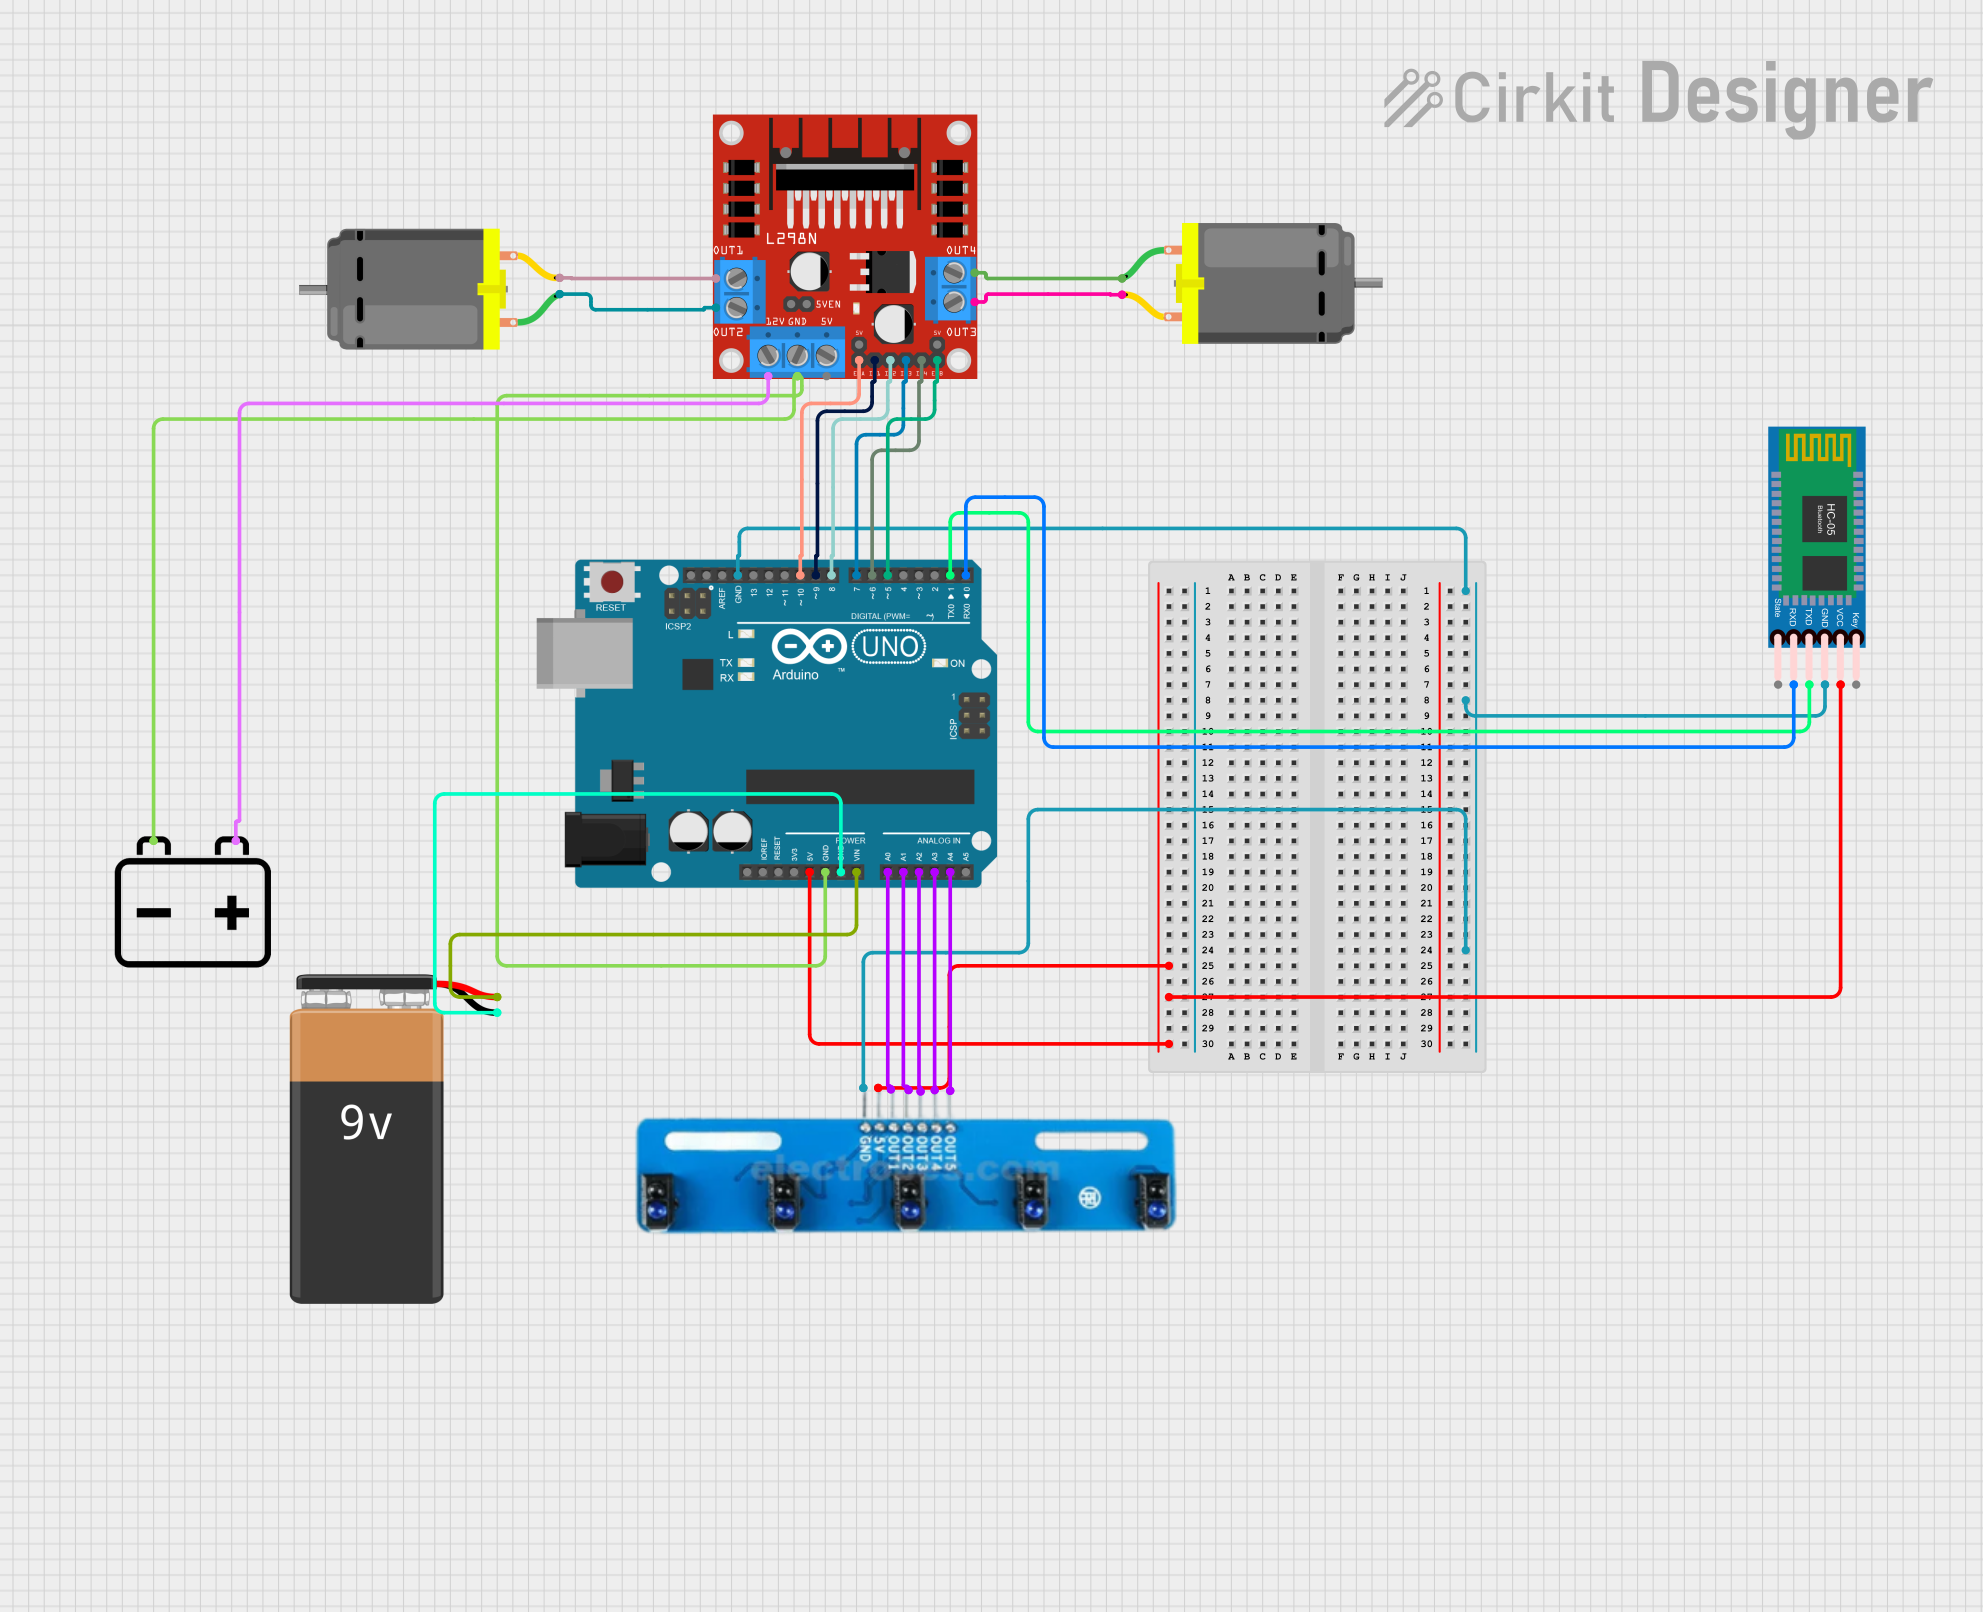
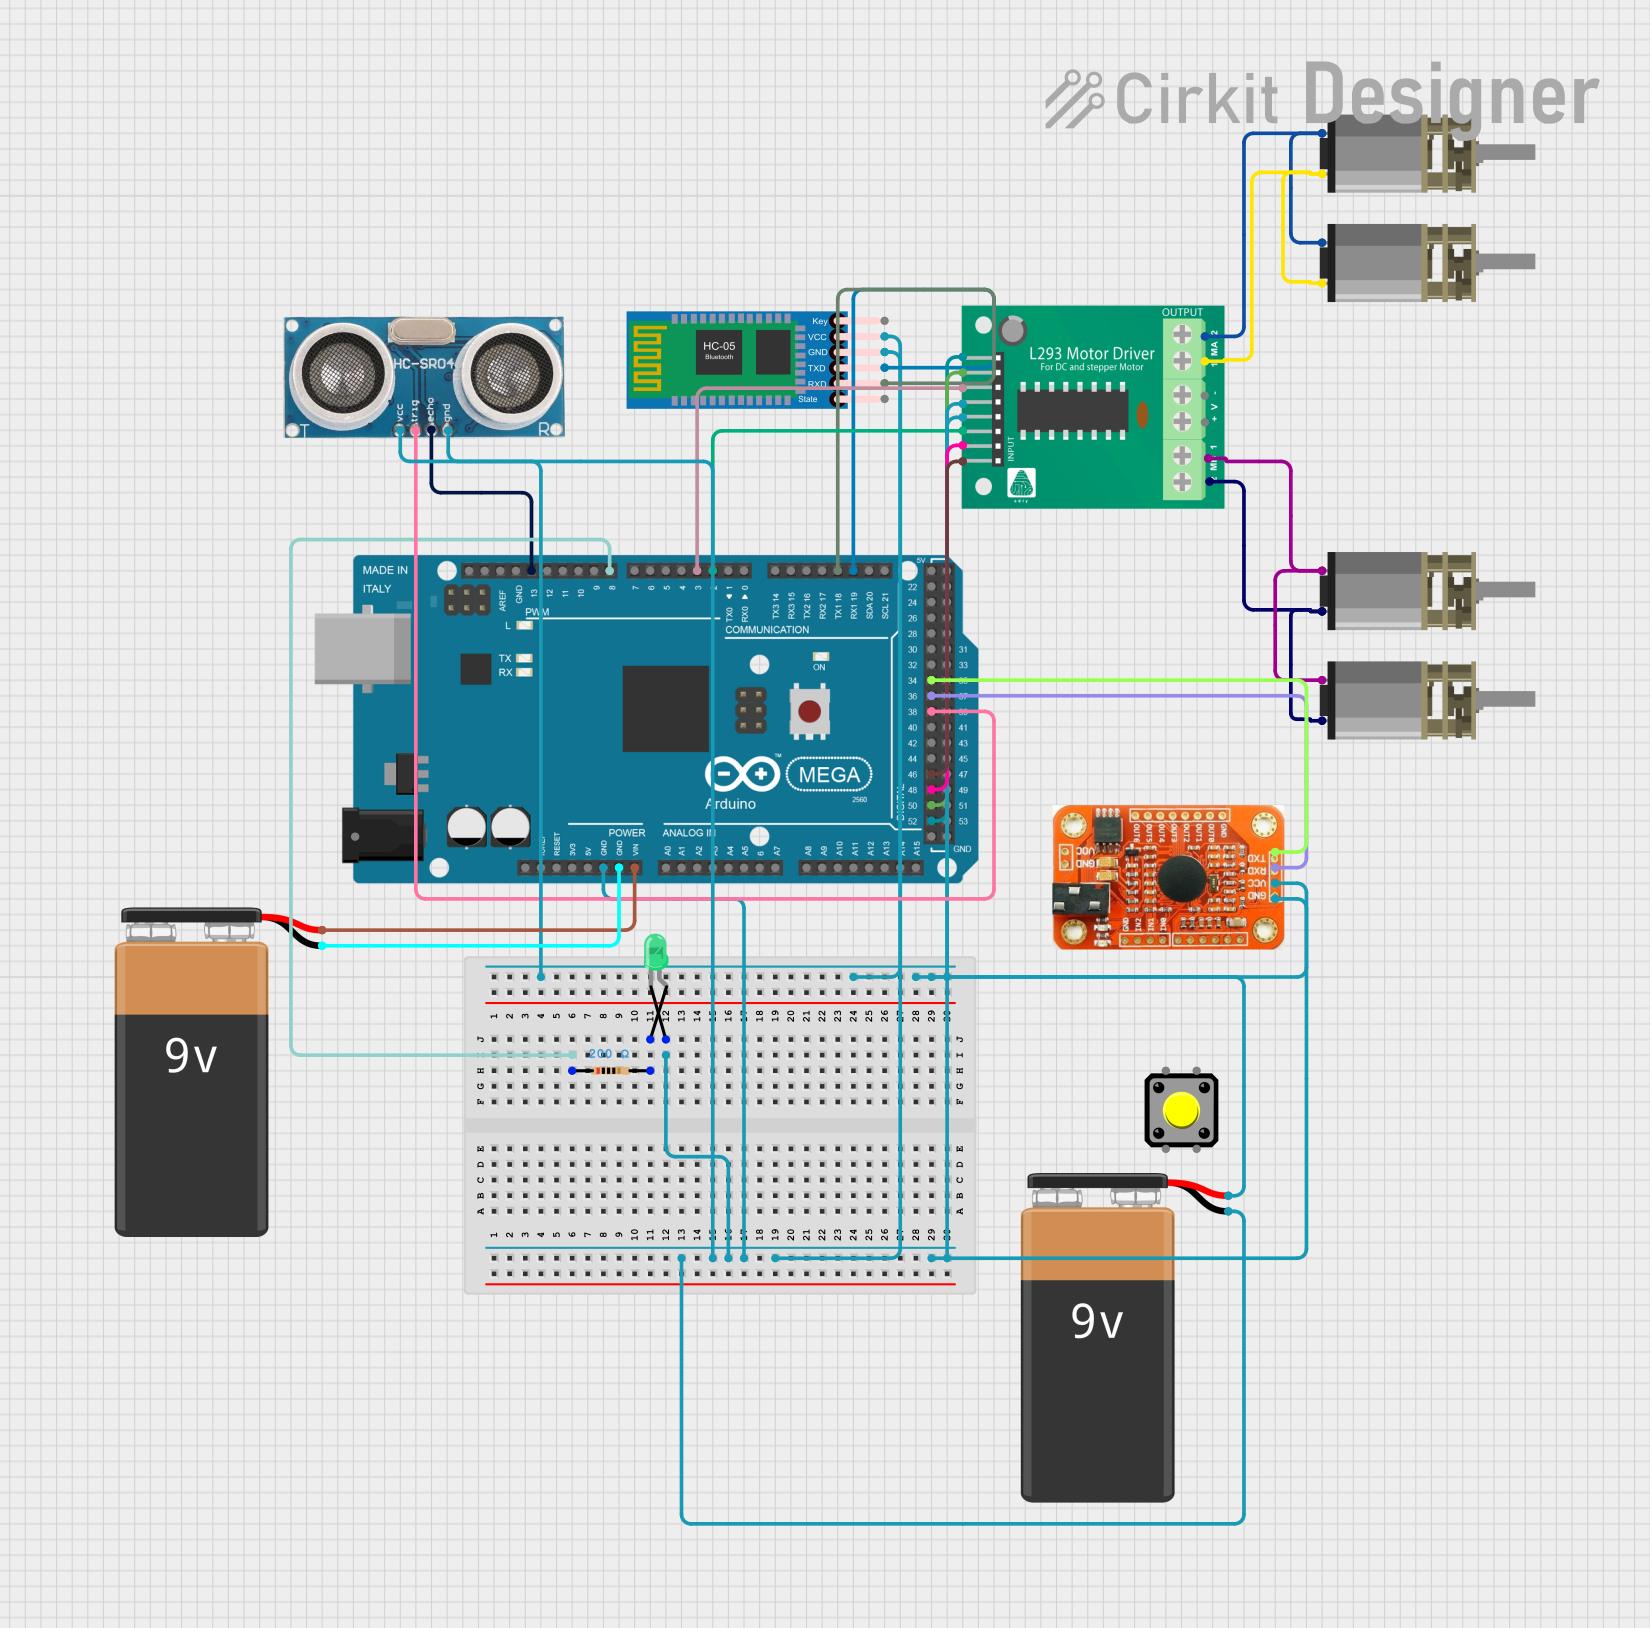
Explore Projects Built with AI Vision Blox
Technical Specifications
Key Technical Details
| Parameter | Value |
|---|---|
| Operating Voltage | 5V DC |
| Power Consumption | 500mA |
| Communication | I2C, UART, SPI |
| Image Resolution | Up to 1080p |
| Frame Rate | Up to 60 FPS |
| AI Model Support | TensorFlow Lite, ONNX, Caffe |
| Operating Temperature | -20°C to 70°C |
| Dimensions | 50mm x 50mm x 20mm |
Pin Configuration and Descriptions
| Pin Number | Pin Name | Description |
|---|---|---|
| 1 | VCC | Power Supply (5V) |
| 2 | GND | Ground |
| 3 | SDA | I2C Data Line |
| 4 | SCL | I2C Clock Line |
| 5 | TX | UART Transmit |
| 6 | RX | UART Receive |
| 7 | MOSI | SPI Master Out Slave In |
| 8 | MISO | SPI Master In Slave Out |
| 9 | SCK | SPI Clock |
| 10 | CS | SPI Chip Select |
Usage Instructions
How to Use the Component in a Circuit
- Power Supply: Connect the VCC pin to a 5V power source and the GND pin to the ground.
- Communication Interface: Choose the communication protocol (I2C, UART, or SPI) based on your application.
- For I2C: Connect SDA to the data line and SCL to the clock line.
- For UART: Connect TX to the transmit line and RX to the receive line.
- For SPI: Connect MOSI, MISO, SCK, and CS to the respective SPI lines.
- AI Model Loading: Load the desired AI model (TensorFlow Lite, ONNX, or Caffe) onto the AI Vision Blox.
- Initialization: Initialize the AI Vision Blox in your code to start processing visual data.
Important Considerations and Best Practices
- Power Supply: Ensure a stable 5V power supply to avoid fluctuations that could affect performance.
- Heat Management: The AI Vision Blox can generate heat during operation. Ensure proper ventilation or use a heat sink if necessary.
- Firmware Updates: Regularly check for firmware updates to ensure optimal performance and access to new features.
- Model Optimization: Optimize AI models for the AI Vision Blox to ensure efficient processing and real-time performance.
Example Code for Arduino UNO
#include <Wire.h>  // Include Wire library for I2C communication

#define AI_VISION_BLOX_ADDR 0x42  // I2C address of AI Vision Blox

void setup() {
  Wire.begin();  // Initialize I2C communication
  Serial.begin(9600);  // Initialize serial communication for debugging

  // Initialize AI Vision Blox
  Wire.beginTransmission(AI_VISION_BLOX_ADDR);
  Wire.write(0x01);  // Command to initialize
  Wire.endTransmission();

  Serial.println("AI Vision Blox Initialized");
}

void loop() {
  // Request data from AI Vision Blox
  Wire.requestFrom(AI_VISION_BLOX_ADDR, 2);  // Request 2 bytes of data

  if (Wire.available()) {
    int data = Wire.read();  // Read the data
    Serial.print("Data: ");
    Serial.println(data);  // Print the data to serial monitor
  }

  delay(1000);  // Wait for 1 second before next request
}
Troubleshooting and FAQs
Common Issues Users Might Face
No Response from AI Vision Blox:
- Solution: Check the power supply and ensure the connections are secure. Verify the communication protocol settings in your code.
Overheating:
- Solution: Ensure proper ventilation and consider using a heat sink. Check for any obstructions that might block airflow.
Incorrect Data Output:
- Solution: Verify the AI model loaded onto the AI Vision Blox. Ensure the model is compatible and optimized for the device.
Communication Errors:
- Solution: Check the wiring and ensure the correct pins are connected. Verify the communication protocol settings in your code.
FAQs
Q1: Can I use multiple AI Vision Blox units in a single system?
- A1: Yes, you can use multiple units. Ensure each unit has a unique I2C address or use different communication protocols.
Q2: How do I update the firmware on the AI Vision Blox?
- A2: Firmware updates can be done via the manufacturer's software tool. Follow the instructions provided in the tool's documentation.
Q3: What AI models are supported by the AI Vision Blox?
- A3: The AI Vision Blox supports TensorFlow Lite, ONNX, and Caffe models. Ensure the models are optimized for the device.
Q4: Can the AI Vision Blox be used outdoors?
- A4: The AI Vision Blox can operate in temperatures ranging from -20°C to 70°C. However, ensure it is protected from direct exposure to harsh environmental conditions.
This documentation provides a comprehensive guide to the AI Vision Blox, covering its technical specifications, usage instructions, and troubleshooting tips. Whether you are a beginner or an experienced user, this guide will help you effectively utilize the AI Vision Blox in your projects.