How to Use Adafruit 2.4 Touchscreen TFT Breakout w MicroSD: Examples, Pinouts, and Specs
Introduction
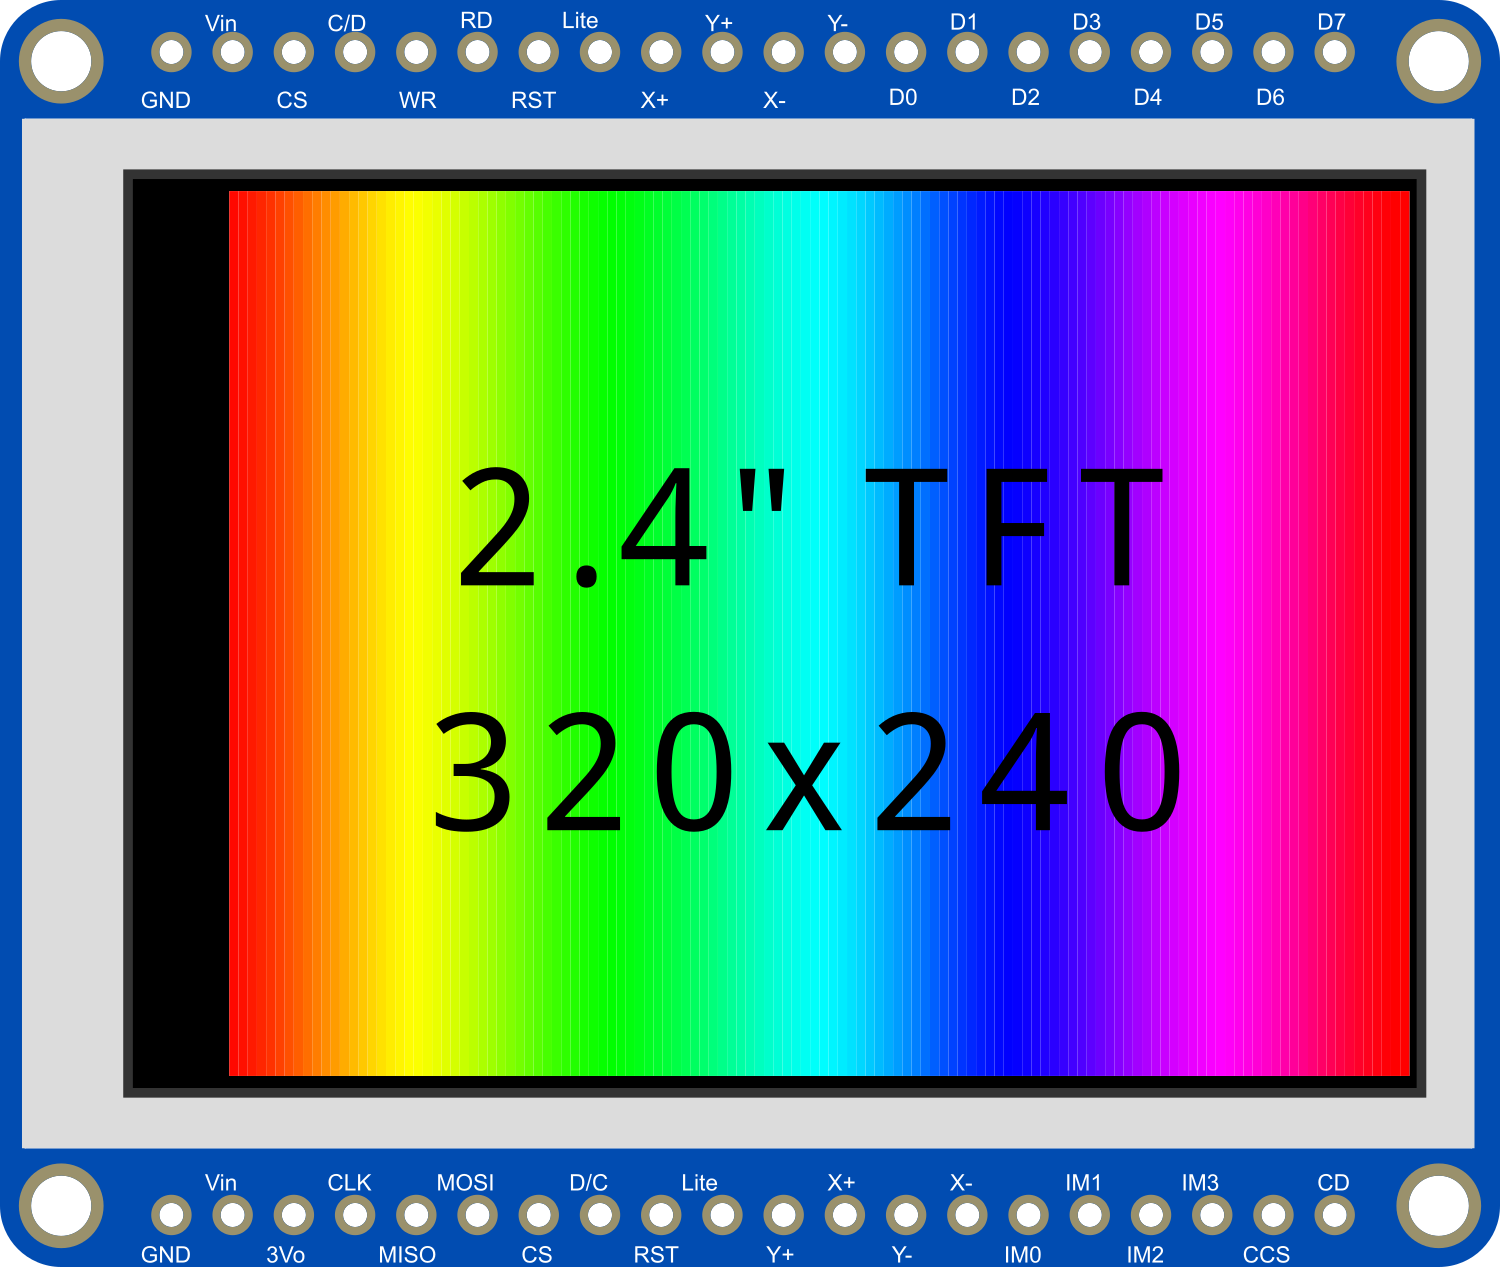
The Adafruit 2.4" Touchscreen TFT Breakout with MicroSD is a versatile and colorful display module suitable for adding a visual interface to your electronics projects. This module features a 2.4-inch TFT LCD with a resolution of 320x240 pixels, capable of displaying detailed graphics and text. It also includes a resistive touch overlay, allowing for user input and interaction. The onboard microSD card slot provides additional storage for multimedia files, making it an excellent choice for projects that require both display and storage capabilities, such as DIY game consoles, interactive art installations, and portable instruments.
Explore Projects Built with Adafruit 2.4 Touchscreen TFT Breakout w MicroSD
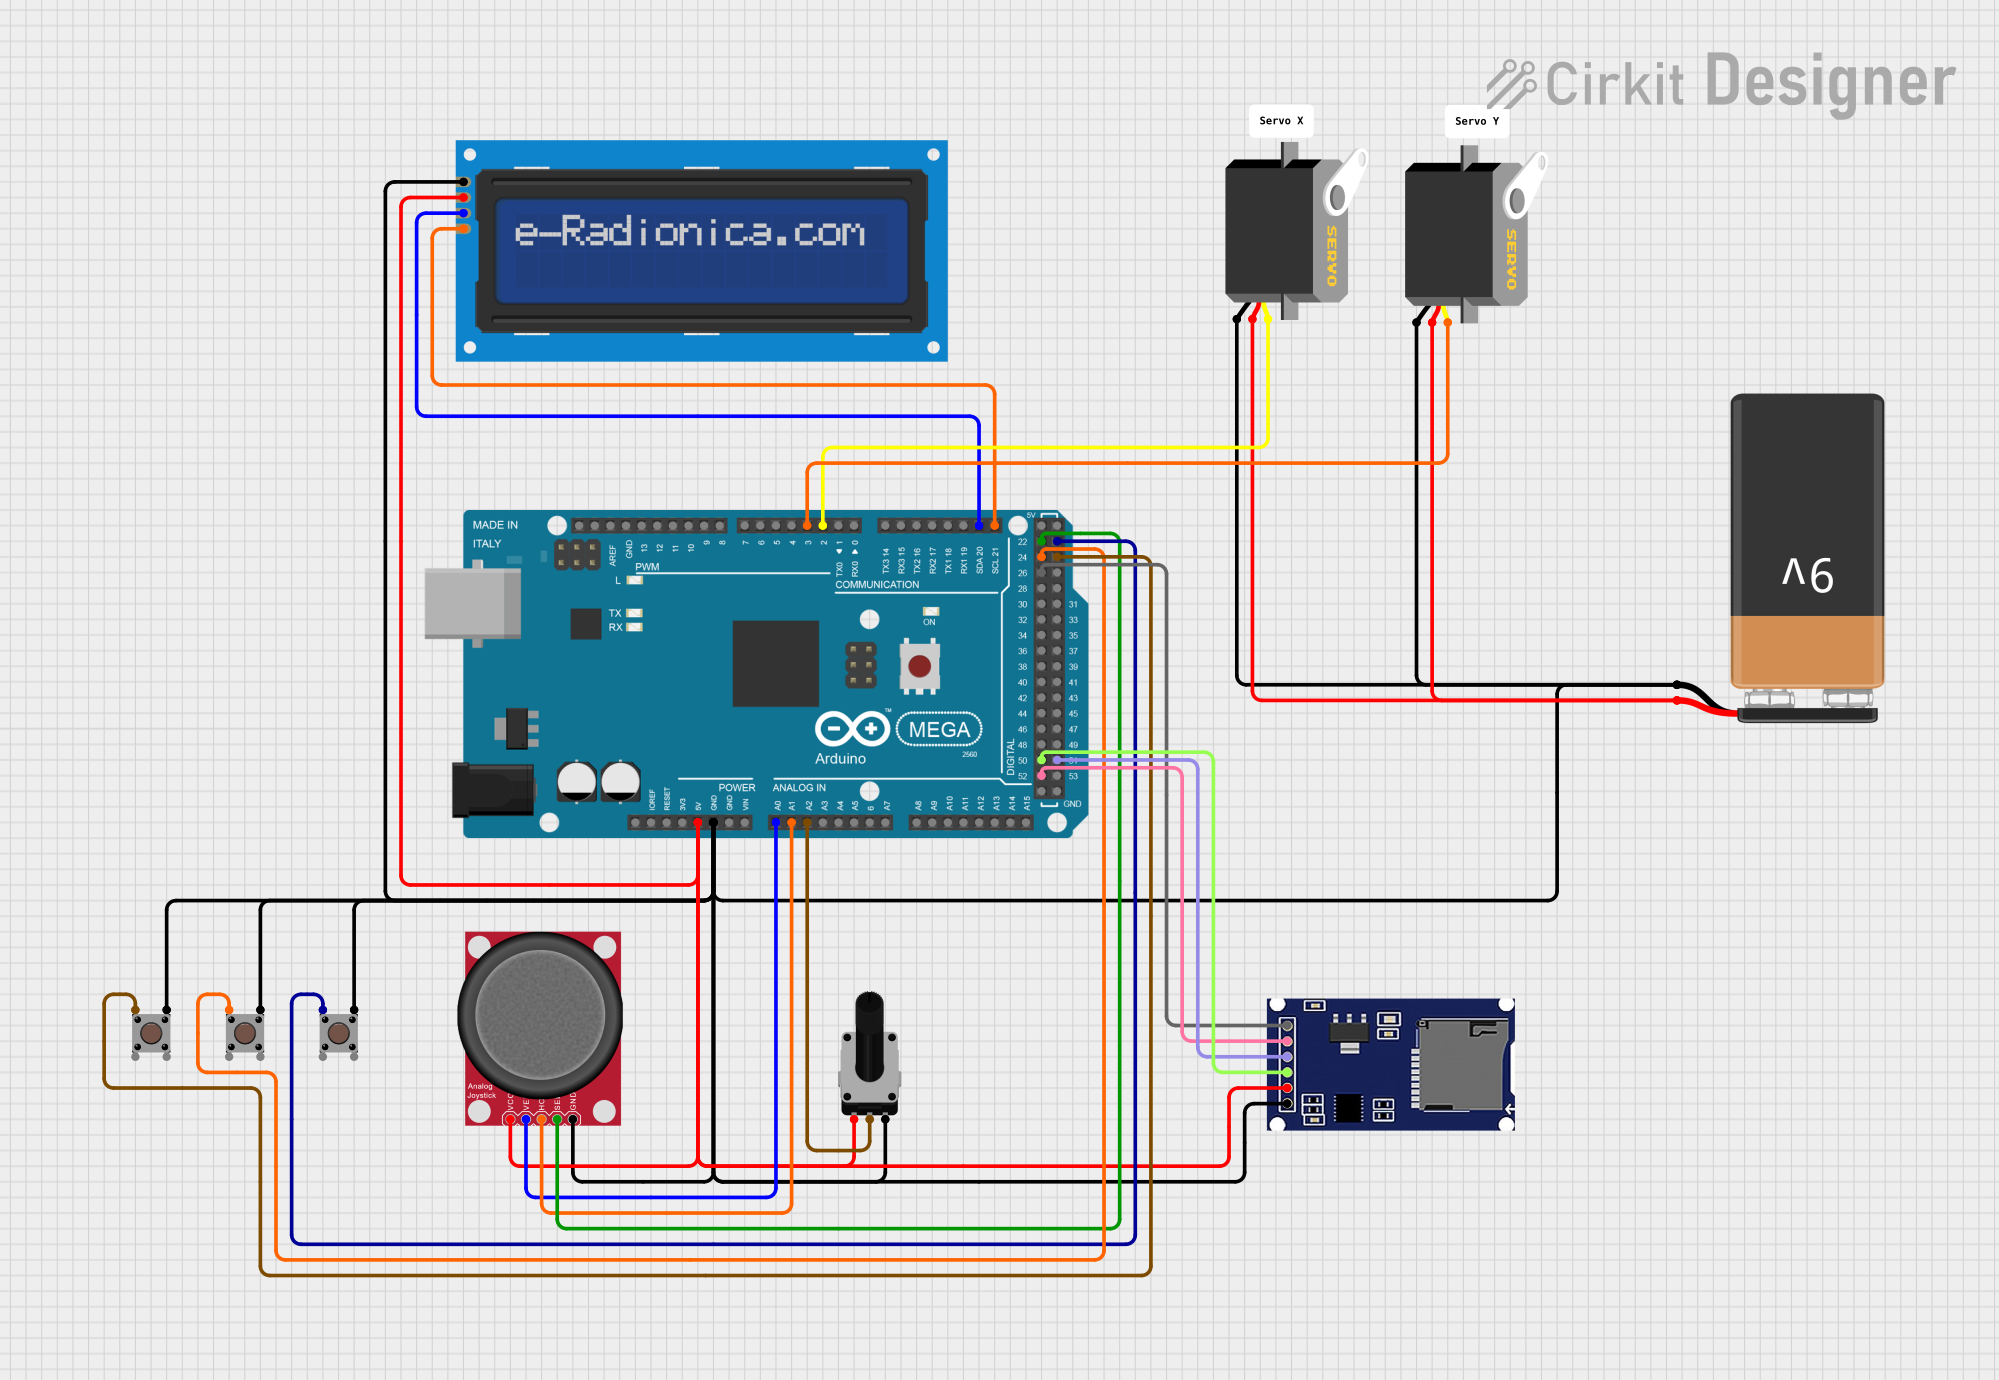

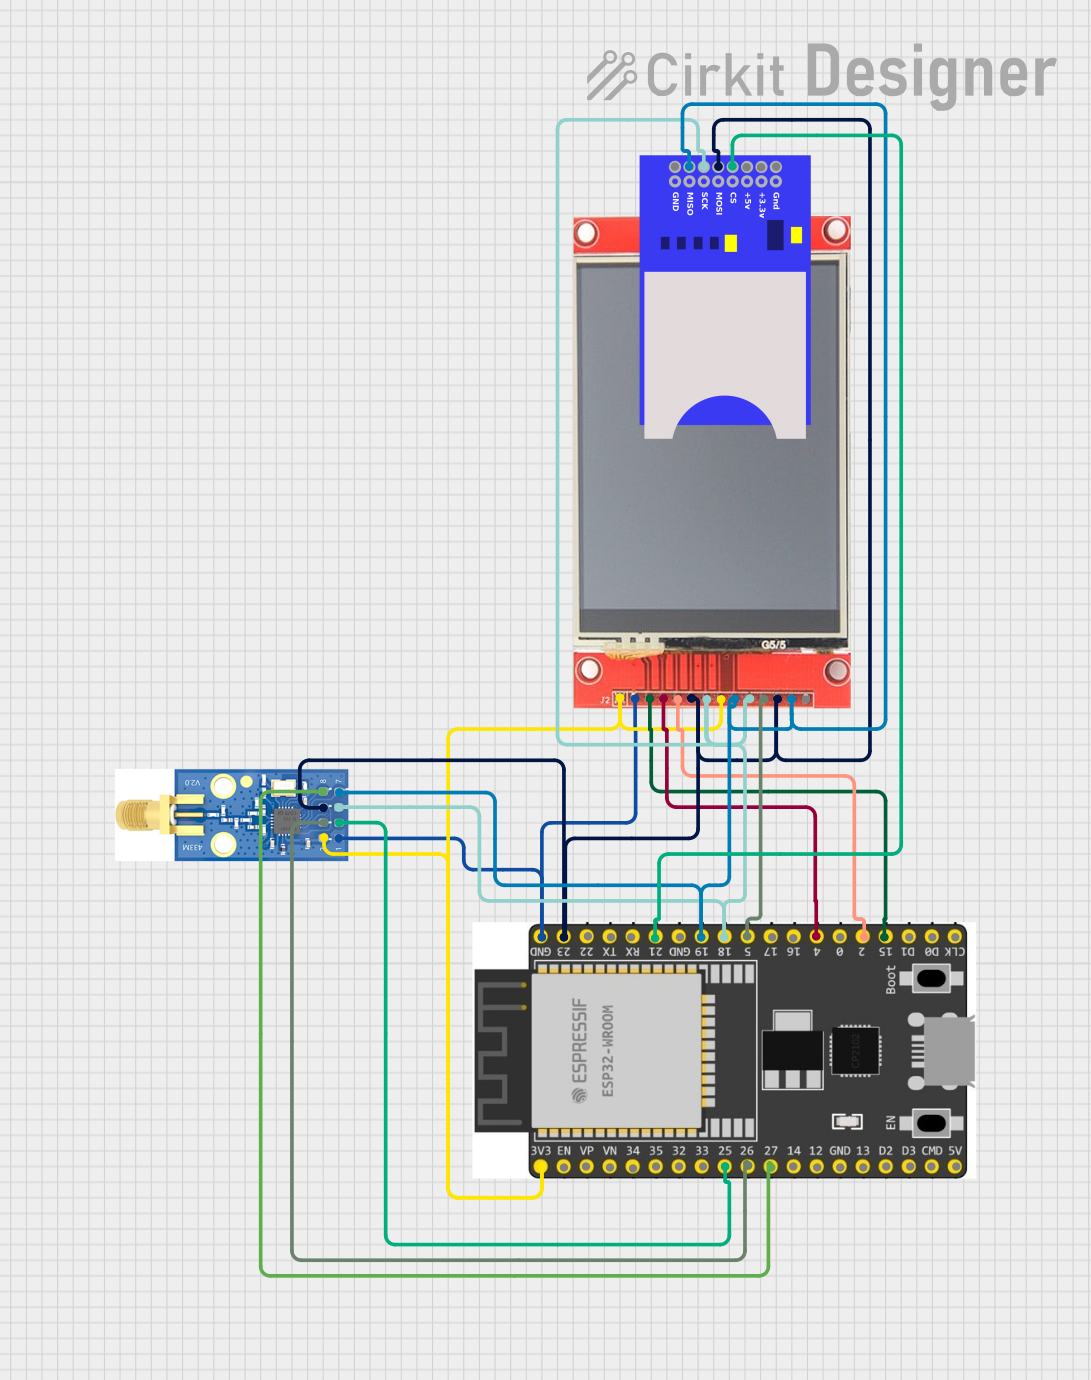
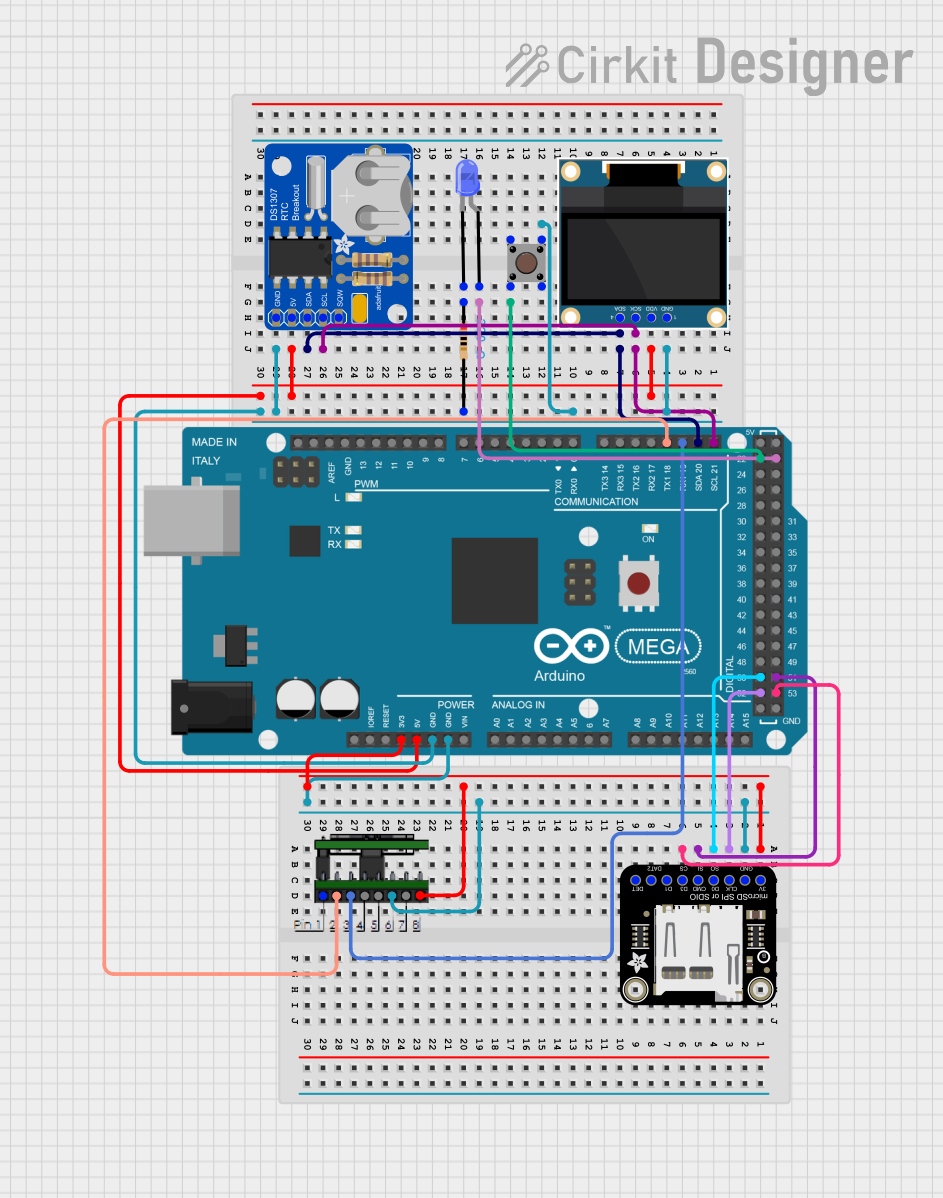
Explore Projects Built with Adafruit 2.4 Touchscreen TFT Breakout w MicroSD
Common Applications and Use Cases
- Handheld gaming devices
- User interfaces for embedded systems
- Data monitoring displays
- DIY smartphones or smartwatches
- Educational tools and toys
Technical Specifications
Key Technical Details
- Display Size: 2.4 inches diagonal
- LCD Type: TFT
- Resolution: 320x240 pixels
- Interface: SPI
- Touchscreen: Resistive
- Onboard Storage: microSD card slot
- Operating Voltage: 3.3V to 5V
Pin Configuration and Descriptions
| Pin Number | Name | Description |
|---|---|---|
| 1 | GND | Ground connection |
| 2 | VCC | Power supply (3.3V-5V) |
| 3 | CS | Chip Select for the TFT |
| 4 | RESET | Reset pin |
| 5 | D/C | Data/Command control pin |
| 6 | MOSI | SPI Master Out Slave In |
| 7 | SCK | SPI Clock |
| 8 | MISO | SPI Master In Slave Out |
| 9 | T_CS | Touchscreen Chip Select |
| 10 | CARD_CS | microSD card Chip Select |
Usage Instructions
How to Use the Component in a Circuit
- Power Connections: Connect the VCC pin to a 3.3V or 5V power supply and the GND pin to the ground.
- SPI Connections: Connect the SCK, MOSI, and MISO pins to the corresponding SPI pins on your microcontroller.
- Control Pins: Connect the CS, RESET, D/C, T_CS, and CARD_CS pins to available digital pins on your microcontroller.
- MicroSD Card: Insert a microSD card into the slot if needed for your application.
Important Considerations and Best Practices
- Use a level shifter if your microcontroller operates at a voltage different from the display's operating voltage.
- When using the touchscreen functionality, calibrate the touch coordinates for accurate input.
- For better performance, use hardware SPI rather than software SPI.
- Always safely eject the microSD card from your computer before inserting it into the module to prevent data corruption.
Example Code for Arduino UNO
#include <Adafruit_GFX.h>         // Core graphics library
#include <Adafruit_TFTLCD.h>      // Hardware-specific library
#include <TouchScreen.h>          // Touch library

// Pin definitions
#define LCD_CS A3 // Chip Select
#define LCD_CD A2 // Command/Data
#define LCD_WR A1 // LCD Write
#define LCD_RD A0 // LCD Read
#define LCD_RESET A4 // Can alternately just connect to Arduino's reset pin

// Initialize Adafruit TFTLCD library with the hardware-specific configuration:
Adafruit_TFTLCD tft(LCD_CS, LCD_CD, LCD_WR, LCD_RD, LCD_RESET);

void setup() {
  Serial.begin(9600);
  tft.reset();
  uint16_t identifier = tft.readID();
  tft.begin(identifier);
  tft.fillScreen(BLACK);
  tft.setCursor(0, 0);
  tft.setTextColor(WHITE);
  tft.setTextSize(1);
  tft.println("Hello, World!");
}

void loop() {
  // Main loop - add your code here to interact with the display
}
Troubleshooting and FAQs
Common Issues Users Might Face
- Display not powering on: Check the power connections and ensure the correct voltage is supplied.
- Touch not responding: Verify the touch screen pin connections and calibrate the touch screen.
- SD card not detected: Ensure the microSD card is inserted correctly and the CARD_CS pin is connected properly.
Solutions and Tips for Troubleshooting
- Double-check all wiring against the pin configuration table.
- Use example sketches to test the display and touch functionality separately.
- Check the Arduino Serial Monitor for any error messages or debug information.
FAQs
Q: Can I use this display with a 5V microcontroller like an Arduino UNO? A: Yes, the display can be used with a 5V microcontroller, but ensure that the logic levels are compatible.
Q: How do I store images on the microSD card to display them on the screen? A: Images can be stored in a compatible format (e.g., BMP) and read using the Adafruit libraries provided for the display.
Q: Is it possible to use the touchscreen and the microSD card at the same time? A: Yes, both functionalities can be used simultaneously, but make sure to manage the Chip Select pins correctly in your code.
Q: What library should I use for the touchscreen? A: The Adafruit_TouchScreen library is recommended for handling the resistive touch functionality.
This documentation provides a comprehensive guide to using the Adafruit 2.4" Touchscreen TFT Breakout with MicroSD. For further assistance, consult the Adafruit forums and the extensive online community resources.