How to Use Servo Motor MG996R: Examples, Pinouts, and Specs
Introduction
The Servo Motor MG996R is a widely used high-torque digital servo motor, renowned for its precision and reliability. It is capable of rotating to specific angles, which makes it an essential component in various applications such as robotic arms, radio-controlled (RC) vehicles, and other projects that demand precise motion control.
Explore Projects Built with Servo Motor MG996R
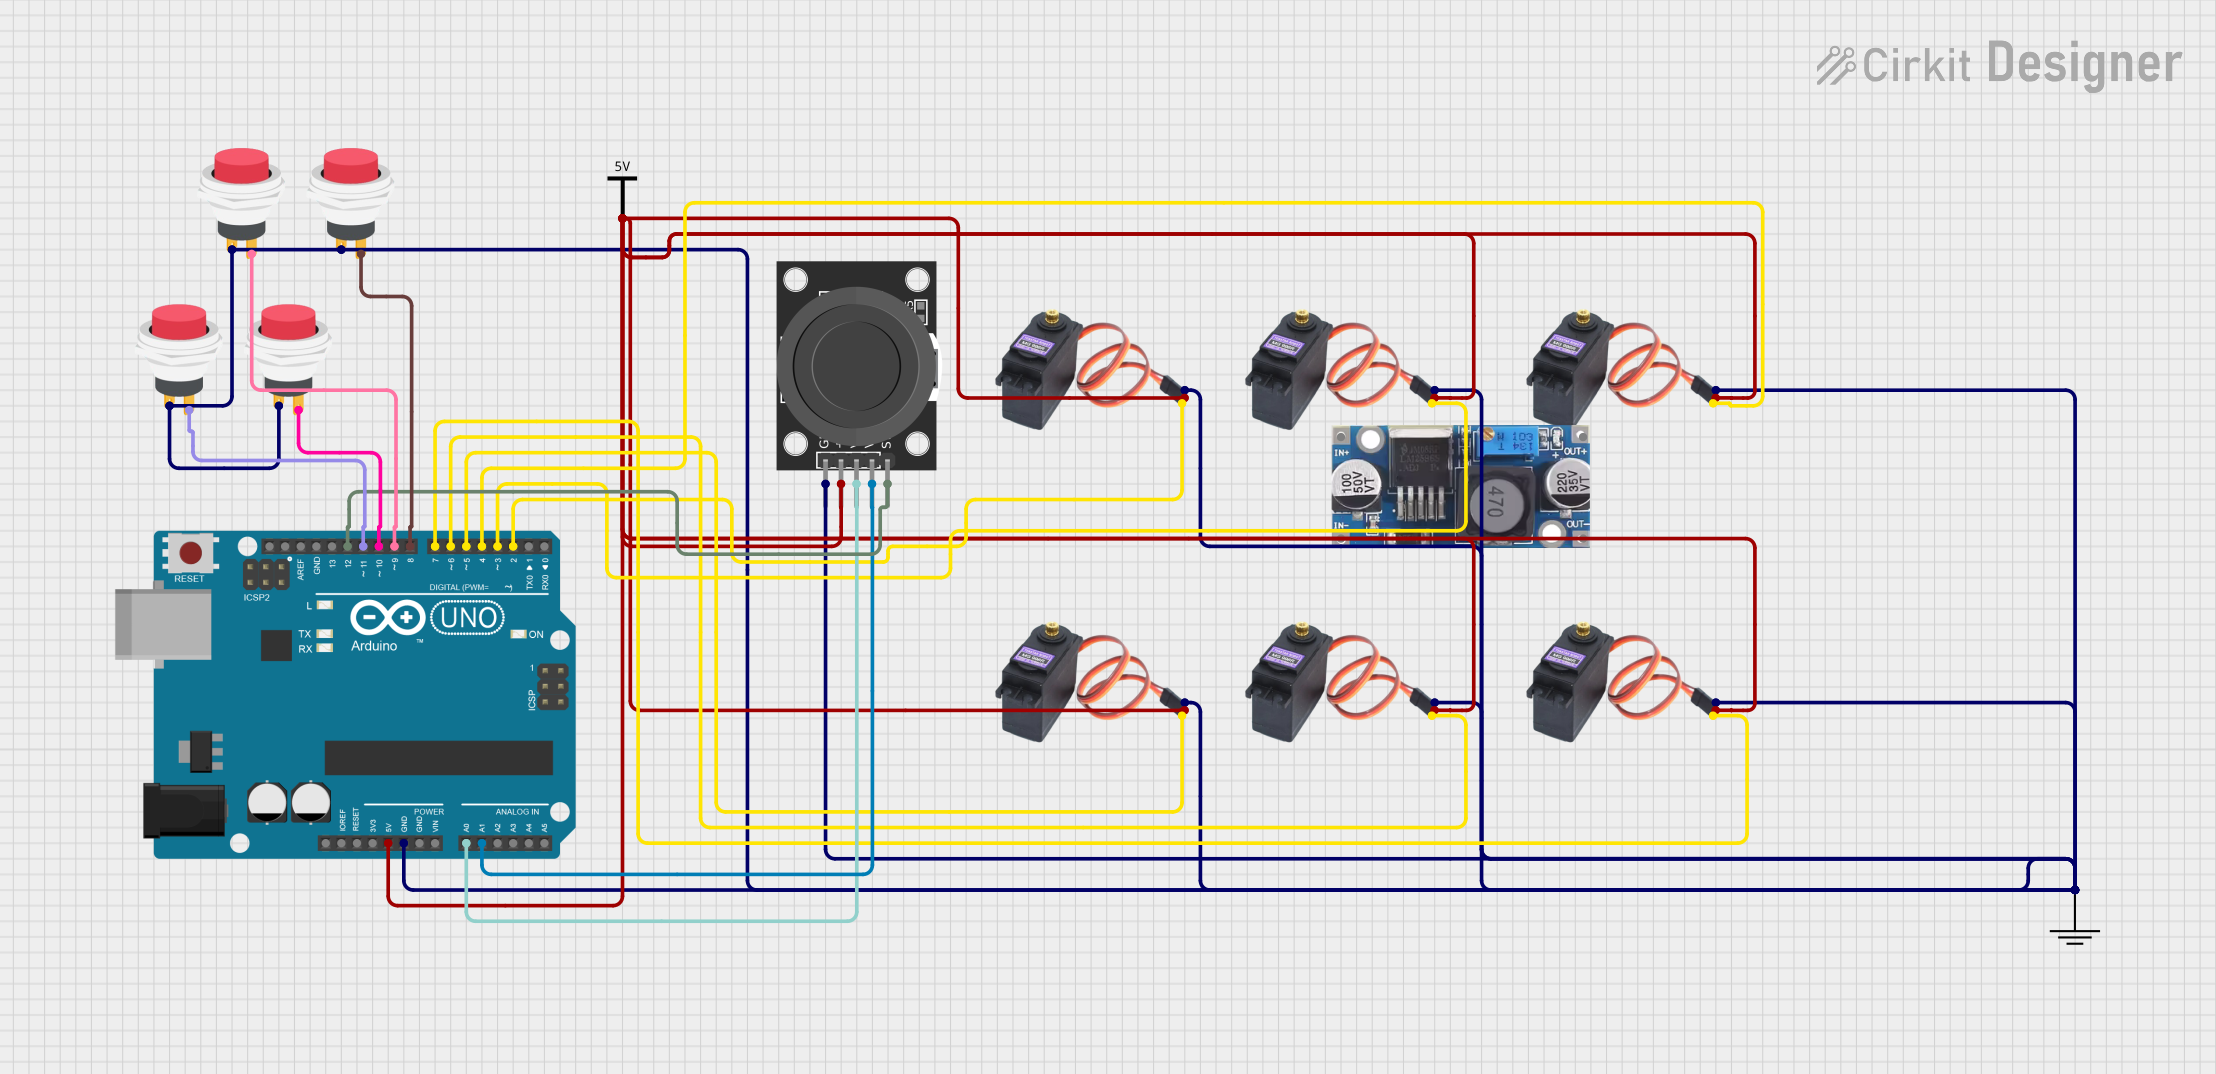
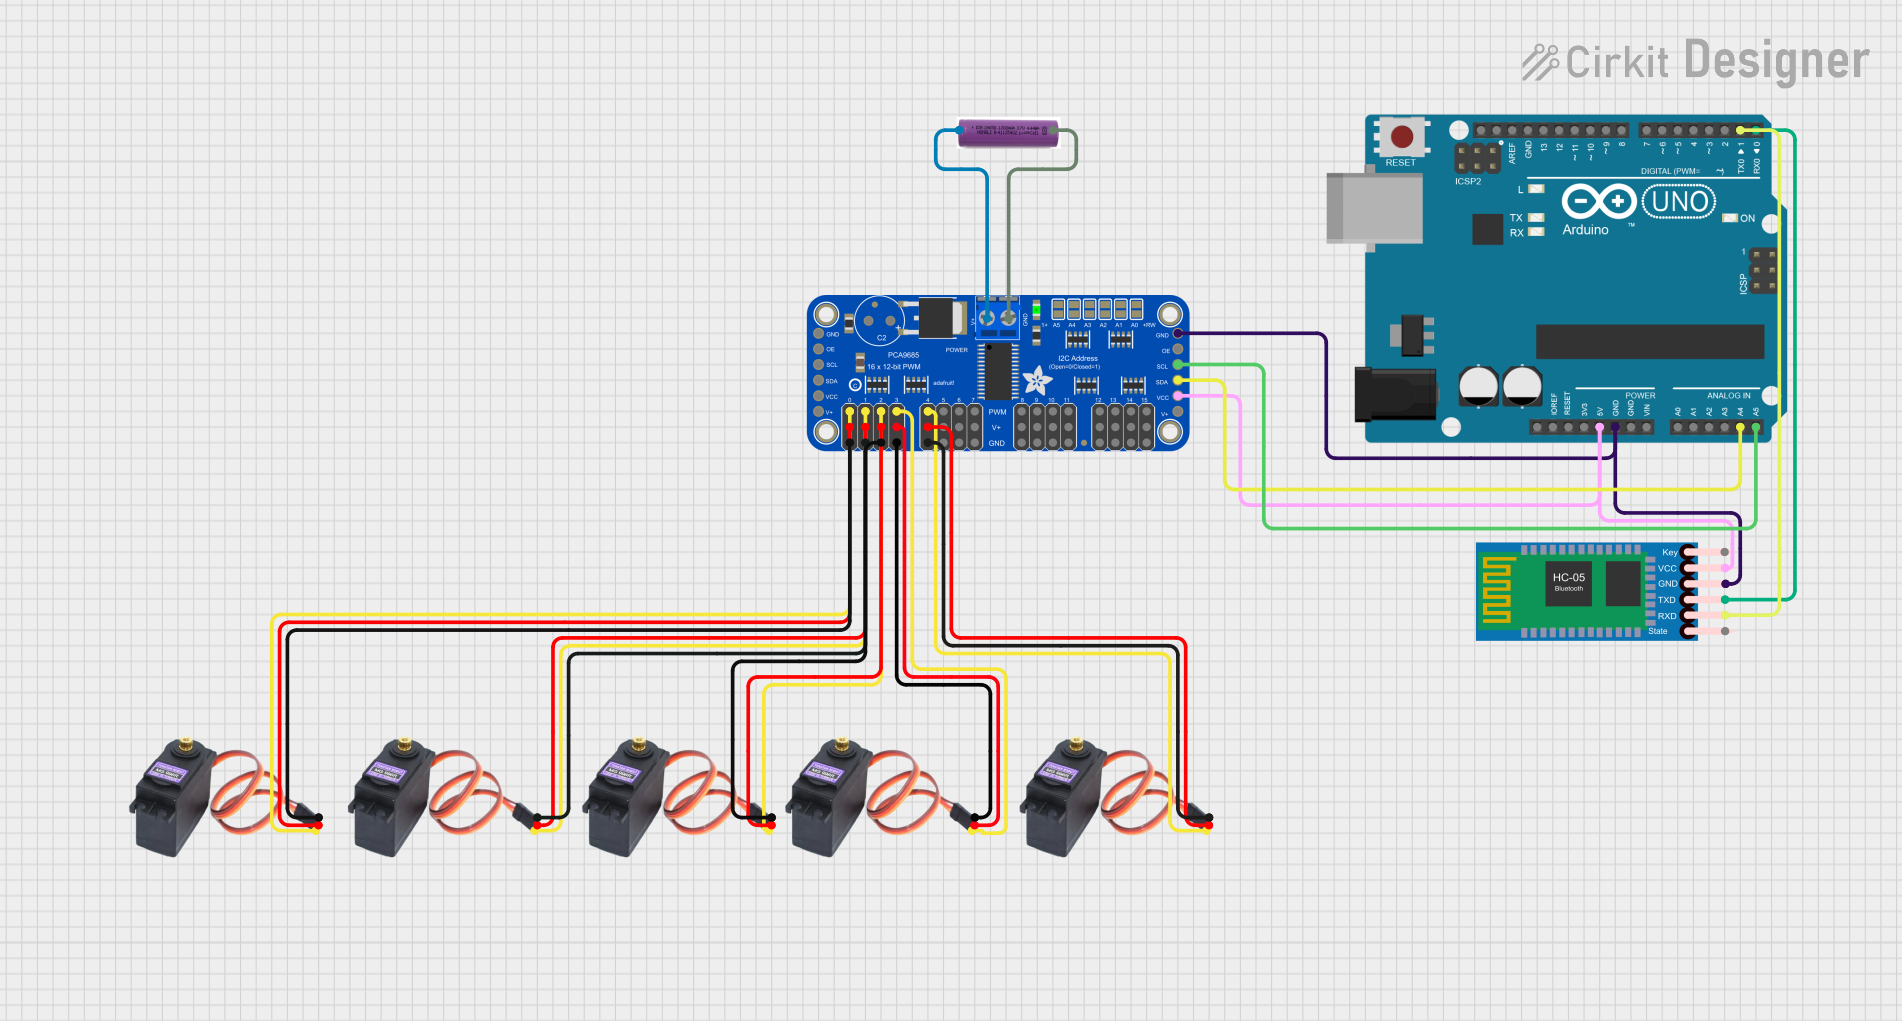


Explore Projects Built with Servo Motor MG996R
Common Applications and Use Cases
- Robotic arms for precise movement and positioning
- Steering mechanisms in RC cars, boats, and airplanes
- Camera pan and tilt systems for photography and videography
- Animatronics for lifelike movements in models and figures
- DIY projects that require controlled rotational movement
Technical Specifications
Key Technical Details
- Operating Voltage: 4.8V to 7.2V
- Stall Torque: 9.4 kg-cm (4.8V), 11 kg-cm (6V)
- Operating Speed: 0.17 sec/60° (4.8V), 0.14 sec/60° (6V)
- Weight: 55g
- Size: 40.7 x 19.7 x 42.9 mm
- Gear Type: Metal gears
- Control System: Analog
- Operating Angle: 120 degrees
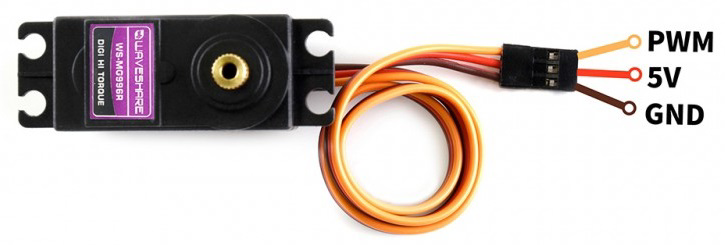
Pin Configuration and Descriptions
| Pin Number | Description | Color |
|---|---|---|
| 1 | Ground | Brown |
| 2 | Power Supply (VCC) | Red |
| 3 | Control Signal Input | Orange |
Usage Instructions
How to Use the Component in a Circuit
- Power Supply: Connect the red wire to a power supply that matches the operating voltage of the servo (4.8V to 7.2V).
- Ground: Attach the brown wire to the ground of your power supply and microcontroller.
- Control Signal: Connect the orange wire to a PWM-capable pin on your microcontroller.
Important Considerations and Best Practices
- Ensure that the power supply can handle the current draw of the servo motor, especially under load.
- Use a separate power supply for the servo motor to prevent noise and voltage drops on the microcontroller.
- Always start with a lower voltage to test the servo's operation before applying the maximum rated voltage.
- Avoid stalling the servo motor for extended periods as this can lead to overheating and damage.
Example Code for Arduino UNO
#include <Servo.h>

Servo myservo;  // Create servo object to control the MG996R

void setup() {
  myservo.attach(9);  // Attaches the servo on pin 9 to the servo object
}

void loop() {
  myservo.write(90);  // Set servo to mid-point (90 degrees)
  delay(1000);        // Wait for 1 second
  myservo.write(0);   // Move servo to 0 degrees
  delay(1000);        // Wait for 1 second
  myservo.write(180); // Move servo to 180 degrees
  delay(1000);        // Wait for 1 second
}
Troubleshooting and FAQs
Common Issues Users Might Face
- Servo Motor Does Not Move: Check the power supply and wiring connections. Ensure the control signal is correctly connected to a PWM-capable pin.
- Erratic Movements: This can be caused by insufficient power supply or electrical noise. Use a dedicated power supply and ensure all connections are secure.
- Overheating: If the servo motor is stalling or under a heavy load, it may overheat. Reduce the load or duty cycle to prevent damage.
Solutions and Tips for Troubleshooting
- Power Issues: Use a multimeter to verify the voltage at the servo's power input. Ensure it falls within the specified range.
- Signal Issues: Check the PWM signal with an oscilloscope if possible, or try controlling the servo with a known-good code and setup.
- Mechanical Load: Make sure the servo is not trying to move beyond its physical limits or carry a load that exceeds its torque rating.
FAQs
Q: Can I control the MG996R servo with a Raspberry Pi? A: Yes, but you will need to ensure proper PWM signal generation, which may require additional libraries or hardware.
Q: How can I increase the lifespan of my MG996R servo? A: Avoid continuous operation at stall torque, minimize the load, and ensure proper power supply to prevent overheating and wear.
Q: Is it possible to control more than one MG996R servo with an Arduino? A: Yes, the Arduino can control multiple servos using the Servo library, but ensure your power supply can handle the combined current draw.