
How to Use Adafruit 1.47in 320x172 Round Rectangle TFT: Examples, Pinouts, and Specs
 Design with Adafruit 1.47in 320x172 Round Rectangle TFT in Cirkit Designer
Introduction
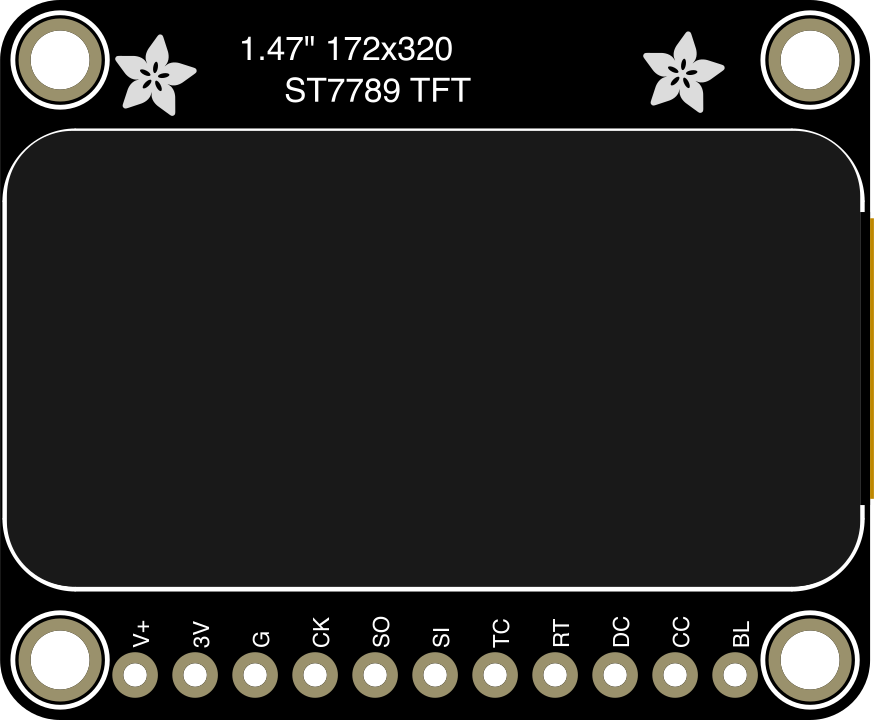
The Adafruit 1.47in 320x172 Round Rectangle TFT (Manufacturer Part ID: 5393) is a compact, high-resolution display module designed for embedded systems and portable devices. Its unique round rectangle shape and vibrant color output make it ideal for applications requiring a modern and visually appealing interface. The display uses an IPS (In-Plane Switching) panel, ensuring wide viewing angles and excellent color reproduction.
Explore Projects Built with Adafruit 1.47in 320x172 Round Rectangle TFT
 Open Project in Cirkit Designer
 Open Project in Cirkit Designer
 Open Project in Cirkit Designer
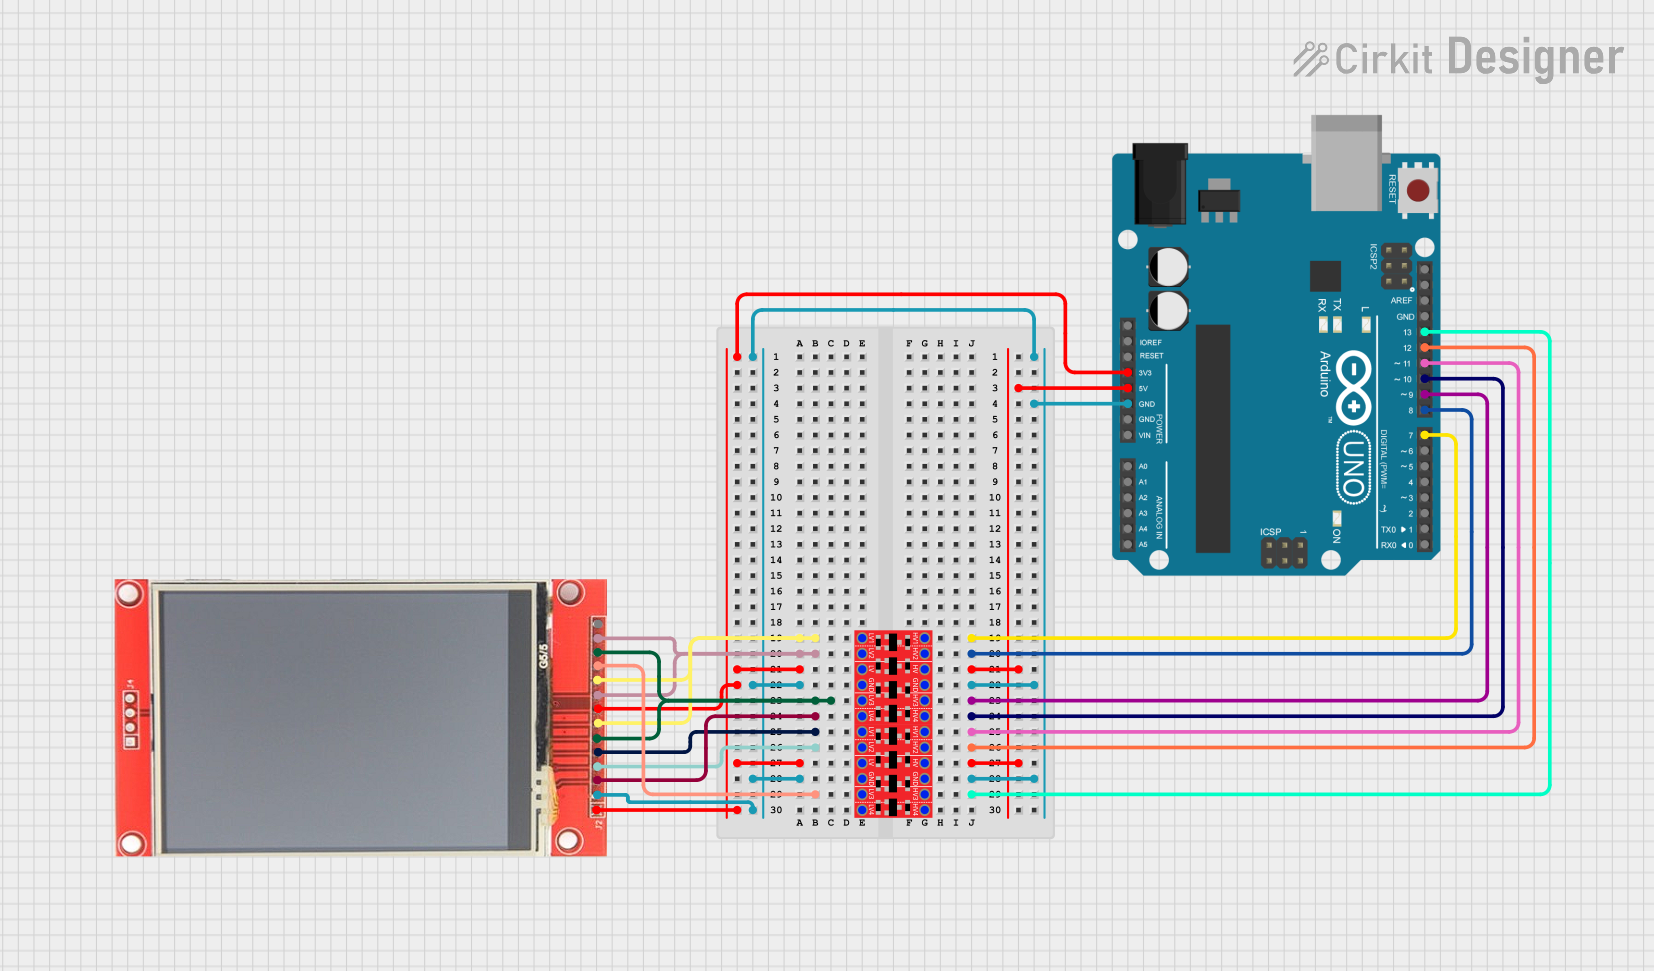 Open Project in Cirkit Designer
Explore Projects Built with Adafruit 1.47in 320x172 Round Rectangle TFT
Open Project in Cirkit DesignerOpen Project in Cirkit DesignerOpen Project in Cirkit DesignerOpen Project in Cirkit DesignerCommon Applications
- Wearable devices
- Portable electronics
- IoT dashboards
- Custom user interfaces for embedded systems
- Compact gaming consoles
Technical Specifications
Below are the key technical details of the Adafruit 1.47in 320x172 Round Rectangle TFT:
| Specification | Details |
|---|---|
| Display Type | TFT LCD with IPS technology |
| Resolution | 320 x 172 pixels |
| Screen Size | 1.47 inches (diagonal) |
| Shape | Round rectangle |
| Interface | SPI (Serial Peripheral Interface) |
| Driver IC | ST7789 |
| Input Voltage | 3.3V logic and power |
| Backlight | LED backlight with adjustable brightness |
| Viewing Angle | Wide (IPS technology) |
| Dimensions | 40.5mm x 20.5mm |
| Operating Temperature | -20°C to 70°C |
Pin Configuration
The display module has the following pinout:
| Pin | Name | Description |
|---|---|---|
| 1 | VIN | Power input (3.3V recommended) |
| 2 | GND | Ground connection |
| 3 | SCK | SPI clock input |
| 4 | MOSI | SPI data input |
| 5 | CS | Chip select (active low) |
| 6 | DC | Data/Command select (high for data, low for command) |
| 7 | RST | Reset pin (active low, optional) |
| 8 | BL | Backlight control (PWM or logic high for full brightness) |
Usage Instructions
Connecting the Display
To use the Adafruit 1.47in TFT display, connect it to a microcontroller such as an Arduino UNO or similar. Below is a typical wiring guide for connecting the display to an Arduino UNO:
| TFT Pin | Arduino UNO Pin |
|---|---|
| VIN | 3.3V |
| GND | GND |
| SCK | D13 (SPI Clock) |
| MOSI | D11 (SPI Data) |
| CS | D10 |
| DC | D9 |
| RST | D8 |
| BL | 3.3V or PWM pin |
Arduino Code Example
The following example demonstrates how to initialize and display graphics on the TFT using the Adafruit GFX and Adafruit ST7789 libraries. Ensure you have installed these libraries via the Arduino Library Manager.
#include <Adafruit_GFX.h>    // Core graphics library
#include <Adafruit_ST7789.h> // ST7789 driver library
#include <SPI.h>             // SPI library

// Define TFT pins
#define TFT_CS    10  // Chip select pin
#define TFT_DC    9   // Data/Command pin
#define TFT_RST   8   // Reset pin (optional)

// Initialize the display object
Adafruit_ST7789 tft = Adafruit_ST7789(TFT_CS, TFT_DC, TFT_RST);

void setup() {
  // Initialize serial communication for debugging
  Serial.begin(9600);
  Serial.println("Initializing TFT...");

  // Initialize the display with a 320x172 resolution
  tft.init(320, 172);

  // Set rotation (0-3 for different orientations)
  tft.setRotation(1);

  // Fill the screen with a solid color
  tft.fillScreen(ST77XX_BLACK);

  // Draw a rectangle with rounded corners
  tft.fillRoundRect(50, 40, 220, 100, 20, ST77XX_BLUE);

  // Display text
  tft.setTextColor(ST77XX_WHITE);
  tft.setTextSize(2);
  tft.setCursor(60, 70);
  tft.print("Hello, TFT!");
}

void loop() {
  // Nothing to do here
}
Important Considerations
- Voltage Levels: Ensure the display operates at 3.3V logic levels. Using 5V logic without level shifters may damage the module.
- Backlight Control: The backlight pin (BL) can be connected to a PWM pin for brightness control or directly to 3.3V for full brightness.
- SPI Speed: Use a moderate SPI clock speed (e.g., 4 MHz) to ensure stable communication, especially with long wires.
Troubleshooting and FAQs
Common Issues
Blank Screen
- Cause: Incorrect wiring or insufficient power.
- Solution: Double-check all connections and ensure the VIN pin is supplied with 3.3V.
Flickering or Artifacts
- Cause: SPI communication issues or noise.
- Solution: Use shorter wires and ensure proper grounding. Reduce SPI clock speed if necessary.
No Response from Display
- Cause: Incorrect initialization or missing libraries.
- Solution: Verify that the Adafruit GFX and Adafruit ST7789 libraries are installed and properly included in your code.
FAQs
Can I use this display with a 5V microcontroller?
- Yes, but you must use level shifters to convert 5V logic to 3.3V.
What is the maximum SPI clock speed supported?
- The ST7789 driver typically supports up to 15 MHz, but lower speeds may be required for longer wires or noisy environments.
Can I control the backlight brightness?
- Yes, connect the BL pin to a PWM-capable pin on your microcontroller for brightness control.
Is the RST pin mandatory?
- No, the RST pin is optional. If not used, connect it to 3.3V.
By following this documentation, you can successfully integrate the Adafruit 1.47in 320x172 Round Rectangle TFT into your projects and create stunning visual interfaces.