How to Use XT60 Male Panel Mount: Examples, Pinouts, and Specs
Introduction
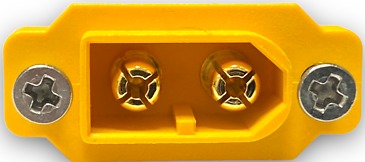
The XT60 Male Panel Mount (Manufacturer Part ID: XT60 M-PNL) by Amass is a high-current connector designed for secure and efficient power connections. Its robust design ensures reliable performance in demanding applications, making it a popular choice for battery and power distribution systems. The panel mount feature allows for easy integration into enclosures, providing a clean and professional finish.
Explore Projects Built with XT60 Male Panel Mount
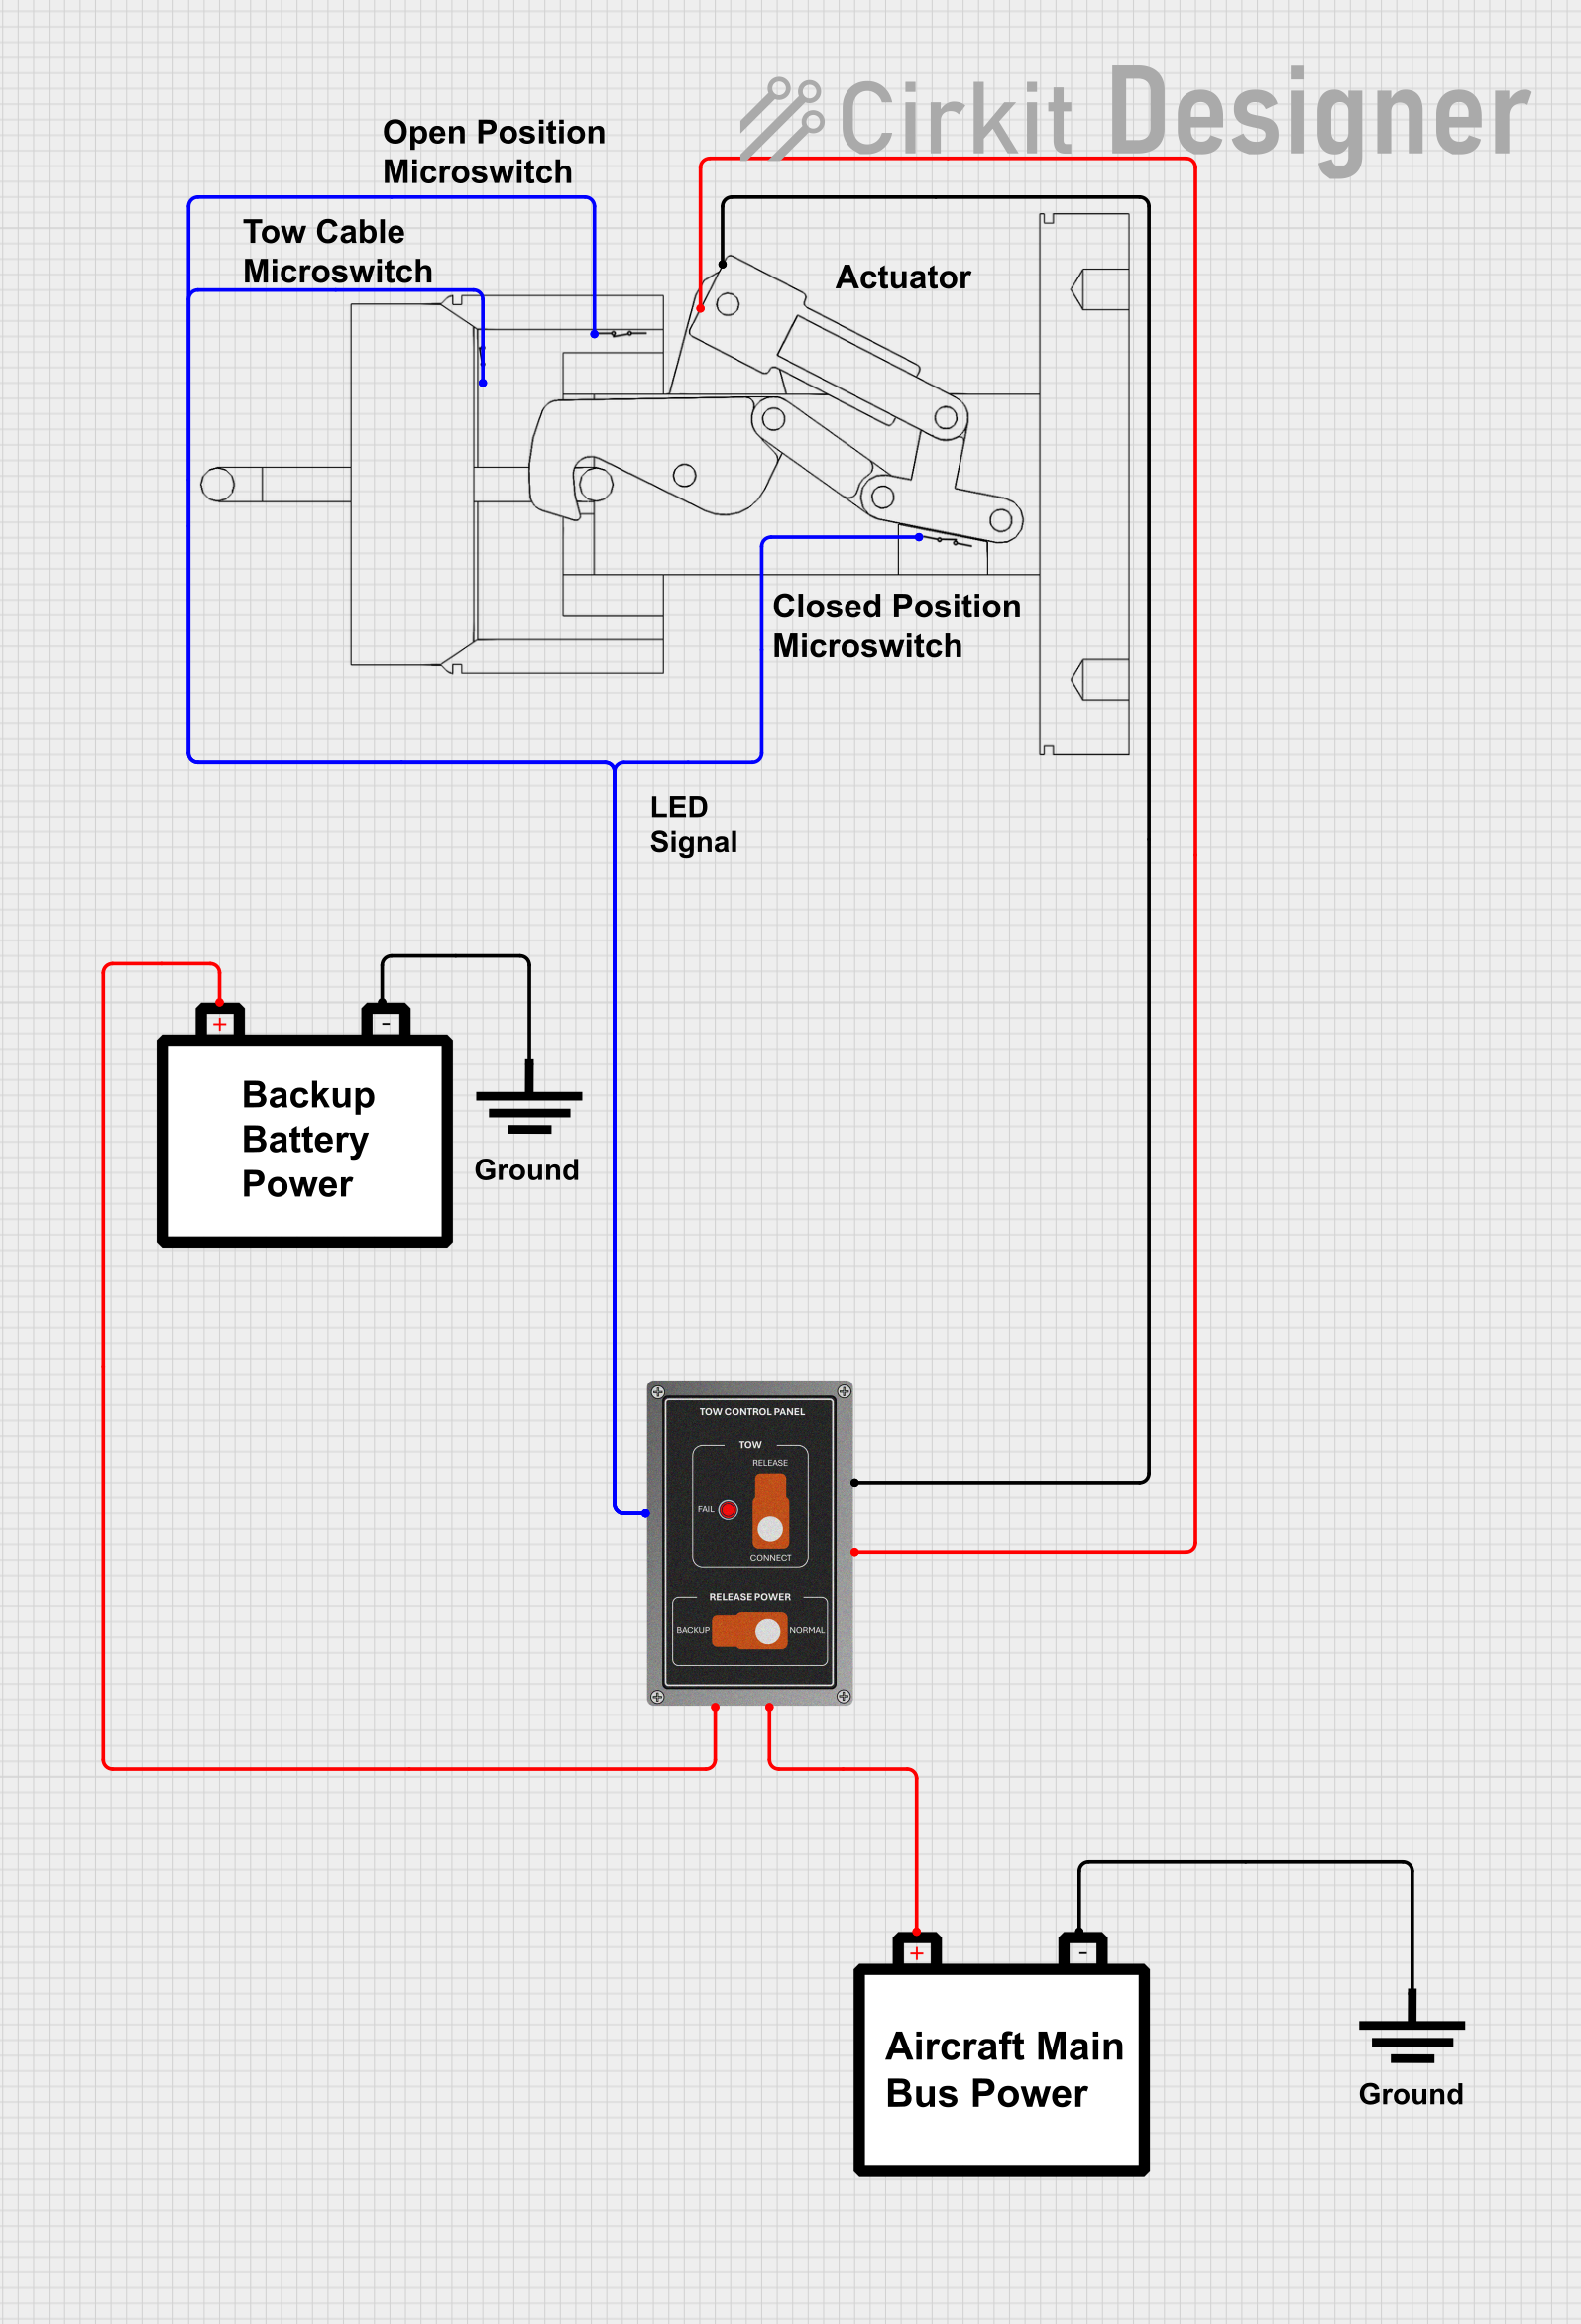

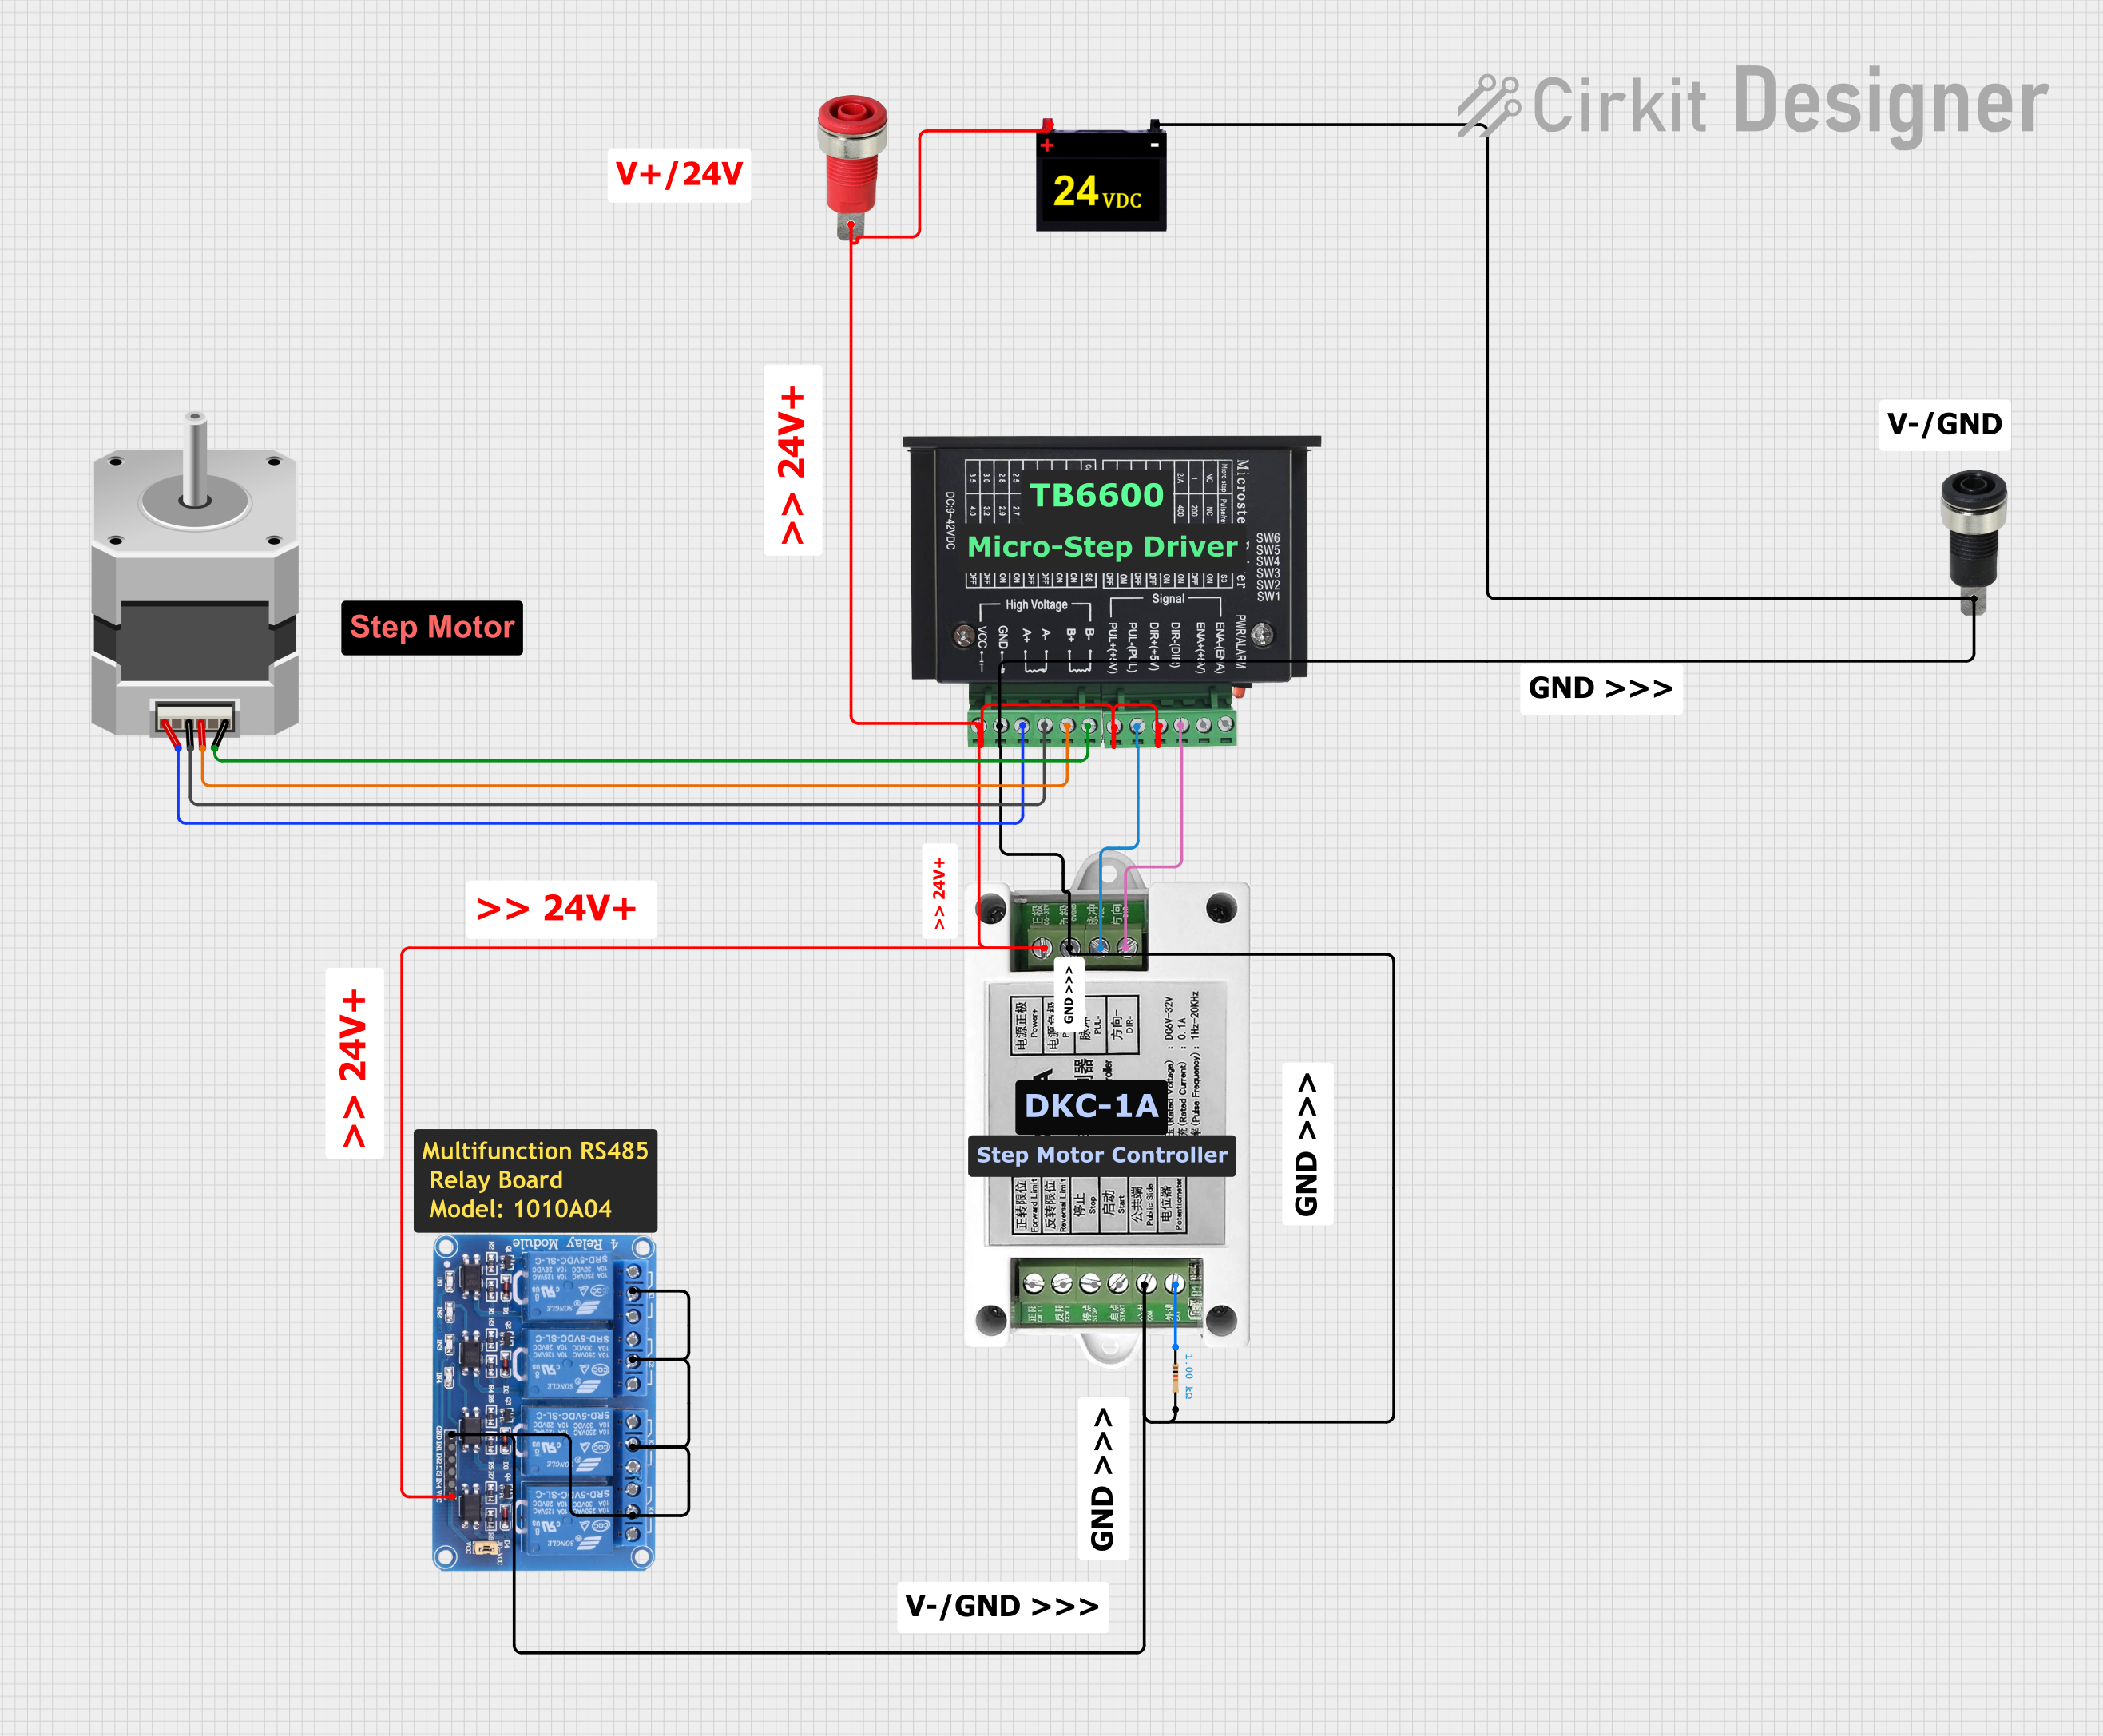
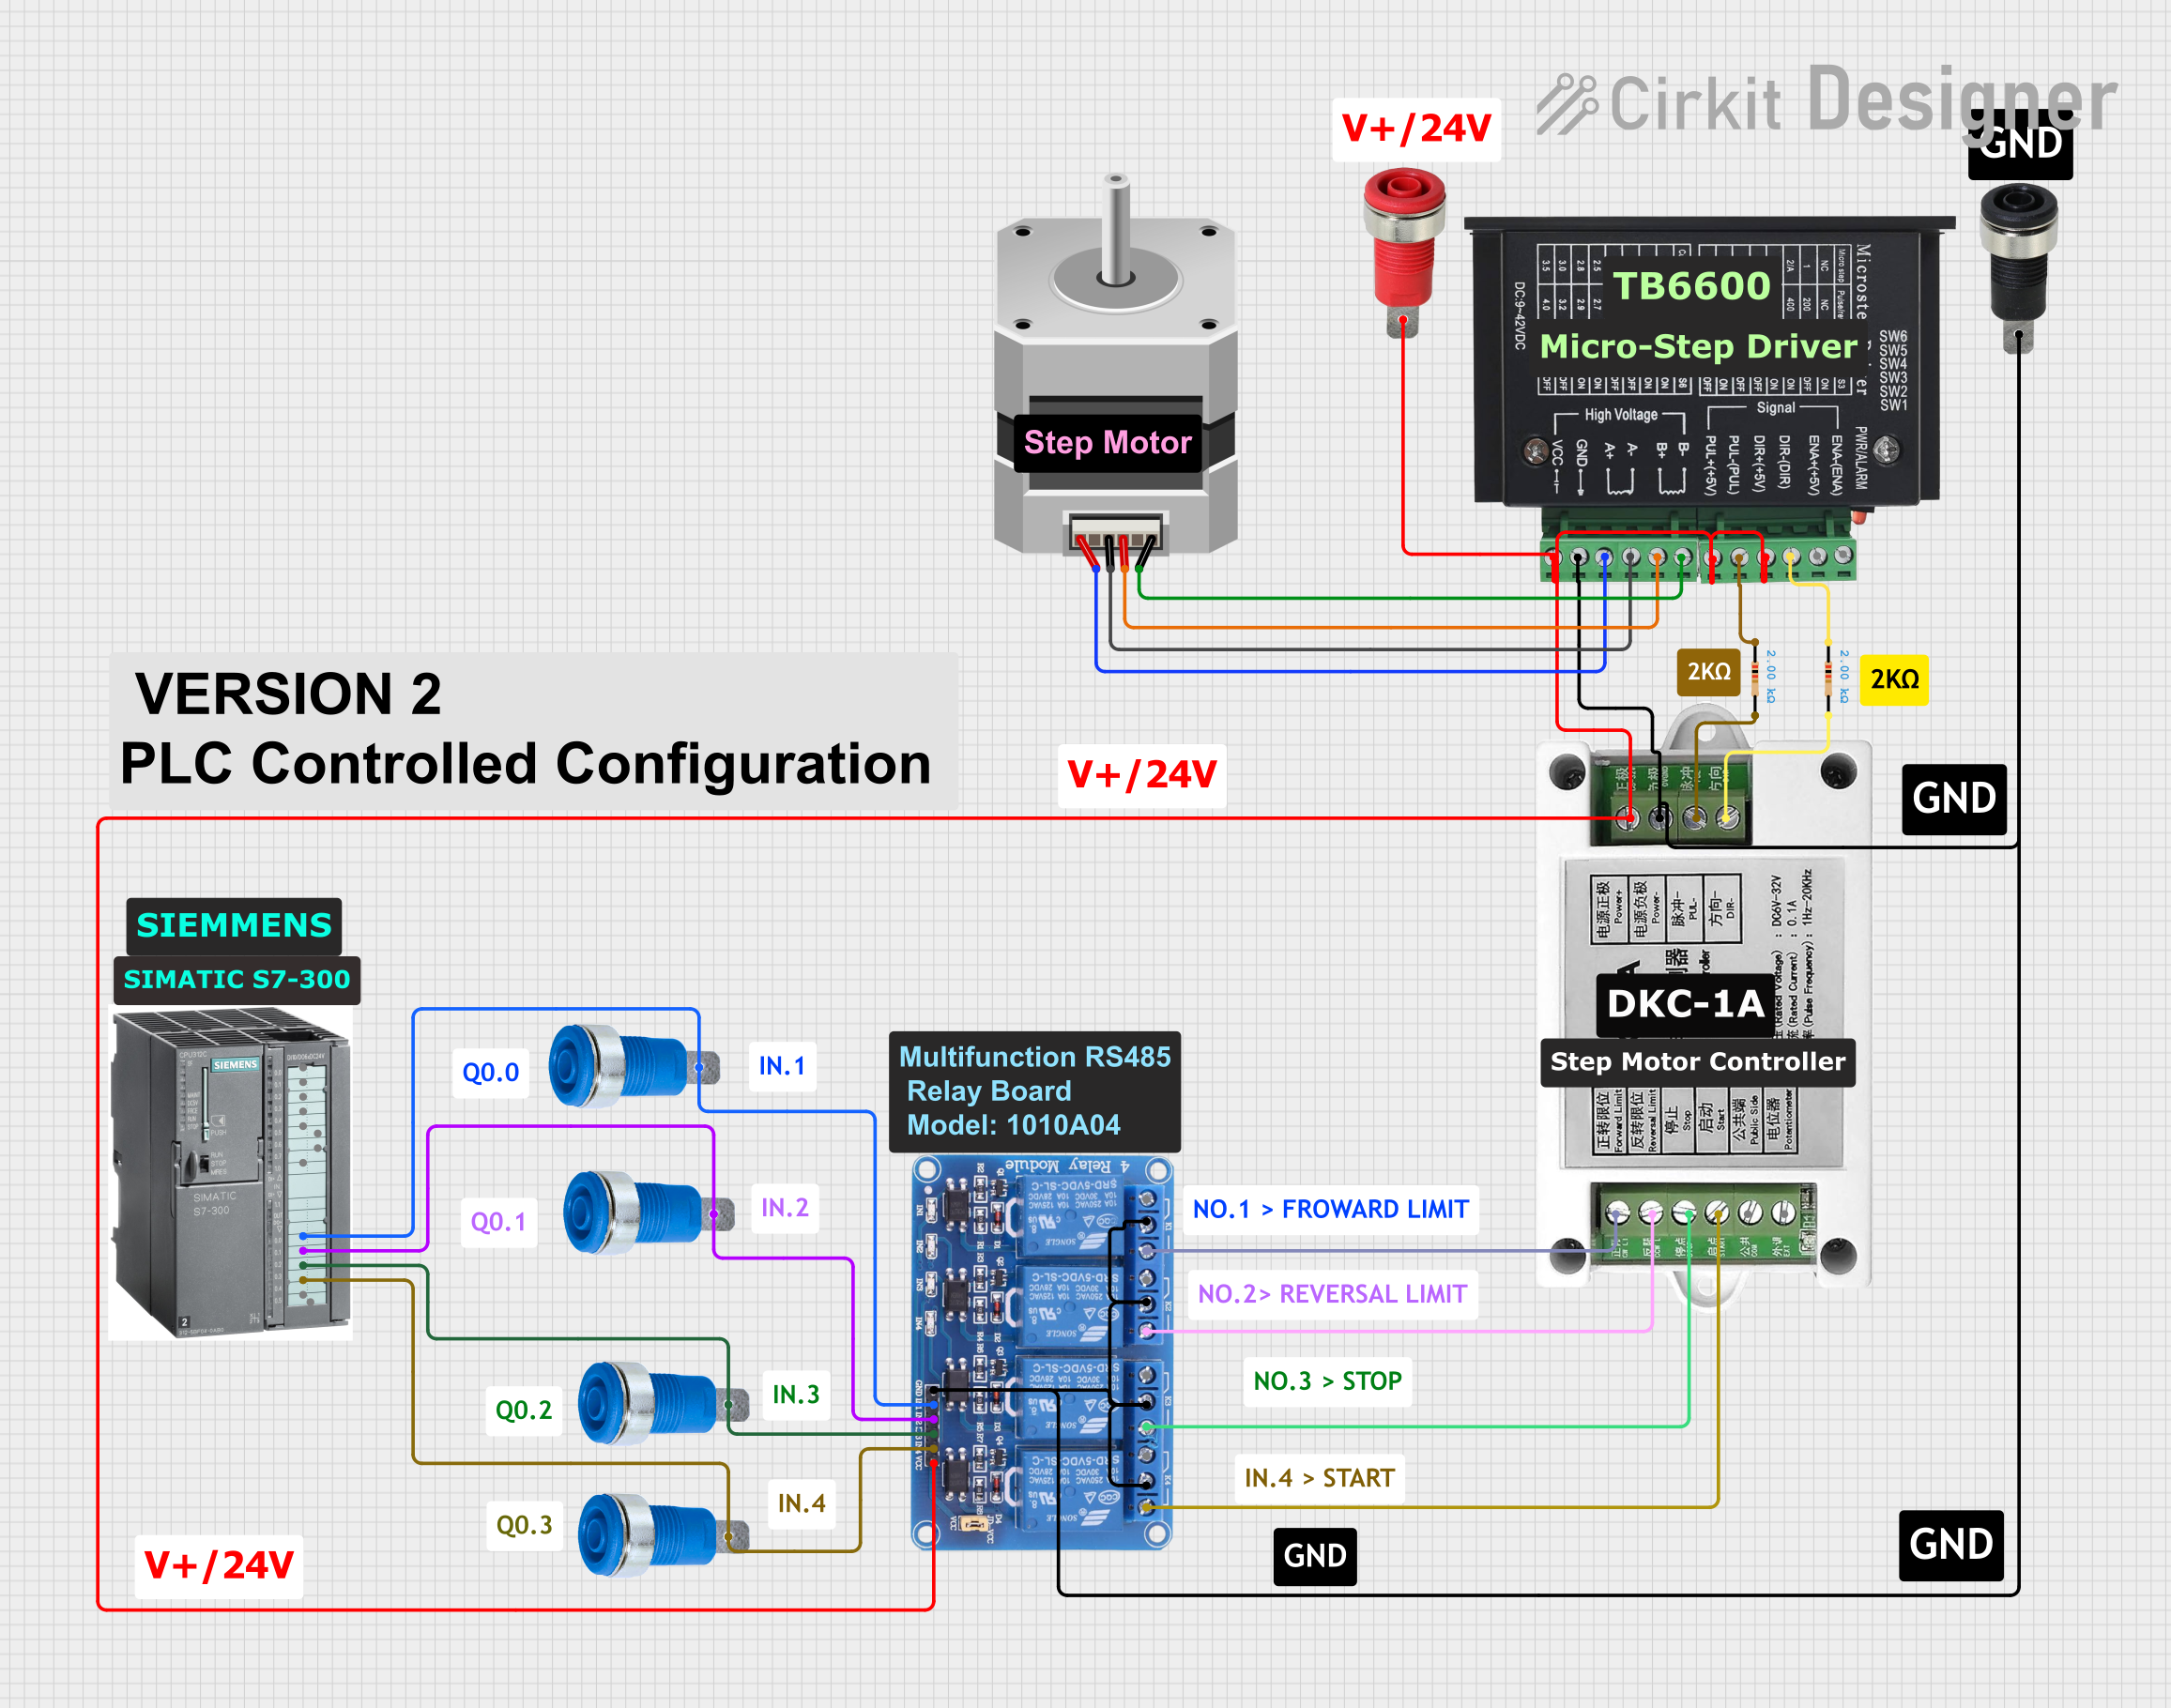
Explore Projects Built with XT60 Male Panel Mount
Common Applications and Use Cases
- RC vehicles (drones, cars, planes) for battery connections
- Power distribution in DIY electronics and robotics
- Solar power systems and energy storage
- Industrial equipment requiring high-current connectors
- Custom enclosures for power management systems
Technical Specifications
The XT60 Male Panel Mount is engineered to handle high currents while maintaining a secure and low-resistance connection. Below are its key specifications:
Key Technical Details
| Parameter | Value |
|---|---|
| Manufacturer | Amass |
| Part ID | XT60 M-PNL |
| Rated Current | 60A (continuous) |
| Peak Current | 100A (for short durations) |
| Voltage Rating | 500V DC |
| Contact Resistance | ≤ 0.6 mΩ |
| Insulation Resistance | ≥ 1000 MΩ |
| Operating Temperature | -20°C to +120°C |
| Material (Contacts) | Gold-plated copper |
| Material (Housing) | Nylon/PA |
| Mounting Style | Panel mount with screws |
| Wire Gauge Compatibility | 12 AWG to 10 AWG |
Pin Configuration and Descriptions
The XT60 Male Panel Mount has two primary pins for power connections:
| Pin Name | Description | Notes |
|---|---|---|
| Positive | Positive terminal (+) | Connect to the positive wire |
| Negative | Negative terminal (-) | Connect to the ground/negative |
Usage Instructions
The XT60 Male Panel Mount is straightforward to use and install. Follow the steps below to integrate it into your project:
Installation Steps
- Prepare the Panel: Drill a hole in your enclosure to fit the XT60 Male Panel Mount. Refer to the datasheet for exact dimensions.
- Secure the Connector: Insert the connector into the panel hole and secure it using the provided screws or mounting hardware.
- Wire Preparation: Strip the insulation from the wires you intend to connect. Ensure the wire gauge is compatible (12 AWG to 10 AWG).
- Soldering: Solder the positive wire to the positive terminal and the negative wire to the negative terminal. Use a high-quality soldering iron and ensure a solid connection.
- Insulation: Use heat shrink tubing or electrical tape to insulate the soldered connections.
- Testing: Verify the connections with a multimeter before applying power.
Important Considerations and Best Practices
- Polarity: Always double-check the polarity of the connections to avoid damage to your components.
- Current Rating: Ensure the current drawn by your system does not exceed the rated 60A continuous current.
- Ventilation: If used in high-current applications, ensure proper ventilation to prevent overheating.
- Secure Mounting: Tighten the screws firmly to prevent the connector from loosening during operation.
- Soldering Tips: Use a soldering iron with sufficient wattage (at least 60W) to ensure proper solder flow on the gold-plated contacts.
Arduino UNO Example
While the XT60 Male Panel Mount is not directly connected to an Arduino UNO, it can be used in power distribution for Arduino-based projects. Below is an example of how to use the XT60 connector to power an Arduino UNO via a 12V battery:
Circuit Description
- Connect the XT60 Male Panel Mount to a 12V battery.
- Use a DC-DC buck converter to step down the voltage to 5V.
- Power the Arduino UNO through its 5V pin.
Sample Code
// Example code to blink an LED connected to pin 13 on the Arduino UNO
// Ensure the Arduino is powered via the XT60 connector and a DC-DC converter

void setup() {
  pinMode(13, OUTPUT); // Set pin 13 as an output
}

void loop() {
  digitalWrite(13, HIGH); // Turn the LED on
  delay(1000);            // Wait for 1 second
  digitalWrite(13, LOW);  // Turn the LED off
  delay(1000);            // Wait for 1 second
}
Troubleshooting and FAQs
Common Issues and Solutions
| Issue | Possible Cause | Solution |
|---|---|---|
| Connector gets hot during use | Exceeding current rating | Reduce current or use thicker wires |
| Loose connection in the panel | Screws not tightened properly | Tighten the screws securely |
| Solder joint failure | Poor soldering technique | Re-solder with proper technique |
| Polarity reversed | Incorrect wiring | Double-check polarity before use |
FAQs
Q: Can the XT60 Male Panel Mount handle AC voltage?
A: While it is primarily designed for DC applications, it can handle AC voltage within its rated voltage and current limits. However, ensure proper insulation and safety precautions.
Q: What tools are required for installation?
A: You will need a soldering iron, solder, wire strippers, a drill (for panel mounting), and a screwdriver.
Q: Can I use this connector for charging batteries?
A: Yes, the XT60 Male Panel Mount is commonly used for charging batteries. Ensure the charger and battery are compatible with the connector's current and voltage ratings.
Q: Is the connector waterproof?
A: The XT60 Male Panel Mount is not inherently waterproof. For outdoor or wet environments, additional sealing or waterproof enclosures are recommended.
By following this documentation, you can effectively integrate the XT60 Male Panel Mount into your projects for reliable and efficient power connections.