How to Use Dimmer: Examples, Pinouts, and Specs
Introduction
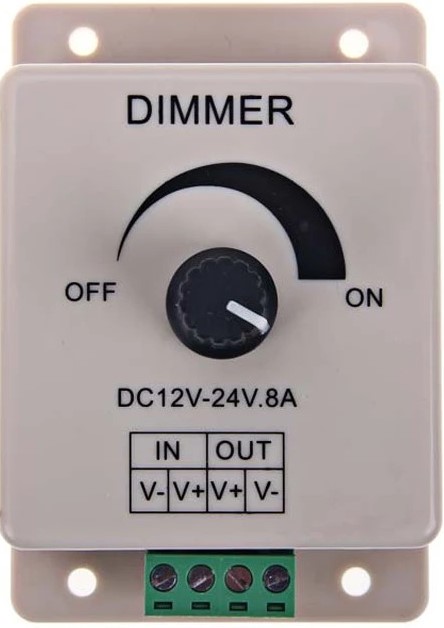
A dimmer is an electronic device that is used to control the brightness of a light source or the speed of a motor. It works by varying the voltage and waveform applied to the device it controls. Dimmers are commonly used in lighting applications to create ambiance and save energy, and in motor control applications to adjust the speed of fans, pumps, and other motor-driven equipment.
Explore Projects Built with Dimmer
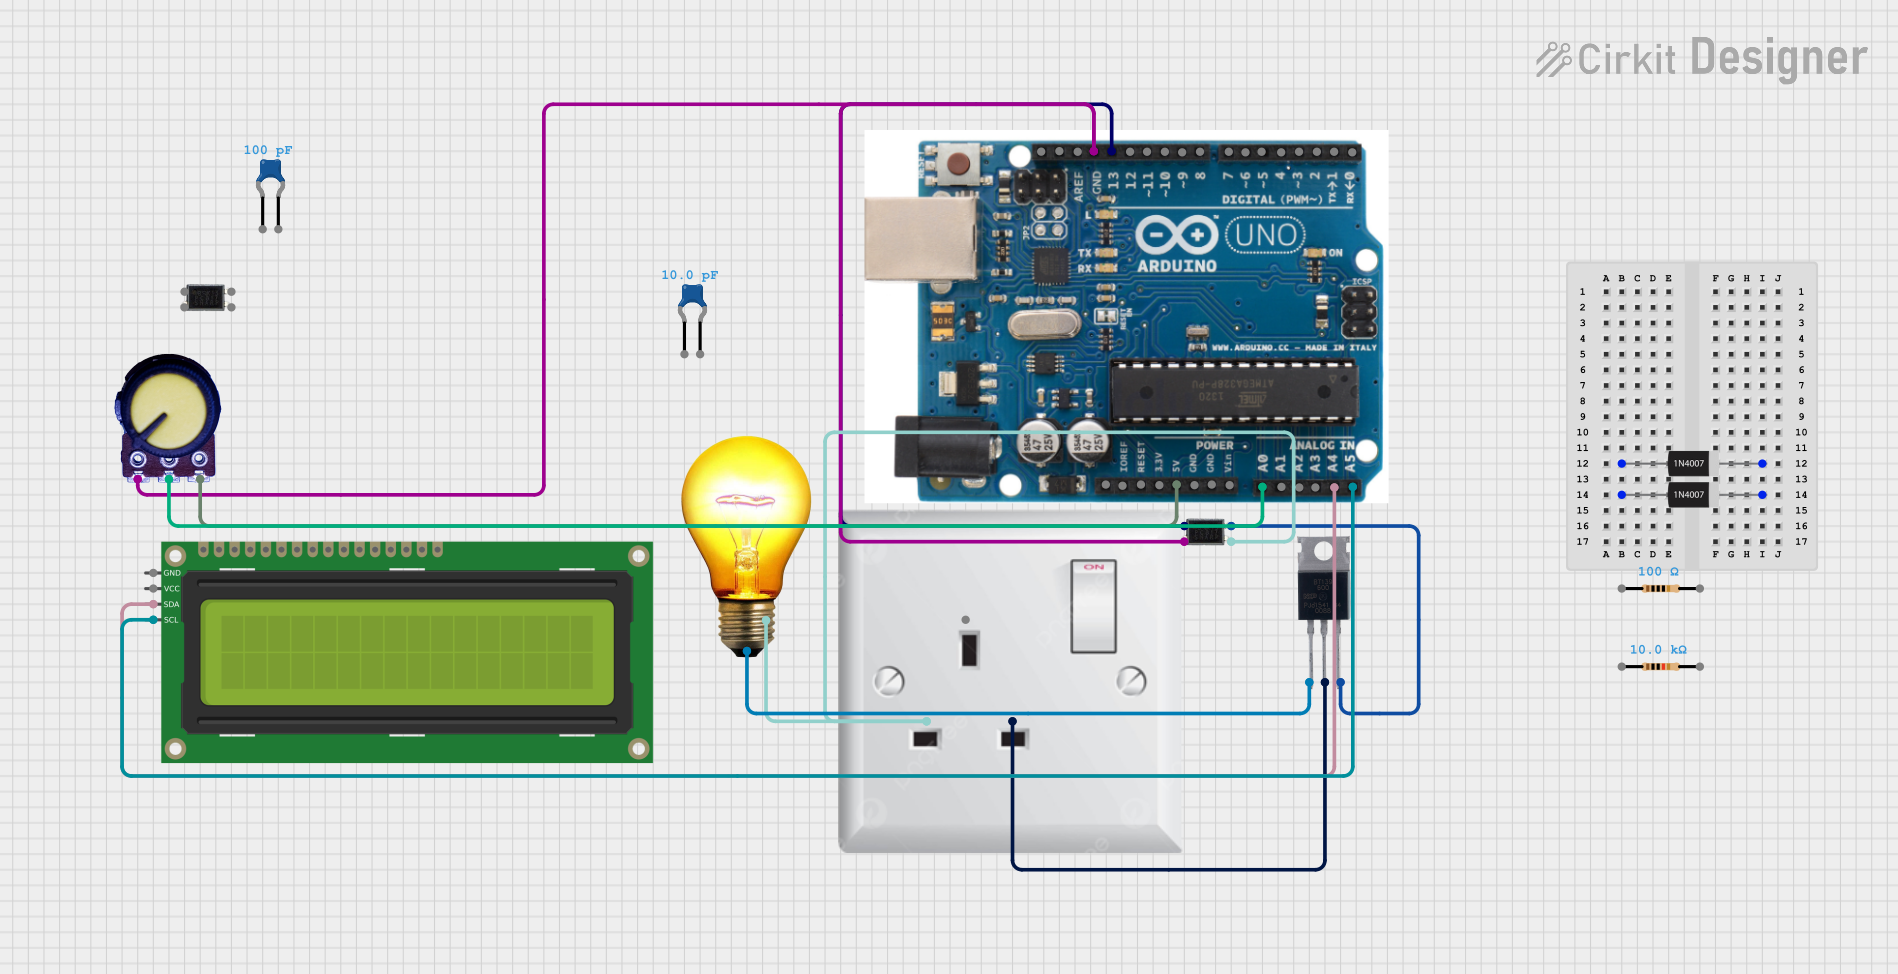

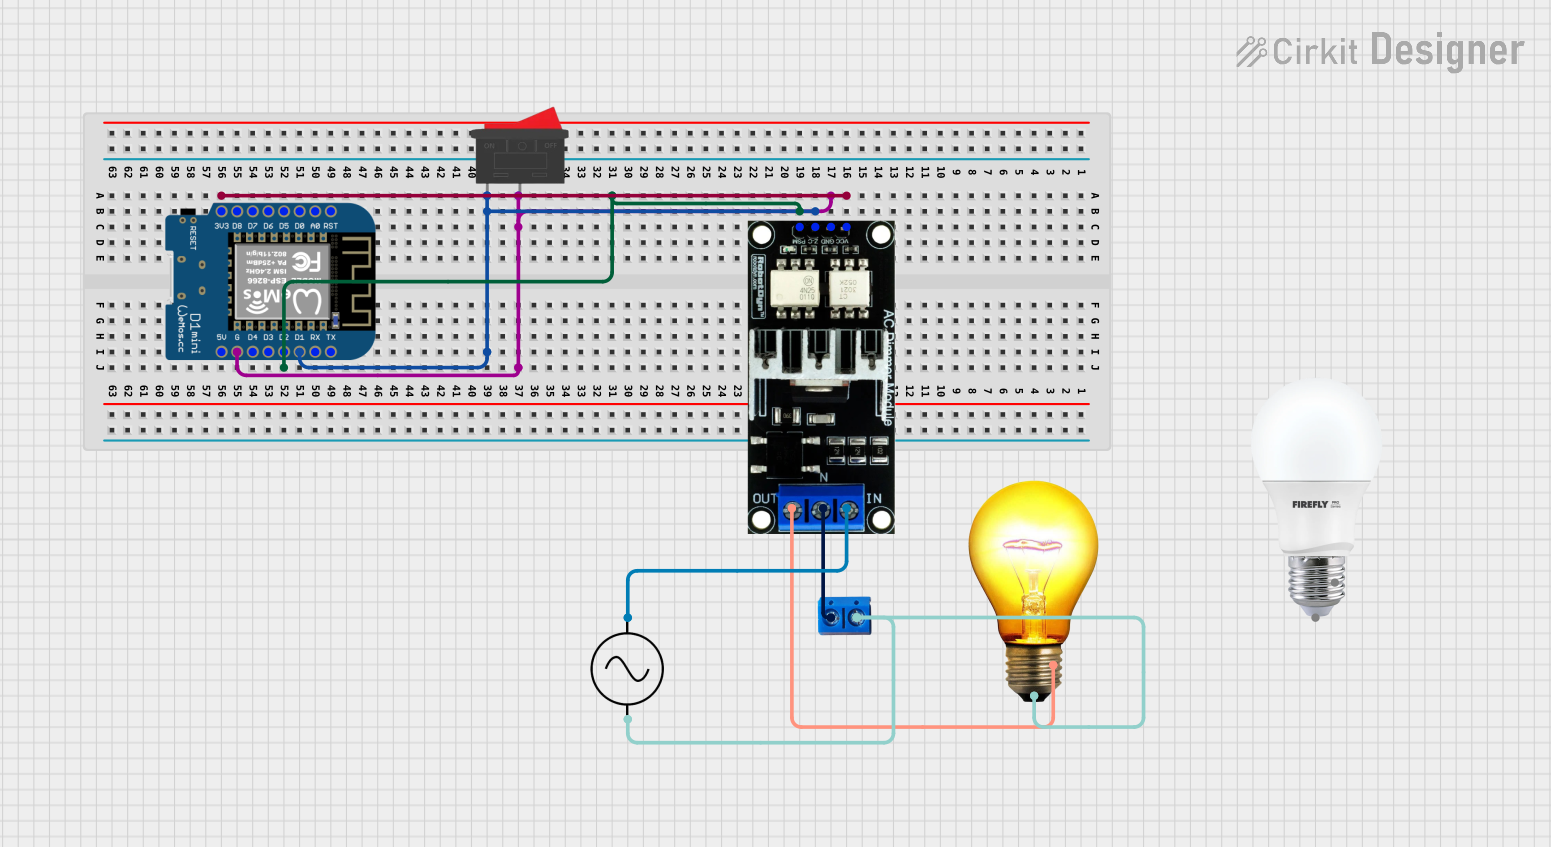
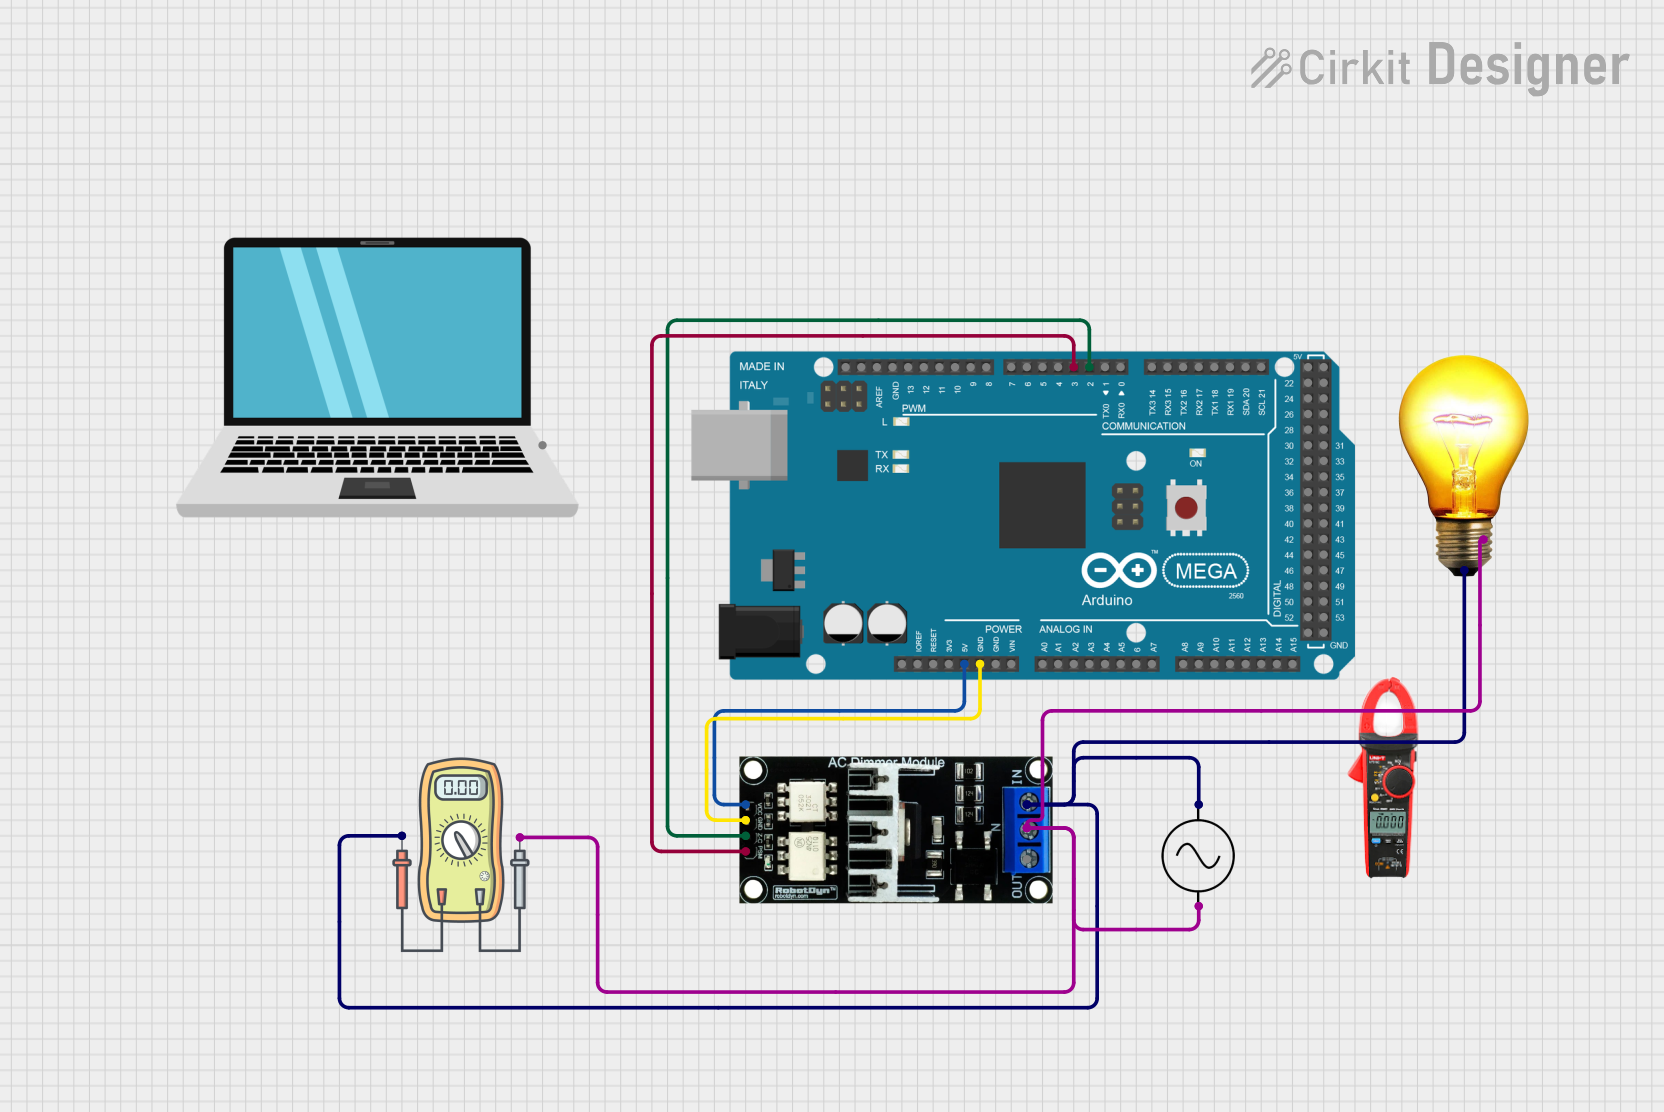
Explore Projects Built with Dimmer
Common Applications and Use Cases
- Lighting Control: Adjusting the brightness of LED and incandescent lights in homes, theaters, and studios.
- Motor Speed Control: Regulating the speed of small DC motors in applications like fans, model trains, and hobby projects.
- Electronic Projects: DIY projects that require control over the power delivered to a circuit.
Technical Specifications
Key Technical Details
- Operating Voltage: Typically ranges from 110V to 240V AC for light dimmers, or lower voltages for DC motor dimmers.
- Current Rating: Depends on the model, but often up to a few amperes for household dimmers.
- Power Ratings: Varies with design, but can handle from a few watts to several kilowatts.
- Frequency: Compatible with the standard mains frequency of 50/60 Hz for AC dimmers.
Pin Configuration and Descriptions
| Pin Number | Description | Notes |
|---|---|---|
| 1 | AC Input (Live) | Connects to live wire of AC mains |
| 2 | AC Input (Neutral) | Connects to neutral wire of AC mains |
| 3 | Output (Live) | Connects to the load (e.g., light bulb) |
| 4 | Output (Neutral) | Connects to the neutral side of the load |
| 5 | Control Signal Input | Accepts PWM signal for dimming control |
| 6 | Ground (for Control Signal) | Connects to system ground |
Usage Instructions
How to Use the Dimmer in a Circuit
- Safety First: Ensure that the power supply is turned off before wiring the dimmer.
- Wiring: Connect the AC input pins to the mains supply, and the output pins to the load.
- Control Signal: For dimmers that accept a control signal, connect a PWM-capable microcontroller, like an Arduino, to the control signal input.
- Testing: Once wired, turn on the power supply and gradually adjust the control signal to test the dimming functionality.
Important Considerations and Best Practices
- Load Compatibility: Ensure the dimmer is compatible with the type of load (e.g., LED, incandescent, motor).
- Heat Dissipation: Dimmers can generate heat; provide adequate ventilation and consider heat sinks for high-power applications.
- Electrical Ratings: Do not exceed the voltage, current, and power ratings of the dimmer.
- PWM Frequency: For electronic dimmers, use an appropriate PWM frequency to avoid flicker or noise.
Example Code for Arduino UNO
// Example code to control a dimmer module with an Arduino UNO

int dimmerPin = 3; // Connect to the control signal input of the dimmer
int brightness = 0; // Variable to store the brightness level

void setup() {
  pinMode(dimmerPin, OUTPUT);
}

void loop() {
  for (brightness = 0; brightness <= 255; brightness += 5) {
    // Increase the brightness gradually
    analogWrite(dimmerPin, brightness);
    delay(30); // Wait for 30 milliseconds
  }

  for (brightness = 255; brightness >= 0; brightness -= 5) {
    // Decrease the brightness gradually
    analogWrite(dimmerPin, brightness);
    delay(30); // Wait for 30 milliseconds
  }
}
Troubleshooting and FAQs
Common Issues
- Flickering Lights: This may be due to an incorrect PWM frequency or a mismatch between the dimmer and the light source.
- Dimmer Not Working: Ensure all connections are secure and the load does not exceed the dimmer's ratings.
- Overheating: If the dimmer is too hot to touch, it may be overloaded or poorly ventilated.
Solutions and Tips for Troubleshooting
- Check Connections: Verify that all wiring is correct and secure.
- Load Compatibility: Use a dimmer that is rated for the specific type of load you are controlling.
- PWM Adjustment: Experiment with different PWM frequencies to find one that works best for your setup.
FAQs
Q: Can I use a dimmer with any type of light bulb? A: Not all light bulbs are dimmable. Check the bulb's specifications to ensure it is compatible with dimming.
Q: What is the maximum power I can control with a dimmer? A: This depends on the specific model of the dimmer. Always refer to the technical specifications for maximum power ratings.
Q: Can I use a dimmer to control the speed of an AC motor? A: Dimmers designed for lights are not suitable for AC motors. Use a motor speed controller specifically designed for that purpose.