How to Use Adafruit ADXL343: Examples, Pinouts, and Specs
Introduction
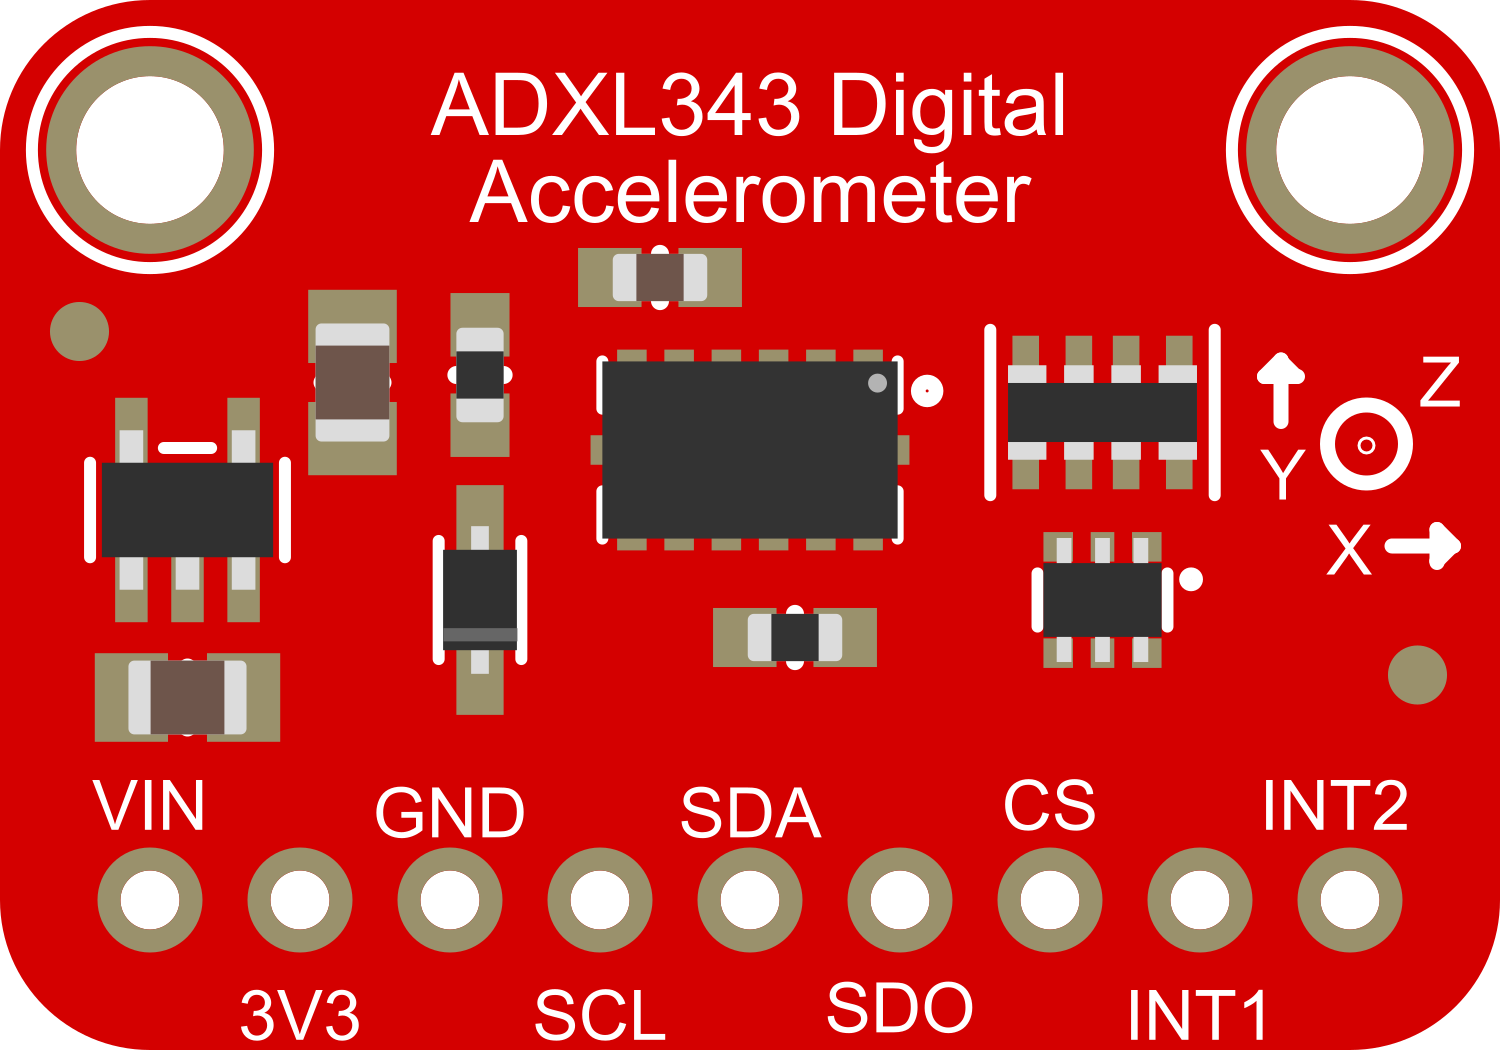
The Adafruit ADXL343 is a small, thin, low-power, 3-axis accelerometer with high resolution (13-bit) measurement at up to ±16 g. Digital output data is formatted as 16-bit two's complement and is accessible through either a SPI (3- or 4-wire) or I2C digital interface. The ADXL343 is well-suited for mobile device applications. It measures the static acceleration of gravity in tilt-sensing applications, as well as dynamic acceleration resulting from motion or shock. Its high resolution (3.9 mg/LSB) enables the measurement of inclination changes less than 1.0°.
Common applications of the ADXL343 include:
- Mobile device motion detection (e.g., shake and tap)
- Gaming and pointing devices
- Industrial instrumentation
- Personal and sports fitness devices
- Robotic and drone motion control
- Vehicle dynamics monitoring
Explore Projects Built with Adafruit ADXL343

Explore Projects Built with Adafruit ADXL343
Technical Specifications
Key Technical Details
- Power Supply (VCC): 2.0V to 3.6V
- Interface: I2C (up to 3.4 Mbps) and SPI (up to 5 MHz)
- Sensing Range: ±2g, ±4g, ±8g, ±16g
- Resolution: 13-bit, 3.9 mg/LSB
- Output Data Rate (ODR): 0.1 Hz to 3200 Hz
- Operating Temperature Range: -40°C to +85°C
Pin Configuration and Descriptions
| Pin Number | Name | Description |
|---|---|---|
| 1 | GND | Ground connection |
| 2 | VCC | Power supply (2.0V to 3.6V) |
| 3 | SCL | Serial Clock Line for I2C interface |
| 4 | SDA | Serial Data Line for I2C interface |
| 5 | CS | Chip Select for SPI interface (active low) |
| 6 | SDO | Serial Data Output for SPI interface (MISO) |
| 7 | SDA | Serial Data Input for SPI interface (MOSI) |
| 8 | SCL | Serial Clock for SPI interface |
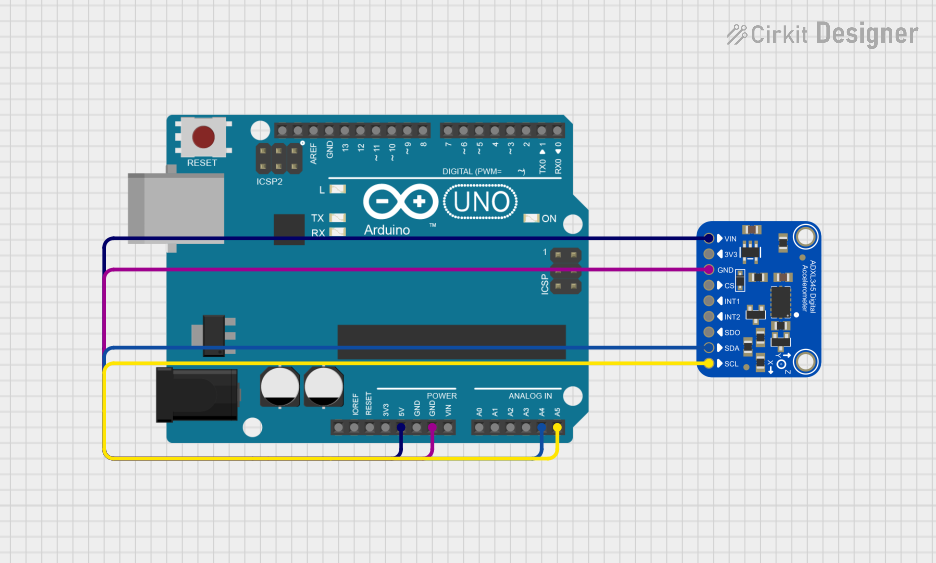
Usage Instructions
Integration with a Circuit
To use the ADXL343 in a circuit:
- Connect VCC to a 2.0V to 3.6V power supply.
- Connect GND to the ground of the power supply.
- For I2C communication, connect SCL to the I2C clock line and SDA to the I2C data line.
- For SPI communication, connect SCL, SDA, SDO, and CS to the corresponding SPI lines (SCK, MOSI, MISO, and SS).
Best Practices
- Use pull-up resistors on the I2C lines (SCL and SDA).
- Keep the power supply stable and within the specified range.
- Place the sensor on a stable surface to minimize noise during tilt sensing.
- Use proper decoupling capacitors close to the sensor's power supply pins to filter out noise.
Example Code for Arduino UNO
Below is an example code snippet for interfacing the ADXL343 with an Arduino UNO using the I2C communication protocol. This code initializes the sensor and reads the acceleration data.
#include <Wire.h>
#include <Adafruit_Sensor.h>
#include <Adafruit_ADXL343.h>

// Assign a unique ID to the sensor
Adafruit_ADXL343 accel = Adafruit_ADXL343(12345);

void setup() {
  Serial.begin(9600);
  if (!accel.begin()) {
    Serial.println("Ooops, no ADXL343 detected ... Check your wiring!");
    while (1);
  }
}

void loop() {
  /* Get a new sensor event */
  sensors_event_t event;
  accel.getEvent(&event);

  /* Display the results (acceleration is measured in m/s^2) */
  Serial.print("X: "); Serial.print(event.acceleration.x); Serial.print(" ");
  Serial.print("Y: "); Serial.print(event.acceleration.y); Serial.print(" ");
  Serial.print("Z: "); Serial.print(event.acceleration.z); Serial.print(" ");
  Serial.println("m/s^2 ");

  // Delay before the next reading
  delay(500);
}
Ensure that you have installed the necessary libraries (Adafruit_Sensor and Adafruit_ADXL343) before uploading this code to your Arduino UNO.
Troubleshooting and FAQs
Common Issues
- Sensor not detected: Ensure that the wiring is correct and that the sensor is properly powered.
- Noisy data: Verify that the sensor is placed on a stable surface and that there are no vibrations affecting the readings.
- Inaccurate readings: Calibrate the sensor by placing it on a known flat surface and adjusting the readings accordingly.
Solutions and Tips
- Double-check connections and solder joints.
- Use the
accel.begin()function to check if the sensor is properly connected. - Implement a simple low-pass filter in software to reduce noise.
- For more accurate tilt measurements, average multiple readings.
FAQs
Q: Can the ADXL343 be used with a 5V microcontroller? A: Yes, but ensure that the VCC is within the specified range and use level shifters for I2C or SPI lines if necessary.
Q: How can I change the range of the sensor?
A: Use the setRange() function provided by the Adafruit ADXL343 library to set the desired range.
Q: What is the maximum sampling rate of the ADXL343? A: The ADXL343 can sample up to 3200 Hz, but the actual maximum rate depends on the communication protocol and microcontroller speed.
For further assistance, consult the datasheet of the ADXL343 and the Adafruit ADXL343 library documentation.