How to Use YL-69 Sonda: Examples, Pinouts, and Specs
Introduction
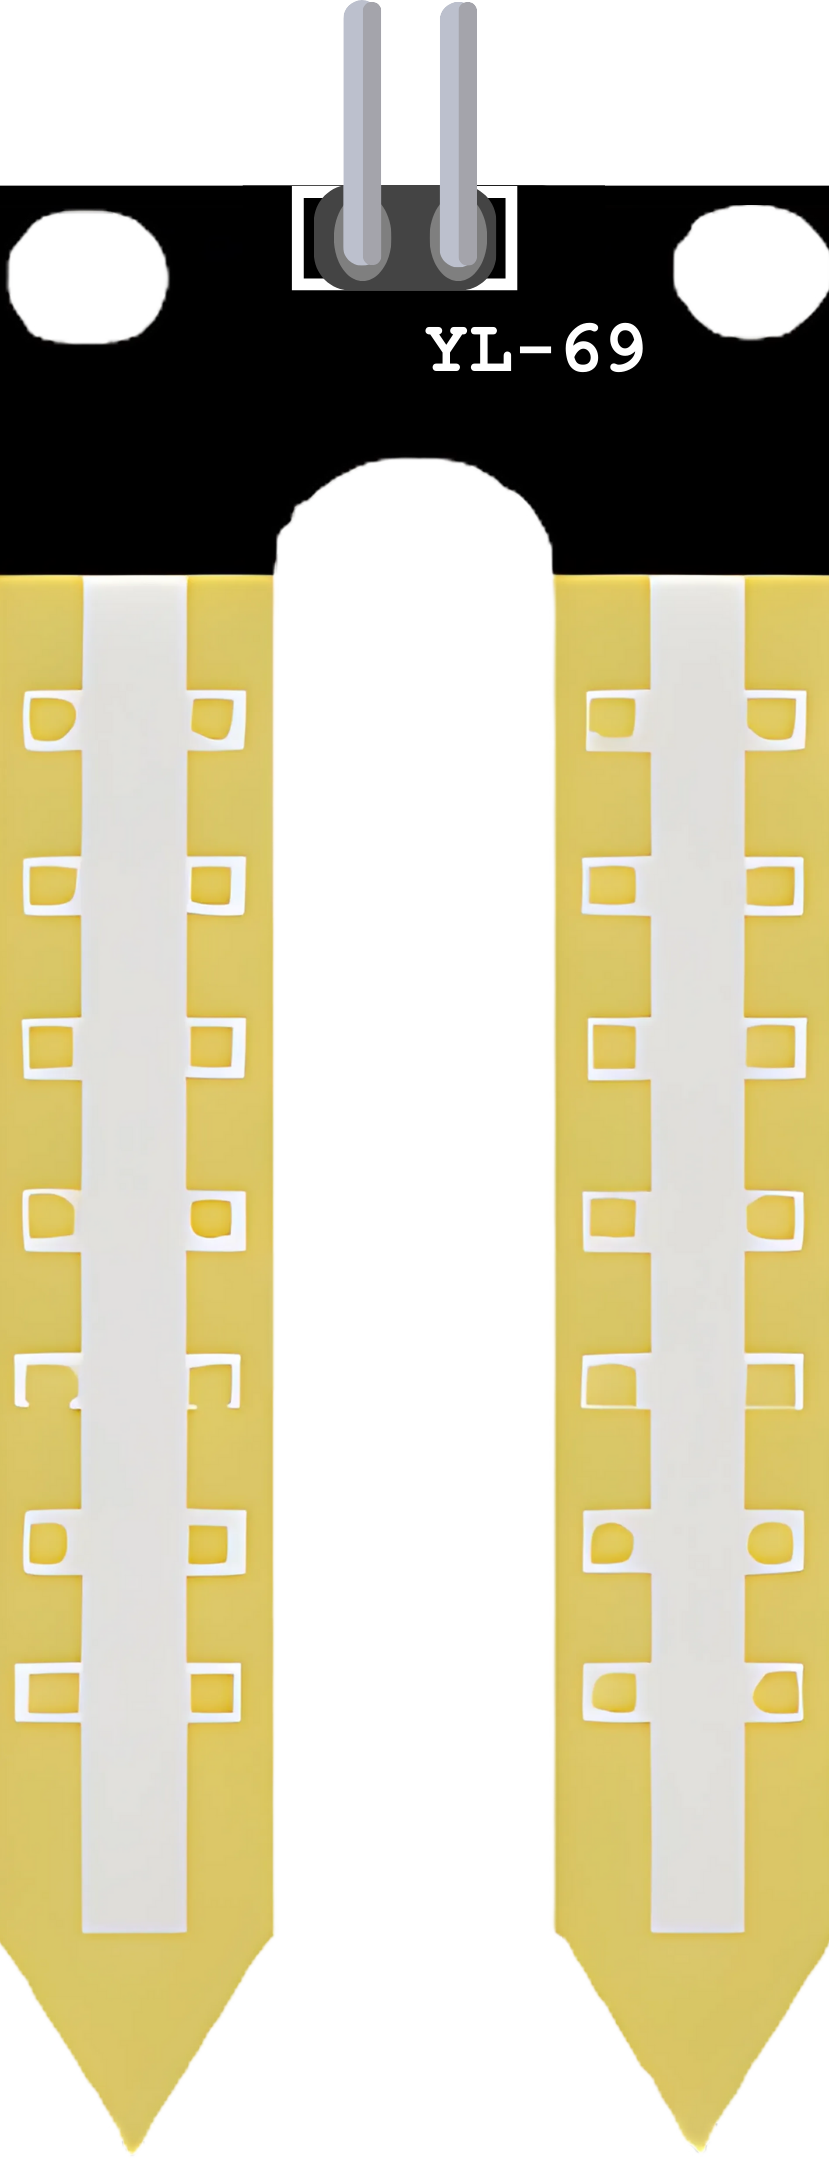
The YL-69 Sonda is a soil moisture sensor designed for monitoring water content in soil. It is an essential tool for agriculture, gardening, and environmental monitoring, allowing for precise irrigation control and plant care. The sensor operates by measuring the conductivity between two probes, which varies with moisture level.
Explore Projects Built with YL-69 Sonda
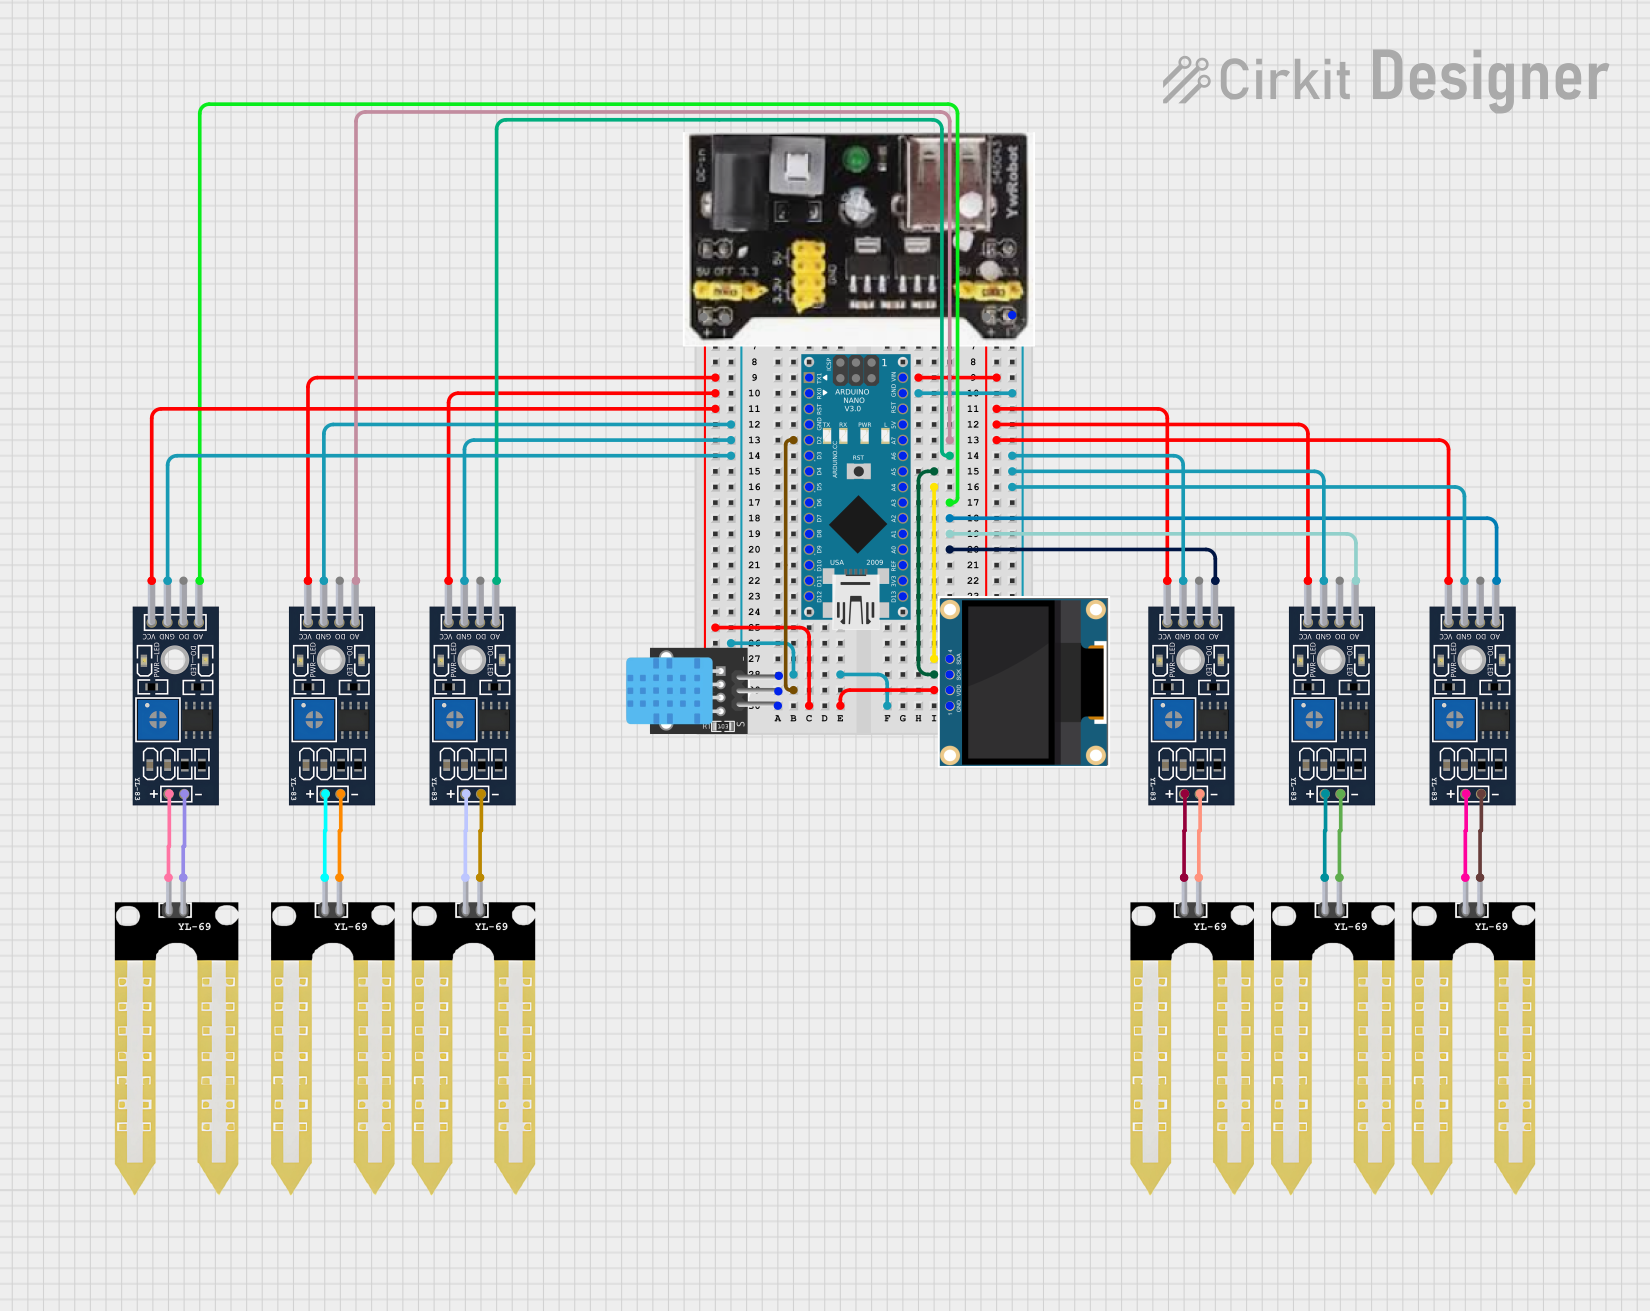

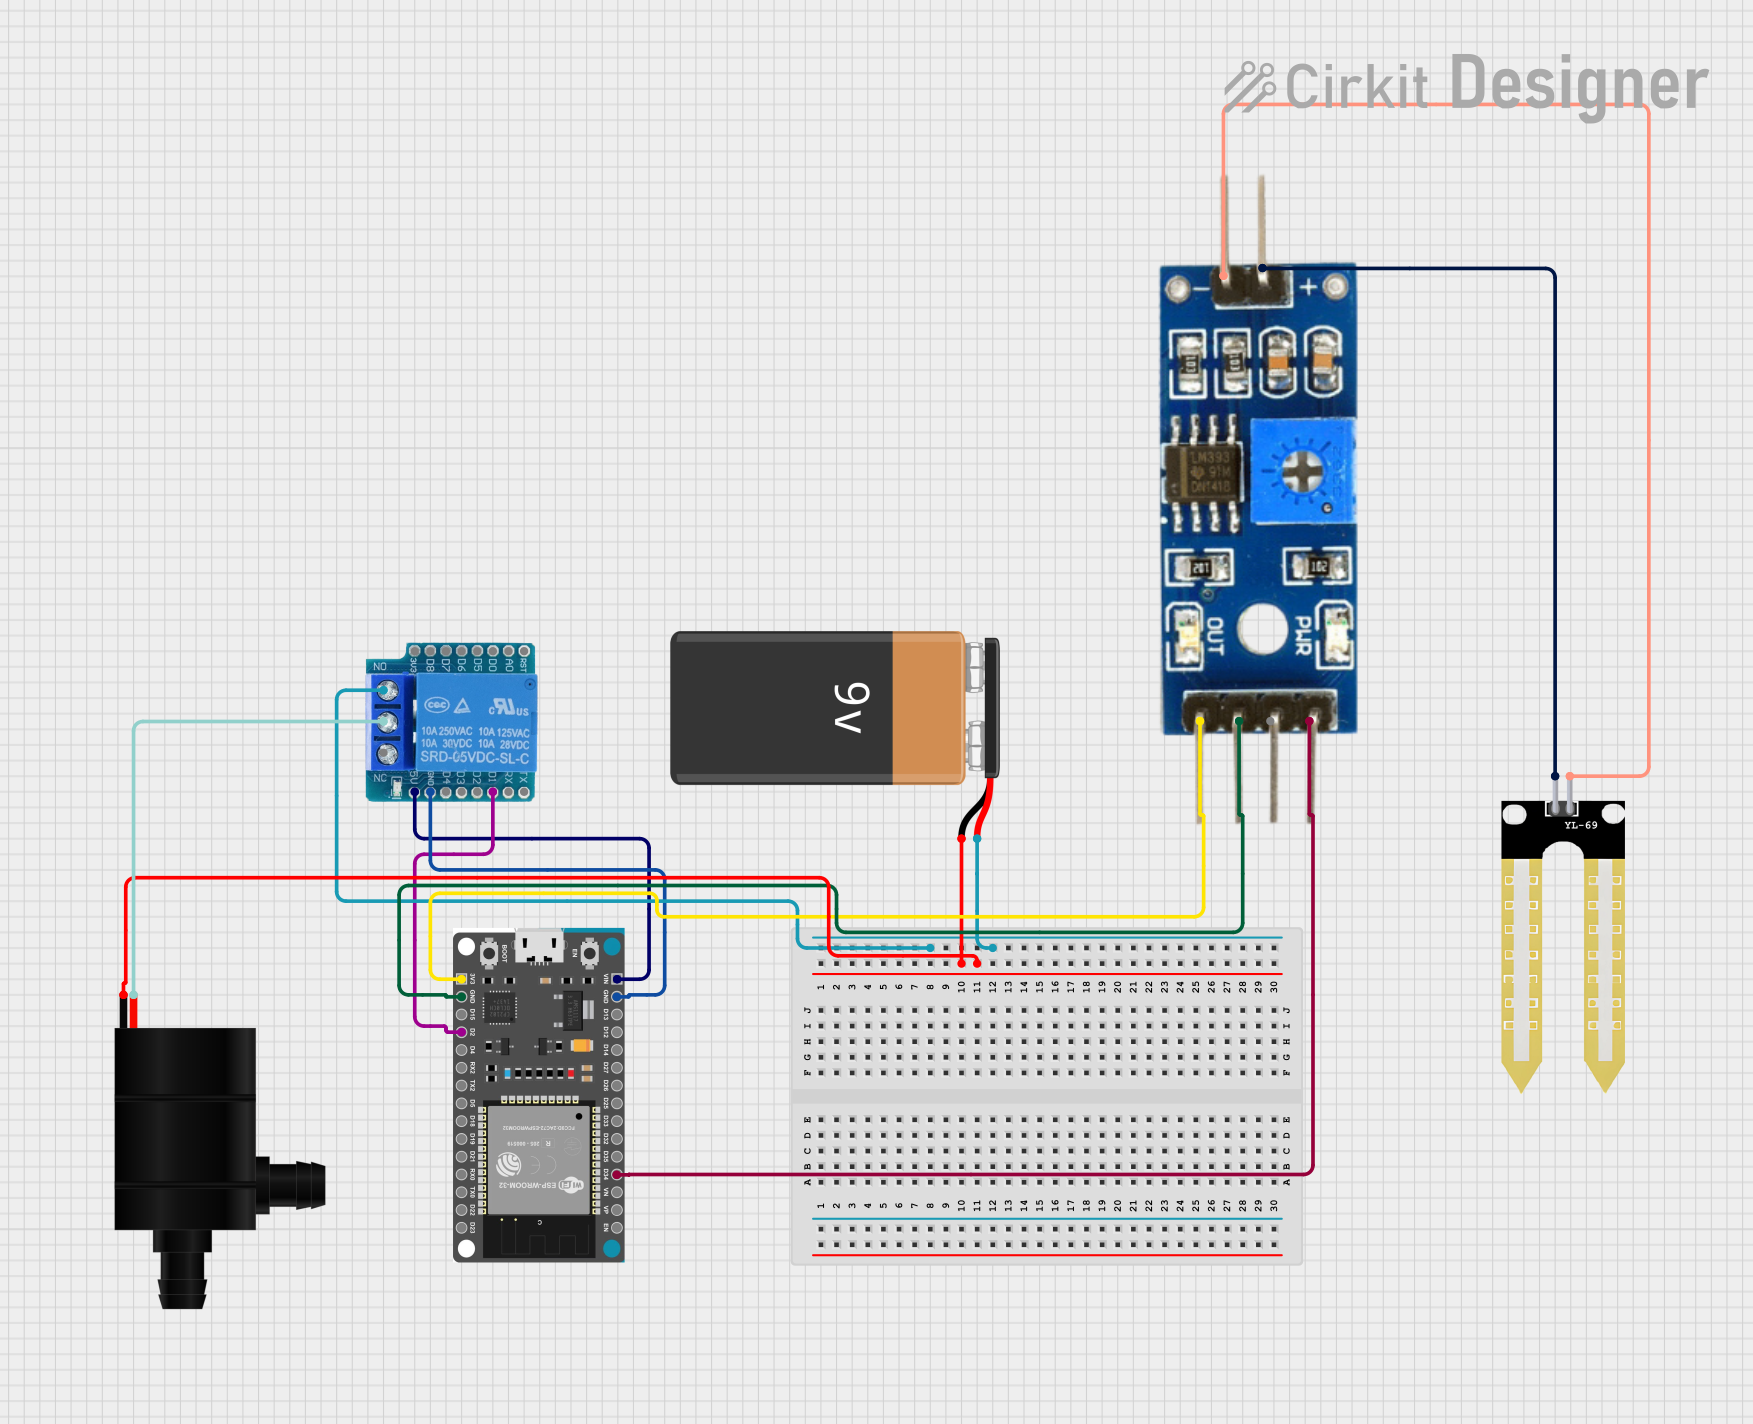

Explore Projects Built with YL-69 Sonda
Common Applications and Use Cases
- Automated irrigation systems
- Plant watering reminders
- Soil moisture monitoring for scientific research
- Environmental monitoring
Technical Specifications
Key Technical Details
- Operating Voltage: 3.3V to 5V
- Output Type: Analog and Digital
- Current: 35mA (typical)
- Sensitivity: Adjustable via onboard potentiometer
Pin Configuration and Descriptions
| Pin Number | Name | Description |
|---|---|---|
| 1 | VCC | Power supply (3.3V to 5V) |
| 2 | GND | Ground connection |
| 3 | AOUT | Analog output signal |
| 4 | DOUT | Digital output signal (threshold set by potentiometer) |
Usage Instructions
How to Use the Component in a Circuit
- Insert the probes into the soil where moisture level monitoring is desired.
- Connect the VCC pin to a 3.3V or 5V power supply.
- Connect the GND pin to the ground of the power supply.
- Connect the AOUT pin to an analog input pin on your microcontroller if you wish to read the analog value.
- Optionally, connect the DOUT pin to a digital input pin on your microcontroller if you want to use the digital output.
Important Considerations and Best Practices
- Avoid submerging the sensor's electronic board in soil or water to prevent damage.
- Clean the probes after use to prevent corrosion and maintain accuracy.
- Calibrate the sensor by adjusting the onboard potentiometer to set the threshold for the digital output.
Example Code for Arduino UNO
// Define the sensor's analog and digital pins
const int analogPin = A0; // Analog output from the sensor
const int digitalPin = 2; // Digital output from the sensor

void setup() {
  Serial.begin(9600); // Start serial communication at 9600 baud
  pinMode(digitalPin, INPUT); // Set the digital pin as input
}

void loop() {
  int sensorAnalogValue = analogRead(analogPin); // Read the analog value
  int sensorDigitalValue = digitalRead(digitalPin); // Read the digital value

  // Print the values to the serial monitor
  Serial.print("Analog Value: ");
  Serial.print(sensorAnalogValue);
  Serial.print(" | Digital Value: ");
  Serial.println(sensorDigitalValue ? "Wet" : "Dry");

  delay(1000); // Wait for a second before reading again
}
Troubleshooting and FAQs
Common Issues Users Might Face
- Inconsistent Readings: Ensure the probes are inserted into the soil properly and that there is no debris affecting the conductivity.
- Corrosion of Probes: Clean the probes regularly and avoid leaving the sensor in the soil for extended periods.
- No Output: Check all connections and ensure the power supply is within the specified voltage range.
Solutions and Tips for Troubleshooting
- If the sensor provides erratic readings, recalibrate the potentiometer and ensure a stable power supply.
- For digital output issues, adjust the potentiometer to set the correct threshold for your soil type.
- If the sensor stops working, inspect for any visible damage or corrosion on the probes and the board.
FAQs
Q: Can the YL-69 Sonda be used with a 3.3V system? A: Yes, the sensor can operate at 3.3V, making it compatible with both 5V and 3.3V systems.
Q: How do I clean the sensor probes? A: Gently wipe the probes with a soft cloth and distilled water. Avoid using any harsh chemicals.
Q: Is it possible to use the sensor in a pot with a plant? A: Absolutely, the YL-69 Sonda is ideal for monitoring moisture in potted plants to ensure optimal watering.
Q: How long can I leave the sensor in the soil? A: While the sensor can be left in the soil for monitoring, it is recommended to remove it when not in use to prevent corrosion.
Q: Can the sensor be calibrated for different soil types? A: Yes, the onboard potentiometer allows for adjusting the threshold to suit various soil types and conditions.