How to Use Speaker: Examples, Pinouts, and Specs
Introduction
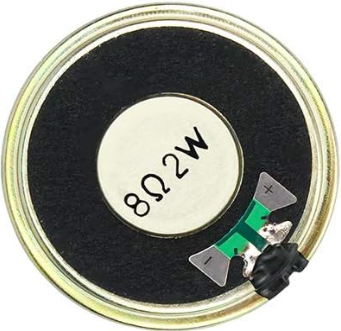
The KeeYees Speaker is a device that converts electrical energy into sound, enabling audio signals to be heard. It is a versatile component commonly used in audio systems, alarms, and embedded projects. This speaker is compact, easy to integrate, and suitable for a wide range of applications, from simple sound generation to more complex audio playback.
Explore Projects Built with Speaker


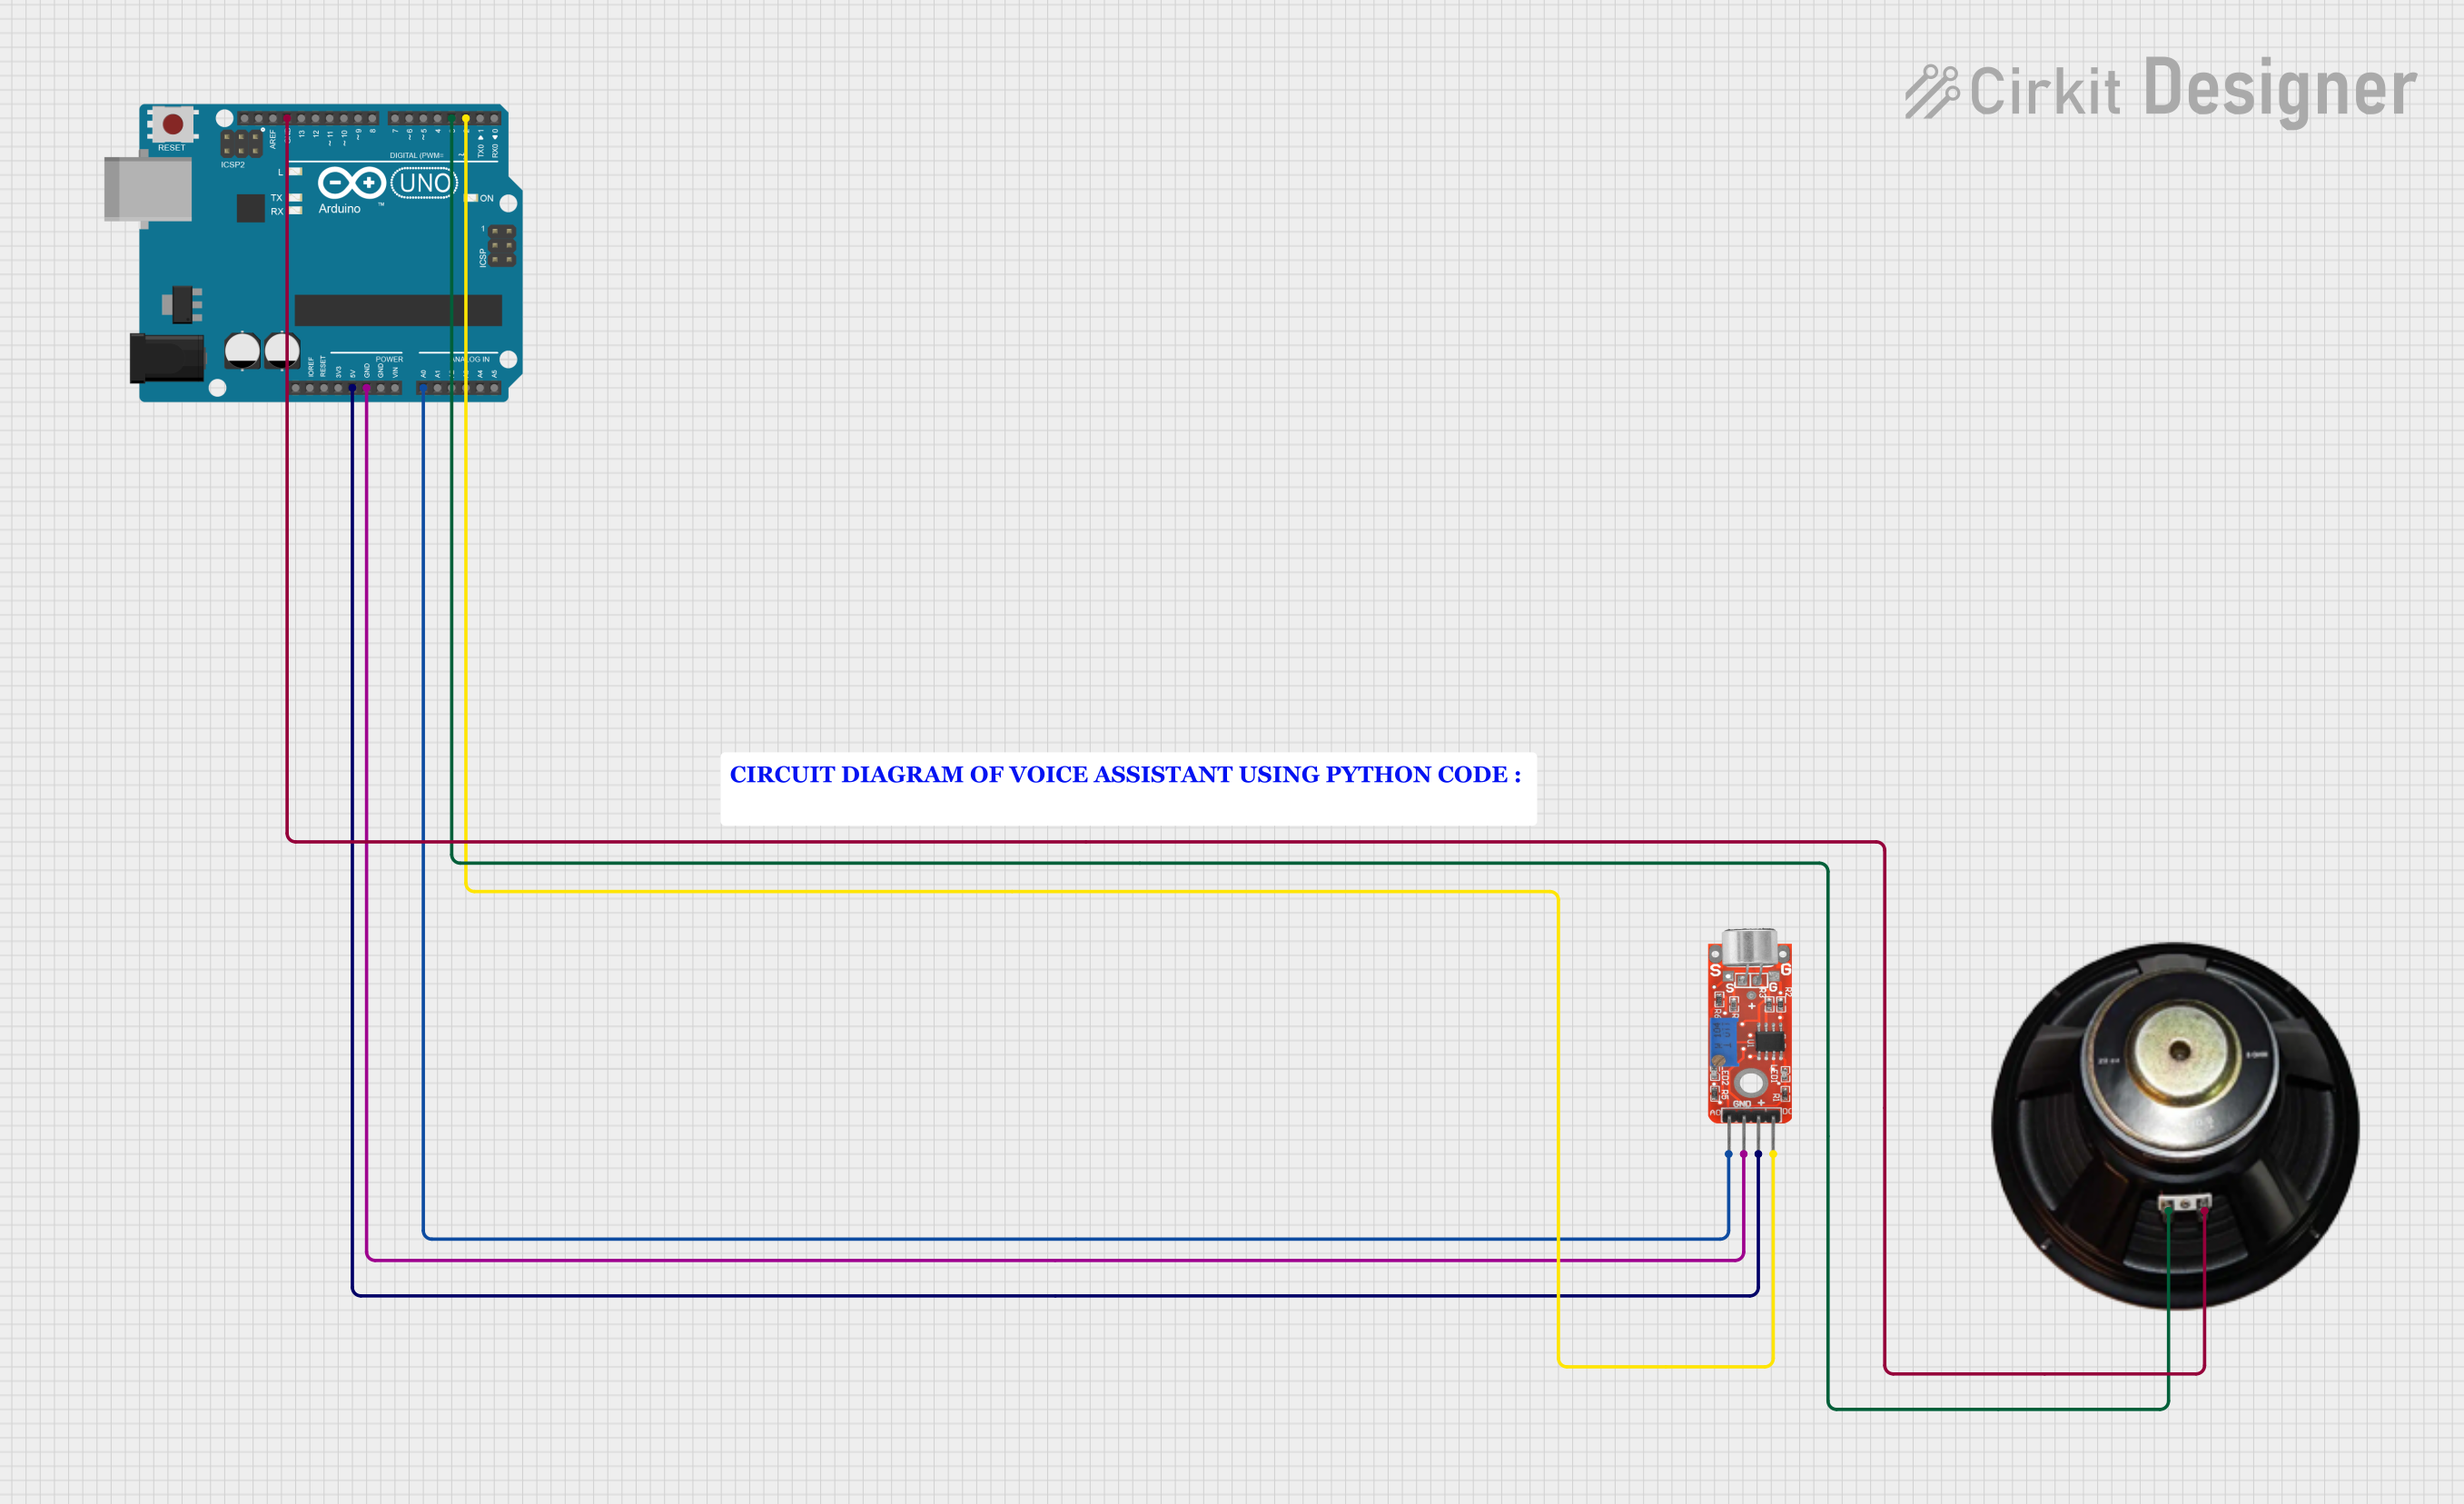
Explore Projects Built with Speaker
Common Applications and Use Cases
- Audio output for microcontroller projects (e.g., Arduino, Raspberry Pi)
- Alarm systems and notification devices
- Sound effects in toys and gadgets
- Voice or music playback in embedded systems
- Educational projects and prototyping
Technical Specifications
The KeeYees Speaker is designed for low-power applications and offers reliable performance. Below are its key technical details:
| Parameter | Value |
|---|---|
| Operating Voltage | 3V to 12V |
| Rated Power | 0.5W |
| Impedance | 8Ω |
| Frequency Range | 300Hz to 10kHz |
| Sound Pressure Level | 85dB ± 3dB |
| Dimensions | 40mm diameter, 10mm height |
| Weight | 15g |
Pin Configuration and Descriptions
The KeeYees Speaker typically has two terminals for connection:
| Pin | Description |
|---|---|
| Positive (+) | Connect to the positive terminal of the power source or audio signal output. |
| Negative (-) | Connect to the ground or negative terminal of the circuit. |
Usage Instructions
How to Use the Speaker in a Circuit
- Connect the Speaker to a Signal Source:
- Attach the positive terminal of the speaker to the audio signal output or microcontroller pin.
- Connect the negative terminal to the ground of the circuit.
- Use a Current-Limiting Resistor (if needed):
- To prevent damage to the speaker or the driving circuit, use a resistor in series with the speaker if the output current exceeds the speaker's rating.
- Amplify the Signal (if required):
- For louder sound output, use an audio amplifier circuit between the signal source and the speaker.
- Test the Circuit:
- Power the circuit and verify that the speaker produces the desired sound.
Important Considerations and Best Practices
- Avoid Overloading: Do not exceed the rated power (0.5W) to prevent damage to the speaker.
- Use Proper Frequency Range: Ensure the input signal is within the speaker's frequency range (300Hz to 10kHz) for optimal performance.
- Secure Mounting: Mount the speaker securely to avoid vibrations or noise interference.
- Polarity Matters: Ensure correct polarity when connecting the speaker to avoid phase issues in audio output.
Example: Connecting the Speaker to an Arduino UNO
Below is an example of how to use the KeeYees Speaker with an Arduino UNO to generate a simple tone:
// Example: Generate a tone using the KeeYees Speaker and Arduino UNO
// Connect the positive terminal of the speaker to pin 8 on the Arduino
// Connect the negative terminal of the speaker to the Arduino GND pin

#define SPEAKER_PIN 8  // Define the pin connected to the speaker

void setup() {
  pinMode(SPEAKER_PIN, OUTPUT);  // Set the speaker pin as an output
}

void loop() {
  tone(SPEAKER_PIN, 1000);  // Generate a 1kHz tone
  delay(500);               // Play the tone for 500ms
  noTone(SPEAKER_PIN);      // Stop the tone
  delay(500);               // Wait for 500ms before repeating
}
Troubleshooting and FAQs
Common Issues and Solutions
No Sound Output:
- Cause: Incorrect wiring or loose connections.
- Solution: Double-check the connections and ensure the speaker is properly connected to the circuit.
Distorted Sound:
- Cause: Input signal exceeds the speaker's rated power or frequency range.
- Solution: Use a resistor or amplifier to limit the input power and ensure the signal is within the frequency range.
Low Volume:
- Cause: Insufficient signal strength.
- Solution: Use an audio amplifier to boost the signal.
Speaker Overheats:
- Cause: Prolonged use at high power levels.
- Solution: Reduce the input power and ensure proper ventilation.
FAQs
Q: Can I use the KeeYees Speaker with a Raspberry Pi?
- A: Yes, but you may need an external amplifier or transistor circuit to drive the speaker, as the Raspberry Pi GPIO pins cannot provide sufficient current.
Q: What type of audio signals can the speaker handle?
- A: The speaker can handle analog audio signals within the frequency range of 300Hz to 10kHz.
Q: Can I use the speaker for music playback?
- A: Yes, but for high-quality music playback, consider using an amplifier and a digital-to-analog converter (DAC) for better sound fidelity.
Q: How do I clean the speaker?
- A: Use a soft, dry cloth to clean the speaker. Avoid using water or cleaning agents that may damage the component.
This documentation provides all the necessary details to effectively use the KeeYees Speaker in your projects. For further assistance, refer to the manufacturer's datasheet or contact KeeYees support.