How to Use Rocker Switch: Examples, Pinouts, and Specs
Introduction
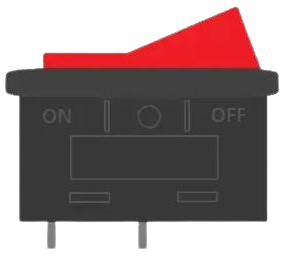
A rocker switch is a type of electrical switch that toggles between two positions, typically used to control power to a device. It features a rectangular or oval shape that rocks back and forth to open or close the circuit. Rocker switches are widely used in various applications due to their simplicity, durability, and ease of operation.
Explore Projects Built with Rocker Switch

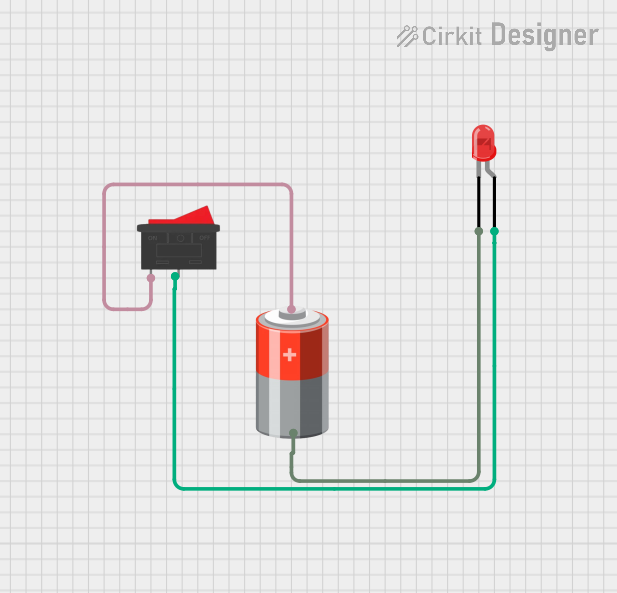
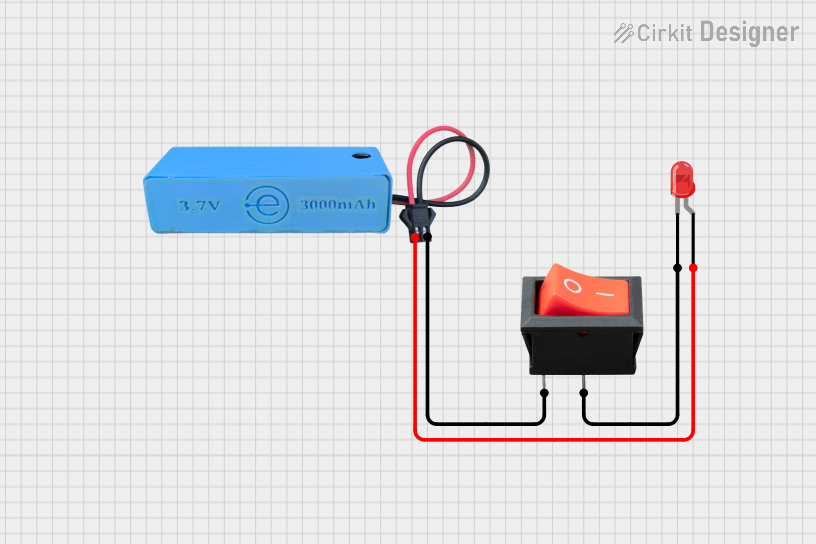
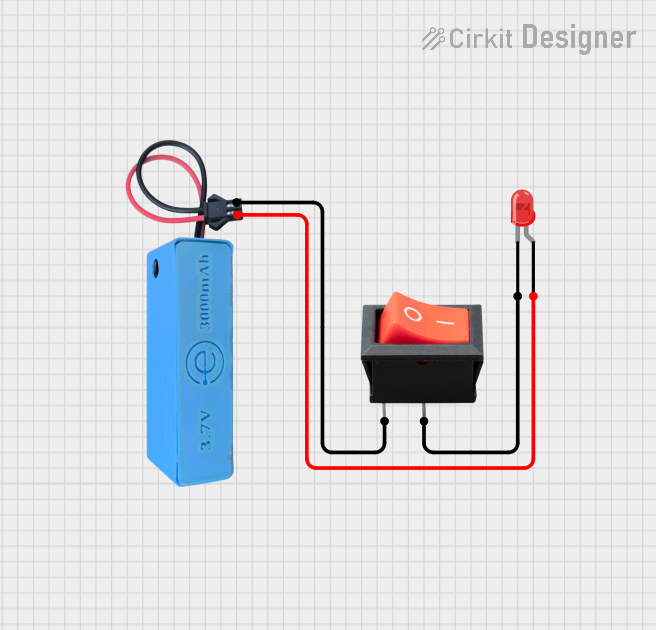
Explore Projects Built with Rocker Switch
Common Applications and Use Cases
- Power control for household appliances (e.g., lamps, fans, and heaters)
- Automotive applications (e.g., dashboard controls)
- Industrial equipment and machinery
- Consumer electronics (e.g., power supplies and audio equipment)
- Marine and aviation control panels
Technical Specifications
Key Technical Details
- Voltage Rating: Typically ranges from 12V to 250V AC or DC (varies by model)
- Current Rating: Commonly 2A to 20A (check specific switch rating)
- Contact Configuration: SPST (Single Pole Single Throw), SPDT (Single Pole Double Throw), DPST (Double Pole Single Throw), or DPDT (Double Pole Double Throw)
- Actuation Type: Rocker mechanism with tactile feedback
- Mounting Style: Panel mount or PCB mount
- Material: Plastic housing with metal contacts (e.g., copper or brass)
- Operating Temperature: -20°C to 85°C (varies by model)
Pin Configuration and Descriptions
The pin configuration of a rocker switch depends on its type. Below are examples for SPST and DPDT configurations:
SPST (Single Pole Single Throw) Rocker Switch
| Pin Number | Label | Description |
|---|---|---|
| 1 | Input (Line) | Connects to the power source |
| 2 | Output (Load) | Connects to the device being powered |
DPDT (Double Pole Double Throw) Rocker Switch
| Pin Number | Label | Description |
|---|---|---|
| 1 | Input 1 | First input for pole 1 |
| 2 | Output 1A | First output for pole 1 (position A) |
| 3 | Output 1B | First output for pole 1 (position B) |
| 4 | Input 2 | Second input for pole 2 |
| 5 | Output 2A | Second output for pole 2 (position A) |
| 6 | Output 2B | Second output for pole 2 (position B) |
Usage Instructions
How to Use the Component in a Circuit
- Identify the Switch Type: Determine whether the rocker switch is SPST, SPDT, DPST, or DPDT based on your circuit requirements.
- Connect the Pins:
- For SPST switches, connect the input pin to the power source and the output pin to the load.
- For DPDT switches, connect the inputs and outputs according to the desired circuit configuration (e.g., ON-ON or ON-OFF-ON).
- Mount the Switch: Secure the rocker switch in a panel or PCB using the appropriate mounting method.
- Test the Circuit: After wiring, test the switch to ensure it toggles correctly between positions and controls the load as intended.
Important Considerations and Best Practices
- Check Ratings: Ensure the voltage and current ratings of the switch match the requirements of your circuit.
- Use Proper Insulation: Avoid short circuits by using insulated wires and heat shrink tubing where necessary.
- Avoid Overloading: Do not exceed the switch's rated current to prevent overheating or damage.
- Polarity: For DC circuits, ensure correct polarity when connecting the switch.
- Debouncing: If using the switch with a microcontroller (e.g., Arduino), implement software or hardware debouncing to avoid false triggers.
Example: Connecting a Rocker Switch to an Arduino UNO
Below is an example of using an SPST rocker switch to control an LED with an Arduino UNO:
// Define pin connections
const int switchPin = 2;  // Rocker switch connected to digital pin 2
const int ledPin = 13;    // LED connected to digital pin 13

void setup() {
  pinMode(switchPin, INPUT_PULLUP); // Set switch pin as input with pull-up resistor
  pinMode(ledPin, OUTPUT);          // Set LED pin as output
}

void loop() {
  int switchState = digitalRead(switchPin); // Read the state of the switch

  if (switchState == LOW) { // If the switch is pressed (LOW due to pull-up)
    digitalWrite(ledPin, HIGH); // Turn on the LED
  } else {
    digitalWrite(ledPin, LOW);  // Turn off the LED
  }
}
Troubleshooting and FAQs
Common Issues Users Might Face
Switch Not Working:
- Cause: Incorrect wiring or loose connections.
- Solution: Double-check the wiring and ensure all connections are secure.
Switch Overheating:
- Cause: Exceeding the current rating of the switch.
- Solution: Use a switch with a higher current rating or reduce the load.
Switch Fails to Toggle:
- Cause: Mechanical failure or debris inside the switch.
- Solution: Inspect the switch for damage or debris and replace if necessary.
LED Flickering When Used with Arduino:
- Cause: Switch bouncing causing multiple triggers.
- Solution: Implement software debouncing in the Arduino code.
Solutions and Tips for Troubleshooting
- Use a multimeter to test continuity between the pins when the switch is toggled.
- Ensure the switch is securely mounted to prevent movement or disconnection.
- For high-power applications, consider using a relay in conjunction with the rocker switch to handle the load safely.
By following this documentation, you can effectively integrate a rocker switch into your projects and troubleshoot common issues with ease.