How to Use DC Motor Module with Fan Blade: Examples, Pinouts, and Specs
Introduction
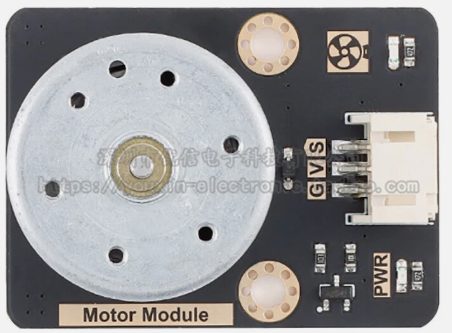
The DC Motor Module with Fan Blade (Manufacturer: Goobetter, Part ID: DC Motor) is a compact and efficient device designed to convert electrical energy into mechanical energy, driving a fan blade to create airflow. This module is ideal for applications requiring ventilation, cooling, or air circulation. Its simple design and ease of use make it suitable for hobbyists, students, and professionals alike.
Explore Projects Built with DC Motor Module with Fan Blade
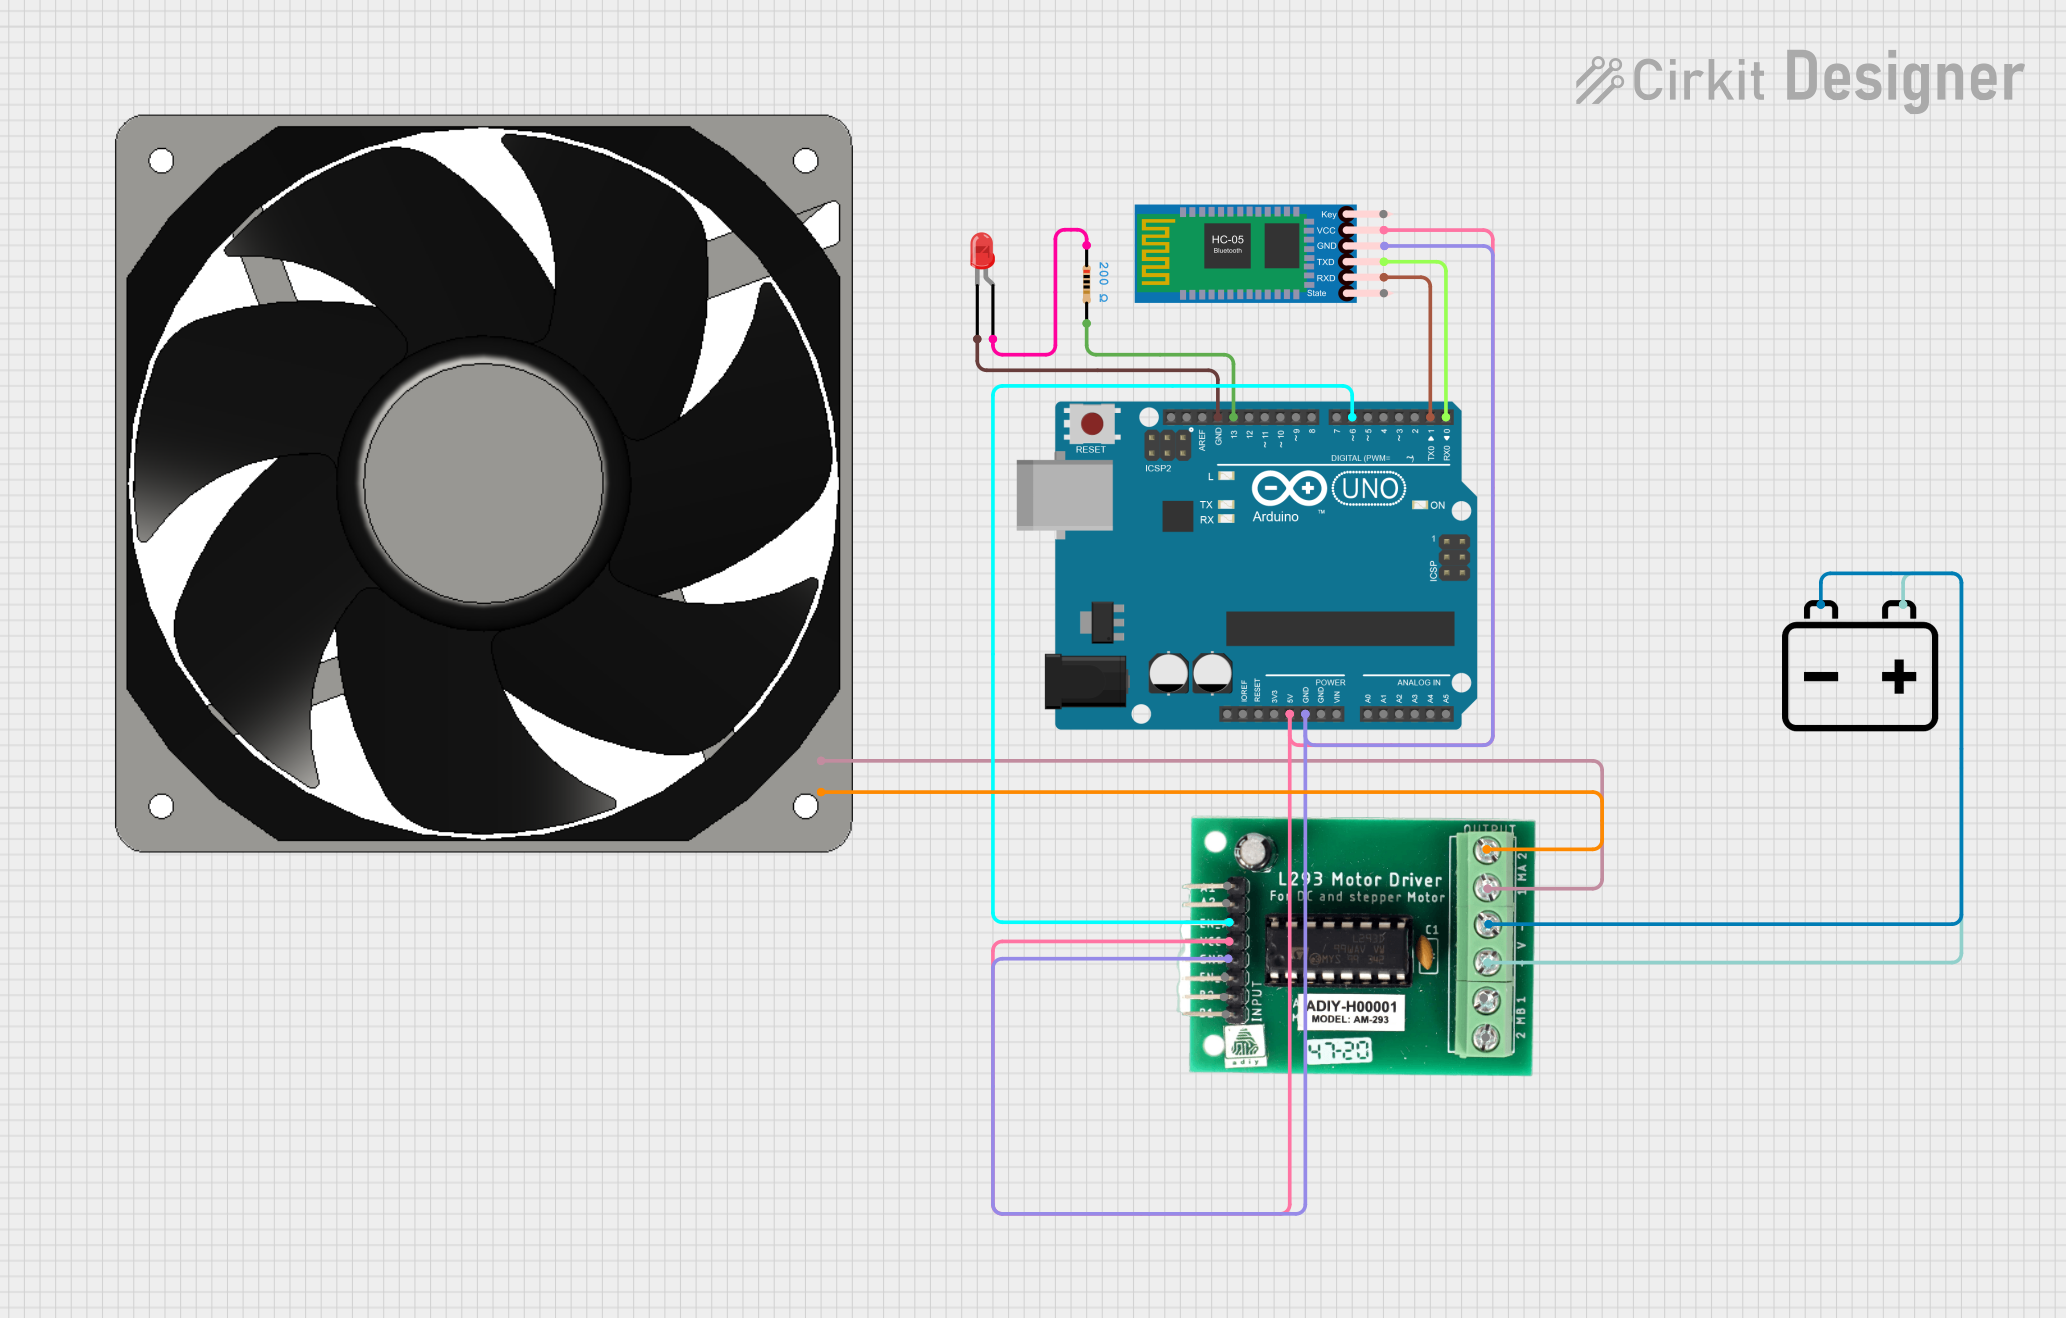
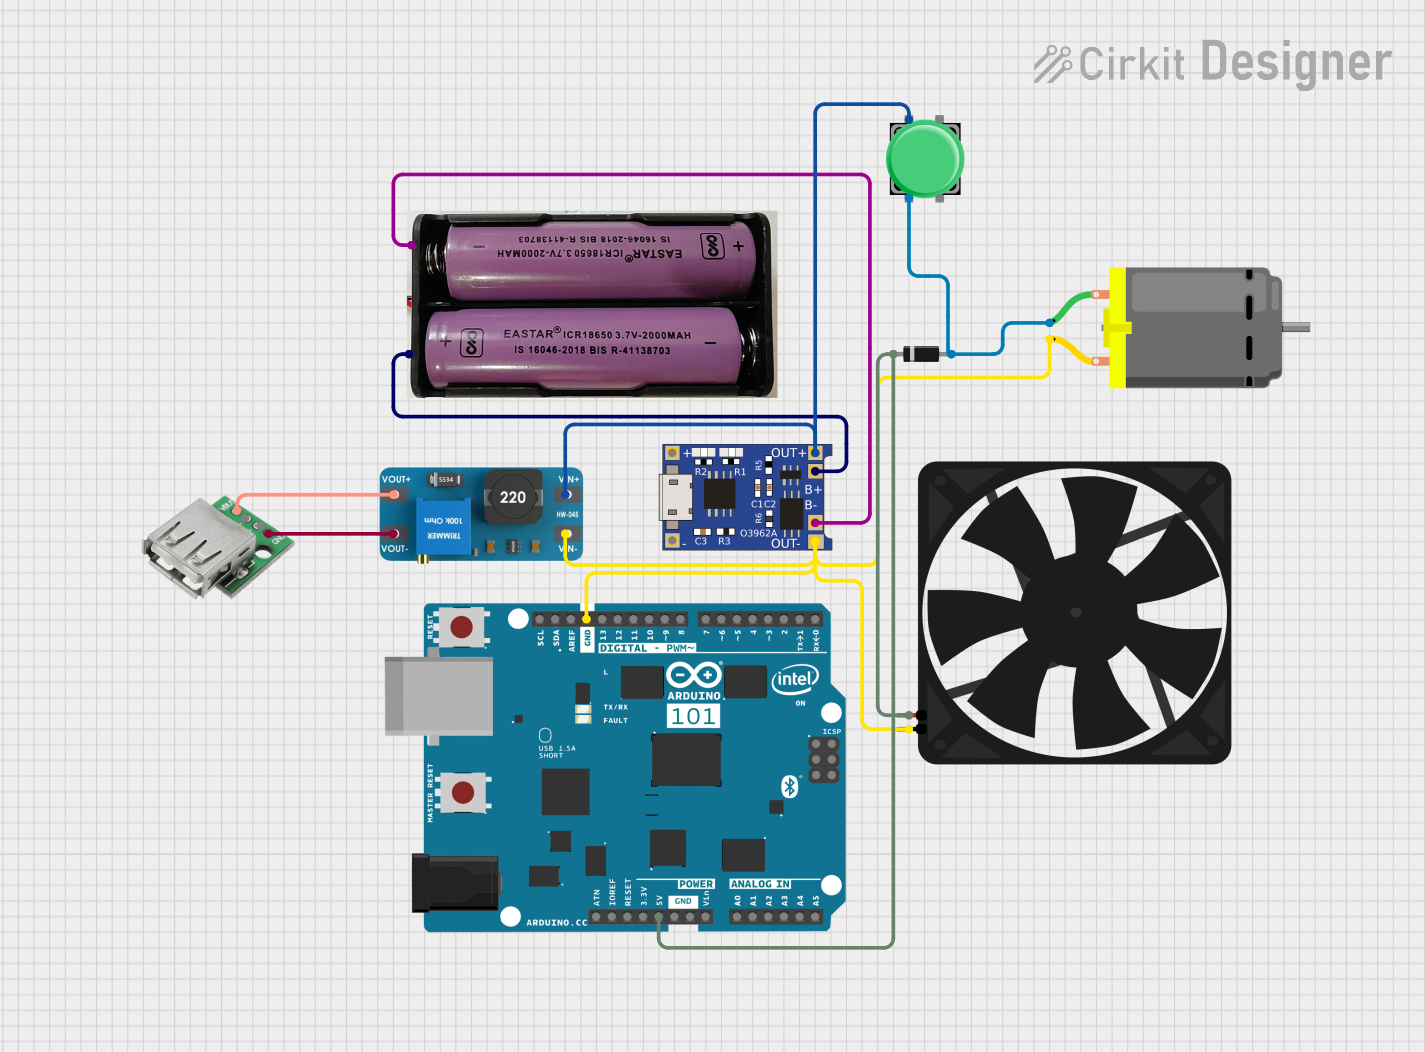

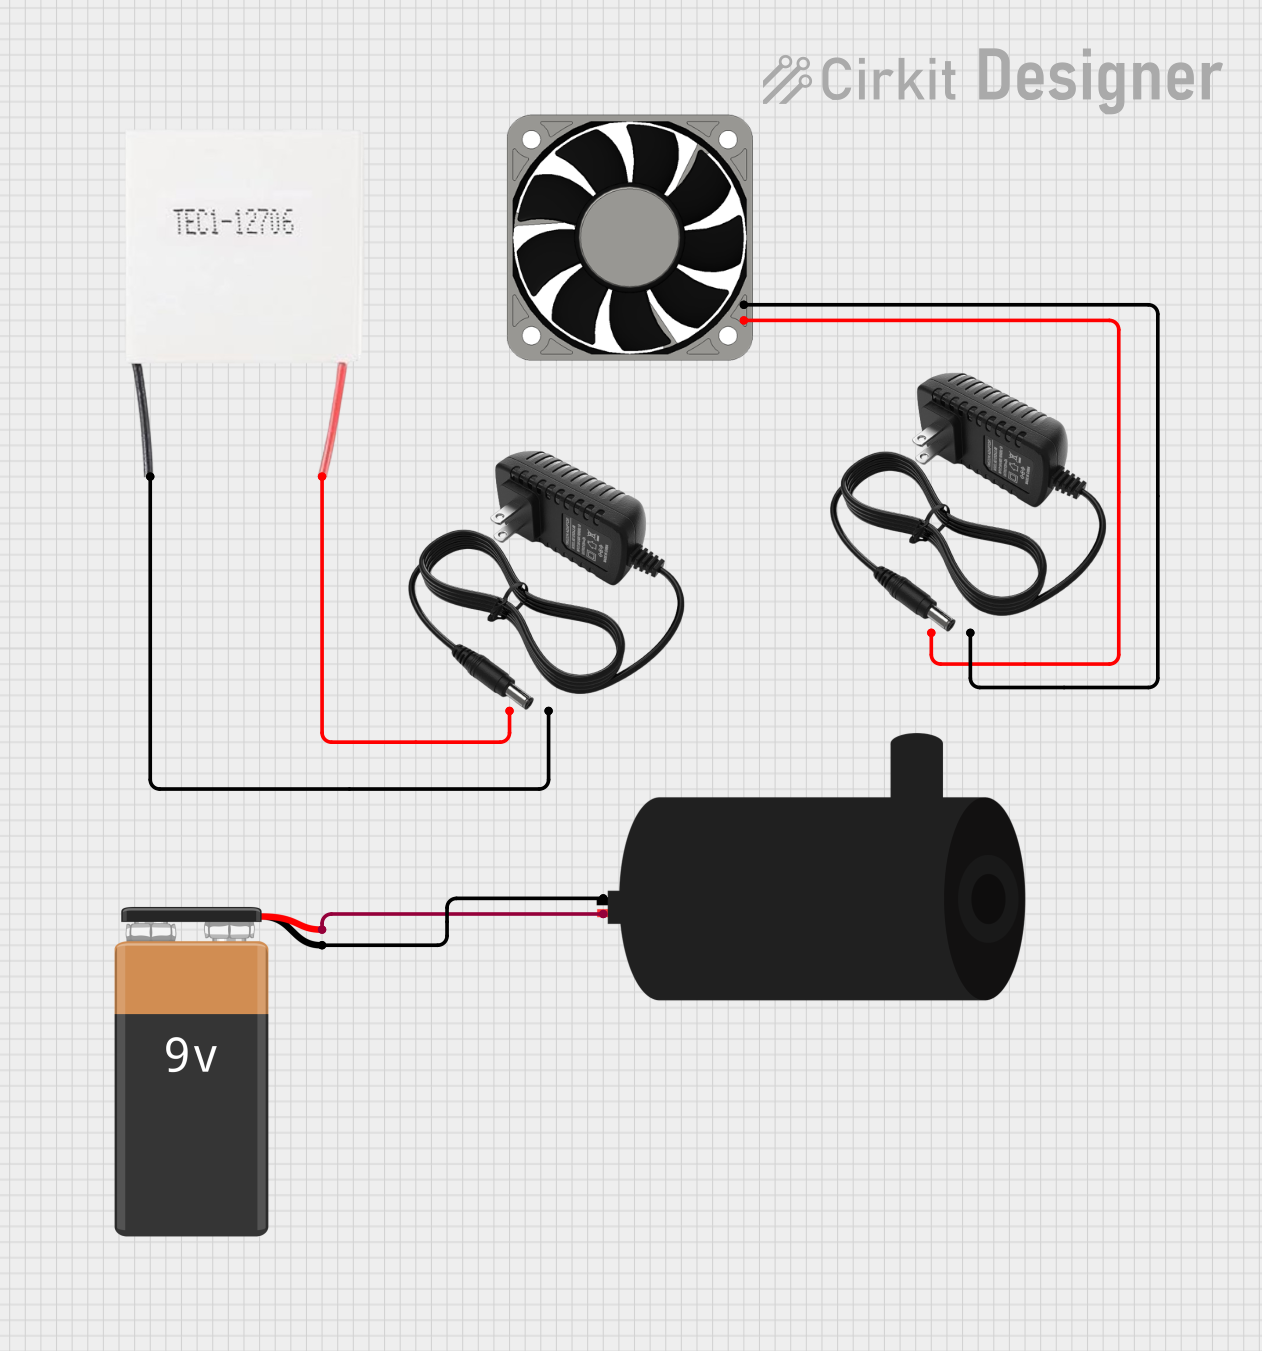
Explore Projects Built with DC Motor Module with Fan Blade
Common Applications and Use Cases
- Cooling systems for electronic devices
- Ventilation in small enclosures or cabinets
- DIY projects requiring airflow or motion
- Educational demonstrations of DC motor principles
- Robotics and automation projects
Technical Specifications
Key Technical Details
| Parameter | Specification |
|---|---|
| Operating Voltage | 3V to 12V DC |
| Rated Current | 100mA to 300mA (depending on load) |
| Maximum Power | 3.6W |
| Speed Range | 1000 to 5000 RPM (approx.) |
| Fan Blade Diameter | 65mm |
| Motor Dimensions | 25mm x 20mm x 15mm |
| Weight | 30g (including fan blade) |
| Operating Temperature | -10°C to 50°C |
Pin Configuration and Descriptions
The DC Motor Module typically has two terminals for electrical connections:
| Pin Name | Description |
|---|---|
| V+ | Positive terminal for power supply (3V to 12V DC) |
| GND | Ground terminal for power supply |
Usage Instructions
How to Use the Component in a Circuit
- Power Supply: Connect the V+ terminal to the positive terminal of a DC power source (3V to 12V) and the GND terminal to the negative terminal.
- Polarity: Ensure correct polarity. Reversing the polarity will reverse the motor's rotation direction.
- Speed Control: To control the speed, use a variable resistor (potentiometer) or a Pulse Width Modulation (PWM) signal.
- Mounting: Secure the motor and fan blade to prevent vibration or movement during operation.
- Testing: After connections, power the module and observe the fan blade's rotation.
Important Considerations and Best Practices
- Voltage Range: Operate the motor within the specified voltage range to avoid damage.
- Current Supply: Ensure the power source can supply sufficient current for the motor's operation.
- Heat Dissipation: Avoid prolonged operation at maximum voltage to prevent overheating.
- Load: Do not obstruct the fan blade, as this may strain the motor and reduce its lifespan.
- Noise: If excessive noise occurs, check for loose connections or misalignment of the fan blade.
Example: Connecting to an Arduino UNO
The DC Motor Module can be controlled using an Arduino UNO and a motor driver (e.g., L298N). Below is an example code to control the motor's speed using PWM:
// Example: Controlling DC Motor with Arduino UNO
// Ensure the motor is connected to a motor driver (e.g., L298N) for safe operation.

const int motorPin = 9; // PWM pin connected to motor driver input

void setup() {
  pinMode(motorPin, OUTPUT); // Set motor pin as output
}

void loop() {
  // Gradually increase motor speed
  for (int speed = 0; speed <= 255; speed += 5) {
    analogWrite(motorPin, speed); // Set motor speed (0-255)
    delay(50); // Wait 50ms
  }

  // Gradually decrease motor speed
  for (int speed = 255; speed >= 0; speed -= 5) {
    analogWrite(motorPin, speed); // Set motor speed (0-255)
    delay(50); // Wait 50ms
  }
}
Note: Always use a motor driver to interface the DC Motor Module with the Arduino, as the motor's current requirements may exceed the Arduino's output capacity.
Troubleshooting and FAQs
Common Issues and Solutions
| Issue | Possible Cause | Solution |
|---|---|---|
| Motor does not spin | No power or incorrect connections | Check power supply and wiring |
| Motor spins in the wrong direction | Reversed polarity | Swap the V+ and GND connections |
| Motor overheats | Overvoltage or prolonged high-speed use | Reduce voltage or limit operation time |
| Excessive noise or vibration | Loose fan blade or misalignment | Secure the fan blade and check alignment |
| Inconsistent speed | Insufficient power supply or interference | Use a stable power source and check wiring |
FAQs
Can I use this motor with a battery?
- Yes, the motor can be powered by batteries within the 3V to 12V range. Ensure the battery can supply sufficient current.
How do I reverse the motor's direction?
- Swap the connections of the V+ and GND terminals to reverse the motor's rotation.
Can I control the motor's speed without an Arduino?
- Yes, you can use a variable resistor (potentiometer) or a dedicated motor speed controller.
What should I do if the motor stops working?
- Check the power supply, wiring, and ensure the fan blade is not obstructed. If the issue persists, the motor may need replacement.
By following this documentation, users can effectively integrate and operate the Goobetter DC Motor Module with Fan Blade in their projects.