How to Use 6-Pin Connector: Examples, Pinouts, and Specs
Introduction
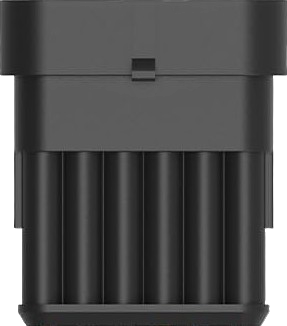
The 6-Pin Connector (Manufacturer: NAOEVO, Part ID: Connector-6Pin6) is an electrical connector with six pins designed to facilitate the transfer of power and signals between electronic devices. Its compact design and reliable performance make it a versatile choice for a wide range of applications.
Explore Projects Built with 6-Pin Connector


Explore Projects Built with 6-Pin Connector
Common Applications and Use Cases
- Power Delivery: Used in devices requiring multiple power lines or ground connections.
- Signal Transmission: Ideal for transmitting data or control signals in electronic circuits.
- PCB Connections: Commonly used to connect printed circuit boards (PCBs) in modular systems.
- Prototyping: Frequently used in breadboards and development kits for quick and reliable connections.
Technical Specifications
The following table outlines the key technical details of the NAOEVO 6-Pin Connector:
| Parameter | Specification |
|---|---|
| Manufacturer | NAOEVO |
| Part ID | Connector-6Pin6 |
| Number of Pins | 6 |
| Pin Pitch | 2.54 mm (standard) |
| Current Rating | 3 A per pin |
| Voltage Rating | 250 V AC/DC |
| Operating Temperature | -40°C to +85°C |
| Contact Material | Phosphor Bronze with Tin Plating |
| Insulation Material | Polyamide (PA66), UL94V-0 rated |
| Durability | 500 mating cycles |
Pin Configuration and Descriptions
The 6-pin connector has the following pin layout and descriptions:
| Pin Number | Description | Notes |
|---|---|---|
| 1 | Power (VCC) | Supplies power to the circuit. |
| 2 | Ground (GND) | Common ground connection. |
| 3 | Signal 1 | Data or control signal line. |
| 4 | Signal 2 | Data or control signal line. |
| 5 | Signal 3 | Data or control signal line. |
| 6 | Signal 4 | Data or control signal line. |
Usage Instructions
How to Use the 6-Pin Connector in a Circuit
- Identify Pin Functions: Refer to the pin configuration table to understand the purpose of each pin.
- Soldering: If using the connector on a PCB, solder the pins carefully to ensure a secure connection.
- Cable Assembly: For cable-to-board connections, crimp the corresponding wires to the connector terminals.
- Mating: Align the male and female connectors properly to avoid damaging the pins.
- Testing: Verify continuity and ensure proper connections before powering the circuit.
Important Considerations and Best Practices
- Pin Alignment: Ensure proper alignment during mating to prevent bent or damaged pins.
- Current and Voltage Limits: Do not exceed the specified current (3 A per pin) or voltage (250 V AC/DC) ratings.
- Environmental Conditions: Use the connector within the specified operating temperature range (-40°C to +85°C).
- Durability: Avoid excessive mating cycles beyond the rated 500 cycles to maintain reliable performance.
Example: Connecting to an Arduino UNO
The 6-pin connector can be used to interface external modules or sensors with an Arduino UNO. Below is an example of connecting a sensor using the 6-pin connector:
Circuit Diagram
- Pin 1 (VCC): Connect to Arduino 5V.
- Pin 2 (GND): Connect to Arduino GND.
- Pin 3-6 (Signal Lines): Connect to Arduino digital or analog pins as needed.
Sample Arduino Code
// Example code for reading data from a sensor connected via a 6-pin connector
// Pin 3 is used for sensor data input in this example

const int sensorPin = 3;  // Signal line connected to Pin 3 of the connector
int sensorValue = 0;      // Variable to store sensor reading

void setup() {
  pinMode(sensorPin, INPUT);  // Set Pin 3 as input
  Serial.begin(9600);         // Initialize serial communication
}

void loop() {
  sensorValue = analogRead(sensorPin);  // Read sensor value
  Serial.print("Sensor Value: ");       // Print the sensor value to the serial monitor
  Serial.println(sensorValue);
  delay(500);                           // Wait for 500ms before the next reading
}
Troubleshooting and FAQs
Common Issues Users Might Face
- Loose Connections: The connector may not establish a proper connection if the pins are not securely mated.
- Solution: Ensure the connector is fully inserted and aligned properly.
- Bent Pins: Pins may bend during improper handling or mating.
- Solution: Carefully straighten the pins using needle-nose pliers.
- Signal Interference: Noise in signal lines may cause erratic behavior.
- Solution: Use shielded cables or add decoupling capacitors to reduce noise.
- Overheating: Exceeding the current rating may cause the connector to overheat.
- Solution: Ensure the current does not exceed 3 A per pin.
FAQs
Q1: Can the 6-pin connector be used for high-speed data transmission?
A1: Yes, the connector can handle moderate-speed data transmission, but for high-speed applications, consider using shielded cables to minimize interference.
Q2: Is the connector waterproof?
A2: No, the NAOEVO 6-Pin Connector is not waterproof. For outdoor or moisture-prone environments, use a waterproof variant.
Q3: Can I use this connector for AC power applications?
A3: Yes, the connector supports up to 250 V AC, but ensure proper insulation and safety measures are in place.
Q4: How do I clean the connector?
A4: Use a soft brush or compressed air to remove dust. Avoid using liquids that may damage the insulation material.
This concludes the documentation for the NAOEVO 6-Pin Connector (Connector-6Pin6).