The SanDisk SD-Card-Adapter (Part ID: sd-card-adapter) is a versatile device designed to enable seamless connectivity between SD cards and other electronic devices. It acts as an interface for data transfer, storage expansion, and communication with microcontrollers, computers, or other host devices. This adapter is widely used in applications requiring portable data storage, such as embedded systems, IoT devices, and multimedia projects.
Explore Projects Built with SD-Card-Adapter
Use Cirkit Designer to design, explore, and prototype these projects online. Some projects support real-time simulation. Click "Open Project" to start designing instantly!
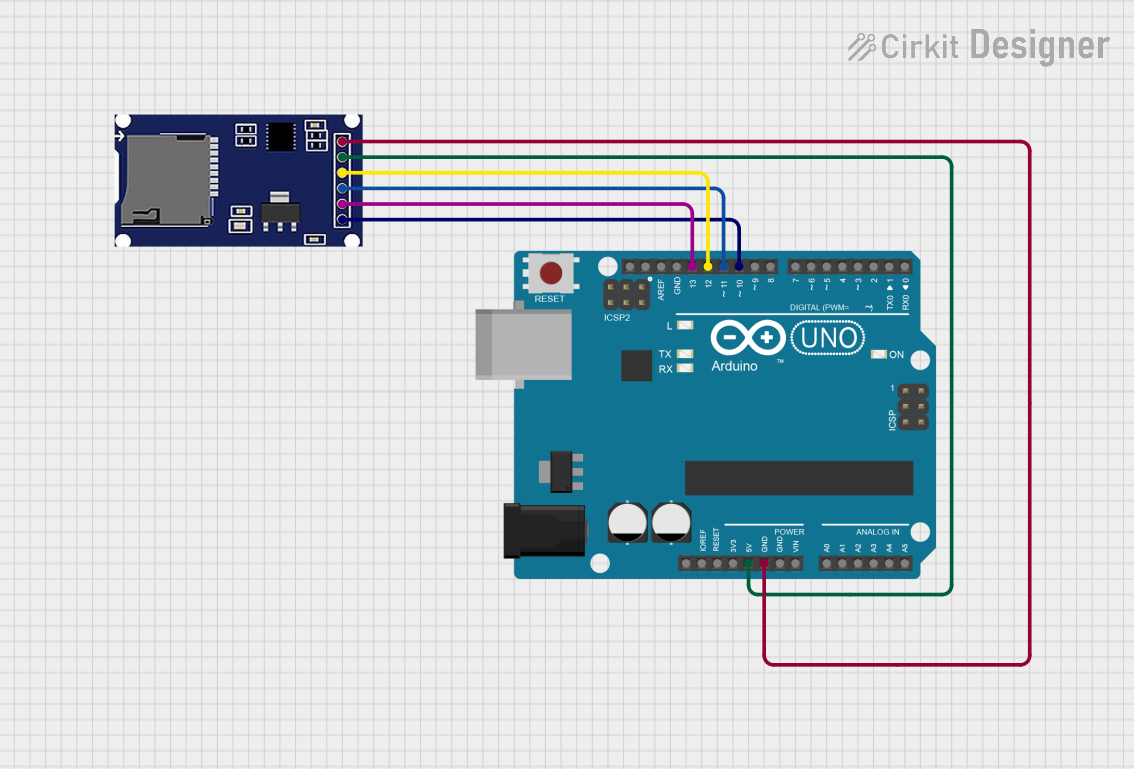
This circuit consists of an Arduino UNO connected to an SD card module. The Arduino provides power and ground to the SD module and interfaces with it using SPI communication through digital pins D10 (CS), D11 (MOSI), D12 (MISO), and D13 (SCK). The setup is intended for reading from or writing to an SD card using the Arduino.
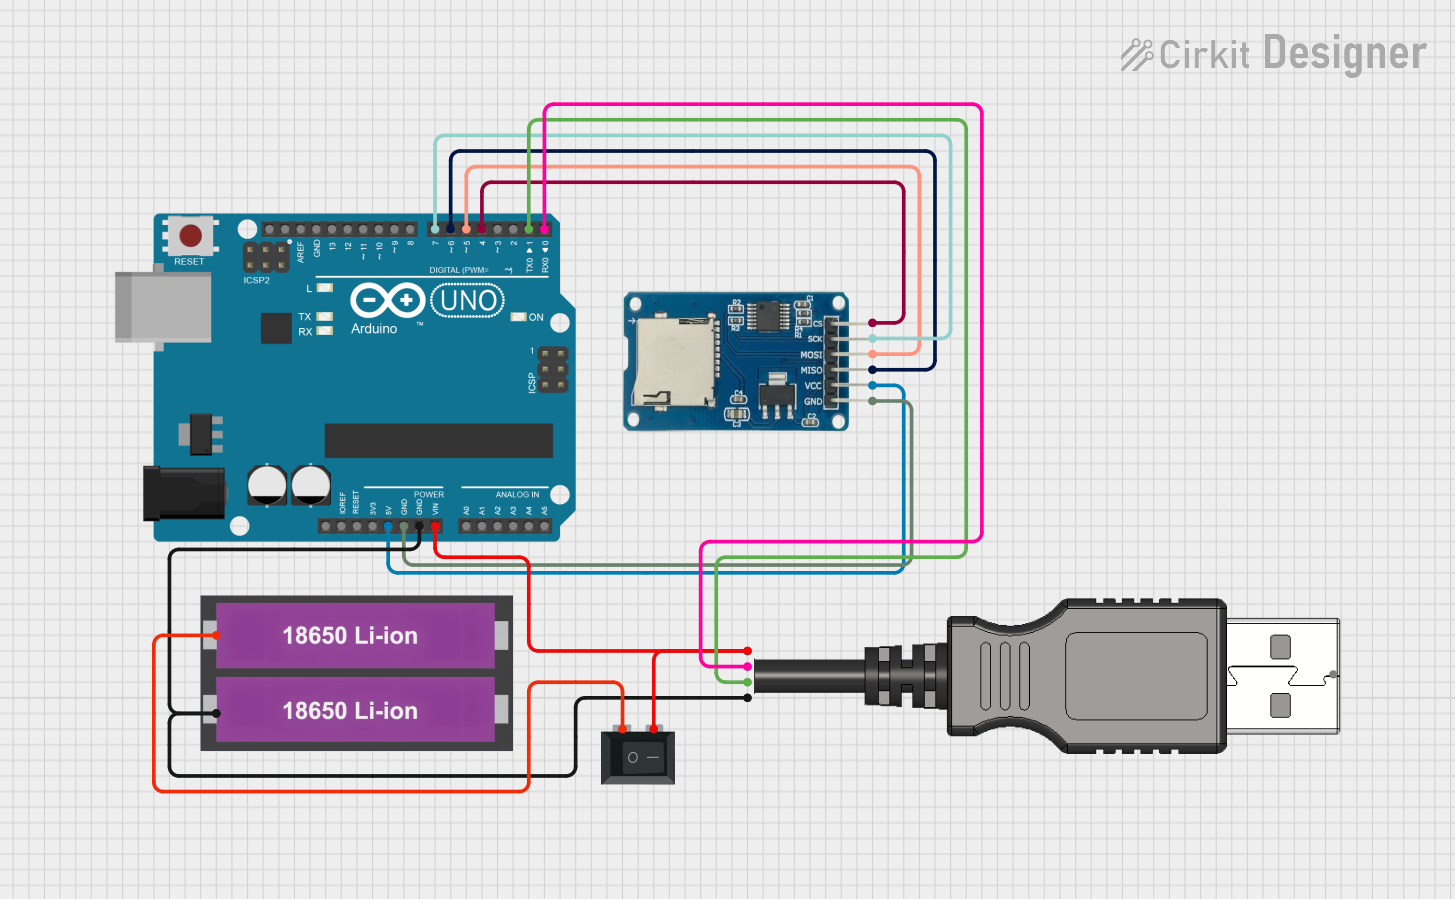
This circuit is designed to interface an Arduino UNO with a Micro SD Card Module for data storage, powered by two 18650 Li-ion batteries through a USB plug and controlled by a rocker switch. The Arduino communicates with the SD card module via SPI protocol and is also connected to the USB plug for potential data transfer or power supply.
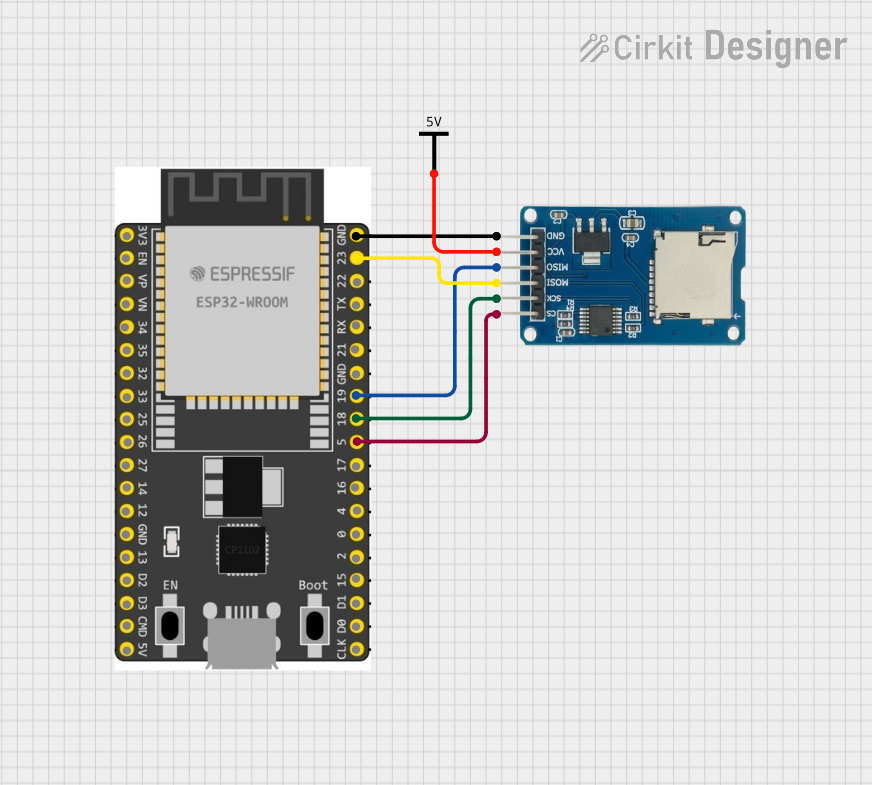
This circuit connects an ESP32 Wroom Dev Kit microcontroller to a Micro SD Card Module for data storage purposes. The ESP32 is configured to communicate with the SD card using the SPI protocol, as indicated by the connections of MOSI, MISO, SCK, and CS pins. A separate Vcc component provides power to the SD card module.
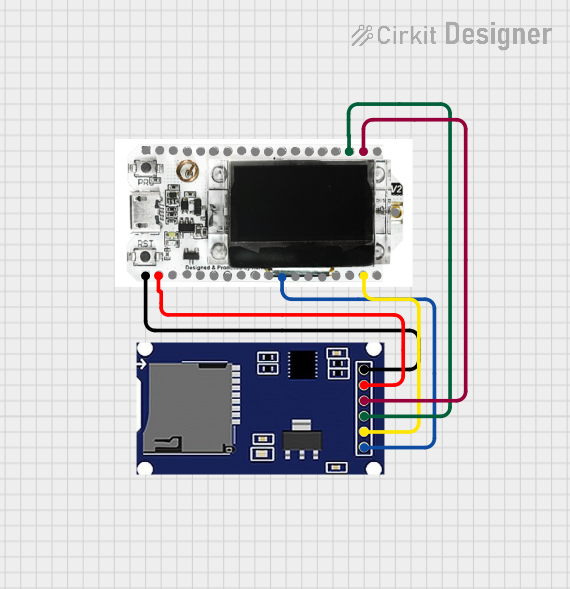
This circuit connects an SD card module to a Heltec LoRa V2 microcontroller for data storage and retrieval. The SD module is interfaced with the microcontroller via SPI communication, utilizing the CS, SCK, MOSI, and MISO pins. Power is supplied to the SD module from the microcontroller's 5V output, and both modules share a common ground.
Data Logging: Storing sensor data in IoT and embedded systems.
Multimedia Storage: Expanding storage for audio, video, and image files.
Firmware Updates: Loading and updating firmware on microcontrollers.
Portable Storage: Transferring files between devices.
Prototyping: Testing SD card functionality in development projects.
Technical Specifications
The following table outlines the key technical details of the SanDisk SD-Card-Adapter:
Parameter
Specification
Manufacturer
SanDisk
Part ID
sd-card-adapter
Supported Card Types
SD, SDHC, SDXC
Operating Voltage
3.3V
Communication Protocol
SPI (Serial Peripheral Interface)
Dimensions
24mm x 32mm x 2.1mm (standard SD)
Operating Temperature
-25°C to 85°C
Storage Temperature
-40°C to 85°C
Pin Configuration and Descriptions
The SD-Card-Adapter uses a standard 8-pin interface. The pin configuration is as follows:
Pin Number
Pin Name
Description
1
CS
Chip Select (Active Low)
2
MOSI
Master Out Slave In (Data Input to SD Card)
3
GND
Ground
4
VCC
Power Supply (3.3V)
5
CLK
Clock Signal
6
GND
Ground
7
MISO
Master In Slave Out (Data Output from SD Card)
8
NC
Not Connected (Reserved for future use)
Usage Instructions
How to Use the SD-Card-Adapter in a Circuit
Power Supply: Connect the VCC pin to a 3.3V power source and the GND pins to the ground.
SPI Communication: Connect the CS, MOSI, MISO, and CLK pins to the corresponding SPI pins on your microcontroller or host device.
Insert SD Card: Ensure the SD card is properly inserted into the adapter slot.
Initialize the Card: Use appropriate software libraries (e.g., Arduino SD library) to initialize and communicate with the SD card.
Important Considerations and Best Practices
Voltage Levels: Ensure the adapter operates at 3.3V. If your microcontroller uses 5V logic, use a level shifter to prevent damage.
Card Compatibility: Verify that the SD card type (SD, SDHC, or SDXC) is supported by your system.
ESD Protection: Handle the adapter and SD card with care to avoid electrostatic discharge.
File System: Format the SD card to FAT16 or FAT32 for compatibility with most libraries and devices.
Example: Connecting to an Arduino UNO
Below is an example of how to use the SD-Card-Adapter with an Arduino UNO:
Circuit Connections
SD-Card-Adapter Pin
Arduino UNO Pin
CS
Pin 10
MOSI
Pin 11
MISO
Pin 12
CLK
Pin 13
VCC
3.3V
GND
GND
Arduino Code Example
#include <SPI.h>
#include <SD.h>

// Define the chip select pin for the SD card
const int chipSelect = 10;

void setup() {
  // Initialize serial communication for debugging
  Serial.begin(9600);
  while (!Serial) {
    ; // Wait for the serial port to connect
  }

  Serial.println("Initializing SD card...");

  // Initialize the SD card
  if (!SD.begin(chipSelect)) {
    Serial.println("Card failed, or not present");
    // Halt the program if the SD card initialization fails
    while (1);
  }
  Serial.println("Card initialized successfully!");
}

void loop() {
  // Example: Writing to a file on the SD card
  File dataFile = SD.open("example.txt", FILE_WRITE);

  if (dataFile) {
    dataFile.println("Hello, SD card!");
    dataFile.close();
    Serial.println("Data written to example.txt");
  } else {
    Serial.println("Error opening example.txt");
  }

  delay(1000); // Wait for 1 second before repeating
}
Troubleshooting and FAQs
Common Issues and Solutions
SD Card Not Detected:
Ensure the SD card is properly inserted into the adapter.
Verify the connections between the adapter and the microcontroller.
Check that the SD card is formatted to FAT16 or FAT32.
File Read/Write Errors:
Confirm that the SD card is not write-protected.
Ensure sufficient free space is available on the SD card.
Verify that the file name and path are correct.
Voltage Mismatch:
If using a 5V microcontroller, add a level shifter to protect the SD-Card-Adapter.
Initialization Fails:
Double-check the SPI connections and pin assignments in the code.
Use a different SD card to rule out compatibility issues.
FAQs
Q: Can I use this adapter with microSD cards?
A: Yes, but you will need a microSD-to-SD card adapter to fit the slot.
Q: What is the maximum storage capacity supported?
A: The maximum capacity depends on the host device and software library. Most systems support up to 32GB (SDHC) or higher with SDXC.
Q: Can I use this adapter with a Raspberry Pi?
A: Yes, the SD-Card-Adapter can be used with Raspberry Pi models that support SPI communication.
Q: Is the adapter hot-swappable?
A: While the adapter itself supports hot-swapping, ensure your system software can handle it without errors.
By following this documentation, you can effectively integrate the SanDisk SD-Card-Adapter into your projects for reliable data storage and transfer.


 Open Project in Cirkit Designer