How to Use Small Bulb with holder: Examples, Pinouts, and Specs
Introduction
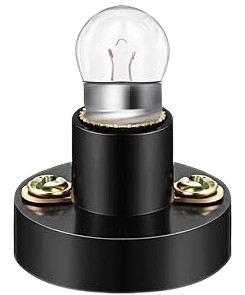
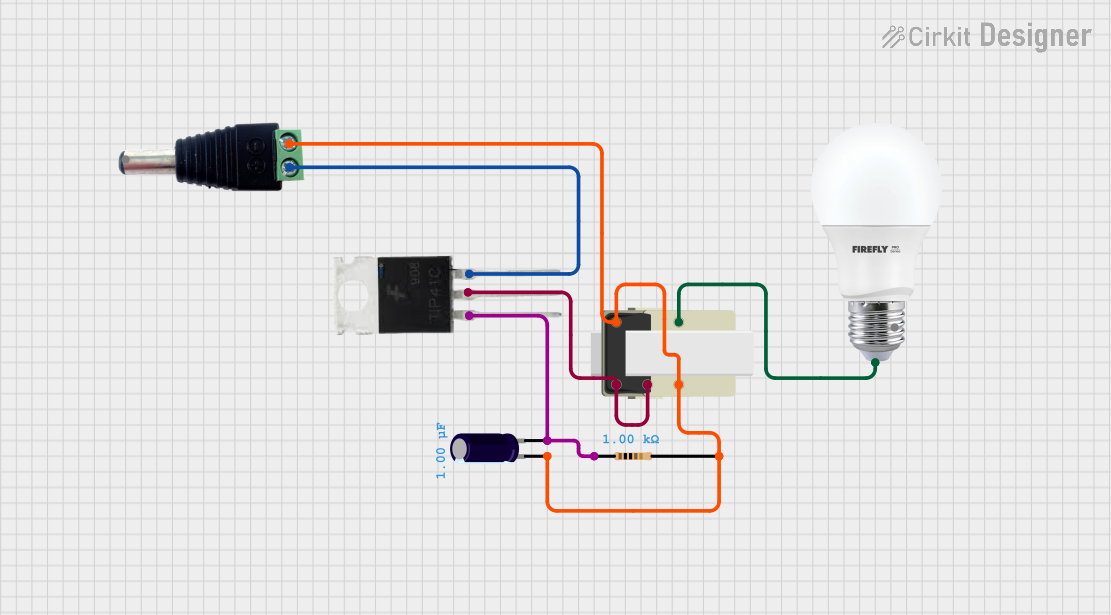
A small bulb with a holder is a compact lighting component that combines a bulb (either incandescent or LED) with a holder for easy installation and electrical connection. The holder ensures secure mounting and provides terminals for connecting the bulb to a power source. These components are widely used in low-power lighting applications, such as indicator lights, decorative lighting, and small-scale DIY electronics projects.
Explore Projects Built with Small Bulb with holder
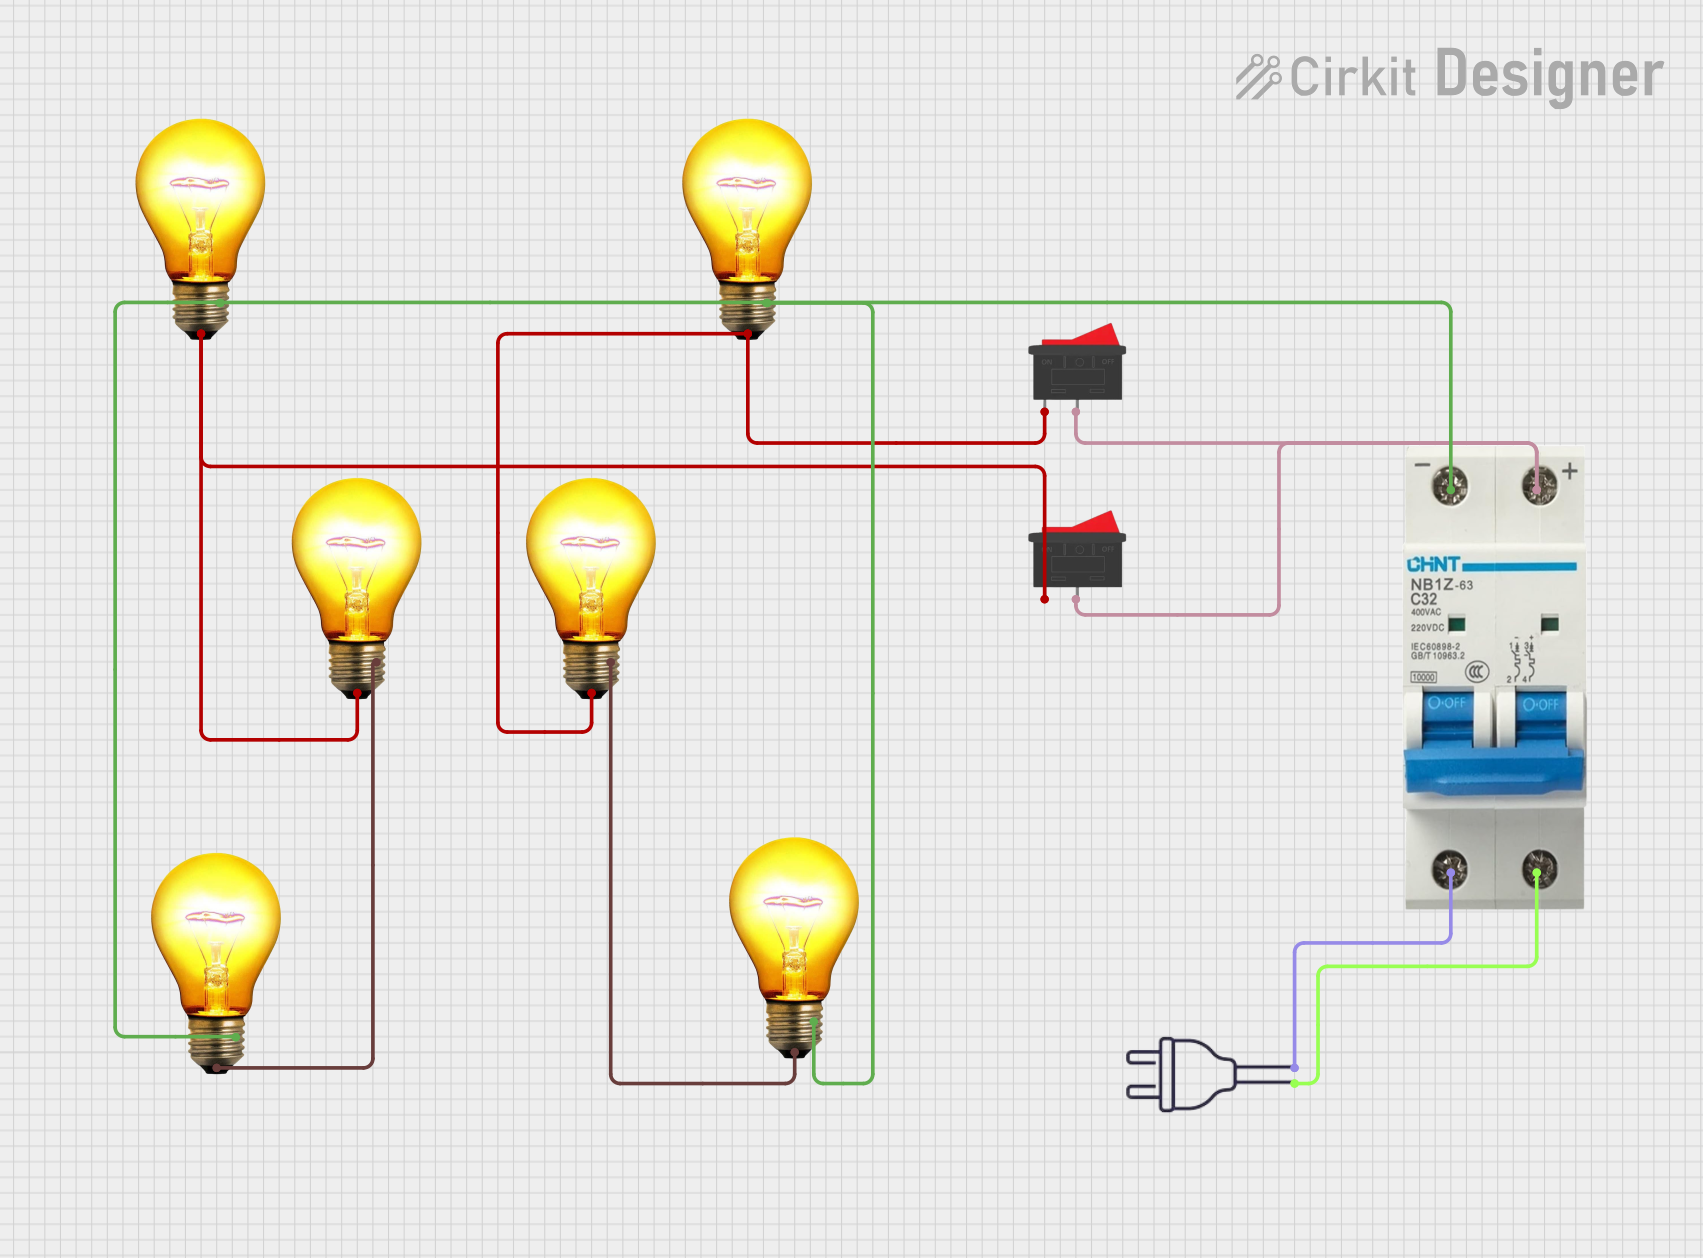
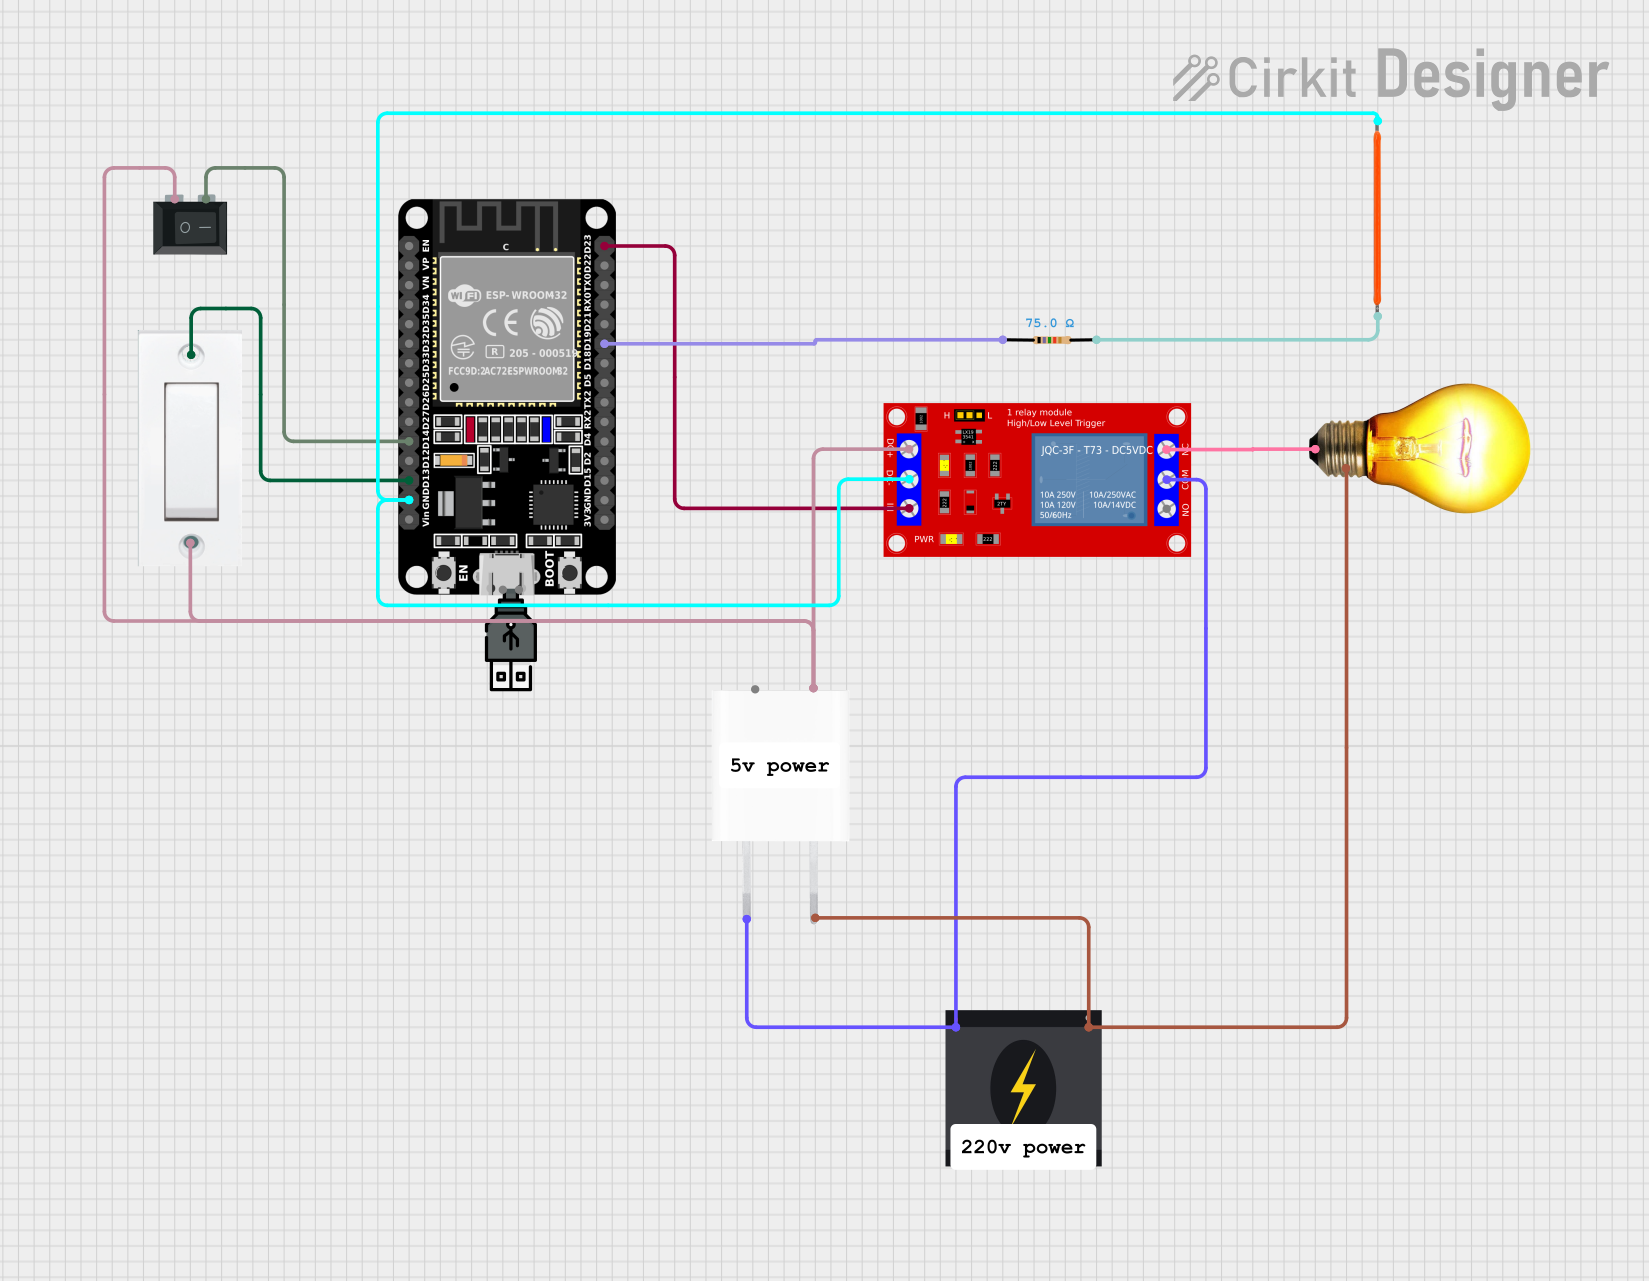
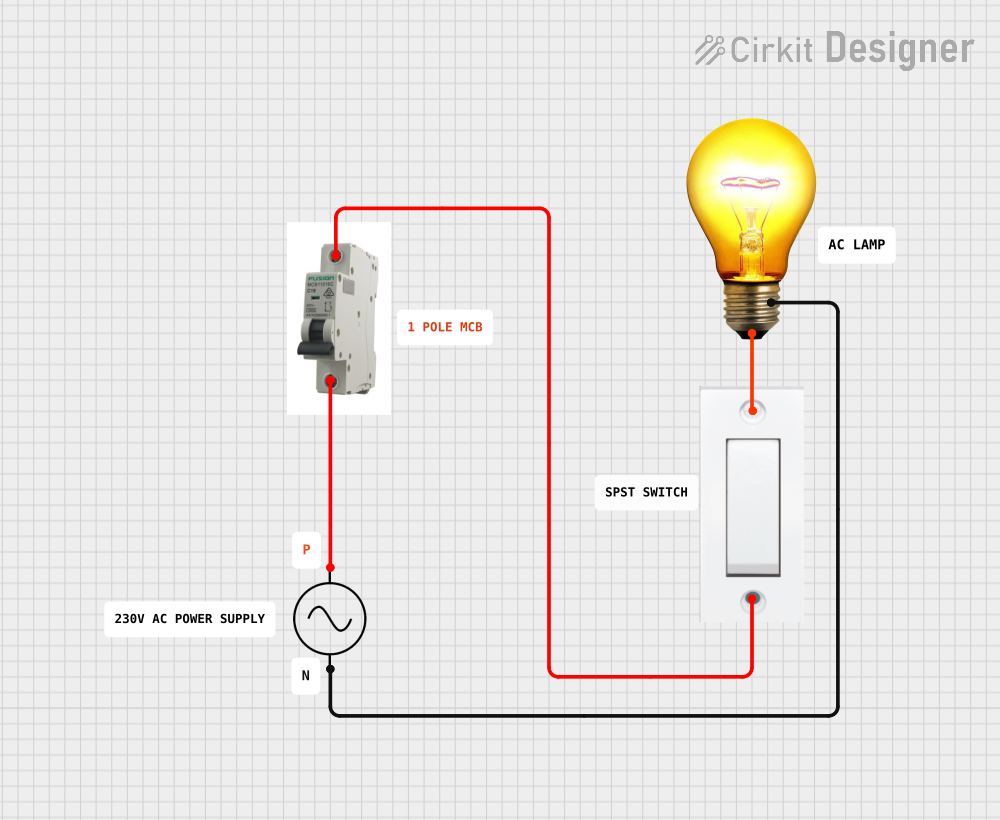
Explore Projects Built with Small Bulb with holder
Common Applications:
- Indicator lights in control panels or appliances
- Decorative lighting in hobby projects
- Educational electronics kits
- Low-power lighting in model-making or prototypes
Technical Specifications
General Specifications:
| Parameter | Value/Range |
|---|---|
| Bulb Type | Incandescent or LED |
| Voltage Rating | 3V, 6V, 12V, or 24V (varies by model) |
| Current Rating | Typically 20mA to 100mA |
| Power Rating | 0.06W to 2.4W |
| Holder Material | Plastic or metal |
| Holder Mounting Type | Screw, clip, or panel mount |
Pin Configuration and Descriptions:
| Pin/Terminal | Description |
|---|---|
| Positive (+) | Connects to the positive terminal of the power source |
| Negative (-) | Connects to the negative terminal (ground) of the power source |
Note: The polarity is critical for LED bulbs but not for incandescent bulbs.
Usage Instructions
How to Use the Component in a Circuit:
- Identify the Voltage Rating: Check the bulb's voltage rating to ensure compatibility with your power source.
- Connect the Terminals:
- For LED bulbs, connect the positive terminal of the holder to the positive side of the power source and the negative terminal to the ground.
- For incandescent bulbs, polarity does not matter; connect the terminals to the power source.
- Secure the Holder: Mount the holder securely using screws, clips, or a panel mount, depending on the design.
- Power the Circuit: Turn on the power source to illuminate the bulb.
Important Considerations and Best Practices:
- Voltage Matching: Always use a power source that matches the bulb's voltage rating to avoid damage.
- Current Limiting for LEDs: If using an LED bulb, include a current-limiting resistor in series to prevent overcurrent. Use the formula ( R = \frac{V_{supply} - V_{LED}}{I_{LED}} ) to calculate the resistor value.
- Heat Management: Incandescent bulbs can generate heat; ensure proper ventilation to avoid overheating.
- Polarity Check: For LED bulbs, ensure correct polarity to avoid damage.
Example: Connecting to an Arduino UNO
You can use a small LED bulb with a holder as an indicator light in an Arduino project. Below is an example circuit and code:
Circuit:
- Connect the positive terminal of the bulb holder to a digital pin on the Arduino (e.g., pin 13) through a 220-ohm resistor.
- Connect the negative terminal of the bulb holder to the Arduino's GND pin.
Code:
// Small LED bulb example with Arduino UNO
// This code blinks the bulb connected to pin 13 every second.

const int bulbPin = 13; // Define the pin connected to the bulb

void setup() {
  pinMode(bulbPin, OUTPUT); // Set the bulb pin as an output
}

void loop() {
  digitalWrite(bulbPin, HIGH); // Turn the bulb ON
  delay(1000);                 // Wait for 1 second
  digitalWrite(bulbPin, LOW);  // Turn the bulb OFF
  delay(1000);                 // Wait for 1 second
}
Troubleshooting and FAQs
Common Issues:
Bulb Does Not Light Up:
- Cause: Incorrect voltage or loose connections.
- Solution: Verify the power source voltage matches the bulb's rating and check all connections.
LED Bulb Flickers:
- Cause: Insufficient current or unstable power supply.
- Solution: Add a current-limiting resistor and ensure a stable power source.
Bulb Overheats:
- Cause: Excessive voltage or prolonged use without ventilation.
- Solution: Use the correct voltage and ensure proper ventilation.
LED Bulb Does Not Work:
- Cause: Incorrect polarity.
- Solution: Reverse the connections to the LED bulb.
FAQs:
Q: Can I use a 12V bulb with a 5V power source?
A: No, the bulb will not light up properly. Always match the bulb's voltage rating with the power source.Q: Do I need a resistor for an incandescent bulb?
A: No, resistors are not required for incandescent bulbs, but they are necessary for LED bulbs to limit current.Q: Can I use this component outdoors?
A: Only if the holder and bulb are rated for outdoor use and protected from moisture.Q: How do I calculate the resistor value for an LED bulb?
A: Use the formula ( R = \frac{V_{supply} - V_{LED}}{I_{LED}} ), where ( V_{supply} ) is the power source voltage, ( V_{LED} ) is the LED's forward voltage, and ( I_{LED} ) is the LED's current rating.
This documentation provides all the necessary details to effectively use a small bulb with a holder in various applications.