
How to Use Sound sensor: Examples, Pinouts, and Specs
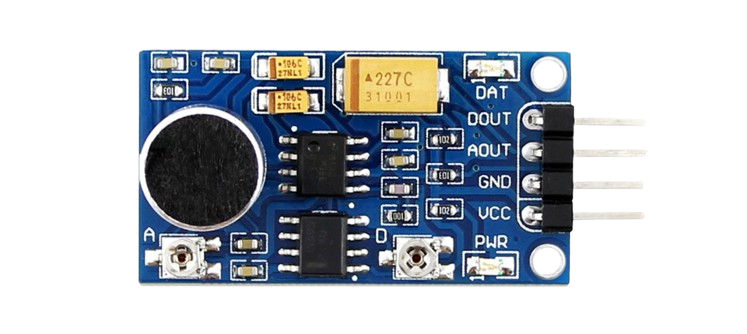
 Design with Sound sensor in Cirkit Designer
Introduction
A sound sensor is a device that detects sound levels and converts them into an electrical signal. It typically consists of a microphone, an amplifier, and a signal processing circuit. Sound sensors are widely used in applications such as voice recognition systems, noise monitoring, and automation systems where sound-based triggers are required. These sensors are ideal for projects involving audio detection, sound-activated devices, or environmental noise analysis.
Explore Projects Built with Sound sensor
 Open Project in Cirkit Designer
 Open Project in Cirkit Designer
 Open Project in Cirkit Designer
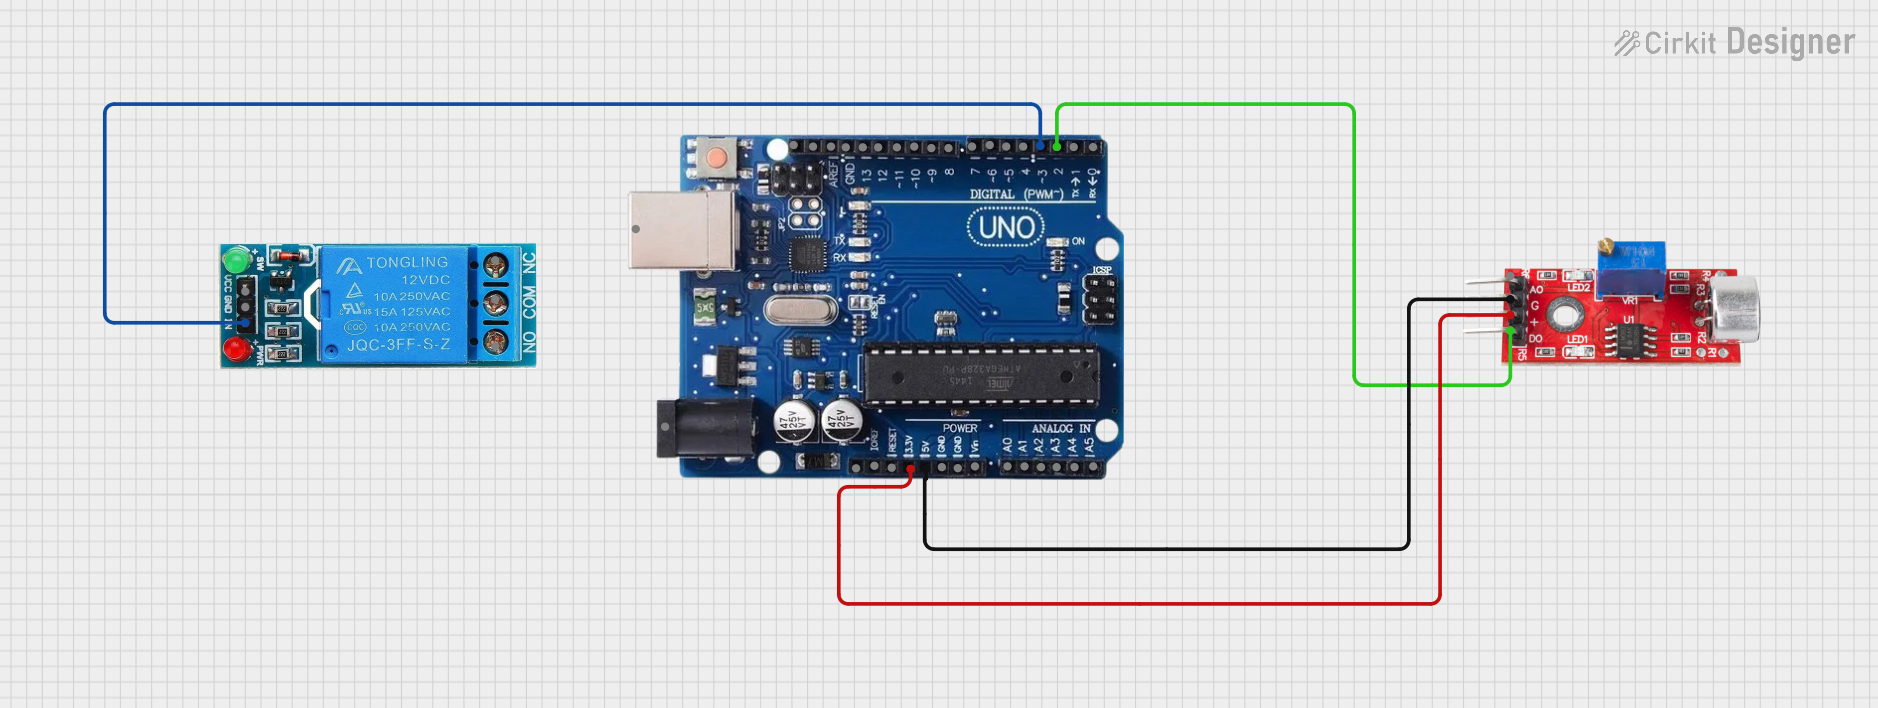
 Open Project in Cirkit Designer
Explore Projects Built with Sound sensor

 Open Project in Cirkit Designer
 Open Project in Cirkit Designer
 Open Project in Cirkit Designer
 Open Project in Cirkit Designer
Technical Specifications
Below are the key technical details of a typical sound sensor module:
- Operating Voltage: 3.3V to 5V DC
- Current Consumption: ≤ 5mA
- Output Type: Analog and Digital
- Microphone Type: Electret Condenser Microphone
- Sensitivity: Adjustable via onboard potentiometer
- Dimensions: ~32mm x 15mm x 8mm
Pin Configuration and Descriptions
The sound sensor module typically has three or four pins. Below is a table describing the pin configuration:
| Pin Name | Description |
|---|---|
| VCC | Power supply pin. Connect to 3.3V or 5V DC. |
| GND | Ground pin. Connect to the ground of the circuit. |
| AO | Analog output pin. Outputs a voltage proportional to the detected sound level. |
| DO | Digital output pin. Outputs HIGH or LOW based on the sound threshold set via the potentiometer. |
Usage Instructions
How to Use the Sound Sensor in a Circuit
- Power the Sensor: Connect the
VCCpin to a 3.3V or 5V power source and theGNDpin to the ground. - Choose Output Type:
- For analog output, connect the
AOpin to an analog input pin of your microcontroller. - For digital output, connect the
DOpin to a digital input pin of your microcontroller.
- For analog output, connect the
- Adjust Sensitivity: Use the onboard potentiometer to set the sound threshold for the digital output. Turning the potentiometer clockwise increases sensitivity, while turning it counterclockwise decreases it.
- Read the Output:
- For analog output, read the voltage level to determine the sound intensity.
- For digital output, monitor the HIGH/LOW signal to detect if the sound exceeds the threshold.
Important Considerations and Best Practices
- Power Supply: Ensure a stable power supply to avoid noise interference in the output signal.
- Placement: Place the sensor away from sources of electrical noise or vibrations for accurate sound detection.
- Threshold Adjustment: Fine-tune the potentiometer to match the desired sound sensitivity for your application.
- Signal Filtering: For precise measurements, consider adding a low-pass filter to the analog output to reduce high-frequency noise.
Example: Connecting to an Arduino UNO
Below is an example of how to use the sound sensor with an Arduino UNO to read both analog and digital outputs:
// Define pin connections
const int analogPin = A0;  // Analog output pin connected to A0
const int digitalPin = 2;  // Digital output pin connected to D2
const int ledPin = 13;     // Built-in LED for visual feedback

void setup() {
  pinMode(digitalPin, INPUT);  // Set digital pin as input
  pinMode(ledPin, OUTPUT);     // Set LED pin as output
  Serial.begin(9600);          // Initialize serial communication
}

void loop() {
  // Read analog value from the sound sensor
  int soundLevel = analogRead(analogPin);
  Serial.print("Analog Sound Level: ");
  Serial.println(soundLevel);

  // Read digital value from the sound sensor
  int soundDetected = digitalRead(digitalPin);
  if (soundDetected == HIGH) {
    digitalWrite(ledPin, HIGH);  // Turn on LED if sound is detected
    Serial.println("Sound detected!");
  } else {
    digitalWrite(ledPin, LOW);   // Turn off LED if no sound is detected
  }

  delay(100);  // Small delay for stability
}
Troubleshooting and FAQs
Common Issues and Solutions
No Output Signal:
- Ensure the sensor is powered correctly (check
VCCandGNDconnections). - Verify that the potentiometer is not set too low (increase sensitivity).
- Ensure the sensor is powered correctly (check
Inconsistent Readings:
- Check for electrical noise or interference in the circuit.
- Use a decoupling capacitor (e.g., 0.1µF) across the power supply pins to stabilize the voltage.
Digital Output Always HIGH or LOW:
- Adjust the potentiometer to set an appropriate sound threshold.
- Ensure the sound source is within the sensor's detection range.
Analog Output Not Changing:
- Verify the connection to the analog pin of the microcontroller.
- Test the sensor with a louder sound source to confirm functionality.
FAQs
Q: Can the sound sensor detect specific frequencies?
A: No, the sound sensor detects overall sound intensity and does not differentiate between frequencies. For frequency-specific detection, use a microphone with a frequency analysis circuit or software.
Q: How far can the sound sensor detect sound?
A: The detection range depends on the sound intensity and the sensor's sensitivity setting. Typically, it works best within a few meters of the sound source.
Q: Can I use the sound sensor outdoors?
A: While the sensor can be used outdoors, it should be protected from moisture, dust, and extreme temperatures to ensure reliable operation.
Q: Is the sound sensor suitable for voice recognition?
A: The sound sensor can detect sound levels but does not process or recognize speech. For voice recognition, additional hardware or software is required.