How to Use Coin Reader: Examples, Pinouts, and Specs
Introduction
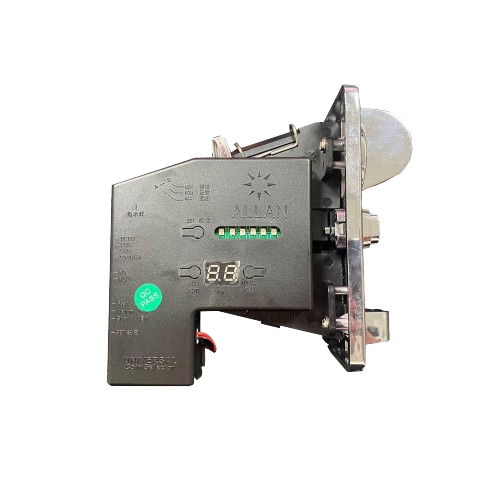
The Coin Reader (Model: c-02), manufactured by Allan, is a compact and reliable device designed to accept and validate coins. It is commonly used in vending machines, arcade games, parking meters, and other automated systems that require cash transactions. The Coin Reader ensures accurate coin recognition and rejection of counterfeit or invalid coins, making it an essential component for secure and efficient cash handling.
Explore Projects Built with Coin Reader
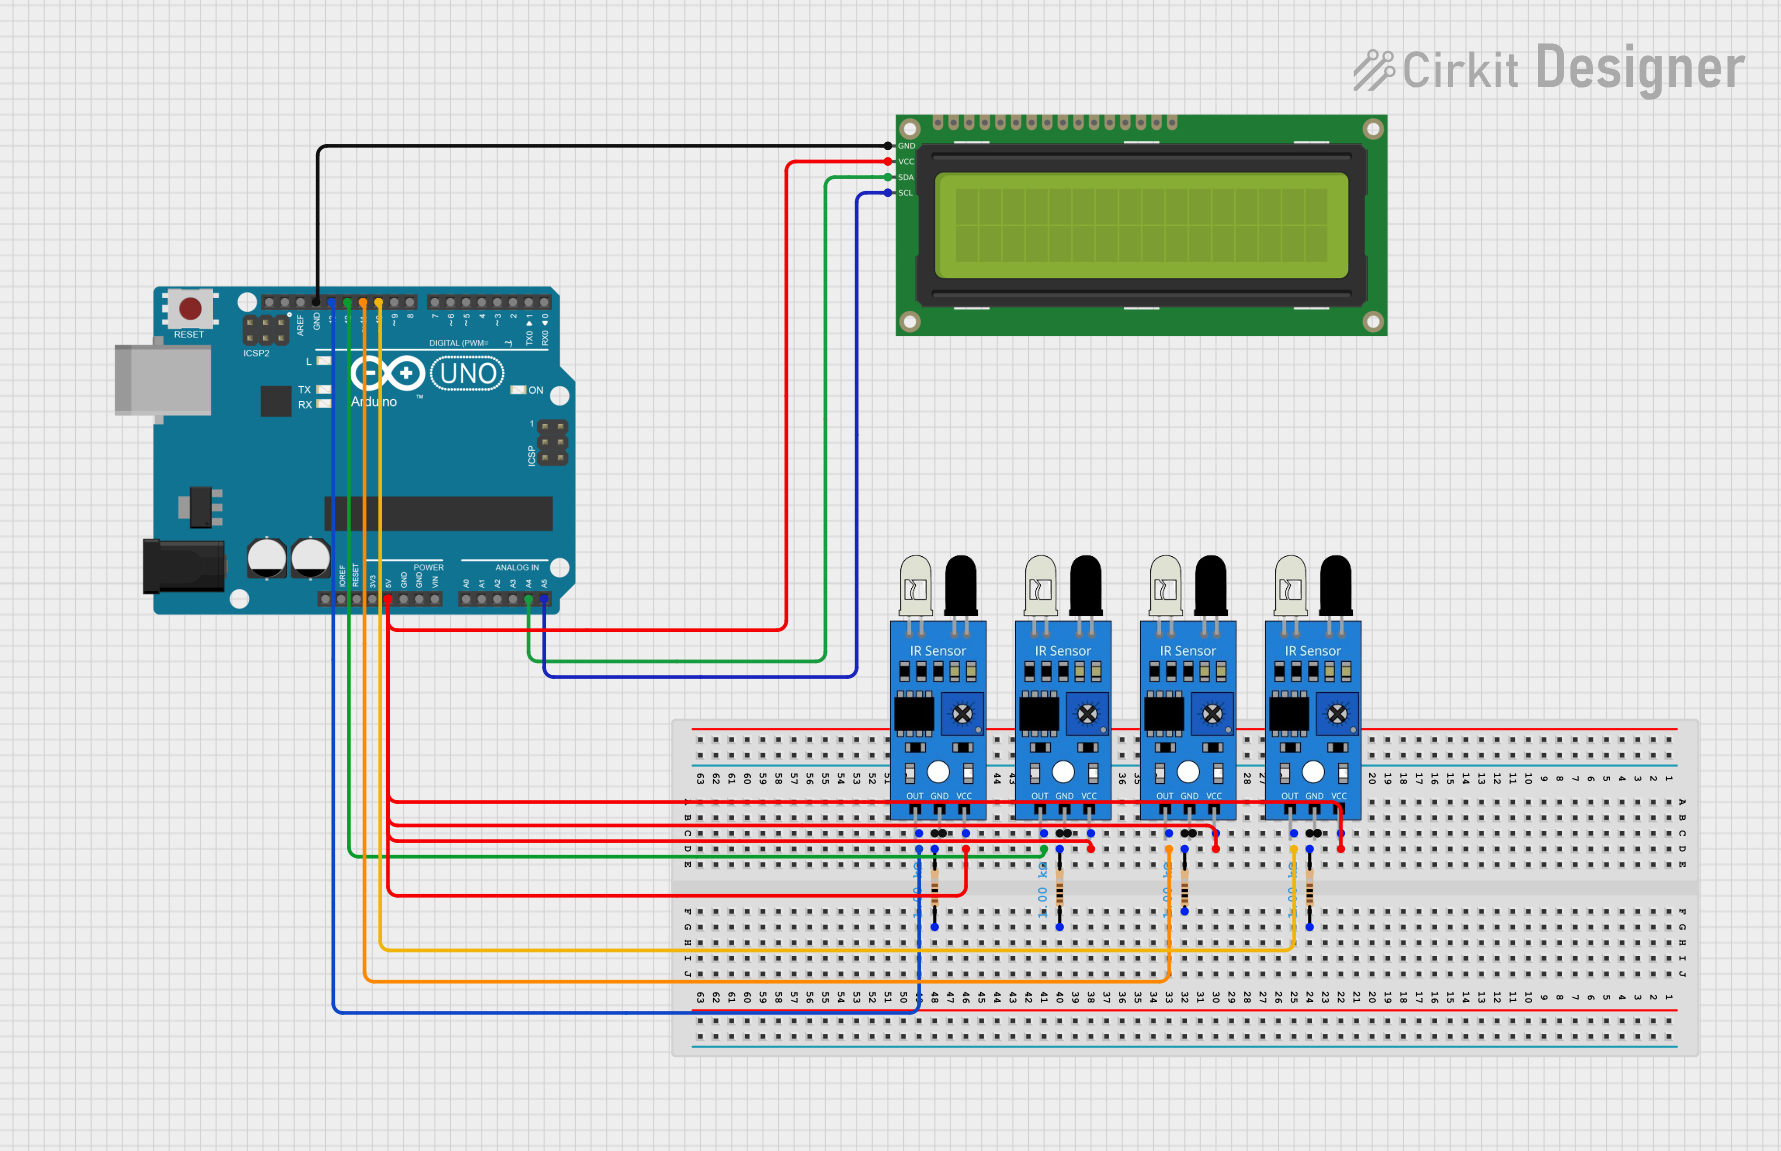

Explore Projects Built with Coin Reader
Common Applications:
- Vending machines
- Arcade and gaming machines
- Parking meters
- Laundromats
- Public transportation ticketing systems
Technical Specifications
The following table outlines the key technical details of the Coin Reader (c-02):
| Parameter | Specification |
|---|---|
| Operating Voltage | 5V DC ± 10% |
| Operating Current | 50mA (idle), 200mA (active) |
| Coin Diameter Range | 18mm to 31mm |
| Coin Thickness Range | 1.2mm to 3.2mm |
| Coin Validation Speed | < 0.5 seconds per coin |
| Output Signal | Pulse signal (TTL logic) |
| Interface | 3-pin connector (VCC, GND, OUT) |
| Operating Temperature | -10°C to 60°C |
| Dimensions | 90mm x 60mm x 30mm |
| Weight | 120g |
Pin Configuration and Descriptions
The Coin Reader has a 3-pin interface for easy integration into circuits. The pin configuration is as follows:
| Pin | Name | Description |
|---|---|---|
| 1 | VCC | Power supply input (5V DC) |
| 2 | GND | Ground connection |
| 3 | OUT | Output signal pin (sends a pulse for each valid coin) |
Usage Instructions
How to Use the Coin Reader in a Circuit
- Power Supply: Connect the VCC pin to a regulated 5V DC power source and the GND pin to the ground of your circuit.
- Output Signal: Connect the OUT pin to a microcontroller or other processing unit to read the pulse signal generated for each valid coin.
- Mounting: Secure the Coin Reader in a stable position to ensure proper coin insertion and validation.
- Calibration: If required, calibrate the Coin Reader to accept specific coin types using the manufacturer's instructions.
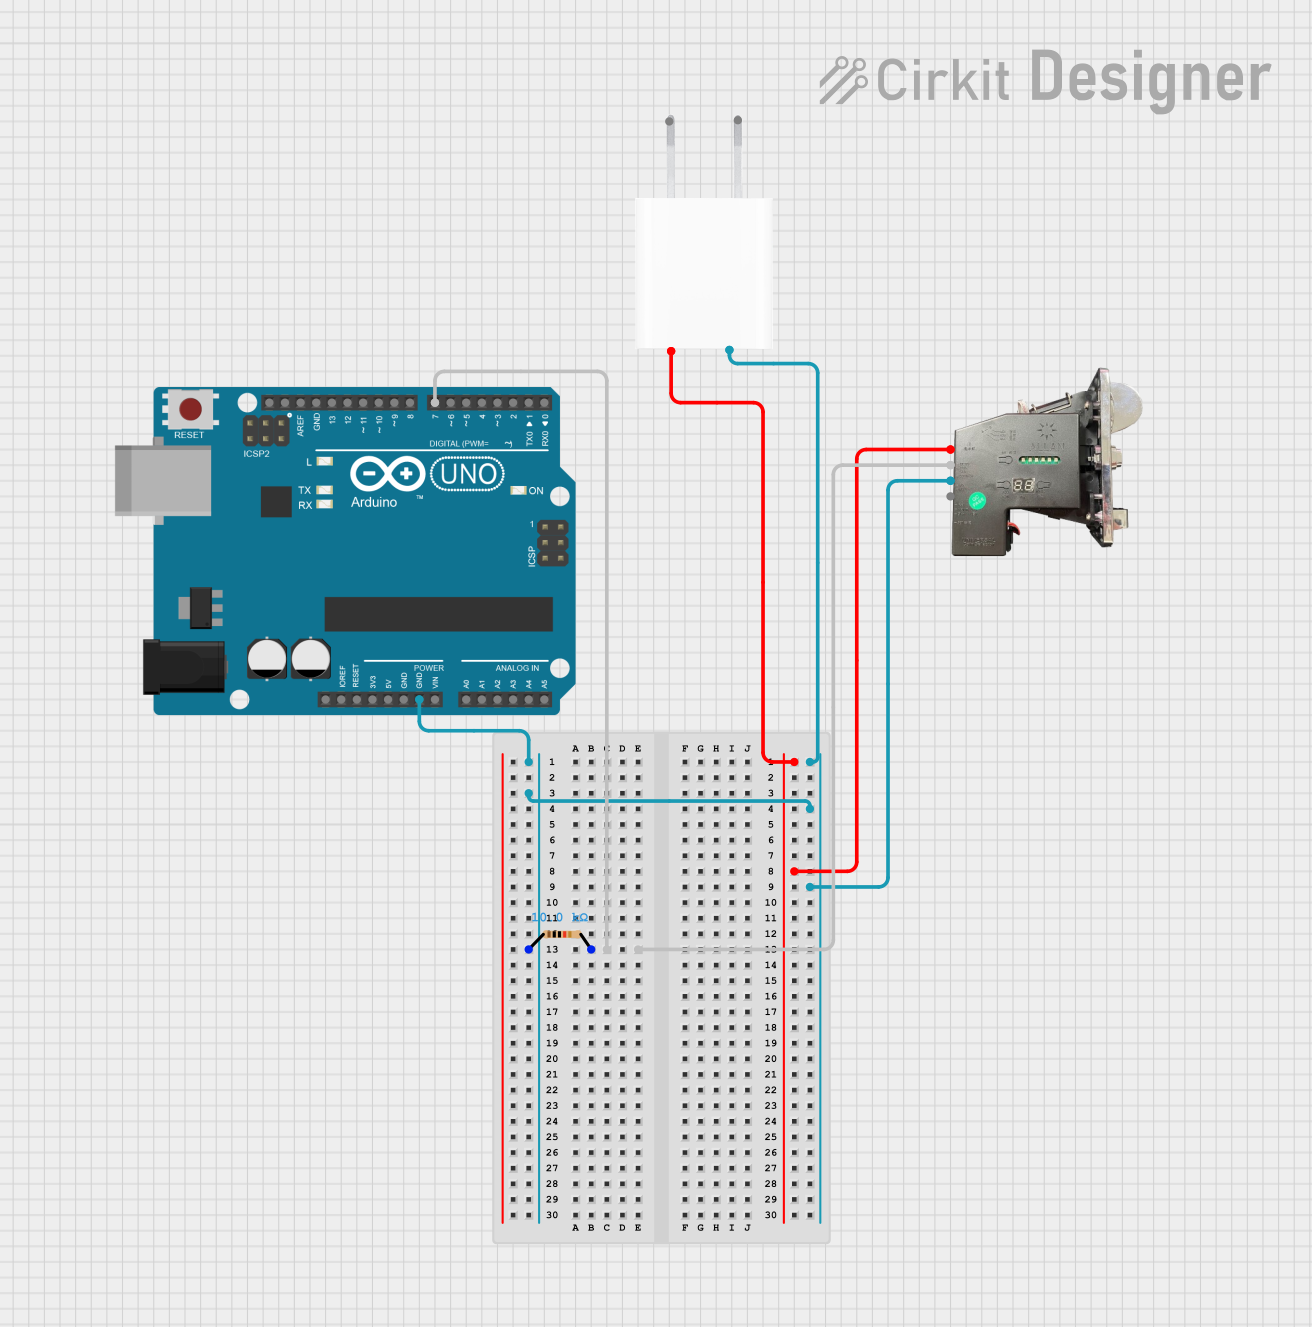
Example Circuit with Arduino UNO
The Coin Reader can be easily interfaced with an Arduino UNO to count coins. Below is an example code snippet:
// Coin Reader Example with Arduino UNO
// This code counts the number of valid coins inserted and displays the count
// on the Serial Monitor.

const int coinPin = 2;  // OUT pin of the Coin Reader connected to digital pin 2
volatile int coinCount = 0;  // Variable to store the coin count

void setup() {
  pinMode(coinPin, INPUT);  // Set the coin pin as input
  attachInterrupt(digitalPinToInterrupt(coinPin), countCoin, RISING);
  // Attach an interrupt to detect rising edge pulses from the Coin Reader
  Serial.begin(9600);  // Initialize Serial communication
}

void loop() {
  Serial.print("Coins Inserted: ");
  Serial.println(coinCount);  // Display the coin count
  delay(1000);  // Update every second
}

// Interrupt Service Routine (ISR) to increment coin count
void countCoin() {
  coinCount++;  // Increment the coin count for each valid coin detected
}
Important Considerations and Best Practices
- Ensure the power supply is stable and within the specified voltage range (5V DC ± 10%).
- Avoid exposing the Coin Reader to excessive dust, moisture, or extreme temperatures.
- Regularly clean the coin slot to prevent dirt or debris from affecting performance.
- Use proper mounting to avoid vibrations or misalignment during operation.
- If using with a microcontroller, debounce the input signal in software to avoid false triggers.
Troubleshooting and FAQs
Common Issues and Solutions
Issue: The Coin Reader does not power on.
- Solution: Check the power supply connection and ensure it provides 5V DC. Verify the polarity of the VCC and GND connections.
Issue: The Coin Reader rejects valid coins.
- Solution: Ensure the coins meet the specified diameter and thickness range. Clean the coin slot and check for obstructions.
Issue: No output signal is generated for valid coins.
- Solution: Verify the connection between the OUT pin and the microcontroller. Check if the microcontroller's input pin is configured correctly.
Issue: The Coin Reader generates multiple pulses for a single coin.
- Solution: Implement software debouncing in your microcontroller code to filter out false triggers.
FAQs
Q1: Can the Coin Reader be used with coins of different currencies?
A1: Yes, but the Coin Reader must be calibrated to recognize the specific dimensions and properties of the coins you intend to use.
Q2: What happens if an invalid coin is inserted?
A2: The Coin Reader will reject the coin, and no output signal will be generated.
Q3: Can the Coin Reader be powered by a battery?
A3: Yes, as long as the battery provides a stable 5V DC output within the specified voltage range.
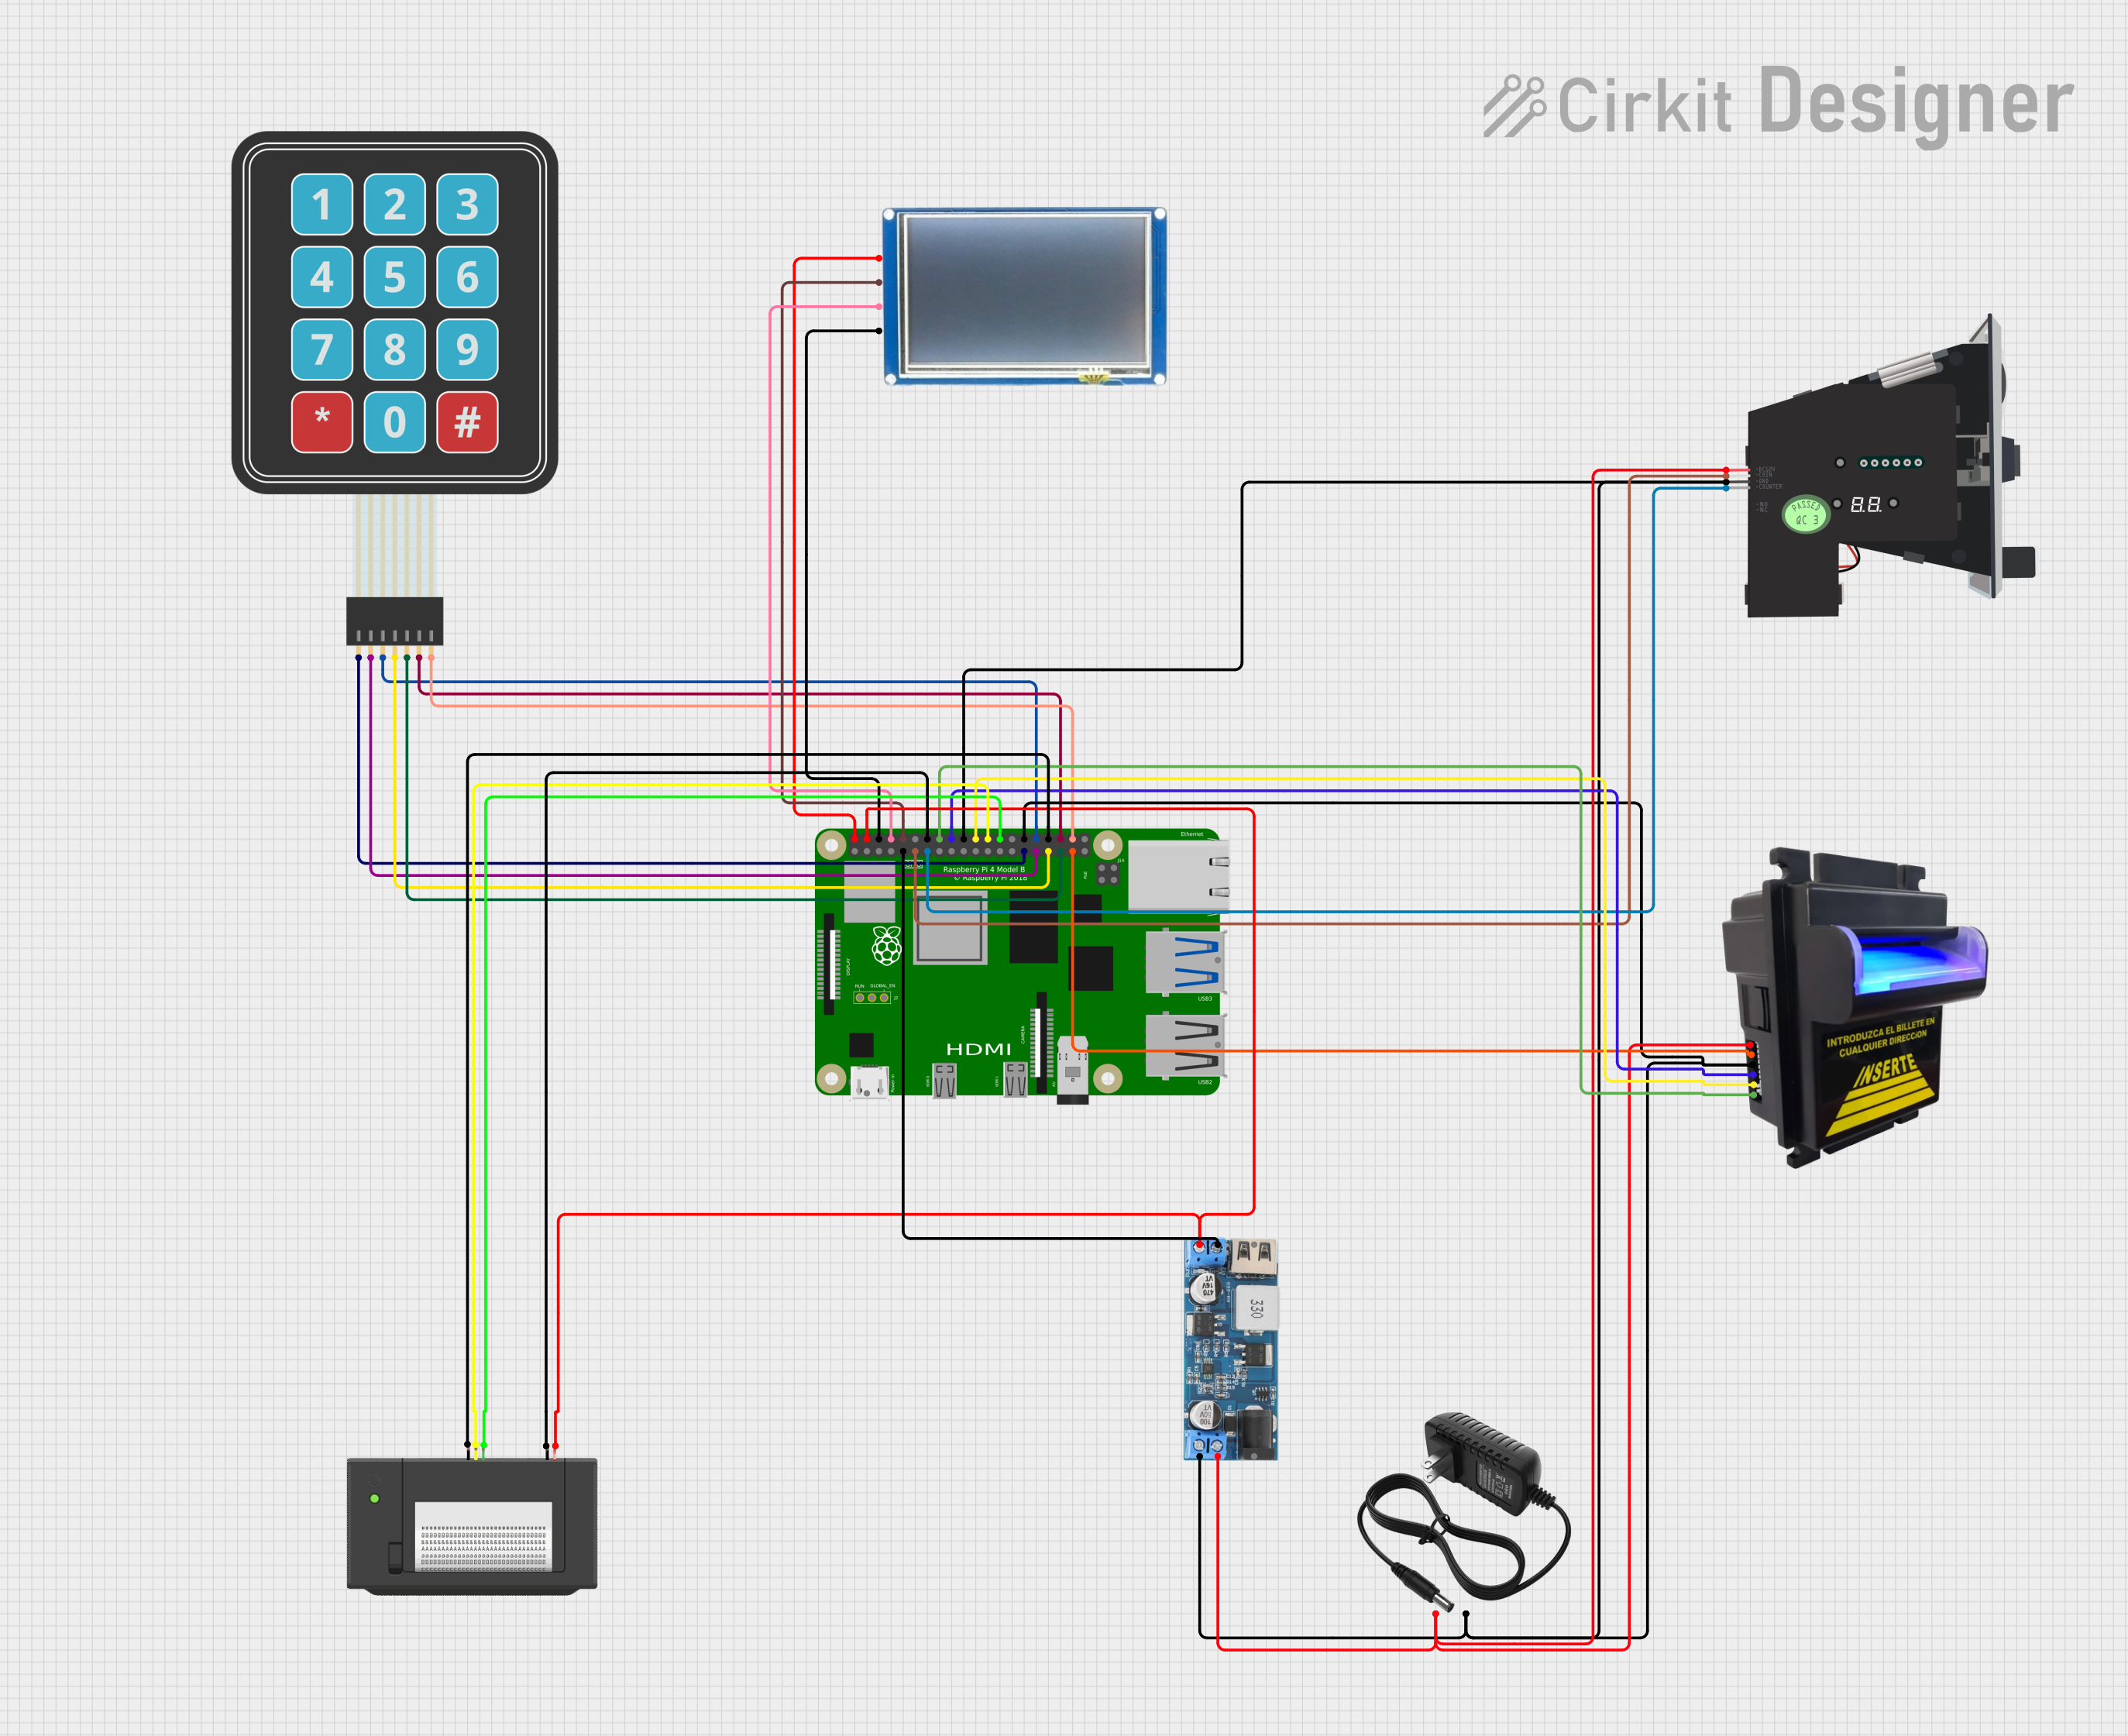
Q4: Is the Coin Reader compatible with Raspberry Pi?
A4: Yes, the Coin Reader can be interfaced with a Raspberry Pi using GPIO pins to read the output signal.
By following this documentation, you can effectively integrate and troubleshoot the Allan c-02 Coin Reader in your projects.