Cirkit Designer Logo
Cirkit Designer
Your all-in-one circuit design IDE
Home / 
Component Documentation

How to Use BME BMP280: Examples, Pinouts, and Specs

Image of BME BMP280
Cirkit Designer LogoDesign with BME BMP280 in Cirkit Designer

Introduction

The BME BMP280 is a high-precision, low-power barometric pressure and temperature sensor. It is widely used in weather monitoring, altitude measurement, and environmental sensing applications. The sensor is designed for both I2C and SPI communication, making it versatile and easy to integrate into various microcontroller-based projects.

Common applications include:

  • Weather stations
  • Altimeters for drones and other vehicles
  • IoT environmental monitoring systems
  • HVAC systems for indoor climate control

Explore Projects Built with BME BMP280

Use Cirkit Designer to design, explore, and prototype these projects online. Some projects support real-time simulation. Click "Open Project" to start designing instantly!
ESP32-Based Environmental Sensing Station with Wi-Fi and Light Intensity Measurement
Image of multi esp32: A project utilizing BME BMP280 in a practical application
This circuit is designed to collect environmental data and light intensity measurements using the ESP32 microcontroller, which communicates with a BME/BMP280 sensor and a BH1750 sensor via I2C, and transmits the data through an LD2410C communication module using serial communication.
Cirkit Designer LogoOpen Project in Cirkit Designer
ESP32-Based Environmental Monitoring System with Solar Charging
Image of IoT Ola (Final): A project utilizing BME BMP280 in a practical application
This circuit features an ESP32 microcontroller interfaced with a BME/BMP280 sensor for environmental monitoring and an MH-Z19B sensor for CO2 measurement, both communicating via I2C (SCL, SDA) and serial (TX, RX) connections respectively. It includes a SIM800L module for GSM communication, connected to the ESP32 via serial (TXD, RXD). Power management is handled by two TP4056 modules for charging 18650 Li-ion batteries via solar panels, with a step-up boost converter to provide consistent voltage to the MH-Z19B, and voltage regulation for the SIM800L. Decoupling capacitors are used to stabilize the power supply to the BME/BMP280 and ESP32.
Cirkit Designer LogoOpen Project in Cirkit Designer
ESP32-Based BMP280 Barometric Pressure Sensor Interface
Image of ESP_BME280_sajat_I2C_port: A project utilizing BME BMP280 in a practical application
This circuit connects an ESP32 Wroom Dev Kit microcontroller with a BMP280 sensor. The ESP32 provides a 3.3V power supply to the BMP280 and interfaces with it using I2C communication protocol, with GPIO 32 and GPIO 33 serving as the SCL and SDA lines, respectively. The purpose of this circuit is likely to read atmospheric pressure and temperature data from the BMP280 sensor for processing or communication by the ESP32.
Cirkit Designer LogoOpen Project in Cirkit Designer
ESP32-Based BMP280 Barometric Pressure Sensor Interface
Image of Esp32 and Bmp280: A project utilizing BME BMP280 in a practical application
This circuit connects an ESP32 development board with a BMP280 sensor. The ESP32 provides power to the BMP280 and communicates with it via I2C, using GPIO 22 and GPIO 21 as the serial clock line (SCL) and serial data line (SDA), respectively. The purpose of this circuit is likely to read atmospheric pressure and temperature data from the BMP280 sensor.
Cirkit Designer LogoOpen Project in Cirkit Designer

Explore Projects Built with BME BMP280

Use Cirkit Designer to design, explore, and prototype these projects online. Some projects support real-time simulation. Click "Open Project" to start designing instantly!
Image of multi esp32: A project utilizing BME BMP280 in a practical application
ESP32-Based Environmental Sensing Station with Wi-Fi and Light Intensity Measurement
This circuit is designed to collect environmental data and light intensity measurements using the ESP32 microcontroller, which communicates with a BME/BMP280 sensor and a BH1750 sensor via I2C, and transmits the data through an LD2410C communication module using serial communication.
Cirkit Designer LogoOpen Project in Cirkit Designer
Image of IoT Ola (Final): A project utilizing BME BMP280 in a practical application
ESP32-Based Environmental Monitoring System with Solar Charging
This circuit features an ESP32 microcontroller interfaced with a BME/BMP280 sensor for environmental monitoring and an MH-Z19B sensor for CO2 measurement, both communicating via I2C (SCL, SDA) and serial (TX, RX) connections respectively. It includes a SIM800L module for GSM communication, connected to the ESP32 via serial (TXD, RXD). Power management is handled by two TP4056 modules for charging 18650 Li-ion batteries via solar panels, with a step-up boost converter to provide consistent voltage to the MH-Z19B, and voltage regulation for the SIM800L. Decoupling capacitors are used to stabilize the power supply to the BME/BMP280 and ESP32.
Cirkit Designer LogoOpen Project in Cirkit Designer
Image of ESP_BME280_sajat_I2C_port: A project utilizing BME BMP280 in a practical application
ESP32-Based BMP280 Barometric Pressure Sensor Interface
This circuit connects an ESP32 Wroom Dev Kit microcontroller with a BMP280 sensor. The ESP32 provides a 3.3V power supply to the BMP280 and interfaces with it using I2C communication protocol, with GPIO 32 and GPIO 33 serving as the SCL and SDA lines, respectively. The purpose of this circuit is likely to read atmospheric pressure and temperature data from the BMP280 sensor for processing or communication by the ESP32.
Cirkit Designer LogoOpen Project in Cirkit Designer
Image of Esp32 and Bmp280: A project utilizing BME BMP280 in a practical application
ESP32-Based BMP280 Barometric Pressure Sensor Interface
This circuit connects an ESP32 development board with a BMP280 sensor. The ESP32 provides power to the BMP280 and communicates with it via I2C, using GPIO 22 and GPIO 21 as the serial clock line (SCL) and serial data line (SDA), respectively. The purpose of this circuit is likely to read atmospheric pressure and temperature data from the BMP280 sensor.
Cirkit Designer LogoOpen Project in Cirkit Designer

Technical Specifications

The BME BMP280 sensor offers the following key specifications:

Parameter Value
Operating Voltage 1.71V to 3.6V
Interface I2C (up to 3.4 MHz) / SPI
Pressure Measurement 300 hPa to 1100 hPa
Temperature Measurement -40°C to +85°C
Pressure Resolution 0.16 Pa
Temperature Resolution 0.01°C
Power Consumption 2.7 µA (in normal mode)
Dimensions 2.0 mm x 2.5 mm x 0.95 mm

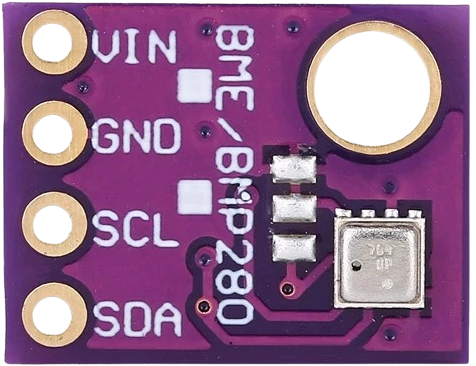
Pin Configuration and Descriptions

The BME BMP280 typically comes in a breakout board format. Below is the pinout for the sensor:

Pin Name Description
VCC Power supply pin (1.71V to 3.6V). Connect to the 3.3V pin of your microcontroller.
GND Ground pin. Connect to the ground of your circuit.
SCL Serial Clock Line for I2C or SPI clock input.
SDA Serial Data Line for I2C or SPI data input/output.
CSB Chip Select for SPI communication. Pull high for I2C mode.
SDO Serial Data Output for SPI or I2C address selection.

Usage Instructions

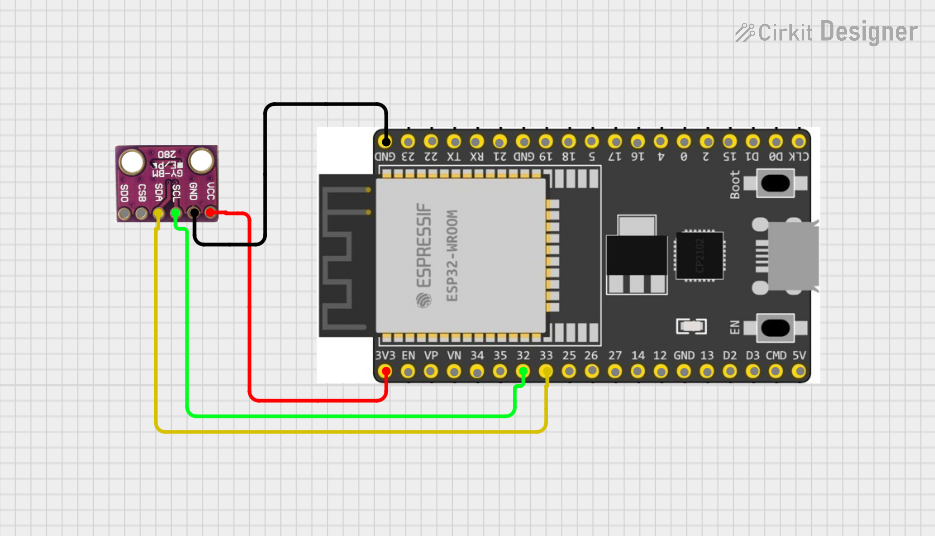
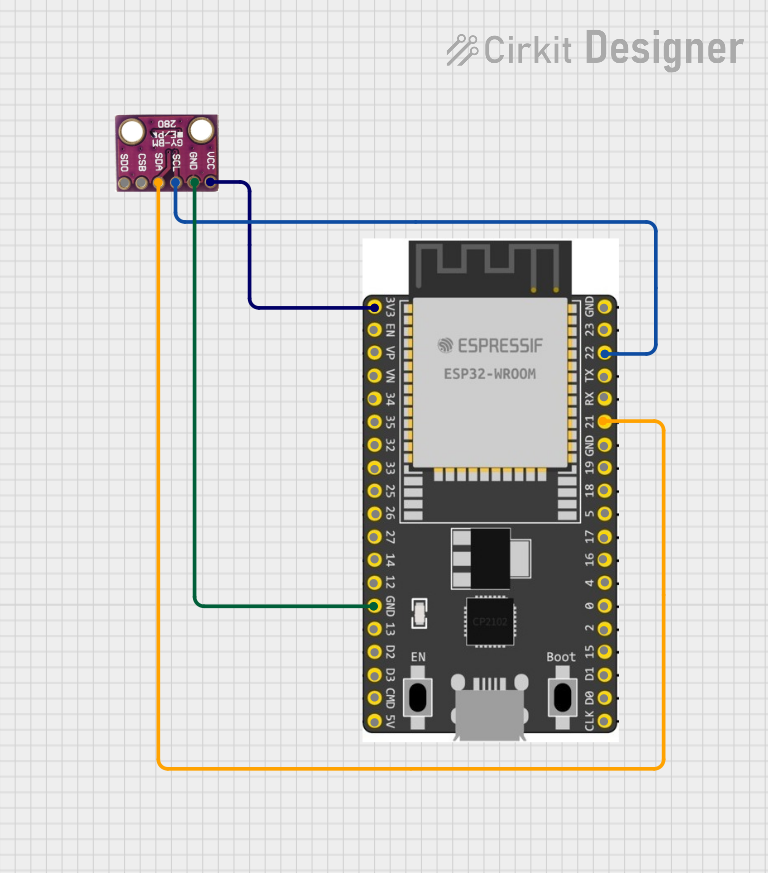
Connecting the BME BMP280 to an Arduino UNO

The BME BMP280 can be easily connected to an Arduino UNO using the I2C interface. Below is the wiring guide:

BME BMP280 Pin Arduino UNO Pin
VCC 3.3V
GND GND
SCL A5 (SCL)
SDA A4 (SDA)
CSB Pull high (3.3V)
SDO Leave unconnected or connect to GND for default I2C address (0x76).

Sample Arduino Code

The following code demonstrates how to read temperature and pressure data from the BME BMP280 using the Adafruit BMP280 library.

#include <Wire.h>
#include <Adafruit_Sensor.h>
#include <Adafruit_BMP280.h>

// Create an instance of the BMP280 sensor
Adafruit_BMP280 bmp; 

void setup() {
  Serial.begin(9600);
  // Initialize the BMP280 sensor
  if (!bmp.begin(0x76)) { 
    // Check if the sensor is connected at I2C address 0x76
    Serial.println("Could not find a valid BMP280 sensor, check wiring!");
    while (1); // Halt the program if the sensor is not detected
  }

  // Configure the sensor settings
  bmp.setSampling(Adafruit_BMP280::MODE_NORMAL,      // Normal mode
                  Adafruit_BMP280::SAMPLING_X2,      // Temperature oversampling x2
                  Adafruit_BMP280::SAMPLING_X16,     // Pressure oversampling x16
                  Adafruit_BMP280::FILTER_X16,       // Filter coefficient x16
                  Adafruit_BMP280::STANDBY_MS_500);  // Standby time 500ms
}

void loop() {
  // Read temperature and pressure data
  float temperature = bmp.readTemperature();
  float pressure = bmp.readPressure();

  // Print the data to the Serial Monitor
  Serial.print("Temperature = ");
  Serial.print(temperature);
  Serial.println(" *C");

  Serial.print("Pressure = ");
  Serial.print(pressure / 100.0); // Convert pressure from Pa to hPa
  Serial.println(" hPa");

  delay(1000); // Wait for 1 second before the next reading
}

Important Considerations

  • Ensure the sensor operates at 3.3V. Connecting it to 5V may damage the sensor.
  • Use pull-up resistors (typically 4.7kΩ) on the SDA and SCL lines if they are not already included on the breakout board.
  • The default I2C address is 0x76. If the SDO pin is connected to VCC, the address changes to 0x77.

Troubleshooting and FAQs

Common Issues

  1. Sensor not detected:

    • Ensure the wiring is correct and matches the pinout table.
    • Verify that the I2C address (default 0x76) matches the address in your code.
    • Check for loose connections or damaged wires.
  2. Incorrect readings:

    • Ensure the sensor is not exposed to extreme environmental conditions beyond its operating range.
    • Verify that the sensor is properly calibrated using the library's configuration functions.
  3. Arduino hangs or crashes:

    • Ensure the sensor is powered with 3.3V and not 5V.
    • Check for proper pull-up resistors on the I2C lines.

FAQs

Q: Can the BME BMP280 measure humidity?
A: No, the BMP280 measures only temperature and pressure. For humidity measurements, use the BME280 sensor.

Q: Can I use the BMP280 with a 5V microcontroller?
A: Yes, but you must use a logic level shifter to convert the 5V signals to 3.3V for the sensor.

Q: How do I switch between I2C and SPI modes?
A: For I2C mode, pull the CSB pin high. For SPI mode, pull the CSB pin low and connect the SDO pin to the SPI MISO line.

By following this documentation, you can successfully integrate the BME BMP280 into your projects for accurate temperature and pressure measurements.