How to Use 12v to QC.30 Fast Charging: Examples, Pinouts, and Specs
Introduction
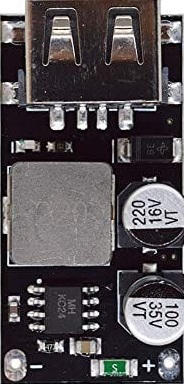
The 12V to QC 3.0 Fast Charging module is a power adapter designed to convert a 12-volt DC input into a Quick Charge 3.0-compatible output. This module enables rapid charging for devices that support Qualcomm's Quick Charge 3.0 standard, such as smartphones, tablets, and other portable electronics. It is an efficient and compact solution for integrating fast-charging capabilities into automotive, solar, or custom power systems.
Explore Projects Built with 12v to QC.30 Fast Charging


Explore Projects Built with 12v to QC.30 Fast Charging
Common Applications and Use Cases
- Automotive systems for charging QC 3.0-compatible devices directly from a 12V car battery.
- DIY power banks and portable charging stations.
- Solar-powered charging systems.
- Integration into custom electronics projects requiring fast-charging capabilities.
Technical Specifications
The following table outlines the key technical details of the 12V to QC 3.0 Fast Charging module:
| Parameter | Value |
|---|---|
| Input Voltage | 12V DC (±10%) |
| Output Voltage | 3.6V to 12V DC (dynamic, based on QC 3.0) |
| Output Current | Up to 3A |
| Power Output | Up to 36W |
| Efficiency | ≥ 90% |
| Quick Charge Standard | QC 3.0 (backward compatible with QC 2.0) |
| Operating Temperature | -20°C to 60°C |
| Dimensions | Varies by manufacturer (typically compact) |
Pin Configuration and Descriptions
The module typically includes the following pins or terminals for input and output connections:
| Pin/Terminal | Description |
|---|---|
| VIN+ | Positive input terminal for 12V DC power supply. |
| VIN- | Negative input terminal (ground). |
| USB Output Port | Standard USB-A or USB-C port for device charging. |
Usage Instructions
How to Use the Component in a Circuit
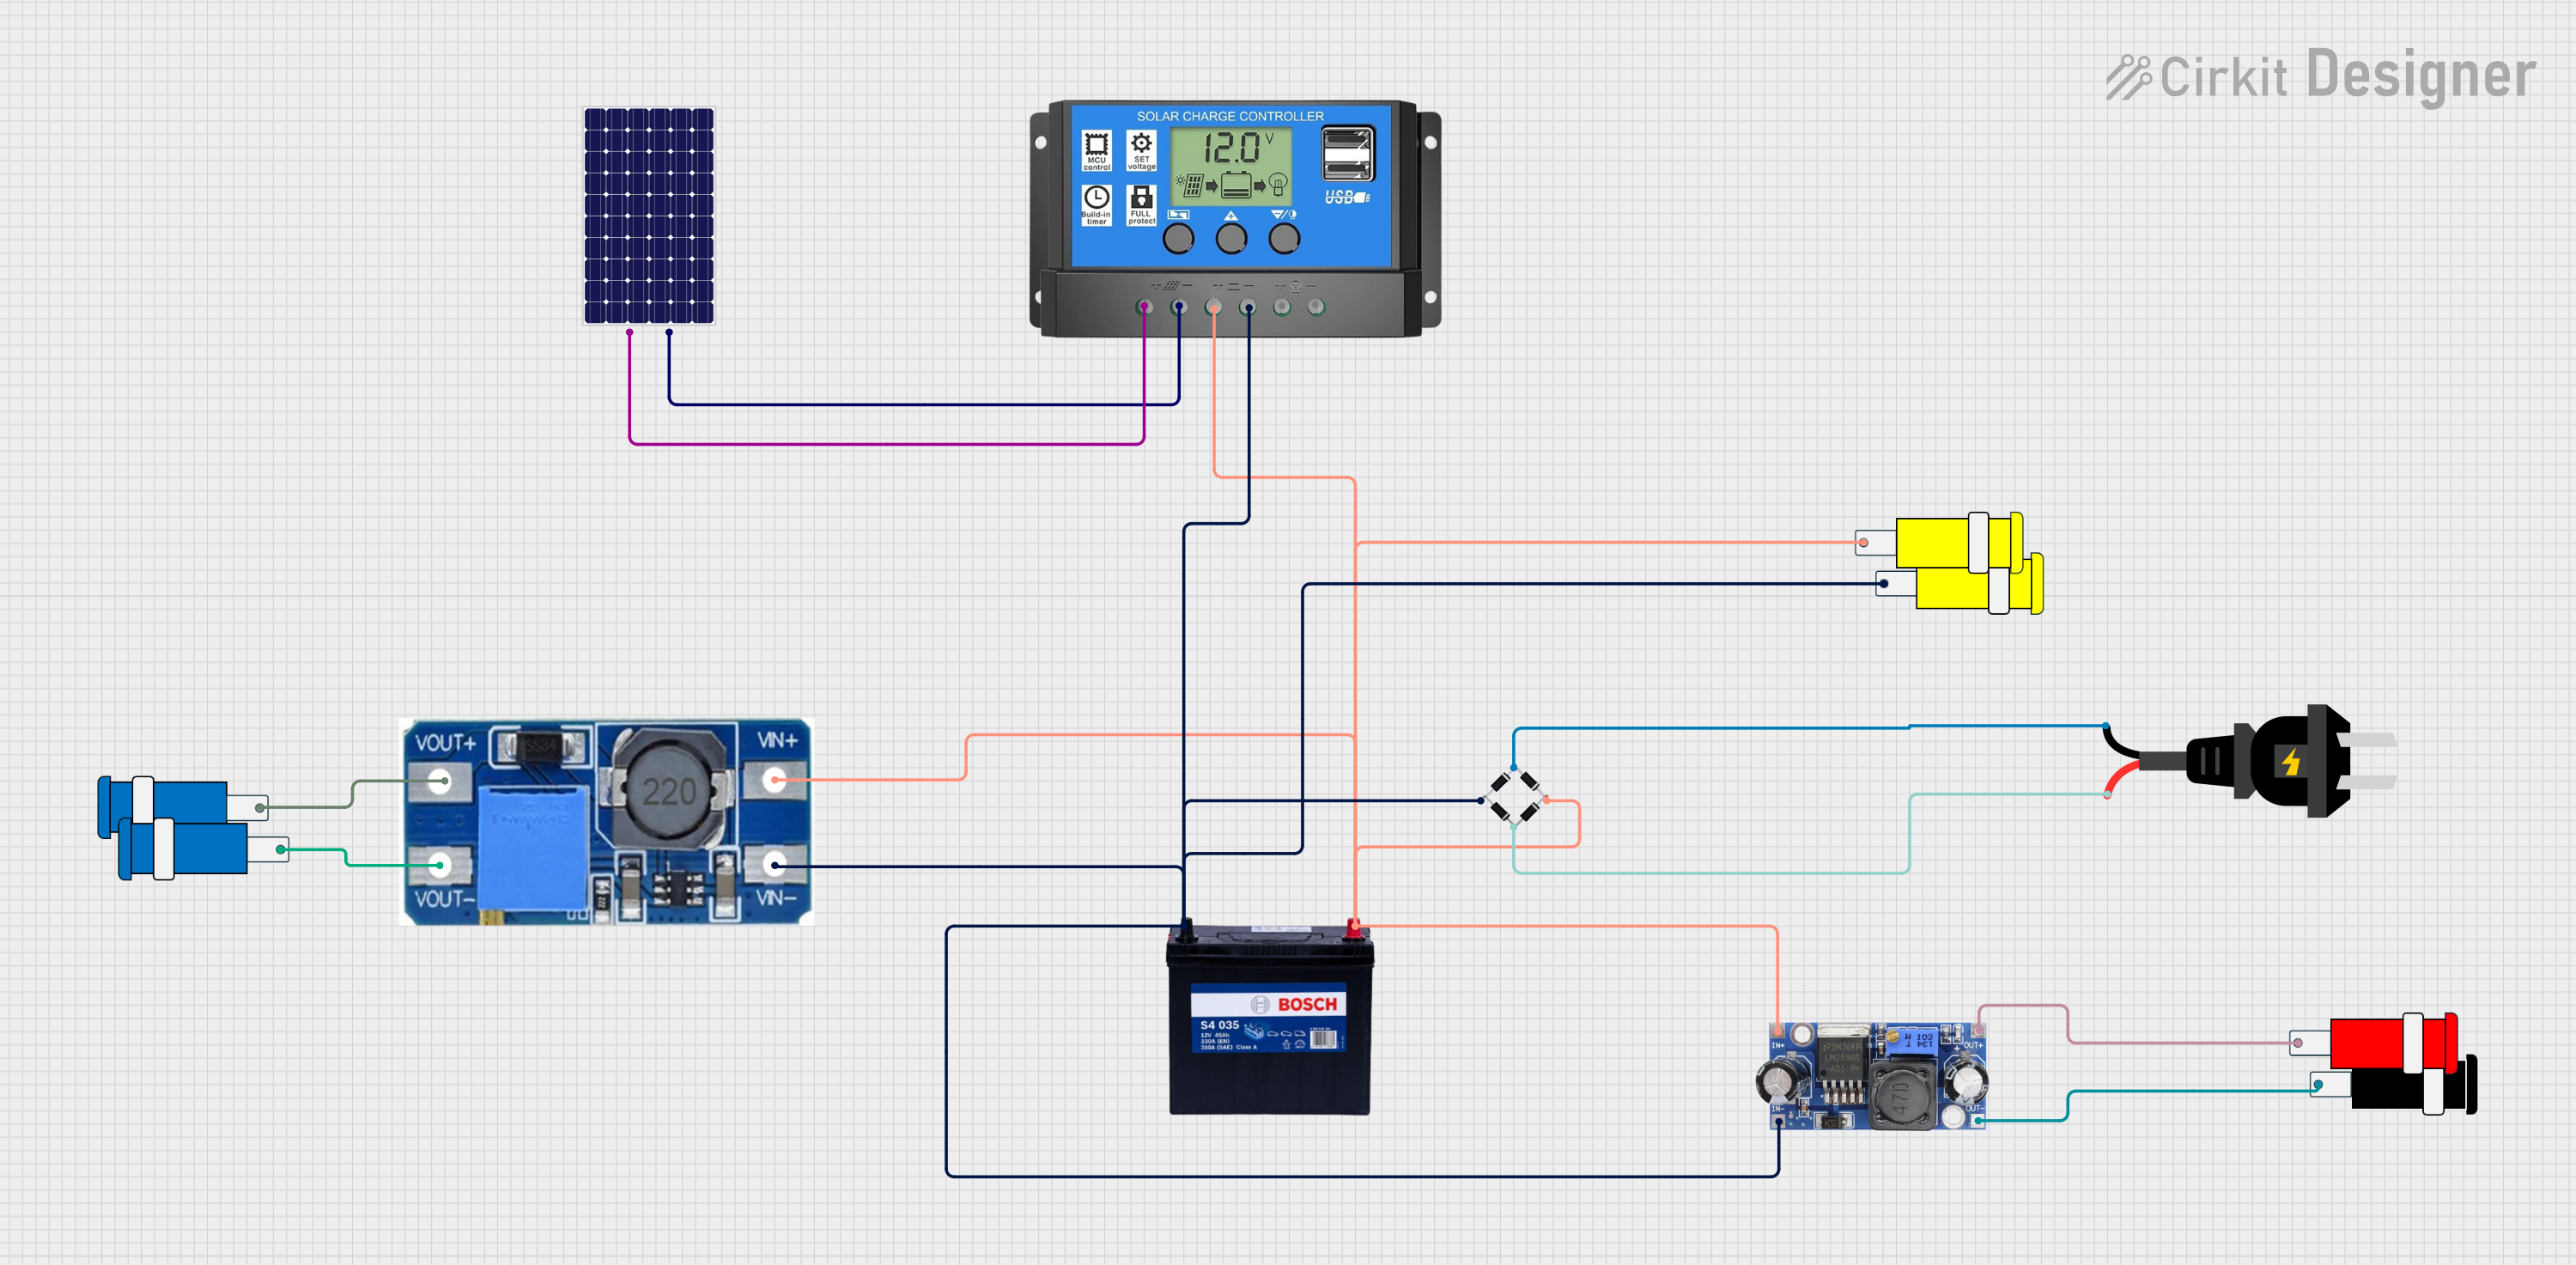
- Power Input: Connect the VIN+ and VIN- terminals to a 12V DC power source. This can be a car battery, a regulated DC power supply, or a solar panel system with a 12V output.
- Device Connection: Plug the device you want to charge into the USB output port of the module using a compatible cable.
- Automatic Voltage Adjustment: The module will automatically negotiate the appropriate voltage and current with the connected device, based on the QC 3.0 protocol.
Important Considerations and Best Practices
- Input Voltage Range: Ensure the input voltage remains within the specified range (12V ±10%) to avoid damage to the module or connected devices.
- Heat Dissipation: If the module is used at high power output for extended periods, ensure proper ventilation or heat sinking to prevent overheating.
- Device Compatibility: Verify that the connected device supports QC 3.0 or earlier versions of Quick Charge for optimal performance. Non-QC devices will charge at standard USB rates.
- Polarity: Double-check the polarity of the input connections (VIN+ and VIN-) to avoid damaging the module.
Example: Using with an Arduino UNO
While the 12V to QC 3.0 module is not directly programmable, it can be integrated into Arduino-based projects to provide power to peripherals. Below is an example of powering an Arduino UNO and a QC 3.0-compatible device simultaneously:
Circuit Setup
- Connect the 12V input of the QC 3.0 module to a 12V DC power source.
- Use the USB output port of the module to power a QC 3.0-compatible device.
- Use a separate 12V-to-5V step-down converter (e.g., a buck converter) to power the Arduino UNO via its VIN pin.
Arduino Code Example
The following code demonstrates how to monitor the input voltage of the QC 3.0 module using the Arduino UNO's analog input:
// Define the analog pin connected to the voltage divider
const int voltagePin = A0;

// Voltage divider resistor values (in ohms)
const float R1 = 10000.0; // Resistor connected to 12V
const float R2 = 1000.0;  // Resistor connected to ground

void setup() {
  Serial.begin(9600); // Initialize serial communication
}

void loop() {
  // Read the analog value (0-1023)
  int analogValue = analogRead(voltagePin);

  // Convert the analog value to voltage
  float inputVoltage = (analogValue * 5.0 / 1023.0) * ((R1 + R2) / R2);

  // Print the input voltage to the Serial Monitor
  Serial.print("Input Voltage: ");
  Serial.print(inputVoltage);
  Serial.println(" V");

  delay(1000); // Wait for 1 second before the next reading
}
Note: Use a voltage divider to scale down the 12V input to a safe range (0-5V) for the Arduino's analog pin.
Troubleshooting and FAQs
Common Issues and Solutions
No Output Voltage:
- Check the input connections for proper polarity and secure connections.
- Verify that the input voltage is within the specified range (12V ±10%).
Device Not Charging at QC 3.0 Speeds:
- Ensure the connected device supports QC 3.0 or earlier Quick Charge standards.
- Use a high-quality USB cable capable of handling higher currents.
Overheating:
- Ensure adequate ventilation or attach a heat sink to the module if it operates at high power for extended periods.
Intermittent Charging:
- Check for loose connections or damaged cables.
- Verify that the input power source is stable and not fluctuating.
FAQs
Q: Can I use this module with a 24V input?
A: No, the module is designed for a 12V input. Using a higher voltage may damage the module.
Q: Is the module compatible with USB-C devices?
A: Yes, if the module includes a USB-C output port, it can charge USB-C devices that support QC 3.0.
Q: Can I use this module to charge non-QC devices?
A: Yes, the module will charge non-QC devices at standard USB charging rates (5V, up to 2A).
Q: How do I know if my device is charging at QC 3.0 speeds?
A: Many devices display a "fast charging" indicator when charging at QC 3.0 speeds. Alternatively, you can use a USB power meter to measure the output voltage and current.
By following this documentation, you can effectively integrate the 12V to QC 3.0 Fast Charging module into your projects and ensure reliable performance.