Cirkit Designer Logo
Cirkit Designer
Your all-in-one circuit design IDE
Home / 
Component Documentation

How to Use Adafruit 128x64 OLED Bonnet: Examples, Pinouts, and Specs

Image of Adafruit 128x64 OLED Bonnet
Cirkit Designer LogoDesign with Adafruit 128x64 OLED Bonnet in Cirkit Designer

Introduction

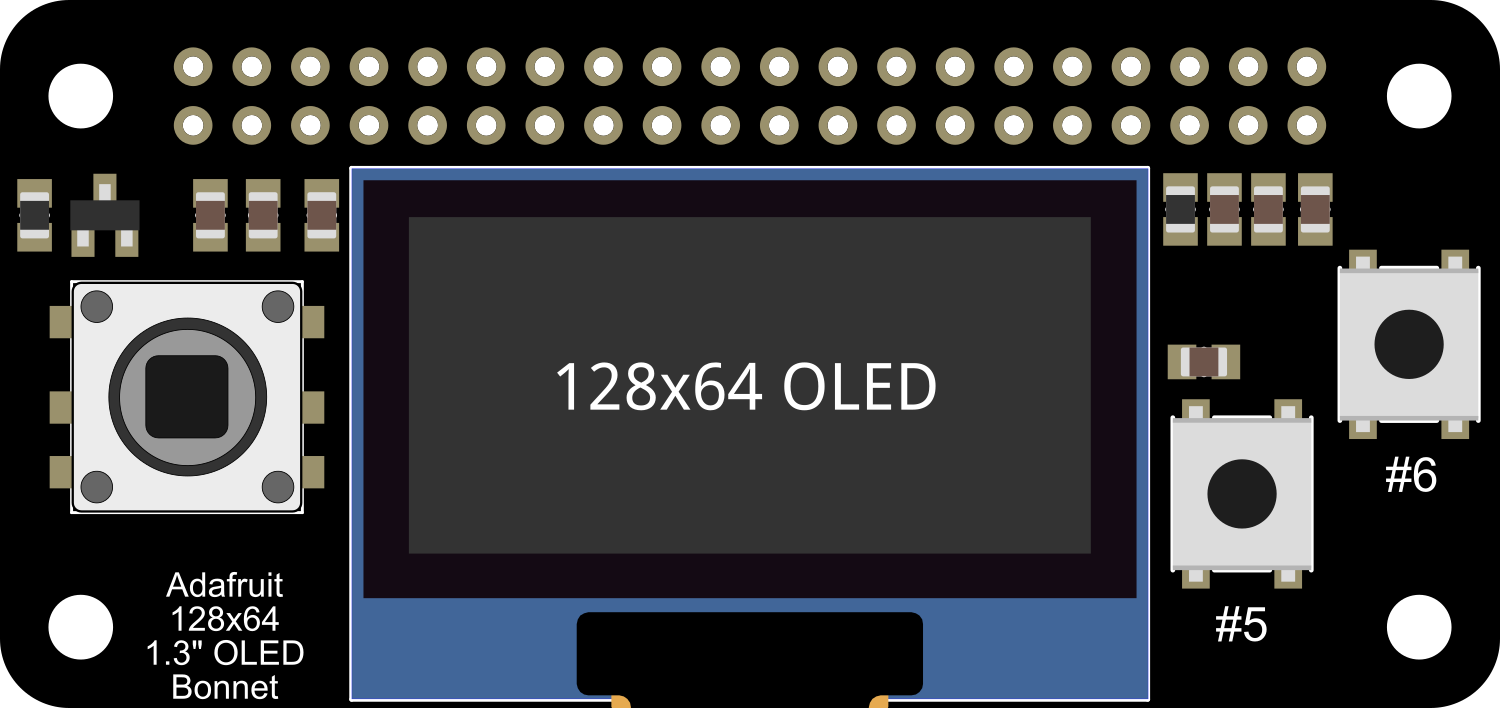
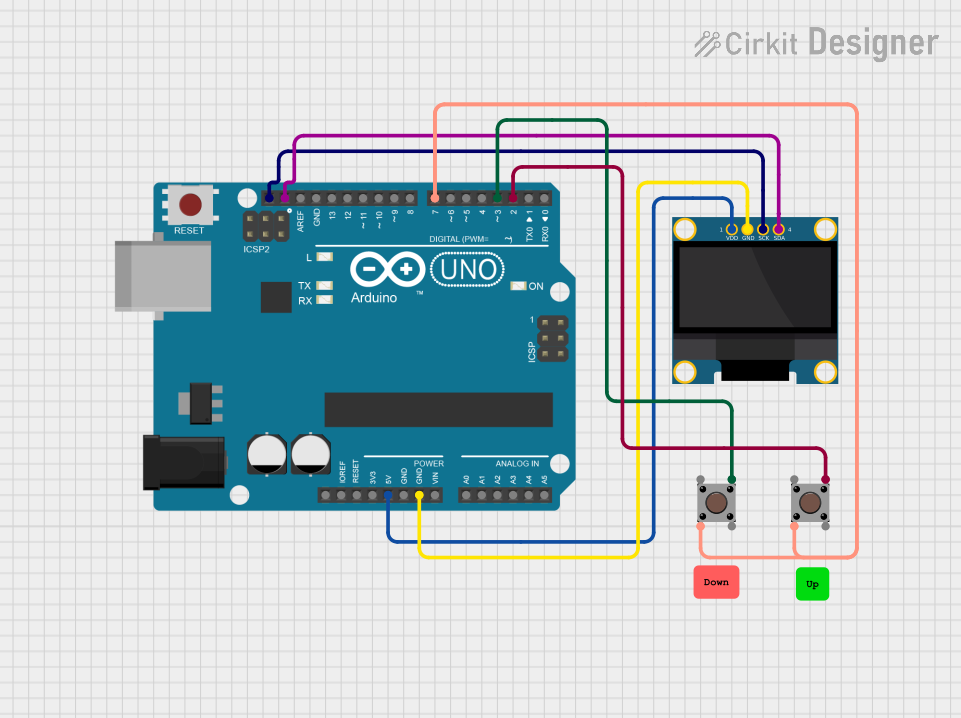
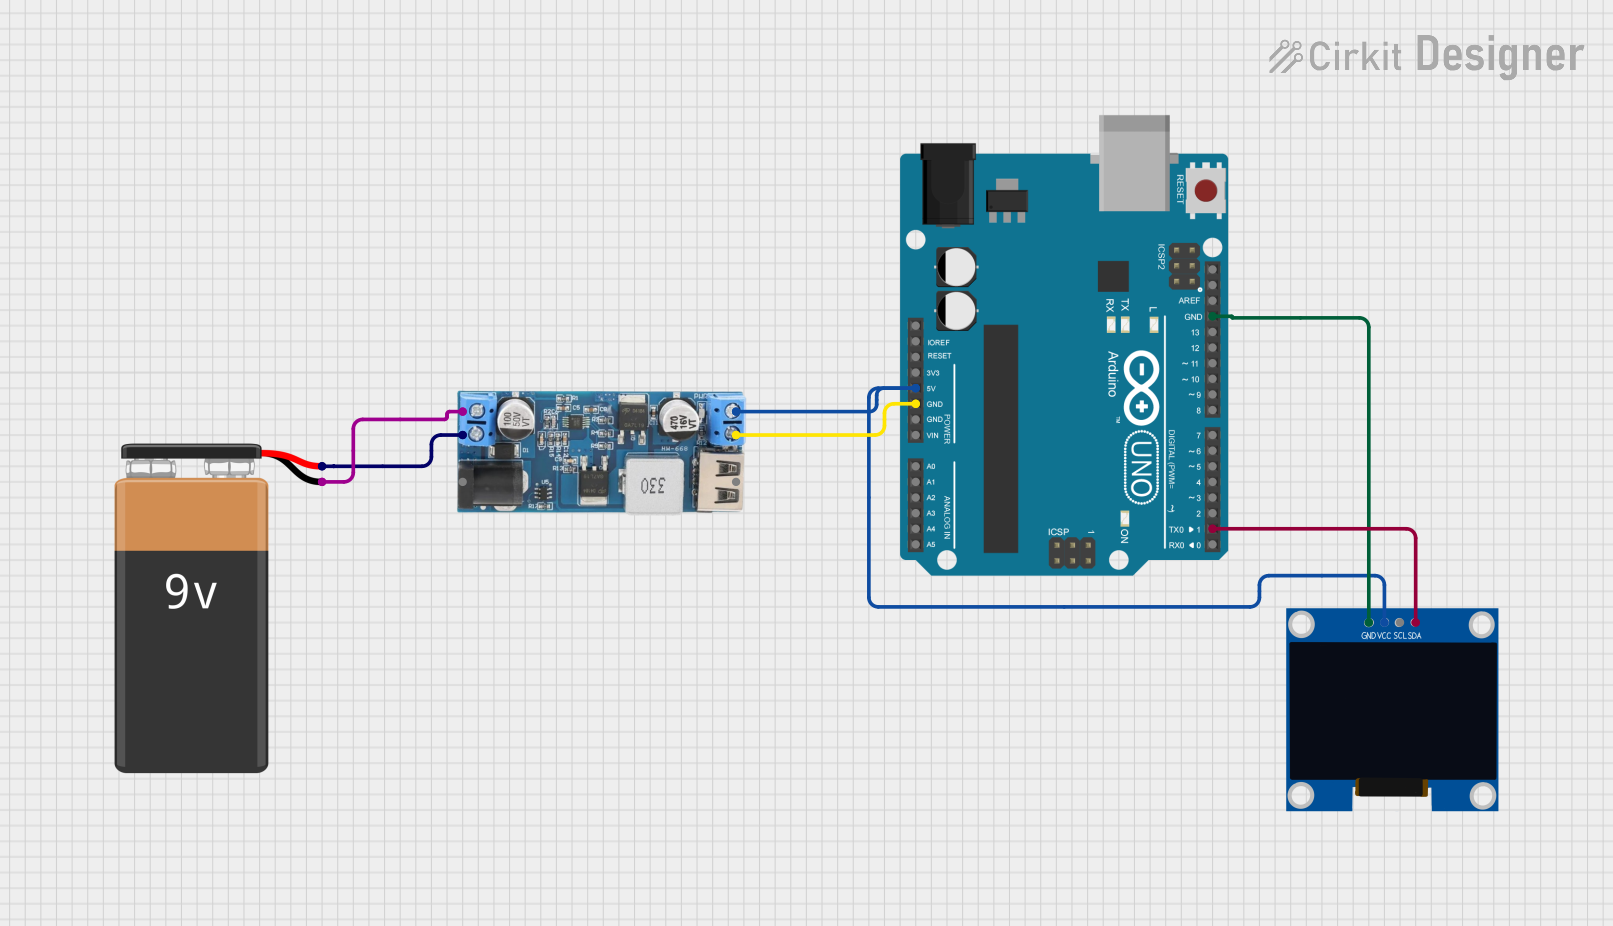
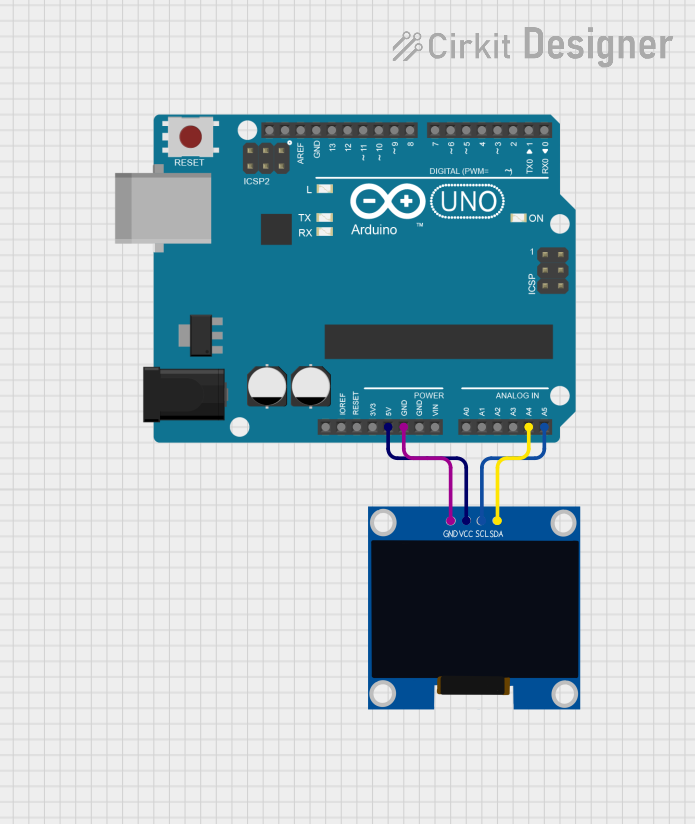
The Adafruit 128x64 OLED Bonnet is a compact display module specifically designed for the Raspberry Pi. This bonnet features a high-contrast, monochrome OLED display with a resolution of 128x64 pixels, providing a crisp visual output for your projects. It is an ideal choice for adding a small screen to display data, menus, or graphics. Common applications include handheld instruments, user interfaces for projects, and status display for IoT devices.

Explore Projects Built with Adafruit 128x64 OLED Bonnet

Use Cirkit Designer to design, explore, and prototype these projects online. Some projects support real-time simulation. Click "Open Project" to start designing instantly!
Arduino UNO Based Pong Game with OLED Display and Pushbutton Controls
Image of Sim test OLED Display: A project utilizing Adafruit 128x64 OLED Bonnet in a practical application
This circuit features an Arduino UNO microcontroller connected to an OLED 128x64 I2C Monochrome Display for visual output and two pushbuttons for user input. The Arduino runs a Pong game, with the display showing the game and the pushbuttons used to control the paddle movement. The display is interfaced via I2C (SCL and SDA), and the pushbuttons are connected to digital pins D2 and D3 for input detection.
Cirkit Designer LogoOpen Project in Cirkit Designer
Arduino UNO Controlled OLED Display with 9V Battery and Step-Down Converter
Image of digik: A project utilizing Adafruit 128x64 OLED Bonnet in a practical application
This circuit features an Arduino UNO connected to a 128x64 OLED display via I2C communication lines (SDA and SCL), with the Arduino providing control signals to the display. A 9V battery powers the circuit through a 12v to 5v step-down power converter, which supplies a regulated 5V to both the Arduino and the OLED display. The embedded code on the Arduino is configured to blink an onboard LED with a 1-second interval.
Cirkit Designer LogoOpen Project in Cirkit Designer
Arduino 101 OLED Display Animation Project
Image of wokwi animater test: A project utilizing Adafruit 128x64 OLED Bonnet in a practical application
This circuit consists of an Arduino 101 microcontroller connected to a 0.96" OLED display via I2C communication. The Arduino runs a program that initializes the OLED and continuously displays an animated sequence of frames on the screen.
Cirkit Designer LogoOpen Project in Cirkit Designer
Arduino UNO with I2C OLED Display Interface
Image of OLED_Display: A project utilizing Adafruit 128x64 OLED Bonnet in a practical application
This circuit connects an Arduino UNO to a 128x64 OLED display using I2C communication protocol. The Arduino provides power to the display and communicates with it via the SDA and SCL lines connected to the A4 and A5 pins, respectively. The embedded code initializes the display and prints 'Hello, World!' on it.
Cirkit Designer LogoOpen Project in Cirkit Designer

Explore Projects Built with Adafruit 128x64 OLED Bonnet

Use Cirkit Designer to design, explore, and prototype these projects online. Some projects support real-time simulation. Click "Open Project" to start designing instantly!
Image of Sim test OLED Display: A project utilizing Adafruit 128x64 OLED Bonnet in a practical application
Arduino UNO Based Pong Game with OLED Display and Pushbutton Controls
This circuit features an Arduino UNO microcontroller connected to an OLED 128x64 I2C Monochrome Display for visual output and two pushbuttons for user input. The Arduino runs a Pong game, with the display showing the game and the pushbuttons used to control the paddle movement. The display is interfaced via I2C (SCL and SDA), and the pushbuttons are connected to digital pins D2 and D3 for input detection.
Cirkit Designer LogoOpen Project in Cirkit Designer
Image of digik: A project utilizing Adafruit 128x64 OLED Bonnet in a practical application
Arduino UNO Controlled OLED Display with 9V Battery and Step-Down Converter
This circuit features an Arduino UNO connected to a 128x64 OLED display via I2C communication lines (SDA and SCL), with the Arduino providing control signals to the display. A 9V battery powers the circuit through a 12v to 5v step-down power converter, which supplies a regulated 5V to both the Arduino and the OLED display. The embedded code on the Arduino is configured to blink an onboard LED with a 1-second interval.
Cirkit Designer LogoOpen Project in Cirkit Designer
Image of wokwi animater test: A project utilizing Adafruit 128x64 OLED Bonnet in a practical application
Arduino 101 OLED Display Animation Project
This circuit consists of an Arduino 101 microcontroller connected to a 0.96" OLED display via I2C communication. The Arduino runs a program that initializes the OLED and continuously displays an animated sequence of frames on the screen.
Cirkit Designer LogoOpen Project in Cirkit Designer
Image of OLED_Display: A project utilizing Adafruit 128x64 OLED Bonnet in a practical application
Arduino UNO with I2C OLED Display Interface
This circuit connects an Arduino UNO to a 128x64 OLED display using I2C communication protocol. The Arduino provides power to the display and communicates with it via the SDA and SCL lines connected to the A4 and A5 pins, respectively. The embedded code initializes the display and prints 'Hello, World!' on it.
Cirkit Designer LogoOpen Project in Cirkit Designer

Technical Specifications

Display Characteristics

  • Display Type: OLED (Organic Light Emitting Diode)
  • Resolution: 128x64 pixels
  • Color: Monochrome (White)

Electrical Specifications

  • Operating Voltage: 3.3V (powered via Raspberry Pi GPIO)
  • Logic Level: 3.3V compatible

Physical Characteristics

  • Dimensions: Fits perfectly onto a Raspberry Pi Zero, Pi 2, Pi 3, or Pi 4
  • Mounting: Directly attachable to the Raspberry Pi GPIO header

Pin Configuration and Descriptions

Pin Number Name Description
1 3V3 Power supply (3.3V from Raspberry Pi)
2 5V Not connected
3 SDA I2C Data Line
4 5V Not connected
5 SCL I2C Clock Line
6 GND Ground connection

Note: The above table only lists the pins used by the OLED Bonnet. The bonnet uses more pins for mechanical stability, but they are not connected electrically.

Usage Instructions

Initial Setup

  1. Attach the Bonnet: Carefully align the pin headers of the OLED Bonnet with the GPIO header on the Raspberry Pi and press down to connect.
  2. Install Libraries: Install the necessary libraries for the OLED Bonnet by running the following commands in the terminal:
sudo apt-get update
sudo apt-get install -y python3-pip
sudo pip3 install adafruit-circuitpython-ssd1306
  1. Enable I2C Interface: Use raspi-config to enable the I2C interface on your Raspberry Pi.

Programming the Display

To use the display with Python, you can use the Adafruit SSD1306 library. Here's a simple example to get started:

import board
import digitalio
from PIL import Image, ImageDraw, ImageFont
import adafruit_ssd1306

Create the I2C interface.

i2c = board.I2C()

Create the SSD1306 OLED class.

The first two parameters are the pixel width and pixel height. Change these

if you have a different sized display.

oled = adafruit_ssd1306.SSD1306_I2C(128, 64, i2c)

Clear the display.

oled.fill(0) oled.show()

Create blank image for drawing.

Make sure to create image with mode '1' for 1-bit color.

image = Image.new('1', (oled.width, oled.height))

Get drawing object to draw on image.

draw = ImageDraw.Draw(image)

Draw a white filled box to clear the image.

draw.rectangle((0, 0, oled.width, oled.height), outline=255, fill=255)

Draw some shapes.

First define some constants to allow easy resizing of shapes.

padding = -2 top = padding bottom = oled.height - padding

Move left to right keeping track of the current x position for drawing shapes.

x = 0

Load a font.

font = ImageFont.load_default()

Draw a black filled box to clear the image.

draw.rectangle((0, 0, oled.width, oled.height), outline=0, fill=0)

Write two lines of text.

draw.text((x, top + 0), 'Hello World!', font=font, fill=255) draw.text((x, top + 20), 'Adafruit OLED', font=font, fill=255)

Display image.

oled.image(image) oled.show()


Best Practices

  • Avoid exposing the display to direct sunlight for extended periods to prevent damage.
  • Handle the Bonnet with care to avoid static discharge or physical damage to the screen.
  • Always shutdown the Raspberry Pi before attaching or detaching the Bonnet.

Troubleshooting and FAQs

Common Issues

  • Display Not Turning On: Ensure that the Bonnet is properly seated on the GPIO pins and that the I2C interface is enabled.
  • Garbled or No Display Output: Check the I2C connections and ensure the correct I2C address is used in your code.
  • Dim Display: Verify that the Raspberry Pi is supplying adequate power to the Bonnet.

FAQs

Q: Can I use this Bonnet with other single-board computers? A: The Adafruit 128x64 OLED Bonnet is designed for the Raspberry Pi GPIO layout. It may not be directly compatible with other boards without an adapter or modifications.

Q: How do I adjust the contrast or brightness of the display? A: The SSD1306 library provides functions to adjust the contrast. OLED displays do not have a backlight, so the brightness is controlled by the pixel's light intensity, which is related to the contrast setting.

Q: Is it possible to display images or complex graphics? A: Yes, the OLED Bonnet can display bitmap images and graphics. You can use the PIL library to draw complex shapes, text, and images.

For further assistance, refer to the Adafruit forums or the SSD1306 library documentation for more detailed information on using the OLED Bonnet.